
Introduction
Magnesium and wood floats are hand tools used to smooth and finish fresh concrete. Magnesium floats are a light metal option that can flatten high spots quickly, while wood floats provide a softer, more forgiving surface. These tools affect the paste by pulling fine aggregate to the surface and shaping the moisture as it begins to set.
Different types have practical uses: magnesium for faster initial leveling and wood for a milder finish and fewer gouges. Understanding benefits and drawbacks helps you decide when each matters for your project and paste consistency. If in doubt, check the tool label and follow the manufacturer’s instructions or local rules to ensure proper technique.
Key Takeaways
- Magnesium and wood floats perform differently; choose by paste work and finish.
- Wood floats smooth larger aggregates; magnesium floats refine paste for tighter surfaces.
- Use wood early to shape the deck; switch to magnesium for final pass.
- Inadequate curing or moisture can compound when using improper float choice.
- Store floats dry, avoid concrete buildup, and inspect edges for cracks.
- Test patch sections to confirm paste consistency before full finishing.
Table of Contents
- Introduction
- Key Takeaways
- What a Float Is and Why It Matters in Finishing
- Magnesium Floats — Characteristics, Benefits, and Limitations
- Wood Floats — Characteristics, Benefits, and Limitations
- Side-by-Side Surface Quality Comparison
- Decision Checklist — When to Choose Magnesium or Wood
- Proper Techniques for Using Magnesium and Wood Floats Effectively
- Maintenance, Storage, and Replacement Guidance
- Environmental, Safety, and Common Mistakes to Avoid
- Conclusion
- FAQ
What a Float Is and Why It Matters in Finishing
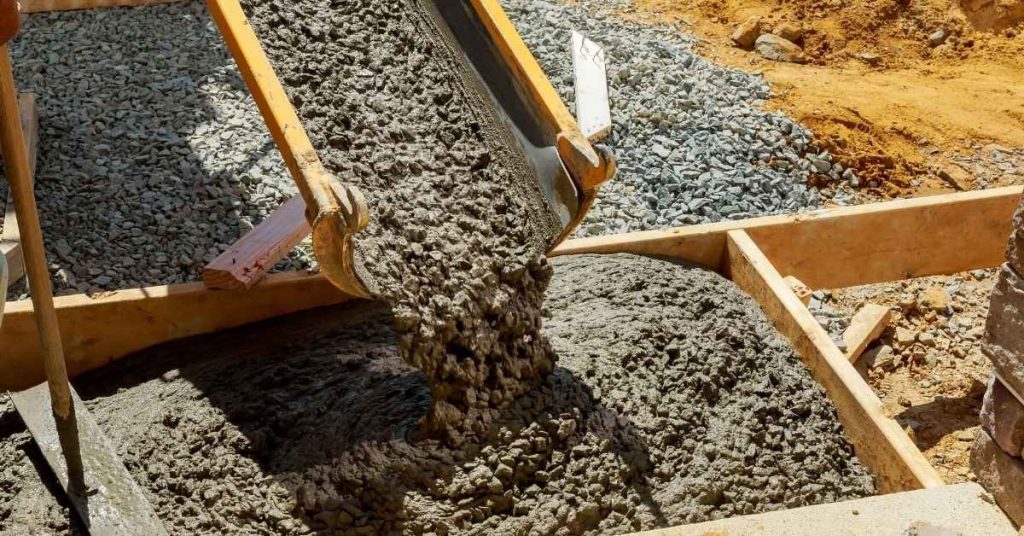
A concrete float is a hand tool used to smooth and consolidate the surface after initial set. It helps bring the cream to the surface and controls bleed water. Choosing between a float and a trowel affects the texture and how many passes are needed before final finishing.
Understanding when to use float finishes versus trowel finishes clarifies the workflow for a given project. The tool choice influences detectability of trowel lines and whether additional leveling is required. Proper selection sets the stage for a consistent final surface without excessive paste pull or texture irregularities.
Definition and Core Functions
A float is a hand tool used in concrete finishing to level and smooth the surface. It consists of a long handle attached to a flat, rectangular blade.
The primary function of a float is to bring cement paste to the surface of the concrete, creating a smooth, even finish. This process is known as ‘floating’ or ‘finishing’.
Floats are typically used after the initial strike-off with a shovel or other tool, and before using a trowel for final finishing.
How Floats Affect Paste Behavior
The type of float used can significantly impact the behavior of the cement paste during the finishing process. Magnesium and wood floats have different effects due to their material composition.
Magnesium floats, being lighter and more rigid, tend to push the paste around rather than pulling it up from below. This can result in a smoother finish but may also lead to a higher risk of ‘whiskering’ or surface imperfections if not used correctly.
Wooden floats, on the other hand, are heavier and more flexible. They tend to pull the paste up from below, creating a thicker layer of cement at the surface. This can help to fill in voids or minor imperfections but may also leave visible trowel lines if not properly finished.
Magnesium Floats — Characteristics, Benefits, and Limitations
Magnesium floats are lightweight and feature a soft edge profile that resists gouging fresh concrete paste. Their composition gives a relatively gentle touch on paste while promoting a smooth initial sheen. Typical interaction with paste helps manage surface burnish in early-set stages.
In field use, magnesium floats finish quickly with good control, yet they wear faster than aluminum and can rust-stain if surfaces stay damp. Practical guidelines cover timing, passes, pressure, and overlaps to avoid pulling out too much paste. Cleaning after use and storing to prevent corrosion are important for longevity.
How Magnesium Changes Paste and Surface Openness
Magnesium floats alter the behavior of fresh concrete paste, influencing its final appearance. During initial passes, observe how the float interacts with the paste to understand its impact on the surface.
The edge profiles and weight of a magnesium float significantly influence the surface effects. For a smooth and uniform finish, choose a float with straight, sharp edges. If texture or sheen is desired, opt for floats with rounded or serrated edges.
To achieve the desired surface openness, adjust float pressure and passes during use. If initial results are not satisfactory, make necessary adjustments to obtain the intended outcome.
Advantages and Drawbacks in Practice
Understanding the pros and cons of magnesium floats helps optimize their use. Evaluate rust staining potential, overall cost, finishing speed, smoothness, and wear rate relative to other float types.
If speed of finishing is critical, consider magnesium floats due to their lighter weight and faster action. If budget is a primary concern, compare costs with wood and aluminum floats, considering wear rate and maintenance needs.
Re-evaluate float choice based on practical performance if initial selection does not meet project requirements. Regularly assess the float’s condition and replace as needed to maintain optimal results.
Best-Use Scenarios for Magnesium Floats
Identifying suitable applications maximizes the benefits of magnesium floats. Evaluate if the project involves decorative overlays or light troweling, and consider slab size, crew speed, and intended surface finish.
For large slabs, magnesium floats can help maintain consistent finishing quality due to their speed and maneuverability. When planning for decorative overlays or light troweling, magnesium floats can provide a suitable base for these finishes, given their ability to create a uniform surface.
If the project’s specific needs are not being met by magnesium floats, re-assess float choice and consider alternative options to ensure optimal results.
Wood Floats — Characteristics, Benefits, and Limitations
Wood floats vary by softwood and hardwood, with density affecting finish durability and edge behavior. Their natural texture interacts with paste by absorbing surface moisture and redistributing cream at the surface. Timing relative to bleed water influences the resulting texture and setting pace.
Wood finishes can be smoother or more textured depending on pressure, angle, and pass count. They offer cost-effective, easy handling and are often preferred for non-slip textures. Be mindful of splintering, moisture absorption, and maintenance needs that affect curing consistency.
How Wood Interacts with Paste and Texture Outcomes
Wood floats interact with concrete paste in several ways, affecting the final surface finish. The float’s material, density, and moisture content play significant roles in determining the outcome.
Moisture absorption and redistribution occur when using a wood float. If the float is moist and soft, it absorbs more water from the paste, leading to increased moisture redistribution and a more textured surface. Conversely, if the float is dry and dense, it absorbs less water, resulting in a smoother finish with less texture.
The timing of using a wood float relative to bleed water and setting is crucial. It’s recommended to float the concrete when the bleed water has disappeared but before the paste starts to set. This ensures optimal interaction between the float and the paste, yielding the desired surface texture.
Advantages and Drawbacks in Practice
Wood floats offer several advantages but also have some drawbacks when used in concrete finishing. Understanding these can help you make informed decisions about their use.
Cost-effectiveness, ease of use, and quiet operation are significant benefits of wood floats. They are cheaper than magnesium or steel floats, making them an attractive option for budget-conscious projects. Additionally, they are quieter to use, which can be beneficial in noise-sensitive environments.
However, wood floats also have drawbacks. They wear faster than other float types and may pick up aggregate if not managed properly. Moreover, they require careful moisture management to prevent uneven curing. It’s essential to monitor wear patterns and replace the float when necessary to maintain consistent results.
Best-Use Scenarios for Wood Floats
Wood floats are particularly suited to certain applications in concrete finishing. Understanding these scenarios can help you make the most of their benefits and avoid potential pitfalls.
Wood floats excel in small pours, where they can be used for initial hand floating to achieve even coverage. They are also ideal when a slightly open texture is desired for brooming or bonded toppings. The float’s ability to redistribute moisture and create a textured surface makes it well-suited to these applications.
However, wood floats may not be the best choice for large pours or where a very smooth, dense finish is required. In such cases, other float types like magnesium or steel might be more appropriate. Always assess the suitability of wood floats based on the project’s specific requirements and past performance in similar scenarios.
Side-by-Side Surface Quality Comparison
Assess readiness for common finishing paths like trowel or broom finishes and note how each float affects set timing, burnishing risk, and required pressure. The comparison helps identify which tool best supports the desired microtexture and sheen. Expect trade-offs in speed versus final smoothness.
When evaluating surface quality, consider measured factors such as bleed water behavior, paste consistency, and aggregate exposure. A practical view shows how float choice influences the path to a consistent final finish. This helps avoid overworking the slab and maintains surface integrity.
Effect on Surface Strength and Dusting Risk
Magnesium floats can increase surface strength due to their ability to compress the concrete paste. This can lead to a stronger, more durable finish.
However, this increased compression also reduces surface openness, which may slightly increase dusting risk over time. Wood floats, on the other hand, create a more open texture that allows for better water evaporation but may result in a slightly weaker surface and higher initial dusting.
To mitigate dusting risk with both types of floats, consider applying a sealer after the concrete has cured. Always check local regulations regarding dust control measures.
Visual and Tactile Differences to Expect
Magnesium floats create a smooth, uniform surface with minimal texture. This results in a sleek, modern look that’s easy to clean.
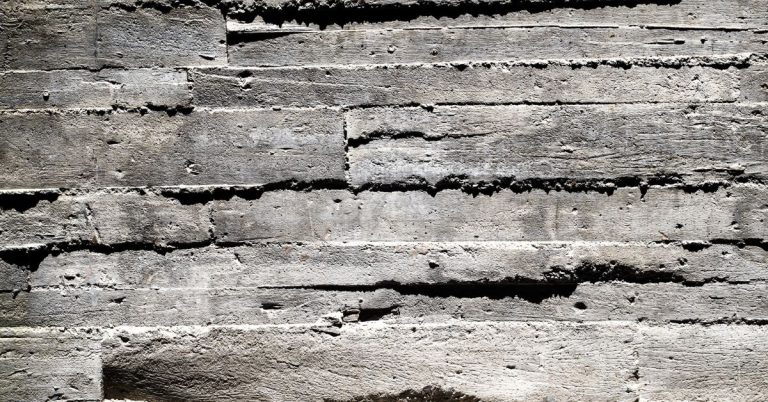
Wood floats, due to their porous nature, impart a more textured finish. The resulting surface has a rustic, natural appearance and feel. The degree of texture can vary depending on the type of wood used and its condition.
Note: Always examine the float before use to ensure it’s in good condition and free from defects that could affect the final finish.
To visualize these differences, consider looking at samples or images of each finish. Consulting with a professional can also provide valuable insights into how these finishes will look in your specific space.
Decision Checklist — When to Choose Magnesium or Wood
Environmental and timing factors include ambient temperature, humidity, wind, and slump or bleed timing that affect texture development. These conditions guide whether a magnesium or wood float is more suitable. Use a quick assessment to anticipate texture outcomes.
Crew skill and workflow matter, including the speed and finesse required. A trial patch can validate the chosen tool and ensure safety considerations are met. Consider downstream treatments and curing plans that might favor one option over another.
Project Factors to Evaluate
Before selecting your float type, assess the following project conditions that can impact magnesium or wood float performance.
- Ambient Temperature and Humidity: Check current and forecasted weather conditions. High heat and humidity may favor magnesium floats for better control.
- Wind Conditions: Assess wind patterns at the job site. Wind can affect float performance, potentially favoring wood floats in such areas.
- Concrete Slump/Bleed Timing: Evaluate the concrete’s workability and bleed time. Critical timing may require gentler, more predictable results, which wood floats might provide.
- Crew Skill and Experience: Consider your team’s familiarity with each float type. A trial patch can help validate their comfort level.
- Workflow Requirements: Assess the need for speed or finesse in your workflow. This may influence your choice between magnesium or wood floats.
- Downstream Treatments and Maintenance: Review joint spacing, curing methods, sealing schedules, and subsequent finishing steps to ensure they align with your float choice.
- Safety Considerations: Evaluate potential safety hazards associated with each float type. Ensure your crew is adequately trained and protected.
- Local Rules and Regulations: Check for any local codes or regulations that may impact your float choice.
Quick rule: Re-evaluate your float choice if initial decision doesn’t meet project needs after considering these factors.
Cost, Lifecycle, and Availability Trade-Offs
Evaluate long-term implications, local availability, pricing, and maintenance costs of magnesium vs. wood floats to make an informed decision.
- Long-Term Durability: Assess expected lifespan under project conditions. Magnesium generally offers better durability.
- Maintenance Costs: Review ongoing maintenance requirements and associated costs for each float type.
- Initial Investment: Compare upfront pricing for magnesium vs. wood floats. Budget may influence your choice.
- Local Availability: Check lead times and availability of each float type in your area. Immediate needs may favor wood floats due to their widespread availability.
- Replacement Costs: Evaluate potential replacement costs over the project lifecycle for each float type.
Decision Review: Revisit your choice if initial selection proves unsustainable over the project’s lifecycle, considering cost, availability, and maintenance factors.
Proper Techniques for Using Magnesium and Wood Floats Effectively
Distinguish when to use magnesium versus wood in the early finishing pass, aligned with project stage goals such as bleed water management and texture. The intended surface outcome guides the initial choice and subsequent passes. Observe how the paste responds to each tool before proceeding.
Step-by-step timing and sequence cover initial and subsequent passes, appropriate counts, and how to avoid overworking. Handling and technique specifics include grip, posture, pressure, and overlap to prevent gouging. Observational cues steer tool switches as conditions change.
Timing, Sequence, and Workflow
Proper timing ensures optimal float performance. Begin the initial float pass once bleed water appears on the concrete surface. This typically happens within a few hours after pouring, depending on weather conditions.
The subsequent passes should be based on your desired surface goals for sheen and texture. Observe the bleed water and slab condition closely; do not rely solely on clock time to dictate your float schedule.
If bleed water is present, start the initial float pass immediately. If you’ve achieved the desired sheen and texture, pause or switch floats as needed. Avoid overworking the paste by limiting the number of passes. Reassess your float strategy if slab conditions change significantly.
Tools and Materials Checklist
Having the correct tools ensures effective float use. Here’s a list of essentials for the finishing stage:
- Magnesium or Wood Float: Select based on your project needs, as discussed in previous sections.
- Trowel (optional): For assisting with float work and evening out surfaces. Ensure it’s clean and in good condition.
- Water Spritzer: To keep the surface moist during floating. Check that it’s functioning properly before use.
- Edge and Control Joint Tools: To create expansion joints and maintain them throughout the float process.
- Float Cleaning Supplies: Have a bucket of water, brushes, and rags ready for cleaning floats between uses to prevent contamination.
Handling, Pressure, and Pass-Count Tips
Correct handling minimizes defects. Grip the float securely but not tightly, maintaining a balanced posture throughout. Passes should be consistent in direction with minimal overlap to avoid leaving marks or pulling paste.
Maintain a consistent float angle and pressure. If you notice changing slab conditions, adjust your float angle, pressure, or pass direction accordingly. For example, reduce pressure if the float starts pulling paste, or increase the angle if it’s gouging the surface.
If the texture appears consistent across the surface, limit the number of passes to avoid overworking the paste. Keep an eye on your work and make adjustments as needed to achieve the desired finish.
Maintenance, Storage, and Replacement Guidance
Cleaning routines for magnesium and wood floats should remove concrete residue without damaging the surface. Dry and deburr tools promptly, using recommended brushes and cleaners. Avoid harsh solvents that could degrade materials.
Watch for wear signals like chips, cracks, warping, or rust concerns that affect paste finish. Storage should control moisture and temperature, with stacking and covers to prevent deformation. Refer to manufacturer care instructions and warranty guidance when deciding on replacement or repairs.
Cleaning and Repair Best Practices
Maintain your floats’ longevity with proper cleaning and repair techniques. Regular care prevents damage and ensures consistent performance.
Cleaning: Use mild soap and a soft-bristled brush to wash magnesium and wood floats. Avoid harsh solvents that can damage the material. After washing, dry thoroughly to prevent moisture-related issues.
Repair: For minor chips or cracks, light sanding followed by resin touch-up is sufficient. However, if the float’s spline is damaged or warping occurs (wood floats), consider resurfacing or replacement to maintain performance and warranty.
Visual Checkpoints and Replacement Triggers
Regularly inspect your floats for signs of wear. Catching issues early prevents downtime and costly repairs or replacements.
- Chips or cracks: Inspect for any visible damage that may affect paste finish.
- Spline damage (wood): Check for broken or loose splines, which can lead to warping.
- Warping (wood): Look for changes in the float’s shape, as this can impact surface quality.
- Rust or corrosion (magnesium): Inspect for any signs of rust, which can compromise the float’s integrity.
- Edge sharpness: Ensure edges are smooth and not excessively worn to prevent damage to the concrete surface.
- Uniform contact area: Check that the float maintains even contact with the surface to avoid inconsistent finish.
- Paste plucking or pull-off behavior: Observe how paste adheres and pulls off. Changes may indicate a need for resurfacing.
- Changes in performance: Note any decline in leveling or smoothing ability, which could signal the need for replacement.
Quick rule: If you notice multiple issues or significant wear, it’s time to consider resurfacing or full replacement to maintain optimal performance and warranty.
Environmental, Safety, and Common Mistakes to Avoid
Weather and slab conditions influence float workability, bleed water timing, and final texture. Practical checks include moisture readings and time-of-day considerations to adjust working windows. Adapting to climate helps maintain control over the surface finish.
Material interaction changes with temperature and evaporation rates, affecting glide, matting, and texture. Watch for over-smoothing or tearing and adjust float selection accordingly. Ergonomics, PPE, and break schedules reduce fatigue and improve safety during finishing tasks.
Environmental Impacts on Float Performance
Ambient and slab conditions significantly influence the performance of magnesium and wood floats. High temperatures and low humidity can speed up cement hydration, making it crucial to use a magnesium float early to achieve desired results before bleed water appears. Conversely, in cooler temperatures with high humidity, using a wood float initially helps maintain workability until the paste stiffens.
Monitor temperature, wind, and evaporation rate to adapt your float usage accordingly. Check moisture readings and adjust working windows based on time of day and climate conditions. Avoid over-reliance on one float type; switch between magnesium and wood as needed to accommodate changing environmental factors.
Safety and Ergonomic Considerations
Maintaining safety and ergonomics is crucial when using floats. Clean your tools regularly to prevent slip hazards on wet slabs, and store them properly when not in use. Implement personal protective equipment (PPE), safe lifting/tilting techniques, and regular breaks to reduce fatigue.
When working with heavy floats, always use two-person handling and follow lifting guidelines. If exposed to harsh chemicals or extreme temperatures, use appropriate PPE and tool-cleaning methods. Establish clear safety protocols, train crew members, and enforce regular equipment maintenance to ensure a safe working environment.
Common Selection and Application Mistakes
To achieve the best results with your concrete floats, avoid these common pitfalls:
- Using the wrong float for the finish: Choose the right float based on the desired texture and environmental conditions.
- Starting too early or too late: Begin floating once bleed water appears to ensure proper consolidation and avoid overworking the surface.
- Overworking the surface: Excessive passes with the float can lead to a weak, dusty finish. Monitor paste stiffness and adjust pass-count accordingly.
- Poor water management: Maintain proper water-to-cement ratio and avoid overwatering or underwatering the concrete.
Regularly inspect your work and make adjustments as needed to prevent these common mistakes from compromising the final finish.
Conclusion
Choosing the right float matters for safety, durability, and a consistent finish, and your best choice depends on the paste behavior you observed and the look you’re after. When in doubt, keep the test area small and document how the paste reacts to each float so you can make an informed call before tackling larger sections.
If you’re moving from testing to finishing, follow this practical flow: prepare the surface, select the float based on paste consistency and desired sheen, apply with steady passes in the recommended direction, clean the tool frequently to avoid dragging debris, and store or replace the float according to manufacturer guidance. Throughout, ensure the area is well-ventilated, gloves and eye protection are in place, and you avoid overworking the paste or forcing the float across a hardened skin.
Common mistakes to avoid include overworking the paste or using the wrong float type for the stage of set, which can cause drag marks or a patchy surface; neglecting to clean the float between passes, which deposits debris and dulls the finish; and postponing maintenance or replacement, which leads to performance problems. A simple safety rule is to test first in a small area, keep tools clean, and respect the material’s setting time before proceeding to the next section.
If the concrete is large, the paste is already gelling, or you notice persistent glazing or inconsistent texture despite correct technique, consider bringing in a pro for a quick check. With careful testing, deliberate technique, and attention to safety, you can achieve a reliable, workmanlike finish and avoid costly repairs. Stay patient, stay methodical, and you’ll finish with confidence.
FAQ
What Are the Main Differences Between Wood and Magnesium Concrete Floats?
Wood floats are classic, gentler on the paste and typically slower to smooth larger areas. Magnesium floats are stiffer, heavier, and can produce a finer finish more quickly, but may be more aggressive on soft paste.
When Should I Choose a Wood Float over a Magnesium Float?
Choose a wood float for delicate paste and when working on older, softer slabs or vertical surfaces where finesse is needed. Use a magnesium float for larger areas, a faster initial leveling, or when a very smooth surface is desired after the first pass.
How Does the Type of Float Affect Paste Consistency and Strength?
Float choice influences how much water is drawn to the surface and how the paste closes pores. Proper use with the right float helps achieve a uniform finish without over-smoothing, which can trap laitance or weaken the surface if done excessively.
What Timing Considerations Should Guide Float Selection?
Float timing depends on the concrete’s set progress. Early passes with a softer wood float can help establish a level surface, while later passes with a magnesium float can refine texture. Always follow manufacturer guidance and test a small area first.