
Introduction
For a simple slab, the dependable finishing order is: place concrete using the approved placement method, screed it to grade, bull float it when the float will glide properly, wait for bleed water to disappear, edge and hand-tool joints if that is your joint method, apply the chosen finish at the right surface firmness, then cure and protect the slab. Saw-cutting has its own timing window and can overlap with curing and protection.
Do not run this work by a clock. Set time changes with the mix, slab thickness, concrete and air temperature, sun, wind, humidity, base moisture, admixtures, placement rate, and crew size. Let the concrete’s response to each tool determine the next step.
Key Takeaways
- Screed after placement; bull float after screeding only while the tool glides without digging in or pushing a paste wave.
- Never trowel, broom, stamp, edge aggressively, or add water while bleed water is rising or standing on the surface.
- Edge and groove only when the concrete holds a clean tool impression without slumping, tearing, or filling with slurry.
- Choose one finish plan—broom, trowel, stamp, exposed aggregate, or another specified system—and use its readiness cues.
- Lay out joints before the pour. Hand-tool, conventional saw-cut, and early-entry saw-cut joints require different timing.
- Begin the selected curing system as soon as the finished surface can accept it. Keep the slab protected until the product label/TDS, project specification, approved drawing, or supplier/engineer gives the applicable curing and traffic-release requirements.
Table of Contents
- Introduction
- Key Takeaways
- Quick Overview of the Finishing Sequence and Why Order Matters
- Pre-Pour Planning and Quality Inspection
- Tools and Materials Checklist
- Step-by-Step Finishing Sequence (Practical Actions and Timing Cues)
- Jointing and Control Joints: Methods, Spacing, and Depth Guidelines
- Surface Finishes: Trowelled, Broom, and Stamped Options
- Curing, Weather Impacts, and Timing
- Common Mistakes, Troubleshooting, Safety, and When to Call a Pro
- Conclusion
- FAQ
Quick Overview of the Finishing Sequence and Why Order Matters
Screeding establishes grade. Bull floating follows it to flatten small ridges, push coarse aggregate slightly below the surface, and leave an even base for the intended finish. It is not a way to spread surface water around.
After the first float pass, pause if water is rising or ponding. Do not work that water back into the slab and do not sprinkle water on the surface to make finishing easier; doing so can leave a weak, dusty surface layer. The FHWA finishing guidance on bleed water and premature finishing explains why finishing must wait until free bleed water is gone.
Bull Floating Importance
Use a clean, undamaged bull float or darby in long, overlapping passes. Keep the leading edge slightly raised so the tool glides instead of digging in. A correct pass removes ridges without pushing a wave of paste ahead of the tool. If the float digs, leaves deep lines, or brings excessive paste to the surface, change the handle angle and pressure; if that does not help, stop and reassess whether the surface is ready or the tool is damaged.
When ‘Walk Away’ Is Acceptable
“Walk away” means stop disturbing the slab while it is bleeding or while it is too soft for the next operation. It does not mean skip curing or planned saw cuts. Return only when the next tool produces its required result cleanly, or when the selected saw system meets its operating requirements and a test cut confirms the surface will not ravel.
Pre-Pour Planning and Quality Inspection
Before the truck arrives or you begin mixing, confirm the slab’s thickness, approved mix, reinforcement, finish, joint layout, isolation-joint locations, curing method, saw-cut plan, access route, cleanup/washout location, and weather plan. Forms must be true to the required dimensions, level where required, clean, and securely braced. The base should be uniform and prepared as the project requires; correct soft spots, standing water, frost, or loose debris before placement.
Site, Forms, and Reinforcement Checks
- Forms: Check dimensions, alignment, level, bracing, joints, and gaps. Repair movement or leaks before the pour.
- Base and drainage: Confirm the prepared subgrade or base is uniform, free of debris, and not frozen or carrying standing water.
- Reinforcement: Verify the specified size, spacing, supports, laps, and cover. Do not pull reinforcement into position after concrete is placed.
- Joint layout: Mark contraction joints, isolation joints, openings, and changes in slab geometry before concrete arrives.
- Access: Stage tools and arrange boards or work positions so finishers do not need to step on the fresh slab. Plan how boards, covers, and saws will be removed or used without damaging the surface.
Quick rule: If forms, base, reinforcement, joint layout, crew access, curing materials, or washout controls are not ready, delay the pour.
Concrete Mix and Delivery Checks
- Batch ticket: Match the delivered mix, aggregate, admixtures, and ordered performance requirements to the project plan.
- Workability: Judge slump and air content against the approved mix and project requirements, not a universal beginner range.
- Water: Do not add water on site unless the producer and project requirements permit it and the addition is properly accounted for.
- Delivery and crew: Make sure the placement rate matches the crew’s ability to screed, float, joint, finish, cure, and clean up without interruption.
Safety and Crew Planning
- Weather: Check for rain, heat, cold, wind, and direct sun. Have windbreaks, shade, covers, or insulation selected for the conditions and ready before placement starts.
- Rain contingency: If rain threatens during finishing, protect the work area without letting a cover touch the unfinished surface. Divert or remove runoff so it cannot wash across the slab.
- PPE: Have alkali-resistant gloves, waterproof boots, eye protection, and clothing that protects skin from wet concrete.
- Assignments: Assign placement, screeding, bull floating, edging, jointing, finishing, curing, saw-cutting, and cleanup duties before the pour.
Safety rule: Wet concrete can burn skin. Wash it off promptly; do not let it stay inside boots, gloves, or clothing.
Tools and Materials Checklist
Stage every tool before placement. Set up a designated washout area or container before the pour so tool-rinse water and cement slurry can be collected rather than discharged to drains or soil.
Required Tools: Bull Float, Edger, Jointing Tools, Trowels
- Screed: A straight, rigid board or straightedge long enough to ride on forms or guides.
- Bull float or darby: Used after screeding for initial floating.
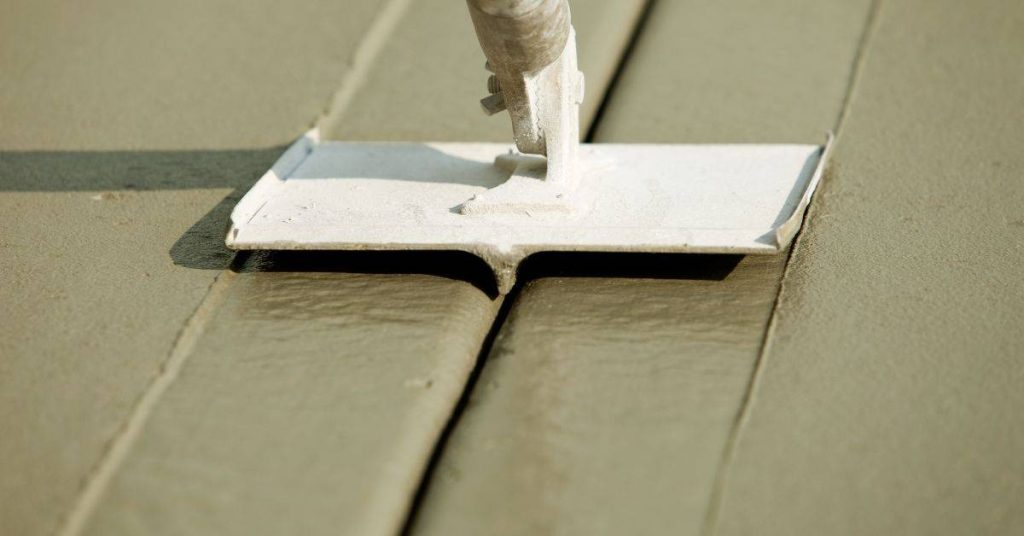
- Edger: Rounds and compacts exposed formed edges.
- Hand groover/jointer or specified saw: Creates contraction joints by the method selected before the pour.
- Magnesium float and hand trowels: For hand work and the finish system where appropriate.
- Finish tool: A concrete broom, stamps and release materials, exposed-aggregate system materials, or troweling equipment appropriate to the chosen finish.
- Curing and protection supplies: The selected curing compound, covers, blankets, fastening materials, and barriers or signs to keep traffic off the slab.
- Cleanup supplies: Washout container, collection tools for saw slurry, and dust-control equipment required by the selected saw operation.
Optional Tools and Rentals
- Concrete saw: For conventional or early-entry saw cuts when the joint plan calls for them.
- Power trowel: A machine used for floating with a pan or float attachment and later troweling with blades, depending on the equipment and project. It is not a beginner substitute for reading the slab.
- Weather protection: Windbreaks, shade, rain covers, or insulated blankets selected for expected conditions.
Step-by-Step Finishing Sequence (Practical Actions and Timing Cues)
Use the following sequence for a straightforward slab. Decorative systems, exposed aggregate, specialty mixes, power equipment, structural slabs, and reinforcement-sensitive work may change the operations and are professional scope unless you have the applicable system instructions and experience.
Concrete Finishing Steps
- Place using the approved method. Deposit concrete close to its final location and avoid unnecessary handling that can segregate the mix or displace reinforcement. If consolidation is required by the project, use the approved method; do not improvise vibration or use it to move concrete across the slab.
- Screed. Pull or saw the straightedge across the forms or guides to strike off excess concrete and fill low areas. The screed should leave the slab at grade without large holes or piles.
- Bull float. After screeding, make broad, overlapping passes while the float glides and removes small ridges without digging in or building up a wave of paste. Stop if the surface response does not permit a clean pass.
- Wait for bleed water. If water rises or stands on the surface, leave it alone. Do not broom, trowel, stamp, edge aggressively, or add water until the surface is free of bleed water.
- Edge and hand-tool joints, if selected. When the concrete supports the tool, the edger should leave a continuous rounded edge and the groover should leave a clean, stable groove. If the sides slump, tear, or refill with slurry, wait.
- Apply the selected finish. Use the finish-specific cues below. Do not make extra passes merely to chase a perfect appearance; overworking brings paste to the surface and can cause defects.
- Coordinate curing, saw cuts, and protection. Begin the selected curing system as soon as final finishing is complete and the surface can accept it without marring. If conventional or early-entry saw cuts are planned afterward, follow the project and saw manufacturer’s timing requirements, protect the slab between operations, and do not delay a needed saw cut simply because curing has started. Make a short test cut and inspect it for raveling or surface damage before continuing.
- Protect and release only as directed. Keep people, pets, equipment, runoff, and rapid drying away from the slab. Do not allow foot traffic, equipment, or vehicles until the applicable product label/TDS, project specification, approved drawing, or supplier/engineer instruction releases that type of traffic.
Screed and Bull Float Technique
Work from a planned access side. Screed one manageable section at a time, then bull float it before it loses workability. Keep the bull float clean, use a shallow leading-edge lift, and overlap passes. Do not wait for a strength value: screeding follows placement, and bull floating follows screeding only while the surface responds correctly.
Edging and Jointing Sequence
Run the edger along forms after the concrete has stiffened enough to retain the rounded profile. Hand-tool contraction joints on the marked layout at the same kind of workable-but-firm stage. You may need a second light edging or grooving pass later for a crisp profile, but do not keep reworking soft concrete.
Final Finishing and Timing
Broom finish: After bleed water is gone, pull a clean broom in one steady direction when it leaves a uniform texture without tearing paste or leaving puddles. Test an inconspicuous edge first.
Steel-troweled finish: Start only when the surface is free of bleed water and the trowel closes the surface without digging in or creating excessive paste. Several light, correctly timed passes are safer than an early hard pass.
Stamped finish: This is a separate system. The slab must support the workers and stamps without excessive displacement, sticking, tearing, or loss of pattern. Follow the stamp-system manufacturer’s release-agent and timing instructions; hire an experienced finisher if this is your first stamp job.
Exposed-aggregate finish: Use only the selected system’s instructions. Apply its surface treatment and expose aggregate only when the system directs; do not wash, brush, or otherwise disturb the surface without that method. Protect the exposed surface and begin the compatible curing procedure when the system permits.
