

Introduction
Kickout flashing is the metal flange that directs water away from the stucco at a wall opening, helping water not to get behind the siding. This article covers safe cutbacks and how to keep the lap order correct when retrofitting behind existing stucco. If in doubt, check the product label and local rules for allowed approaches.
Gather basic flashing, a utility knife, hammer or chisel, a level, and protective gear. Plan the cuts to expose enough surface for a proper kickout and follow the correct lap order as you install, while checking manufacturer instructions and local rules. If you’re unsure, pause and verify with the label or a local pro before proceeding.
Key takeaways
- Kickout flashing redirects water from siding into flashing at wall-roof junctions, preventing backflow.
- Plan retrofit by mapping existing flashings, stopping points, and required backer materials.
- Prepare tools and materials: caulking, metal flashing, chisel, hammer, masonry bits.
- Cutback stucco safely by scoring, controlling dust, and using proper protective gear.
- Install correct lap order: flashing behind starter strip, underlaps, then stucco coat.
- Safety checkpoints and testing: verify weather barrier integrity and perform water intrusion test after retrofit.
Table of Contents
- Introduction
- Key takeaways
- Overview and Scope of a Kickout Flashing Retrofit
- Planning and Pre-Work Checklist
- Tools and Materials Checklist
- Safe Stucco Cutback Techniques
- Correct Lap Order and Flashing Sequencing
- Step-by-Step Retrofit Installation Procedure
- Safety, Quality Checkpoints, and Testing
- Costs, Common Mistakes to Avoid, and Maintenance
- Conclusion
- FAQ
Overview and Scope of a Kickout Flashing Retrofit
A kickout flashing retrofit is a targeted modification to route roof runoff away from a stucco wall and back into the roof system. It helps prevent water from migrating down the wall and into the building envelope by directing flow toward the roof edge. The goal is to integrate this retrofit with the existing wall assemblies so water gets a clean path to the drainage plane without compromising the weather barrier.
This section explains what situations warrant attention, including stucco over wood or gypsum substrates and roof-wall junctions above openings. It notes when to call in a professional for assessment, especially if there are signs of leaks, structural concerns, or uncertain overlaps. It also outlines compatibility considerations with current flashing plans, underlayment, and parapet edges to ensure a durable connection between roof and wall systems.
Purpose and performance objectives
The primary job of kickout flashing is to direct rainwater away from wall cladding and junctions. It protects your home’s sheathing and finishes by preventing water intrusion at roof-to-wall connections.
Kickouts work by creating a continuous drainage path, allowing water to flow back into the roof system instead of seeping behind stucco or other claddings. They also help maintain air and vapor barriers, keeping your home’s interior dry and comfortable.
Key performance objectives for a kickout flashing retrofit include:
- Reliably diverting water away from the wall
- Creating a continuous drainage path
- Maintaining or improving air/vapor barriers
- Ensuring durable, code-compliant integration with stucco and roof systems
When a retrofit is recommended vs. full re-cladding
Not every water intrusion issue requires a complete re-cladding of your stucco walls. A kickout flashing retrofit might be sufficient if you notice:
- Visible stains or discoloration on the stucco
- Minor water intrusion, such as damp spots or peeling paint
- Missing or damaged kickouts at roof-to-wall junctions
However, more extensive repairs may be needed if you observe:
- Significant stucco damage, cracks, or delamination
- Widespread water intrusion or mold growth
- Structural concerns, such as rotting sheathing or framing
- Complex roof lines or uncertain roof/wall overlaps
Consult a professional if you’re unsure about the extent of damage or if you suspect structural issues. They can assess your home’s condition and recommend appropriate repairs.
Planning and Pre-Work Checklist
Before cutting stucco, confirm scope, code requirements, and manufacturer guidelines that affect the retrofit. Make a clear plan for what will be modified and how it integrates with the existing wall and roof assemblies. Identify required permits and approvals so there are no surprises during work.
Create a documentation routine for photos and measurements, noting flash locations, substrate condition, and stucco thickness. Establish a decision log to track changes, approvals, and design questions. Clarify who is involved and when decisions will be made to keep the project moving smoothly.
Assessing the wall assembly and roof junction
Before you start cutting, understand your wall’s makeup to determine cutback depth and flashing integration.
- Stucco thickness: Measure at multiple locations. Too thin, it may crack; too thick, it’s hard to integrate flashing.
- WRB/housewrap location: Find where it ends. If it’s buried under stucco, you’ll need a deeper cutback.
- Sheathing type: Identify if it’s plywood, OSB, or other. This affects how you secure your flashing.
- Roof edge conditions: Check for damage, rotted wood, or missing pieces. Repairs might be needed before installing new flashing.
- Flashing details: Note existing flashing types and conditions. You’ll need to match or improve them.
- Roof-to-wall transitions: Identify any cladding changes at the wall line. This affects cutback location.
- Wall height: Measure from grade to eave. Taller walls need deeper cutbacks.
- Window/door flashings: Check if they’re intact and properly sloped. They might need replacement or adjustment.
Quick rule: Skipping any of these checks could lead to leaks, improper flashing integration, or costly rework.
Permits, insurance, and notification
Before you start work, ensure you’re covered legally and with your insurer.
- Check local codes: Contact your building department to see if permits are required for your project.
- HOA approvals: If you live in an HOA, get their written approval before starting work.
- Verify insurance: Confirm your homeowner’s policy covers any potential damages during the retrofit.
- Utility clearances: Call 811 to have underground lines marked before digging or cutting into walls.
- Notify neighbors: Let them know about the work, especially if it might disrupt their property or daily routines.
- Contractor’s license and insurance: If hiring help, ensure they’re licensed and insured to protect yourself from liability.
- Warranty considerations: Check if your existing warranties (roof, stucco) might be voided by the retrofit. Notify manufacturers if unsure.
Quick rule: Skipping these steps could lead to fines, damaged property, or invalidated warranties.
Tools and Materials Checklist
Define where the kickout flashing will be applied and how it routes water away from the wall while remaining compatible with the wall assembly. This helps ensure the retrofit functions with the existing roof and siding plans. Keep the focus on durable, code-compliant combinations.
Assemble a practical set of cutting tools, pry bars, snips, sealant guns, measuring devices, and safety gear. Include waste containment and temporary weather protection to keep the area tidy and shielded between steps. Consider material options for kickout flashing and secondary flashings, and verify compatibility with the substrate and manufacturer guidelines.
Recommended tools and PPE
Before you start, make sure you have the right gear to keep your retrofit safe and efficient.
- Safety glasses: Protect your eyes from debris during cutting and grinding.
- Work gloves: Essential for handling sharp edges and hot surfaces.
- Ear protection: Use when operating power tools like grinders or saws to prevent hearing damage.
- Dust mask/respirator: Protect your lungs from dust and debris, especially when grinding or cutting stucco.
- Hard hat: Safety first – protect your head from falling objects or impact with tools.
- Tape measure: Accurate measurements ensure proper flashing installation and cutbacks.
- Circular saw or reciprocating saw: For cutting through stucco, OSB, or plywood at the roof line.
- Grinder with metal cutoff wheel: To safely cut metal flashings to size.
- Snips: For trimming and fitting metal flashings around obstacles.
- Caulking gun: Apply sealants at seams, ends, and nail holes for a watertight finish.
- Pry bar: Gently remove damaged or excess stucco to expose the wall assembly.
- Level: Ensure proper alignment of flashings and maintain drainage paths.
Quick rule: Always prioritize safety. Wear PPE, use tools correctly, and keep your workspace clean.
Flashing material types and selection criteria
Choose the right flashing materials to ensure durability and compatibility with your existing wall assembly.
- Aluminum: Lightweight, durable, and paintable. Check for corrosion resistance in coastal areas.
- Galvanized steel: Stronger than aluminum but susceptible to corrosion over time. Consider using stainless steel or adding a protective coating.
- Stainless steel: Highly resistant to corrosion, ideal for coastal regions and harsh climates. More expensive than other options.
- Copper: Excellent corrosion resistance but can be costly. Not recommended for below-siding applications due to potential damage from fasteners.
- Flexible membrane: Self-adhesive membranes provide a watertight seal and are easy to install. Ensure they’re compatible with your roofing and WRB materials.
- Secondary flashings: Consider metal or vinyl flashing, self-adhesive membranes, or sealants for additional waterproofing at seams and nail holes.
Quick rule: Always check manufacturer compatibility and corrosion resistance before purchasing. Choose materials that integrate well with your existing wall assembly and siding.
Safe Stucco Cutback Techniques
Set a clear objective for conservative removal, limiting exposure and maintaining structural safety. Confirm the weather window and have a plan to stop if conditions are unclear or moisture is detected. Use PPE and establish a safe exit path before starting each section.
Assess the WRB and sheathing, map risk areas, and test for moisture or delamination as you go. Plan the work in small, controllable sections to minimize exposure time and avoid unnecessary damage to the wall system.
How to score and remove stucco safely
Start by marking your cut lines with a pencil. Use a straight edge, like a level or a long piece of wood, to ensure clean, straight lines.
Use a utility knife or a scoring tool to create shallow grooves along these lines. This helps control the break and prevents deep gouges into the lath, adhesion layer, or sheathing.
For removal, use a chipping hammer or a pry bar. Work from the top down, chipping off small sections at a time. Be conservative – it’s easier to remove more later than to fix damage now.
Never force tools into the stucco. If you feel resistance, stop and reassess your technique or the substrate below.
Protecting WRB, lath, and sheathing during exposure
Once you’ve scored and removed a section of stucco, you’ll expose the underlying materials. The Water Resistive Barrier (WRB) should look like a plastic sheet or felt paper. Sheathing is typically plywood or OSB.
If you find metal lath, be extra careful. It can be sharp and may have rusted over time. Use gloves and protect your skin.
Temporarily cover exposed areas with a piece of plastic sheeting or a tarp to keep out moisture and debris. If you find rot or damage, stop work immediately. Reassess the situation and adjust your plan as needed.
Do not continue working if you’re unsure about the condition of the substrate. It’s better to seek professional advice than to cause further damage.
Correct Lap Order and Flashing Sequencing
Define a practical stack order that directs water outward: roof edge flashing, kickout flashing, underlayment or WRB, wall wrap, and stucco. This arrangement helps prevent traps where water could back up between layers. Keep the focus on continuous drainage paths and proper terminations.
Explain overlap logic in plain terms. Specify which layer sits on top of another and how seams are flashed to prevent backward water flow. Highlight integration points with the roof assembly and any required sealants or tapes at transitions to support a reliable, weather-tight finish.
Layering hierarchy (WRB, flashing, roofing, stucco)
The key to a successful kickout flashing retrofit is understanding how each layer should overlap the next. Here’s how:
Roof edge flashing goes first, lapping up under the shingles and over the roof deck.
Kickout flashing comes next, slotting in at the wall line. It should lap underneath the roof edge flashing to maintain a continuous water barrier. The kickout’s vertical leg should extend down, ending just above the stucco cladding.
The WRB/underlayment goes on top of the kickout flashing, lapping over it by at least 4 inches. This ensures any water that gets behind the roof edge flashing still drains outwards.
Fastening, sealants, and transition detailing
Proper fastening and sealing are crucial to maintain drainage plane continuity. Here’s how:
Use fasteners sparingly on the kickout flashing. Too many can compromise its integrity. Instead, use backer materials like Z-flashing or J-channel where needed.
Apply compatible sealants at all transitions and overlaps. This includes the roof edge flashing to kickout transition, kickout to WRB/underlayment, and any fasteners or nail holes. Follow manufacturer guidelines for best results.
Ensure that all fasteners are not driven into critical layers like the WRB/underlayment or stucco cladding. This could compromise their water resistance. Instead, drive them into the lath or sheathing behind.
Step-by-Step Retrofit Installation Procedure
Plan the sequence from protection and cutback through to kickout flashing installation and termination. Emphasize staged inspections and practical checks after each major step. Keep the work area protected and set up a clear path for movement and access throughout the project.
Expose the kickout area, verify substrate soundness, and note the exact locations for back-dedding and laps. Install the kickout with proper orientation, seal to roof flashing and WRB, and secure with appropriate fasteners while preserving a clean drainage path.
Step-by-Step Installation Process
This section guides you through the practical steps of retrofitting a kickout flashing behind stucco, from preparation to final checks.
- Establish a weather window and protect surrounding finishes. Cover the ground with drop cloths or tarps to keep it clean.
- Set up safety PPE, including hard hats, safety glasses, and gloves. Confirm permit/inspection requirements and outline staged inspection points.
- Expose the kickout area by carefully scoring and removing stucco using safe techniques mentioned earlier. Verify a clean, sound substrate.
- Remove loose material, check WRB/underlayment condition, and mark exact kickout and lap locations for both flashing pieces.
- Fit the kickout flashing in proper orientation, ensuring runoff is directed away from the wall face. Seal it to roof flashing and WRB using appropriate sealant.
- Secure the kickout flashing with appropriate fasteners, following the manufacturer’s guidelines. Verify a continuous drain path and tight but not over-compressed joints.
- Align the kickout flashing with the roof plane and integrate it with existing roof-to-wall flashing. Backfill or reseal around edges to maintain a watertight seal.
- Plan for stucco termination with proper weep, control joints, and lath attachment. Apply approved sealant and/or backer rod at the kickout junction.
- Embed lath/mesh correctly, apply base coat transition, and plan final sealant at the termination line. Perform a staged water or pressure test where feasible to check for leaks.
Installing the kickout flashing and tying into roof edge
The kickout flashing is crucial for directing water away from your wall. Here’s how to install it correctly.
First, position the kickout flashing at the roof-to-wall intersection. It should extend beyond the stucco termination line by about 2-4 inches to ensure proper drainage.
Next, bend or form the kickout flashing to match the roof edge’s contour. Use a utility knife or tin snips to make clean cuts as needed. Ensure the flashing is tight but not over-compressed against the roof and wall surfaces.
Pro tip: Use a level to ensure the kickout flashing is properly aligned with the roof plane, promoting efficient water runoff.
Restoring WRB and stucco termination details
Properly dressing the WRB/housewrap and finishing the stucco termination are essential for maintaining a watertight barrier.
Dress the WRB/housewrap over or under the flashings, following the manufacturer’s guidelines. Ensure it extends at least 2 inches beyond the kickout flashing to maintain a continuous water-resistive barrier.
Apply termination strips or counterflashings over the WRB/housewrap and kickout flashing. This helps prevent water from getting behind the stucco and causing damage.
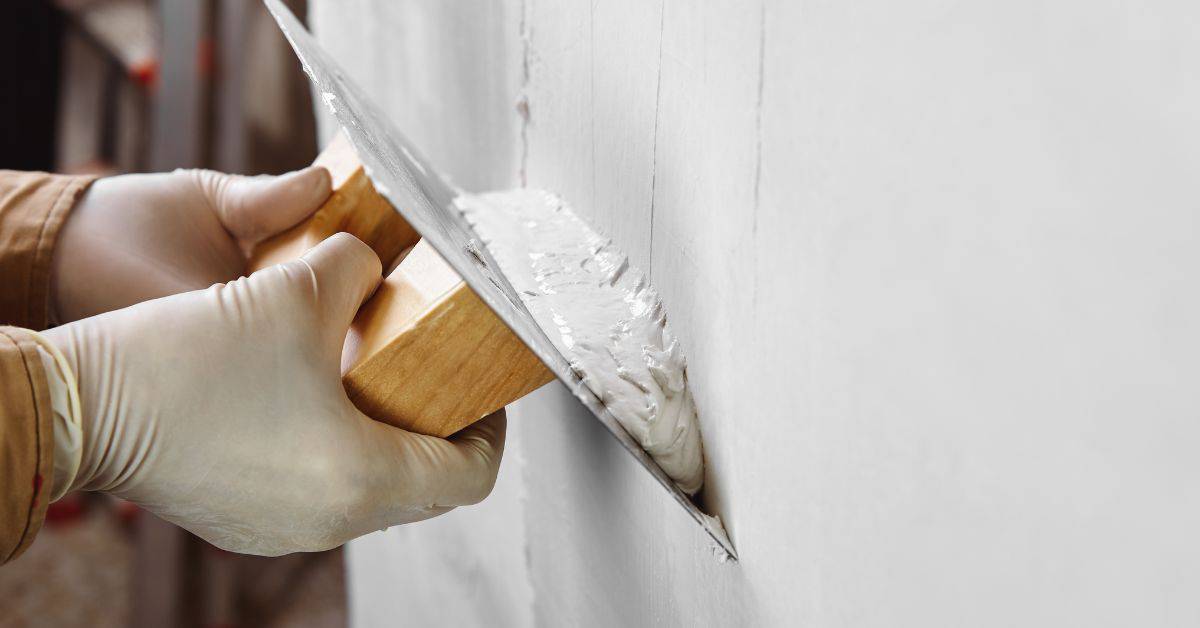
Patch or re-finish the stucco to match the existing finish, ensuring proper drainage and appearance. Use a high-quality exterior-grade patching compound and follow the manufacturer’s instructions for best results.
Safety, Quality Checkpoints, and Testing
Establish a safety foundation with fall protection plans, dust control, silica precautions, and awareness of electrical hazards. Use PPE appropriate for the conditions and maintain a tidy, organized worksite to minimize risk. Implement dust control methods and containment measures to protect occupants and nearby areas.
Use quality checkpoints to verify lap order, flashing behind stucco, and sealant bead integrity. Plan for inspections at key milestones and document any moisture concerns or concealed damage that requires expert input. Simple water tests and moisture checks can help validate the retrofit before completing the job.
PPE, Fall Protection, and Silica/Dust Control
Before you start cutting into your stucco or working on the roof, gear up with these safety essentials.
- Hard Hat: Protects against falling debris. Wear it anytime you’re under potential hazards.
- Safety Glasses: Shields eyes from dust and small particles. Don’t remove them even briefly.
- Respirator: Essential for silica dust protection. Use a NIOSH-approved P100 respirator or equivalent.
- Ear Protection: Reduces noise exposure from power tools. Wear them consistently while using machinery.
- Gloves: Protects hands from cuts and abrasions. Choose a pair that fits well for better grip.
- Fall Protection: Use guardrails, safety nets, or harnesses when working at heights over 6 feet.
- Dust Control: Wet down work areas to minimize dust. Use HEPA vacuums for cleanup.
- Electrical Awareness: Be cautious around power lines and electrical hazards. Follow lockout/tagout procedures when needed.
Quick rule: Always follow local occupational safety rules and regulations to ensure a safe work environment.
Visual and Water Test Checkpoints
After installing your kickout flashing, perform these visual inspections and water tests to ensure it’s working correctly.
- Flashing Lap Order: Verify that the flashing laps properly behind the stucco. The lower layer should be tucked under the one above it.
- Sealant Bead Continuity: Inspect sealant beads at all joints and intersections to ensure they’re intact and continuous.
- Flashing Height: Check that the flashing extends high enough up the wall to prevent water intrusion. It should be at least 2 inches above the stucco finish.
- Drip Edge: Ensure the flashing has a drip edge to direct water away from the building envelope.
- Roof Integration: Confirm that the flashing ties into the roof edge correctly, allowing proper drainage.
- Stucco Termination: Inspect where the stucco meets the flashing. It should be sloped away from the wall to direct water outwards.
- Low-Pressure Water Test: Spray or drench visible seams with water to check for leaks. Look for signs of moisture intrusion.
Quick rule: If you find any issues during these checks, address them promptly before proceeding with the project.
Costs, Common Mistakes to Avoid, and Maintenance
Explain the main cost drivers, such as material choice, access requirements, extent of cutback, and potential hidden damage. Provide guidance on budgeting without listing prices, and remind readers that quotes may vary based on scope and site specifics. Encourage readers to compare proposals carefully and verify warranties.
List common installation errors to avoid, including improper cutback sizing and lap order, failure to address concealed damage, and poor sealing. Propose a maintenance and inspection plan to monitor flashing performance, with routine checks for cracks, drainage paths, and sealant condition to prolong service life.
Common retrofit mistakes and how to prevent them
Here are some common mistakes to avoid when retrofitting kickout flashing behind stucco.
- Incorrect lap order: Flashing should overlap in a specific way to direct water outwards. Incorrect sequencing can lead to leaks. Always follow the correct lap order as explained earlier.
- Inadequate temporary protection: When exposing your walls, protect the WRB, lath, and sheathing with drop cloths or plastic sheeting to prevent damage from debris or weather.
- Wrong material compatibility: Ensure your chosen flashing is compatible with your existing stucco. Incompatible materials can lead to premature failure.
- Poor fastener placement: Fasteners should be placed in the middle of the flashing laps, not at the edges. Off-center fasteners can cause leaks and damage.
Preventing these mistakes ensures a long-lasting, watertight retrofit.
Long-term maintenance and when to re-inspect
Maintaining your kickout flashing is crucial for its longevity. Perform visual checks at least once a year, preferably before winter.
Clear any debris from the flashing and ensure water can drain freely. Check sealants around flashing seams and at stucco cracks. Ensure drainage pathways are clear and functioning.
After major storms or roof work, re-inspect your kickout flashing. Look for signs of damage such as cracked or peeling sealants, bent or damaged flashing, or new stucco cracks. If you notice any issues, address them promptly to prevent further damage.
Remember: Regular maintenance and timely repairs are key to prolonging the performance of your kickout flashing.
Conclusion
Backed by a solid plan, a careful cutback, and the right lap order, you finish with a flashing job that keeps water out, looks right, and lasts. Safety and accuracy now save you costly fixes later.
Proceed with a practical check: confirm the project scope and access, gather the listed tools and materials, perform the cutback in small sections, verify the correct sequence of flashing as you install, and test each stage before moving on. Work in a clean, dry area, protect surrounding stucco, and keep a steady pace so you don’t miss a step or force a misfit.
Avoid these common traps: rushing the cutback or skipping sealant at turns, and trying to shoehorn components where the lap order is wrong. Always verify proper lap order, test small areas first, and keep the area dry during installation to prevent damage. If anything looks questionable or the framing or backing isn’t solid, stop and reassess before you proceed.
If the project runs into hidden rot, uncertain framing, or you’re unsure about flashing integration with the existing stucco, it’s smart to call a professional. When in doubt, don’t push past what you can safely handle. You can do this, and you’ll have a durable, well-sealed finish you’ll be proud of.
FAQ
What is kickout flashing, and why does it matter in stucco retrofits?
Kickout flashing is the piece that channels water away from the wall at the transition where a roof edge meets a wall. It helps prevent water from running behind the stucco. Without proper kickout, water can seep into the wall and cause damage over time.
What tools and materials do I need for retrofitting kickout flashing behind stucco?
You’ll need a hammer, chisel or grinder for removing material, a chisel or pry bar for clean cuts, a utility knife, a tape measure, and a level. For flashing, use a compatible kickout flashing piece, flashing tape, sealant, and appropriate fasteners. Check the product labels and manufacturer instructions for exact fit and compatibility.
How do I safely cut back stucco to install kickout flashing?
Cut back only the stucco that you can clearly access without tearing into the wall structure. Use a appropriate cutting tool to score and remove the outer layer cleanly, then clear dust and loose material. Stop if you hit any solid backing, structural elements, or wires, and consult a pro or follow manufacturer guidance before proceeding.
What is the correct lap order for flashing installation behind stucco?
Install the kickout flashing first to direct water away from the wall. Lay any secondary flashed layers and sealants in the order specified by the flashing manufacturer, ensuring overlaps face water intrusion away from the interior. If in doubt, refer to the product instructions or local guidance for the exact sequence and overlap requirements.