
Introduction
Inside-corner stucco crack reinforcement is a way to strengthen the joint without making it bulky. It focuses on tying the corner back together and borrowing the surrounding material’s strength so the crack doesn’t widen. Check local guidelines and product instructions to choose a method that fits your wall and climate.
Different stucco types and reinforcement products require compatible substrates and proper adhesion. When you repair, follow the installation steps for the chosen product and keep an eye on moisture, movement, and surface cleanliness. If in doubt, verify with the product label or manufacturer instructions and consider periodic inspections to catch cracking early.
Key takeaways
- Assess inside-corner cracks for movement, moisture, and substrate condition before repairs.
- Plan access and scope to avoid bulking and ensure proper reinforcement placement.
- Choose non-bulking reinforcement and fiber options compatible with current stucco.
- Follow adhesion, curing, and durability best practices; use manufacturer guidance.
- Know material choices and installation basics for common stucco systems.
- Safety first: PPE, dust control, and fall prevention during repairs.
Table of Contents
- Introduction
- Key takeaways
- Why Inside-Corner Cracks Form and How to Assess Them
- Planning the Repair: Scope, Access, and Risk Factors
- Tools and Materials Checklist for Non-Bulking Corner Reinforcement
- Reinforcement Methods That Prevent Bulking
- Fiber Reinforcement Options and Application Methods
- Step-by-Step DIY Repair Procedure (no-Bulk Approach)
- Adhesion, Curing, and Durability Best Practices
- Cost, Safety, Timeline and Common Mistakes to Avoid
- Conclusion
- FAQ
Why Inside-Corner Cracks Form and How to Assess Them
Inside corners crack for a mix of structural movement, material behavior, and installation choices. Look for signs like continuous or stepped cracks and note how they change with loading or seasonal shifts. This quick view helps you decide what to test next.
Different factors like lath type, stucco thickness, cure issues, moisture movement, or bond failure can predispose corners to cracking. Also check how corners were reinforced or corner beads were used and whether control joints were properly placed. A simple severity framework guides whether you escalate to diagnosis or proceed to repair options.
Common causes (movement, embedment failure, poor termination)
Inside-corner cracks often happen due to a few common reasons. Here’s what you need to check:
Movement: Concrete can crack if it moves too much before setting. This happens when the base isn’t stable or compacted properly, or when there’s too much water in your mix.
Check: Base compaction and moisture content of your concrete mix.
Embedment failure: If you’ve got rebar or other embedments in your corner, they might not be secure. This can cause cracks when the concrete moves.
Check: Ensure embedments are securely tied and properly anchored.
Poor termination: Corners need proper finishing to prevent cracking. If you don’t taper or round off your corners, they’ll be weak points that crack under pressure.
Check: Your corner finish is smooth, rounded, or tapered properly.
Quick diagnostic checklist
Before you decide to fix inside-corner cracks yourself or call a pro, use this checklist to assess the situation. It’ll help you understand what’s causing the cracks and whether DIY is feasible.
- Check substrate soundness: Tap the concrete around the crack with a hammer. If it sounds hollow, there might be delamination or voids underneath. What goes wrong if you skip this: You might end up fixing a symptom instead of the cause.
- Inspect bond: Look for any gaps between the concrete and the formwork. A poor bond can lead to cracks. Use a flashlight if needed. What goes wrong if you skip this: You might not address the root cause of the cracking.
- Check moisture content: Measure the relative humidity (RH) in the concrete using a RH meter. Ideal curing conditions are around 40-60% RH. What goes wrong if you skip this: Incorrect moisture levels can lead to poor curing and more cracks.
- Examine crack pattern: Look at the crack’s shape, length, and direction. Hairline cracks are usually not a big deal, but wider or zigzag cracks need attention. What goes wrong if you skip this: You might underestimate the severity of the problem.
- Check for movement: Gently push and pull on the cracked area to see if there’s any give. Movement can cause cracks, especially at corners. What goes wrong if you skip this: You might not address the underlying structural issue causing the crack.
- Inspect embedments: Check if any reinforcing bars or other embedments are properly anchored and not moving. Loose embedments can cause cracks. What goes wrong if you skip this: You might not fix the source of the cracking.
- Check termination details: Ensure that the concrete at the corner has proper termination, like a 45-degree V-groove or a reinforcement bend. Poor terminations can lead to cracks. What goes wrong if you skip this: You might not prevent future cracking.
- Look for signs of settlement: Check if the surrounding area is level and hasn’t settled. Settlement can cause corner cracks. What goes wrong if you skip this: You might not address the underlying structural issue causing the crack.
Quick rule: If any of these checks reveal significant issues, or if you’re unsure about what you’ve found, it’s best to consult a professional. Better safe than sorry when it comes to concrete cracks.
Planning the Repair: Scope, Access, and Risk Factors
Start by mapping the crack length, width, and depth, and note any nearby joints or trim that could influence the repair scope. Expansion joints and hidden movement zones should be identified to avoid underestimating work. These details shape your plan.
Inspect adjoining systems for water intrusion paths and compromised flashing or caulks. Confirm window interfaces and roofline terminations to anticipate moisture risks. Accessibility, containment, and ventilation also drive how you schedule and execute the repair.
When to call a professional
Before you grab your trowel and start mixing, know when it’s time to step back. Some cracks are more than just cosmetic.
Extensive delamination, where chunks of stucco are falling off, signals serious substrate issues. Don’t DIY – call a pro.
Recurring leaks around the crack could mean water intrusion behind your stucco. That’s not something you want to tackle alone. Get an expert opinion.
If you see structural movement, like bulging walls or doors that won’t close, stop and call a professional immediately. You’re dealing with more than just a crack – it could be a structural problem.
Permits, warranties, and compatibility considerations
Before you start your repair, check if you need any permits. Local building codes vary, so don’t assume.
Next, review your warranty. Some manufacturers cover repairs under certain conditions. Don’t void your warranty by using incompatible materials or methods.
Ensure the patch material you choose is compatible with your existing stucco assembly. Different types of stucco have different properties. Using the wrong stuff can cause more cracks down the line.
Check with the manufacturer if you’re unsure. They know their product best and can guide you towards a compatible repair.
Tools and Materials Checklist for Non-Bulking Corner Reinforcement
Profile and cutting tools should minimize added thickness, such as thin-profile embedment channels and precise grinders. Choose sizes that fit the existing corner geometry and are easy to align during work. Having the right tools prevents bulky patches later.
Embedment methods like flush-recessed channels or pre-reinforcement nets help keep thickness low. Finish with feathered transitions using appropriate trowels and brushes. Keep a short list of compatible embeds and lightweight binders for quick checks on site.
Essential tools
Before you start your corner repair, make sure you have all the necessary tools at hand. This checklist ensures you’re well-equipped for a smooth and efficient job.
- Rasp/trowel: For profiling and shaping corners.
- Utility knife: To cut mesh, tape, and other materials cleanly.
- Mixing paddle: To blend your repair materials thoroughly.
- Hawk: To hold and transfer mixed material.
- Caulk gun: For applying sealants and adhesives.
- Sanding tools (e.g., orbital sander, sanding block): To smooth surfaces before and after repair.
- Safety gear (gloves, goggles, dust mask): Protect yourself from debris and chemicals.
- Tape measure: To ensure accurate cuts and measurements.
Quick rule: Always double-check your tools before starting. Missing a tool can lead to improper repairs or delays.
Materials that do not bulk up the corner
Choosing the right materials is crucial for reinforcing your corners without adding unwanted thickness. Here’s a checklist to guide you.
- Bonding agents: Ensure they’re compatible with your existing stucco system and can penetrate well into the substrate.
- Polymer-modified basecoats: Check for low-build options that provide reinforcement without adding bulk.
- Alkali-resistant glass mesh/tape: Opt for thin, lightweight options to minimize thickness.
- Synthetic fiber additives: Choose those designed for thin-layer applications and compatible with your stucco system.
- Low-build corner beads: Ensure they’re suitable for your corner geometry and can be embedded flush with the surface.
- Epoxy primers: Select ones that create a strong bond without adding significant thickness.
- Flexible caulks: Choose those designed for stucco repairs, providing flexibility without excessive bulk.
- Manufacturer instructions: Always check and follow them to ensure compatibility with your specific stucco system.
Quick rule: Always prioritize thin-layer, low-build materials to avoid adding unnecessary thickness to your corners.
Reinforcement Methods That Prevent Bulking
Clarify what bulking means in this project and how each method avoids edge buildup. Consider embedded mesh, fibers, or low-profile corner accessories that address movement without adding bulk. Your choice should fit the crack pattern and substrate.
Compare options by crack width, movement, climate, and installation tolerances. For each method, outline prep steps, embedding depth, curing, and edge detail to preserve a clean corner line. Use compatibility checks to avoid premature bulging or telegraphing.
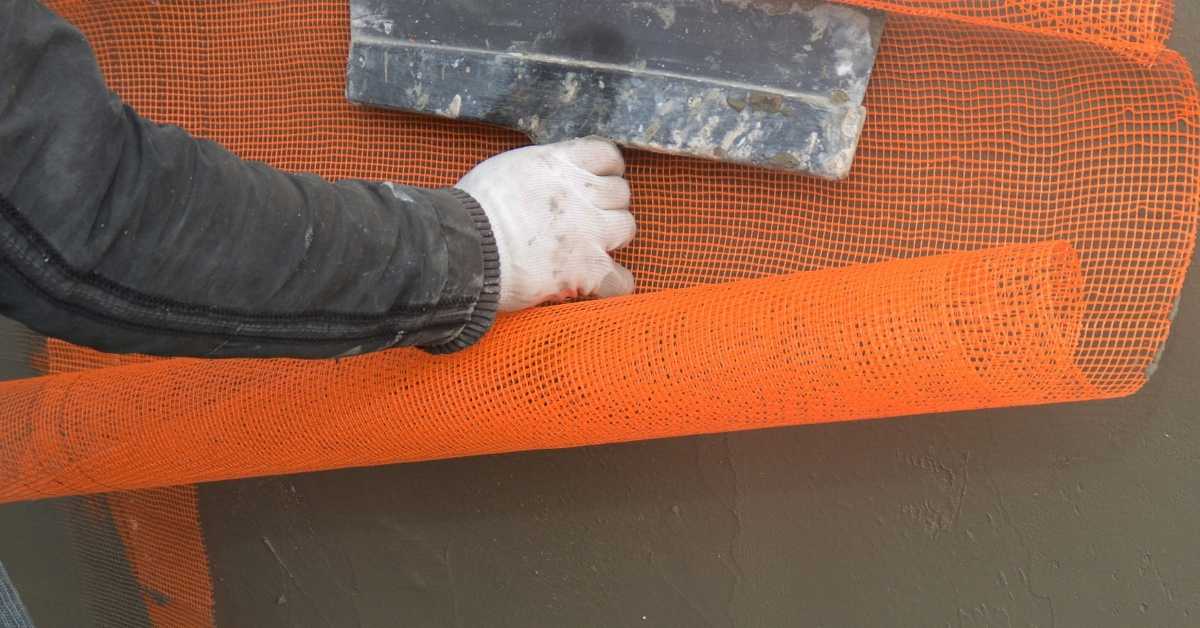
Embedded mesh/tape techniques
Bulking at inside corners often happens when you add too many layers. To avoid this, embed narrow mesh or tape with a thin basecoat layer. This bridges the crack without adding thickness.
Narrow mesh: Use 1/4″ or 1/2″ wide galvanized steel or fiberglass mesh. Embed it in a thin (around 3/32″) basecoat layer.
Tape: Apply fiberglass or vinyl tape along the corner before applying the basecoat. This reinforces and seals the corner without adding bulk.
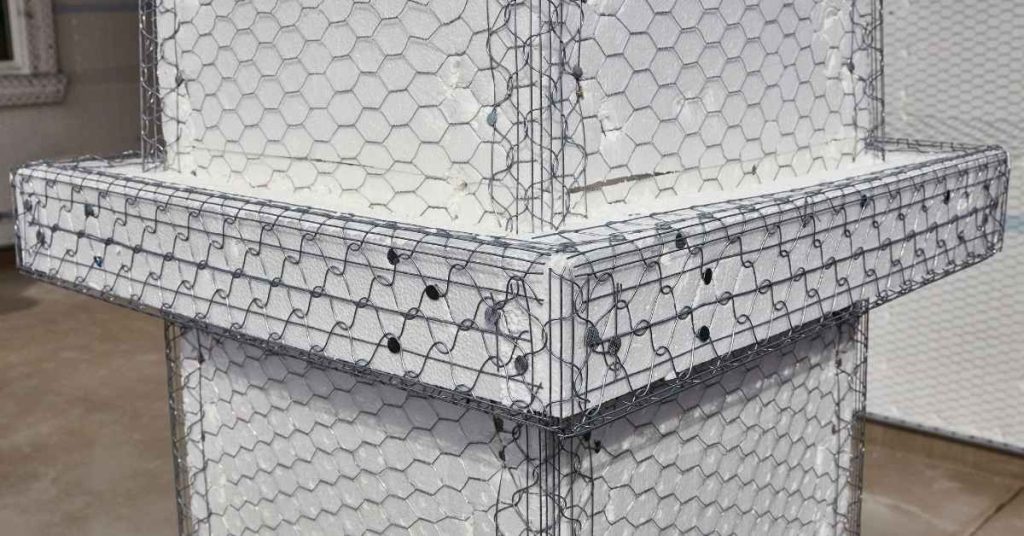
Low-profile corner beads and E-flange systems
Corner beads and E-flanges increase embedment and anchorage, preventing cracks. They don’t add much mass, keeping the profile minimal.
Corner beads: Use thin (around 1/8″ to 1/4″) metal or plastic corner beads. Apply them with a thin layer of basecoat before installing lath and scratch coat.
E-flanges: These engineered termination profiles fit over the corner, providing extra anchorage without adding thickness. They’re great for EIFS systems.
Adhesive and mechanical anchoring approaches
Sometimes, you need to restore adhesion where cracks have broken free from the substrate. Use bonding agents, injection adhesives, or discreet fasteners.
Bonding agents: Apply these liquid additives to your basecoat mix to improve adhesion and flexibility. They help prevent future cracking without adding bulk.
Injection adhesives: For larger cracks, inject a flexible adhesive directly into the void. This restores adhesion without building up the corner.
Mechanical fasteners: Use discreet fasteners like screws or nails to secure loose areas. Drive them in at an angle and fill with matching stucco mix. Keep it minimal to avoid bulking.
Fiber Reinforcement Options and Application Methods
Fiber types include glass-reinforced options and synthetic chopped fibers, each with different handling. Assess how they fit with traditional mixes, EIFS blends, or interior plaster without thickening the corner. Choose based on adhesion and curing compatibility.
Disperse fibers evenly in the mix or use pre-mixed products to prevent clumping. Consider netting or mats for corners as alternatives. Outline sequence and tools to maintain edge sharpness while embedding fibers.
Choosing the right fiber for the job
The first step is picking the right fiber reinforcement. You’ve got options like glass, polypropylene, and nylon.
Glass is alkali-resistant, so it won’t degrade in your stucco mix. It’s also strong and stiff, but can be brittle. It’s great for traditional stucco mixes.
Synthetic chopped fibers, like polypropylene or nylon, are flexible and durable. They’re good for EIFS blends and interior plasters. But they might not handle alkali as well as glass.
Check product data to confirm compatibility with your basecoat and consider handling properties. You want something easy to mix and apply.
How to apply fibers without bulking
The key here is thin layers and even distribution. You don’t want to thicken that corner.
One way is the embedment coat method. Mix your fibers into a single, thin embedment coat. This gives you reinforcement right where you need it without adding bulk.
Another approach is the skim coat method. You mix your fibers into a thin skim coat. This preserves the corner’s profile while giving you some extra strength.
Whichever method you choose, make sure to maintain uniform fiber distribution. Avoid clumping at all costs. And if you’re using corner beads or starter tracks, install them before applying your reinforced layer.
Step-by-Step DIY Repair Procedure (no-Bulk Approach)
Start with a diagnostic check to confirm moisture status and movement indicators. Identify active cracks versus hairline fractures to avoid trapping moisture. This guides whether a no-bulk approach will work.
Choose thin interior corner reinforcement and specify compatible patch materials with precise thickness targets. Prepare the substrate with light cleaning and a breathable bonding agent to maximize adhesion without adding bulk. Follow a clear, sequential application plan and allow proper curing with ventilation.
Step-by-Step Repair Process
Follow this clear, numbered sequence to repair inside-corner cracks without adding bulk. It covers preparation, main work, and final checks.
- Safety first: wear gloves, goggles, and a dust mask. Inspect the area for any hazards before starting.
- Remove loose stucco with a chisel or scraper. Be careful not to damage the substrate.
- Clean the corner thoroughly using a stiff brush and water. Let it dry completely.
- Check the substrate for soundness. If you find any issues, consult a professional before proceeding.
- Measure and mark the crack’s length. Cut reinforcement mesh or tape to size, plus an extra inch on each side.
- Apply a thin layer of compatible bonding agent along the crack and edges using a paintbrush.
- Embed the reinforcement mesh/tape into the wet bonding agent. Ensure it’s flush with the corner and well-bonded.
- Feather the edges of the reinforcement with a trowel to minimize build-up. Let it dry according to manufacturer’s instructions.
- Mix your low-profile patch material as per instructions. Apply it thinly over the crack, feathering the edges.
- Let the patch cure properly with adequate ventilation. Follow the manufacturer’s guidelines for curing times.
Surface Prep and Cleaning
Preparing the surface is crucial for a successful, no-bulk repair. Remove loose stucco and clean the area thoroughly to ensure proper bonding.
Start by using a chisel or scraper to remove any loose or damaged stucco from the corner. Be careful not to damage the substrate underneath.
Next, use a stiff brush and water to clean the area thoroughly. Remove all dust and debris. Let it dry completely before proceeding.
Finally, check the substrate for soundness. If you find any issues like cracks or crumbling, consult a professional before continuing with your repair.
Embedding Reinforcement and Basecoat Application
Properly embedding the reinforcement ensures a strong bond and minimal bulk. Here’s how to do it right.
First, measure and cut your reinforcement mesh/tape to size, plus an extra inch on each side. This will give you enough material to embed properly.
Next, apply a thin layer of compatible bonding agent along the crack and edges using a paintbrush. Ensure the area is well-coated but not overly saturated.
Then, embed the reinforcement mesh/tape into the wet bonding agent. Use a trowel or your fingers to press it firmly against the corner. Ensure it’s flush with the surface and well-bonded. Feather the edges of the reinforcement with the trowel to minimize build-up.
Finally, let the basecoat dry according to the manufacturer’s instructions before proceeding with the final finish coat.
Finishing, Texture Match and Inspection
Use this checklist to ensure a seamless, durable repair that matches your existing stucco. Check after applying the final finish coat.
- Texture: Ensure the repaired area blends with the surrounding texture. Use a texture spray or brush on a matching texture if needed.
- Level: Check for any lumps, bumps, or uneven areas. Sand down high spots and fill in low spots as necessary.
- Cracking: Inspect the repaired area for any new cracks. If found, address them immediately to prevent further damage.
- Bulging: Check for any signs of bulging or excess thickness. This could indicate a problem with your repair that needs to be addressed.
- Moisture: Ensure there are no signs of moisture intrusion. If you suspect a moisture issue, consult a professional immediately.
- Sealant: Apply a flexible sealant along the repaired area to accommodate future movement and prevent water intrusion.
- Color match: Check that the repaired area matches the surrounding stucco in color. If necessary, apply a matching paint or stain.
- Cleanliness: Ensure the area is clean and free of any debris or dust. This will help your repair last longer.
Quick rule: Always inspect your work thoroughly after completing a repair. Catching and fixing issues early can save you time, money, and effort in the long run.
Adhesion, Curing, and Durability Best Practices
Focus on surface preparation, proper primers, and compatible bonding systems for plaster, stucco, or EIFS substrates. Mechanical keys and bonding cement may be needed in certain joints or expansion interfaces. These steps promote a strong bond without extra thickness.
Address environmental conditions and curing needs, including temperature and humidity. Plan for wet/dry cycles and post-application protection to prevent premature cracking. Include adhesion testing and periodic checks to confirm long-term performance.
Primers and bonding agents
A good primer is like a strong handshake for your repair. It improves adhesion by cleaning the surface, promoting bond, and preventing premature curing.
Use a bonding primer or additive when repairing thin areas to ensure proper adhesion. Apply it evenly with a brush or roller, following manufacturer’s instructions.
When to use: Always use a primer on bare surfaces. For thin repairs, apply a second coat after embedding reinforcement and before applying the basecoat.
Curing, environmental controls and spot testing
Proper curing is key to strong adhesion. Follow product guidelines for temperature, humidity, and cure time. Protect repairs from extreme conditions during this period.
Perform small test patches to verify adhesion and finish before proceeding with the full repair. This helps you catch any issues early and make adjustments as needed.
Acceptable temperatures: Most products cure best between 50°F (10°C) and 90°F (32°C). Avoid curing in freezing or extremely hot conditions.
Cost, Safety, Timeline and Common Mistakes to Avoid
Compare non-bulking options such as epoxy injections, fiber patches, surface mesh, or micro-toppings against their effect on moisture barriers and interior air flow. Use a simple decision flow based on crack characteristics and interior conditions. This helps select an appropriate method.
Outline safety precautions, including PPE and proper ventilation. Highlight common errors like over-priming, neglecting moisture sources, or selecting bulking methods. A quick checklist keeps the job on track from assessment to monitoring.
Cost and time considerations
When planning your concrete project, cost and schedule are key. Here’s what you need to consider:
Materials choice affects cost. Basic concrete is cheap, but add-ons like color or decorative elements hike the price. Check product labels for pricing.
Prep scope impacts time and money. Proper site prep – base compaction, leveling, forms – saves you in the long run. Don’t skip it to save a few bucks.
Labor’s a big chunk of your budget. Hiring pros? Get multiple quotes for larger jobs. DIY? Factor in time and learning curve. Always check local labor laws and regulations.
Safety and PPE
First things first, safety’s not something you can skimp on. It’s your life we’re talking about here.
Dust control: Concrete dust is nasty stuff. Wear a respirator, not just a dust mask. Check the label to make sure it’s rated for concrete dust.
Eye protection: Safety glasses or goggles are a must. You don’t want concrete in your eyes, trust me on this one.
Gloves and tool handling: Wear gloves to protect your hands from cuts and abrasions. And for Pete’s sake, use tools properly. Don’t be a hero, follow the manufacturer’s instructions.
Common mistakes and how to avoid them
Here are some common pitfalls when working with concrete, so you can steer clear of them.
- Insufficient prep: Skimping on site preparation leads to weak foundations. Always ensure the base is clean, level, and well-compacted before pouring.
- Mismatched materials: Using incompatible concrete mixes or aggregates can result in poor performance. Stick to recommended mixes for your project’s needs.
- Over-bulking: Too much water weakens the mix. Check the water-cement ratio (usually 0.45-0.6 by weight) and avoid adding extra water on-site.
- Inadequate embedment: Reinforcement too close to the surface can cause cracking. Make sure steel is well-covered with concrete, typically at least 2 inches from the top.
Double-check these points before you start mixing and pouring. A little extra time upfront saves a lot of trouble later on.
Conclusion
Repairing inside-corner cracks with a no-bulk approach pays off in safety, durability, and a clean look that lasts. Stay focused on control, proper prep, and solid curing to prevent re-cracking and moisture intrusion.
First, assess access, plan your steps, assemble the tools and non-bulking reinforcement materials, confirm you can dry-fit and follow the no-bulk approach, then proceed in small, tested stages and check adhesion and cure times before moving on. Remember, success comes from testing a small area first, keeping the repair itself compact, and using the right fiber or mesh as you plan, not from rushing to fill a large space.
Common mistakes to avoid are over-filling the corner, skipping surface prep or adhesion checks, and ignoring cure and environmental conditions. Maintain strict safety: wear eye protection and a mask in dusty or dusty-mixing moments, work with good ventilation, and never mix or apply materials beyond their stated guidelines. If you see signs of ongoing movement, active water intrusion, or cracks that open or shift after repair, stop and reassess rather than forcing a fix.
If the crack shows real movement, large width, or ongoing leaks, or you’re unsure about the underlying structure, it’s wise to bring in a professional. Otherwise, keep the plan simple, follow the no-bulk method, and stay disciplined with prep and curing. You can finish this with solid, lasting results—steady progress, careful checks, and a bit of grit.
FAQ
What types of stucco materials and products should I know about for inside-corner repairs?
Know the basics: cement-based stucco, polymer-modified coatings, and lightweight textured finishes may be used around inside corners. Check labels for cure time, bonding requirements, and compatibility with existing stucco. Always follow manufacturer instructions and local guidelines when selecting products.
How do installation techniques affect inside-corner crack prevention and repair?
Proper corner preparation, backer support, and controlled application help prevent bulking. Use products and methods that minimize joint movement while still allowing for natural expansion. If unsure, compare your chosen approach to the instructions from the product maker and adjust for your wall type.
What maintenance steps help keep inside corners from cracking again?
Keep an eye on water intrusion, avoid improper coatings over flashing, and address any movement or settlement early. Clean surfaces, reseal any flashing joints when needed, and touch up with compatible finishes following the product’s instructions. When in doubt, consult the product label or a manufacturer’s datasheet for maintenance intervals.
What are practical repair options for damaged or cracked stucco near inside corners without adding bulk?
Use thin, compatible reinforcements and patching materials that won’t create a bulky corner. Focus on surface preparation, proper bonding, and feathered transitions to blend with the surrounding wall. Always verify compatibility with existing stucco and the finish coat by checking product labels or instructions.