
Introduction
Injecting adhesive behind loose plaster is a technique to reattach it by forcing glue into the gap behind the plaster. It can work when the substrate is sound and the plaster isn’t too far detached. Check the wall for hollow spots and test fit before you start.
This approach can fail when the backing is crumbled or the gaps are too wide. If you hear loose plaster crumbling or see large voids, stop and assess. Check product labels and manufacturer guidance for cure times and surface prep; if unsure, consult local rules.
Key takeaways
- Assess plaster condition and moisture before attempting adhesive injection to avoid failures.
- Use injection only where backing is solid and cracks are limited in extent.
- Choose adhesive compatible with substrate and follow manufacturer instructions precisely.
- Prepare area, protect tenants and surfaces, and ventilate; wear eye and skin protection.
- Conduct a small test injection in a concealed area to gauge penetration response.
- If injection shows minimal movement or stains, reassess suitability or seek pro help.
Table of Contents
- Introduction
- Key takeaways
- How Adhesive Injection Is Supposed to Work
- Diagnosing Whether Injection Is Appropriate
- Types of Adhesives and How to Choose One
- Tools and Materials Checklist
- Step-by-Step Injection Procedure (DIY-Friendly)
- When Injection Typically Works Well
- Common Failure Modes and Why Injections Fail
- What to Do When Injection Fails or Is Unsuitable
- Conclusion
- FAQ
How Adhesive Injection Is Supposed to Work
The basic idea is to place adhesive behind a loose layer of plaster so it can grip the back of the plaster and the substrate it sits on. This creates a new bond that helps the plaster resist further movement and reduces hollow spots that can crack or detach. The goal is to transfer stresses from the loose layer to solid material behind it without creating new voids.
In practice, you want the adhesive to fill gaps and form contact with both surfaces. A proper bond should resist typical loads from everyday use and settle the plaster back into place. Always verify that the product is compatible with your substrate and plaster before proceeding.
Mechanics of adhesion and void filling
The adhesive injection process relies on two key principles: bridging gaps and transferring loads.
Adhesives, when injected behind loose plaster, seep into the voids created by delamination. They fill these spaces, creating a bond between the plaster and its substrate (usually the wall or ceiling structure).
Bridging gaps means the adhesive spans the distance between the two surfaces, connecting them. Once cured, it forms a strong bond that helps prevent further separation.
Transferring loads refers to how the adhesive distributes the weight and stress of the plaster evenly across the substrate. This helps stabilize the plaster and reduces the risk of future cracking or crumbling.
Common injection methods (needle, port, pressure)
There are three main approaches to injecting adhesive behind loose plaster:
Needle injection involves using a syringe-like tool with a long, thin needle. This method is best for small areas and narrow gaps.
Port injection requires drilling small holes into the plaster, then inserting ports that allow adhesive to be pumped in under pressure. This method is ideal for larger areas or when significant suction exists behind the plaster.
Pressure injection uses a specialized pump to force adhesive through tubes and into the voids. This method ensures even coverage and is suitable for extensive delamination issues.
Diagnosing Whether Injection Is Appropriate
Start by evaluating the area for movement, looseness, and cracking. Look for signs that the plaster is only delaminated or if the substrate itself is compromised. Moisture or ongoing dampness is a red flag that can undermine an injection repair.
Next, test a small area to gauge how well the plaster re-adheres after an injection. Consider the extent of delamination and whether the backing material appears stable. When in doubt, consult the product instructions or local guidelines to judge suitability for your situation.
Visual and audible inspection checklist
Before you start, use this checklist to map out loose plaster. It’s quick and helps avoid surprises.
- Cracks: Look for hairline or wider cracks. They might hide voids.
- Sound changes: Tap the wall. Hollow sounds mean delamination.
- Peeling paint: Check if paint is lifting. It could be hiding a problem.
- Wavy or bulging areas: These might have voids behind them.
- Old repairs: Inspect previous fixes. They might need reinforcing.
- Moisture stains: Check for water damage. It can weaken plaster.
- Efflorescence: Look for white, powdery deposits. They could signal dampness.
- Loose pieces: Gently push on the wall. If it gives, there’s a void.
Quick rule: Don’t skip any steps. Each one helps you understand what you’re dealing with.
Probing, access holes, and measuring voids
To get a better idea of the void’s size and location, use these non-destructive methods.
Start by probing with a thin tool like a needle or a small awl. Gently push it into the plaster where you suspect a void. If it goes in easily, there’s likely a void behind.
Next, make minimal-access holes using a small drill bit. This lets you see inside without causing too much damage. Mark out spots based on your probe results and drill small holes at those points.
Use a thin wire or a piece of string to measure the depth and size of the voids. Insert it into the access holes and feel around. Mark the string where it first hits solid material, then pull it out and measure the length. This gives you an estimate of the void’s size.
Moisture and substrate condition assessment
Before injecting adhesive, check for moisture and substrate issues that could affect adhesion.
Dampness: Use a moisture meter to test the wall. Excessive dampness can prevent adhesion and cause further damage.
Efflorescence: If you see white, powdery deposits on the surface, it might be due to excess moisture. Scrape off any efflorescence before injecting.
Lath or backing deterioration: Inspect the lath or backing material behind the plaster. If it’s damaged or weak, it won’t hold the adhesive well. You might need to reinforce it first.
Types of Adhesives and How to Choose One
Adhesive categories commonly used include epoxy, polyurethane, acrylic, and gypsum-compatible options. Each type has different cure behavior, substrate compatibility, and moisture tolerance. Matching the adhesive to your plaster, backing, and expected stresses is key.
Always check the product label or data sheet for substrate recommendations and curing guidance. Follow the manufacturer instructions and your local rules to ensure a compatible choice. When unsure, compare notes across labels and seek professional guidance if needed.
Substrate and Plaster Compatibility
Before you choose an adhesive, check your existing plaster and backing material. You want to ensure they’ll bond well together.
Plaster: Make sure it’s clean, dry, and free from any loose or crumbling parts. If not, fix those first. Some adhesives work better on certain types of plasters (like gypsum-based), so check that too.
Substrate: This is what your plaster sticks to – usually a wall or ceiling. It needs to be solid and stable. If it’s not, fix that first. Some adhesives work better on certain substrates, like concrete or wood, so consider that as well.
Viscosity, Open Time, and Cure Behavior
The way an adhesive flows (viscosity) affects how deep it can penetrate into the voids. Thinner adhesives flow more, thicker ones less.
Open time: This is how long you have to work with the adhesive before it starts setting. Longer open times give you more time to inject and spread the adhesive evenly.
Cure behavior: How an adhesive sets and gains strength over time affects when you can paint or decorate over it. Some adhesives cure quickly, others take days or weeks. Always check the manufacturer’s specs for this.
Chemical and Environmental Considerations
Some adhesives release harmful chemicals (VOCs) as they cure. Keep people, especially kids and pets, away until it’s safe.
Moisture sensitivity: Some adhesives don’t like moisture. If your walls are damp, fix that first or choose a moisture-resistant adhesive.
Temperature limits: Adhesives perform best within certain temperature ranges. Too hot or too cold can stop them from setting properly. Check the manufacturer’s specs for this.
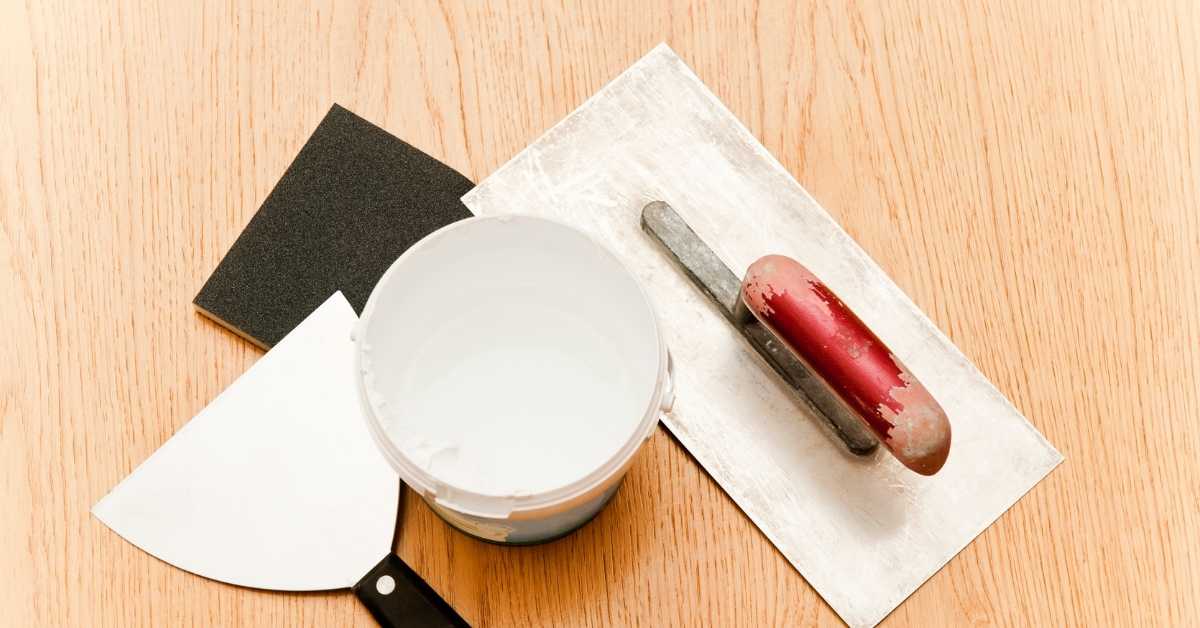
Tools and Materials Checklist
Gather an injection kit with fittings and delivery system, surface-prep tools, and appropriate PPE. Include a method to clean and dry the area, plus containers for mixing if required. Have a small trowel or applicator for finishing and removal of squeeze-out.
Also assemble basic hand tools, a drill or punch for access, waste containment, rags, and a bucket. Plan for surface protection and simple containment to keep dust and debris under control. Always verify that your chosen tools are compatible with the adhesive you selected.
Injection equipment and ports
Before you start, make sure you have the right gear to deliver adhesive into those voids.
- Nozzles: Choose between needle (for small holes) or port (for larger areas).
- Tubing: Flexible enough for easy maneuvering, rigid enough not to kink.
- Hand dispenser: For low-viscosity adhesives, use a caulking gun.
- Power dispenser: For high-viscosity or large-scale jobs, use a progressive pump.
- Pressure gauge: To monitor injection pressure and prevent overfilling.
- Injection ports: If using port method, ensure they’re compatible with your nozzle size.
- Cleaning supplies: Have rags and solvent on hand to clean up any adhesive spills.
- Safety glasses: Protect eyes from debris or adhesive splatter.
Quick rule: Always test your equipment before starting. A faulty nozzle can ruin your repair.
Surface prep and finishing materials
Preparation is key to a successful injection job. Here’s what you’ll need.
- Sealant: To prevent moisture from entering or adhesive from leaking out.
- Plaster filler: For filling any small cracks or holes before injection.
- Sandpaper: Light grit for smoothing surfaces after repair.
- Primer: To improve adhesion of finishing materials.
- Paint or wallpaper paste: Depending on your final finish.
- Cleaning supplies: To remove dust, dirt, and grease from the surface.
- Tape: For protecting adjacent areas during repair.
- Drop cloths: To catch any drips or spills.
Quick rule: Always clean and prep surfaces thoroughly. A dirty surface won’t bond properly.
Safety gear and testing supplies
Your safety and the health of your home are top priorities. Here’s what to check for.
- Gloves: Protect hands from adhesive and debris.
- Respirator: For high-dust tasks or if you suspect asbestos.
- Moisture meter: To check for hidden dampness before injecting.
- Lead test kit: If your home was built before 1978, test for lead paint.
- Asbestos test kit: For homes built between the 1930s and 1950s, check for asbestos.
- Safety glasses: Protect eyes from dust and debris.
- Ear protection: For using power tools during prep work.
- Work clothes: Old clothes you don’t mind getting dirty or damaged.
Quick rule: Always test for moisture, lead, and asbestos before starting. Your safety depends on it.
Step-by-Step Injection Procedure (DIY-Friendly)
Prepare the area by cleaning and drying the surface, then protect nearby finishes. Set up the injection system and test the flow before injecting into the voids. Install any needed fittings according to your kit’s instructions.
Proceed with controlled injections, allowing the adhesive to fill the space and bond with the backer. Wipe excess adhesive from the surface as you go and let the area cure per the product’s guidance. Do not substitute the steps with other instructions from different products unless verified.
Step-by-Step Process
This section guides you through the DIY-friendly step-by-step injection procedure to reattach loose plaster.
- Wear safety gear: gloves, goggles, and a dust mask. Safety first!
- Check your tools and materials. You’ve got this!
- Prepare the surface by cleaning and lightly sanding. This helps the adhesive bond better.
- Mix the adhesive according to manufacturer’s instructions. Don’t rush it; follow their advice.
- Load the injection gun, then test it on a scrap piece of plaster. Make sure it works before you start.
- Insert the injection ports into the prepared holes. Gently does it!
- Begin injecting at the lowest point, working upwards. Keep pressure steady and low.
- Monitor adhesive flow. If it’s too slow or stops, check for blockages or leaks.
- Once done, clean up your workspace. Safety first, remember?
Preparing the area and drilling minimal holes
Arrange your work area to keep it tidy and safe. Lay down drop cloths to protect floors.
Use a small, sharp masonry drill bit to create access points. This helps preserve the plaster surface.
Be gentle. Too much force can cause more damage.
Drill just deep enough for your injection ports. No deeper!
Injection technique and pressure control
Start injecting at a low, steady pressure. You don’t want to force the adhesive.
Monitor the adhesive flow. If it’s too slow or stops, check for blockages or leaks. Use your probe if needed.
Keep pressure low. Too much can cause the plaster to crack or crumble.
If you’re unsure about pressure, stop and consult a pro before proceeding.
Curing, cleaning ports, and surface repairs
Let the adhesive cure as directed by the manufacturer. Patience is key here!
Once cured, remove the injection ports. Twist gently to avoid damaging the surface.
Clean the holes. Use a small brush or vacuum to remove any remaining adhesive or dust.
Repair the surface using spackling compound or plaster of Paris. Sand smooth once dry. You’re almost done!
When Injection Typically Works Well
Injection tends to be effective when the plaster is delaminated but the underlying substrate is sound and capable of forming a solid bond. It helps when there is clear access to voids behind the plaster and movement is limited. The repair is generally more economical when these conditions hold true.
It is often suitable for interior walls with minor to moderate delamination and stable framing. Avoid relying on injection for areas with continuous cracking, significant moisture, or structural movement that would keep challenging the bond. Always assess the specific site conditions and consult guidance as needed.
Small voids and stable substrates
Injection works best when the voids behind your plaster are small. Think dime-sized or smaller. These are easy to fill and won’t suck up too much adhesive.
Your substrate needs to be in good shape too. If it’s solid, like a well-latticed wall or concrete block, injection can re-bond the loose plaster effectively. It’ll grab onto that stable surface and pull your plaster back tight.
But remember, no injection works miracles. It won’t fix major delamination or crumbling backing. If you’ve got big gaps or a weak substrate, consider other repair methods first.
Dry conditions and intact lath or backing
Moisture’s the enemy here. If your walls are damp, injection might not work. The adhesive needs a dry surface to stick to.
Your lath or backing needs to be in one piece too. Injection relies on that structure to hold everything together. If it’s damaged, the plaster might still fall off later.
So, before you start, make sure your walls are bone-dry. And check for any hidden damage behind the plaster. A quick tap test can help – solid sound means solid backing.
Visual signs of a successful repair
After injection, you should see and hear a difference right away. The loose plaster should feel firm again. It shouldn’t wobble or sound hollow when you tap it.
Keep an eye out for new cracks too. If they appear, that’s a sign the repair didn’t take. Injection shouldn’t cause more damage.
In the short term, watch for any signs of stress. If the plaster starts to crack or peel again, you might need to reinforce the area or try a different repair method.
Common Failure Modes and Why Injections Fail
Failures happen when the surface isn’t properly prepped or the wrong adhesive is used for the substrate. A bond that never forms well can allow re-delamination and short-term loosening. Poor access to voids or uneven filling can also create weak points.
Other risk factors include moisture, ongoing movement, or cure conditions that aren’t met. Take steps to dry the area, follow instructions closely, and test a small area to confirm the bond before proceeding with larger work.
Large delaminations and detached keys
Adhesive injection works best when voids are small. Extensive gaps or lost mechanical keys make it tough for the adhesive to grab onto anything.
Think of it like trying to glue two pieces of sandpaper together. If they’re too far apart, there’s not enough surface area for a strong bond.
Tip: Before injecting, try pressing on the plaster. If it feels spongy or moves more than a little, consider other repair methods.
Moisture, salts, and biological degradation
Persistent dampness weakens adhesion. Salts can migrate, pushing apart the plaster and adhesive over time.
Rot or mold can eat away at the substrate, leaving nothing for the adhesive to bond with. Even if initial adhesion seems good, these issues will cause failure eventually.
Tip: Before injecting, check for moisture sources and treat any mold or rot. Consider waterproofing additives in your adhesive.
Movement, vibration, and structural instability
Ongoing substrate movement or structural issues will cause repeat delamination despite injection. The plaster and adhesive can’t stay stuck if they’re constantly being pulled apart.
Think of it like trying to glue two pieces of wood together while someone’s shaking the table. No matter how strong the glue, it won’t hold.
Tip: Before injecting, check for structural issues. Fix any underlying problems before proceeding with repairs.
What to Do When Injection Fails or Is Unsuitable
If injection isn’t suitable or the repair fails, consider alternatives such as mechanical stabilization or patching as appropriate to the site. Underpinning or re-surfacing may be necessary when the backing is compromised. Decide on a plan based on the observed conditions and available access.
Protect the area, document what you observed, and re-evaluate options with reference to manufacturer guidance and local rules. When in doubt, seek professional assessment to determine the safest and most durable path forward.
Removal and partial re-plastering strategies
If injection fails, it’s time to remove the loose plaster carefully. Don’t just hack at it – you’ll cause more damage.
Controlled removal: Use a sharp cold chisel and hammer. Tap gently along the edge of the loose area until you can prize it off in large pieces.
Once removed, assess the substrate. If it’s sound, you can re-plaster directly onto it. If not, use metal lath or plasterboard to replace what was lost.
For small areas, use ready-mixed plaster. For larger ones, mix your own using sand and cement in a 3:1 ratio.
Reinforcement and mechanical fixing options
Sometimes, injection alone isn’t enough. You need to reinforce the substrate or add mechanical fixings.
Adding keys: If the existing plaster is sound but has pulled away from the lath, you can add ‘keys’ – small grooves cut into the surface with a cold chisel. This gives the new plaster something to grip onto.
Screws and lath replacement: For larger areas or where the substrate is unsound, use screws to fix new metal lath or replace old lath with new. Ensure screws are long enough to penetrate into solid masonry.
Once fixed, apply a thin layer of plaster ‘base’ before applying your final coat. This gives the best adhesion.
When to call a professional conservator or structural engineer
Some jobs are beyond the scope of DIY. If you’re unsure, it’s always best to seek professional advice.
Historic finishes: If your plaster has historic significance or is part of a listed building, do not attempt repairs yourself. Call a conservator experienced in working with old plasters.
Structural cracks: Cracks wider than 3mm or those that run diagonally could indicate structural movement. Do not attempt to repair these yourself – call a structural engineer immediately.
Suspected hazardous materials: If you suspect asbestos or other hazardous materials, do not disturb them. Call a licensed professional for assessment and removal.
Conclusion
If you do it right, adhesive injection can stabilize loose plaster without wrecking the wall or the look, but making it work comes down to safe steps, careful testing, and solid curing time.
First, check that injection is appropriate by testing a small area, choosing the right adhesive for the job, preparing the surface and containment, and following a plain, step by step plan: set up ventilation and dust control, mix only what you need, buttress the area with pushing and tapping as you go, inject in a deliberate pattern, wipe excess, and allow full cure before loading the wall again. Do the work in a dry, clean area, and measure cure times against the product instructions. If any moisture or spreading cracks appear, pause and reassess before continuing.
Common mistakes to avoid are overpressurizing the system, using the wrong adhesive for the substrate or moisture level, and skipping a small-area test or cure check. Always wear eye protection and gloves, seal off adjacent surfaces, and never rush the cure. If you detect warping, delamination, or persistent dampness, stop and re-evaluate rather than pushing forward.
If the area is large, structurally uncertain, or the plaster is heavily cracked or damp, it makes sense to call a professional rather than risk costly damage. When you know the limits and follow the checks, you can move confidently toward a solid, lasting repair. You’ve got this—steady progress beats guesswork, every time.
FAQ
When should I stop and call a pro rather than continue injecting?
If you feel bouncy plaster, cracks widening, or new loose patches popping up after injections, stop. Significant moisture, mold, or unseen gypsum plaster behind the wall means there’s a bigger issue. Check labels and follow manufacturer guidance or local rules before proceeding.
How can I test whether the bond improved after an injection?
Tap the surface gently in several spots to listen for solid sound. Push lightly on the plaster near the treated area; if it doesn’t move, you’re gaining bond. If it still sounds hollow or moves, reassess or retreat only where appropriate per instructions.
What should I do if I see hollow spots or crumbling behind the plaster after injection?
Documented hollow spots often mean poor seal or voids; avoid overfilling. Remove loose material carefully and re-inject only the areas that truly need it, following the product’s directions. If plaster keeps deteriorating, stop and seek guidance.
Are there risks to electrical wires or plumbing behind the wall when injecting adhesive?
Yes, there can be. Always check for hidden services before hammering or drilling. If you’re unsure, pause and verify with a stud finder or schematics, and follow safety precautions from the product label or manufacturer instructions.