
Introduction
Tieing slab reinforcement into a footing means securely connecting the steel in the footing to the steel in the slab so the two act as a single unit. Use dowels or hooks to link the bars where the slab meets the footing, and keep them clean, straight, and properly aligned. Always tie with the right wire and follow practical basics so you maintain continuous reinforcement with the correct concrete cover in mind.
Place the connection points so the dowels and hooks align with the slab edge and footing layout, keeping spacing consistent for your project. Maintain adequate concrete cover over the embedded bars by keeping forms and supports in place during tying, so the pours stay durable. Check the labels, manufacturer instructions, and local rules for any requirements on dowel size, hook shape, and tie methods before you proceed.
Key takeaways
- Maintain consistent concrete cover around dowels and hooks for durability and bond.
- Align dowels with slab reinforcement and footing to transfer loads properly.
- Use correct tying methods and keep spacing as per plan to avoid movement.
- Verify bar elevation and maintain cover during pour to prevent misalignment.
- Inspect connections at joints; hooks, dowels, and sleeves should be secure before concrete.
- Do not improvise—consult manufacturer instructions and local codes for specifics.
Table of Contents
- Introduction
- Key takeaways
- Quick Overview — Purpose and Common Situations
- Basic Structural Principles Behind Dowels and Hooks
- Planning and Pre-Construction Checks
- Tools and Materials Checklist
- Step-by-Step Procedure for Tying Slab Reinforcement into a Footing
- Maintaining Correct Concrete Cover and Alignment on-Site
- Safety, Inspection Points, and Common Mistakes to Avoid
- Practical Next Steps and Trusted Sources
- Conclusion
- FAQ
Quick Overview — Purpose and Common Situations
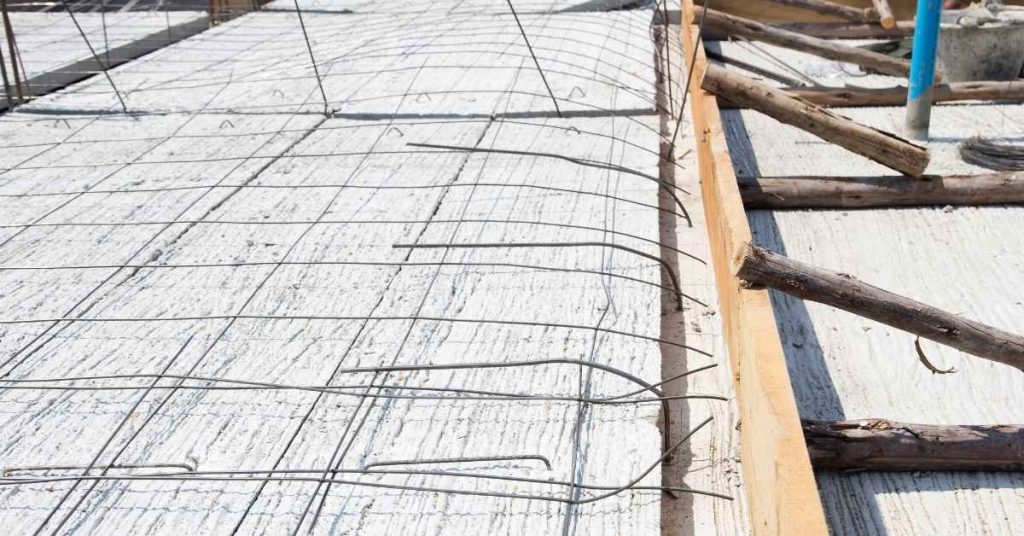
The core purpose of tying slab reinforcement into a footing is to create a continuous path for shear and bending transfer between elements. This helps prevent differential settlement and preserves overall structural integrity. Properly tied connections reduce potential movement at joints and support long-term performance.
Common installation scenarios include new slabs on grade, slab-to-beam connections, and structural slabs that require dowels, hooks, or stitched reinforcement. Review the project’s drawings to confirm what’s required in each case. Check the label or data sheet for recommended dowel diameter, length, spacing, hook configurations, and cover requirements, and look for guidance on couplers or epoxy-set anchors if specified. Ensure layout aligns with footing rebar and that formwork allows straight, clean dowels through the wall or slab edge. Consider corrosion protection and cover materials based on exposure. Plan pre-pour checks and identify potential pitfalls such as misaligned cutoffs or inadequate embedment so you can address them before pours.
When this connection is required
Tying slab reinforcement into footings is crucial for structural integrity. It’s needed when:
New slabs on grade are poured, like patios or driveways.
Slab-to-beam connections are made in buildings, transferring loads from slabs to supporting beams.
Structural slabs require reinforcement tying into footings for stability and load transfer. Always check your construction documents or consult an engineer for project-specific requirements.
Key objectives of a good connection
A well-tied reinforcement ensures continuous load transfer, preventing settlement and maintaining structural integrity. The main goals are:
Continuous load transfer: Dowels and hooks help distribute loads evenly from the slab to the footing.
Crack control: Proper tying reduces cracking by keeping reinforcement in place during concrete curing and loading.
Positional stability of reinforcement: Correct alignment and spacing maintain the reinforcing bars’ position, preventing misalignment that could compromise structural strength.
Basic Structural Principles Behind Dowels and Hooks
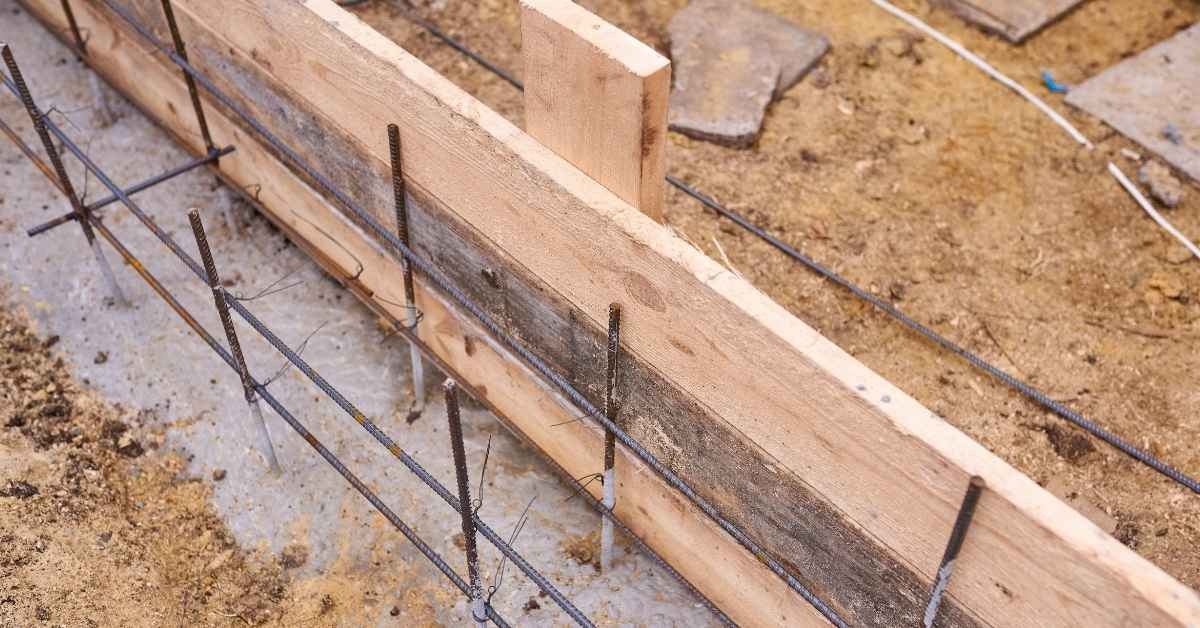
Dowels primarily transfer shear across the joint and keep slabs aligned, resisting longitudinal movement at the joint. They help maintain consistency between the footing and slab when loads change. Properly placed dowels are essential for a stable, continuous joint.
Hooks develop anchorage and resist withdrawal, guiding bar orientation into the footing. They differ from standard loops or bends by providing a more secure anchor and better load transfer. Discuss development length, laps, and overlaps to ensure continuity without creating weak points, and verify concrete cover, bar spacing, and alignment during placement to prevent crowding or misalignment.
How dowels transfer loads
Dowels are straight bars that run through the joint between your slab and footing. They’re designed to provide shear continuity, stopping any sliding or movement at the joint.
Embedment length is crucial here – it’s how far the dowel goes into the footing. This is determined by design and code, so follow those specs.
Alignment matters too. Dowels need to be perpendicular or properly angled during pour to work right. Any misalignment can lead to stress concentrations and weak points.
How hooks and bends provide anchorage
Hooks and bends in your reinforcement bars serve a vital purpose – they anchor the bar into the footing, resisting withdrawal.
Think of it like this: when concrete sets around them, these bends create mechanical interlock. This is what stops the bar from pulling out under load.
Development length comes into play here. It’s how long a bend or hook needs to be to develop full anchorage. Follow your designer’s specs for this – they’ll tell you the right shape and length for your bars.
Planning and Pre-Construction Checks
Review project plans and specs in detail to confirm footing dimensions, slab thickness, load paths, and reinforcement layout. Verify dowel size, spacing, embedment length, and hook configurations, plus concrete cover as shown in drawings. Note ambiguities or deviations to resolve with the structural engineer before work begins.
Inspect structural drawings and the rebar schedule, cross-check dowel locations where the slab ties into the footing, and confirm splice details or couplers. Ensure compatibility with existing or new footing forms and any schedule changes due to site conditions. Verify minimum concrete cover, edge distances, and space for hooks or bent reinforcing to pass without interference from formwork or future finishes.
Confirming alignment between footing and slab
Before pouring your concrete slab, you need to ensure it’ll align perfectly with the footings. Here’s how:
Check layout lines: These are the guidelines marked out before excavation. Make sure they’re still visible and accurate.
Next, verify elevation control. Use a level to ensure the forms for your slab are at the correct height relative to the top of your footings. The slab should be level with or slightly below the top of the footing.
Tolerance checks: Dowels connect your footing and slab, so they must align perfectly. Check dowel locations against your layout lines. Tolerance for misalignment is typically around 1/4″ to 3/8″, but check local codes or manufacturer specs.
Permits, engineering confirmations, and sequencing
Before you start, get your permits in order. Check with local building department to know what’s needed.
Engineering details for dowel placement are crucial. Don’t guess, get it right from the start. Follow manufacturer instructions or consult an engineer if unsure.
Sequencing is key: First, ensure your footing and slab align as planned. Then, form up, place dowels, and finally pour. Rushing this can lead to sloppy work and costly mistakes.
Tools and Materials Checklist
Identify project-specific material needs such as dowels, hooks, chairs, or welded wire fabric, and note where bonding agents or epoxy-coated options are appropriate. Match material choices to project specs and exposure conditions as shown in the drawings or manufacturer instructions.
Compile a precise on-site tools and consumables list, including measuring tools, cutting and fastening tools, alignment aids, form ties, mixer, wheelbarrow, buckets, safety gear, lubricants, tape, and epoxy or grout as required. Include backup options for rain or limited access and plan for proper storage to prevent corrosion or damage.
Tools for cutting, bending, and tying rebar
Before you start, make sure you have the right tools to cut, bend, and tie your rebar. Here’s a quick checklist:
- Rebar cutter: To cut rebar cleanly and quickly. Ensure it can handle your bar sizes.
- Rebar bender: For bending bars to shape. Check its capacity against your bar sizes.
- Tie tool or pliers: To tie rebar together securely.
- Level: To ensure your bars are properly aligned and vertical.
- Measuring tape: For accurate cutting and placement of bars.
- Pencil: To mark cut lines and measurements.
- Bolt cutters (optional): For emergency cuts if your rebar cutter isn’t available.
- Gloves: To protect your hands from sharp edges and hot metal.
Quick rule: Always test your tools with a scrap piece of rebar to ensure they’re working properly before starting the job.
Materials: rebar, dowels, ties, chairs, and spacers
Here’s a checklist of materials you’ll need for your reinforcement. Make sure they meet your project specs:
- Rebar (main bars): Check sizes, lengths, and quantities needed for your slab and footing.
- Dowel bars: Ensure they’re the right diameter and length for your project. They should match your main bar size.
- Tie wire: Use galvanized or epoxy-coated wire to prevent corrosion. Check its gauge against your needs.
- Concrete spacers (chairs): Make sure they’re the right height for your cover requirements and can support your rebar grid.
- Form ties: Choose ties that are compatible with your formwork system and can hold your forms securely in place.
- Epoxy or bonding agent (optional): If required, ensure it’s compatible with your concrete mix and reinforcement materials.
- Concrete mix: Confirm the strength and type of concrete needed for your footing and slab.
- Mortar (optional): For filling voids or gaps in your formwork, if necessary.
Quick rule: Always check your materials against your project plans and specs to ensure you have the right stuff for the job.
Step-by-Step Procedure for Tying Slab Reinforcement into a Footing
Start by locating dowel positions in the footing and verify their alignment with slab reinforcement. Note the embedment length and projection above grade before any tying or formwork is set. Record any deviations for approval before proceeding.
Dowel size, spacing, and hooks are next: specify diameter and material, determine spacing, and ensure proper overlap with slab rebar. Include proper hooks or continuous dowels as required by code and verify correct orientation. Prepare with rebar chairs or supports to maintain required cover and clearance, and clear debris from the work area.
Step-by-Step Process
Follow this clear, sequential process to tie your slab reinforcement into the footing safely and effectively.
- Preparation: Ensure all tools are on-site. Check drawings for dowel positions, sizes, and spacing.
- Safety checks: Clear debris from the area. Verify forms are secure or plan temporary bracing.
- Positioning dowels: Locate and mark dowel positions in the footing. Ensure alignment with slab reinforcement.
- Installing dowels: Cut dowels to specified lengths. Insert them plumb, maintaining correct embedment and projection above grade.
- Forming hooks and bends: Create hooks or bends in rebar as per drawings. Ensure proper overlap for lap splices.
- Tying reinforcement: Use wire ties or binding methods to secure dowels to slab rebar without crushing them.
- Supporting and maintaining clearances: Use chairs or spacers to maintain required concrete cover. Keep minimum clearance between dowels and surrounding rebar.
- Pre-pour inspection: Check measurements, alignment, and that no movement has occurred during tying.
Positioning and installing dowels
Accurately position and install dowels to ensure a strong connection between your footing and slab.
Start by locating: Dowel positions in the footing, as marked on your drawings. Verify alignment with slab reinforcement.
Cut dowels: To specified lengths, including embedment length and projection above grade.
Install dowels: Insert them plumb into the footing, using temporary supports or sleeves to maintain correct position until concrete is poured. Ensure they’re secure before moving on.
Forming hooks, bends, and lap splices
Properly forming hooks, bends, and lap splices is crucial for a strong connection.
Follow specified bend shapes: As per your engineer’s drawings or code requirements. Use a rebar bending tool to maintain consistency.
Create hooks: For dowels, form hooks at the ends of rebar, ensuring they’re long enough to provide adequate anchorage in the concrete.
Form lap splices: Overlap rebar as specified by your engineer or code. Ensure proper overlap length for strength.
Final tying, supporting, and pre-pour inspection
Before pouring concrete: Conduct a thorough inspection to ensure everything is correct.
- Check cover: Verify that chairs or spacers maintain the required concrete cover for both dowels and slab rebar.
- Verify alignment: Confirm that dowels are straight and aligned with slab reinforcement.
- Confirm no movement: Ensure that nothing has shifted during tying, which could compromise the structure.
- Measure embedment: Recheck that dowels are embedded to the correct depth in the footing.
- Verify hooks and bends: Confirm that all hooks and bends are formed correctly and meet specified requirements.
- Check ties: Ensure wire ties or bindings are secure but not over-tensioned, which could bend dowels or disturb alignment.
- Clearance check: Verify that minimum clearance is maintained between dowels and surrounding rebar.
- Review project details: Compare your work with the project details and code requirements to ensure everything meets standards.
Quick rule: If anything doesn’t meet specifications, correct it before pouring concrete to avoid structural issues.
Maintaining Correct Concrete Cover and Alignment on-Site
Correct concrete cover protects against corrosion, fire exposure, and edge loads, and it affects long-term durability. It also helps ensure proper transfer of loads at the footing-to-slab interface. Plan for consistent cover throughout the pour.
Identify recommended cover depths and how they influence dowel alignment and the need for chairs or spacers. Use cover gauges, rulers, templates, and chalk lines to verify spacing and vertical alignment before and during pour. Maintain formwork stability and control vibration to avoid washing out around embedded reinforcement.
Methods to ensure and measure cover
The concrete cover – the distance from the rebar to the outer surface of the slab – is crucial for durability. Here’s how to maintain it:
Spacers and chairs: Use them to keep your bars at the right height. Check they’re level, not tilted.
Measure cover with a cover gauge or ruler. Compare readings with your plans. If unsure, ask your inspector.
Correcting misalignment and displaced bars
Alignment’s key for a strong bond between slab and footing. Here’s what to do if things go wrong:
Minor issues: Brace or retie bars as needed. Check with your engineer first.
Major problems: Stop work immediately. Consult engineering. They’ll guide you on how to fix it without compromising structural integrity.
Safety, Inspection Points, and Common Mistakes to Avoid
Prioritize PPE and site hazards such as sharp rebar ends, pinch points, overhead loads, and weather conditions. Establish a quick stop-work signal if conditions are unsafe. Plan for safe handling and securing of materials.
Focus on safe handling, cutting, and bending practices, and ensure proper storage, transport, and layout readiness. Before pour, verify embedment depth, cover, and continuous dowel hooks and ties, and check alignment with formwork. Anticipate common mistakes and have remedies ready, such as re-checking against drawings and re-cutting where needed.
Jobsite Safety and PPE
Before you start handling rebar, follow this checklist to ensure a safe work environment.
- Eye Protection: Wear safety glasses or goggles to protect from flying debris when cutting and bending.
- Hand Protection: Use gloves to prevent cuts and punctures from sharp rebar ends.
- Head Protection: Wear a hard hat to safeguard against falling objects.
- Foot Protection: Wear steel-toe boots to protect your feet from heavy equipment and dropped tools.
- Rebar Ends: Cap or secure loose rebar ends to prevent injuries from sharp points.
- Trip Hazards: Keep the work area clean, removing loose ties and offcuts that could cause trips.
- Pinch Points: Be aware of pinch points between moving parts of equipment and keep hands clear.
- Overhead Loads: Look out for overhead loads being moved by cranes or other machinery, and stay clear of their paths.
- Weather Conditions: Check weather forecasts and stop work if conditions become unsafe (e.g., lightning, high winds).
Quick rule: If you spot any unsafe conditions or hazards, stop work immediately and alert your supervisor.
Typical Errors and Quick Fixes
Catch these common mistakes early to avoid costly rework and delays in your project.
- Insufficient Cover: Check that the rebar is properly embedded in the concrete. Inadequate cover can lead to corrosion and reduced structural integrity.
- Misaligned Dowels: Ensure dowels are aligned with the footing’s centerline. Misalignment can cause stress concentrations and reduce the slab’s strength.
- Loose Ties: Check that ties are secure and not moving after bending. Loose ties can result in displaced rebar and improper reinforcement.
- Improper Spacing: Verify that rebar is spaced correctly according to the plan. Incorrect spacing can weaken the slab’s overall strength.
- Insufficient Embedment: Confirm that dowels are properly embedded in the footing. Inadequate embedment can cause dowels to pull out under load.
- Missing Corrosion Protection: If required, ensure corrosion protection (e.g., coating or wrapping) is applied to rebar to prevent rusting.
Quick rule: If you find any of these issues, address them immediately. For complex problems, consult your engineer for guidance.
Practical Next Steps and Trusted Sources
Evaluate suppliers for reliability, lead times, warranty, batch traceability, and after-sales support. Balance upfront cost with long-term performance and field service options. Gather enough information to compare like with like.
Review key product data to verify embedment length, dowel diameter, spacing, coating, and tolerances. Look for applicable standards and ensure the claims align with manufacturer data sheets. Use visual guides and field sheets to train crews and speed up installations while maintaining quality.
Choosing materials and sourcing economically
The right materials ensure a strong, durable slab. Here’s how to source them economically without compromising quality.
- Local steel suppliers: Compare prices, certifications, and delivery times. Prioritize those meeting your project’s standards.
- Certified rebar: Look for ASTM A615/A616 ratings to ensure strength and ductility. Avoid uncertified bars that may crack or break under stress.
- Dowels: Check embedment length, diameter, and spacing to match your footing size. Inadequate dowels can lead to slab settlement and cracking.
- Ties and spacers: Specify galvanized or epoxy-coated ties for corrosion resistance. Poorly coated ties can cause reinforcement corrosion and staining.
- Chairs: Choose chairs that provide even support, preventing bars from displacing during concrete placement. Uneven support can result in weak spots and misaligned bars.
Visual checkpoints and recommended video/tutorial resources
Use these checklists before, during, and after pouring to ensure a successful pour. Inspectors should use them regularly.
- Rebar alignment: Check bars are aligned with the footing centerline. Misaligned bars can cause stress concentrations and cracking.
- Dowel placement: Verify dowels are centered in the footing and extend into the slab as per design. Off-center dowels can lead to slab curling and cracking.
- Hook formation: Ensure hooks are formed correctly, with consistent bend radii. Poorly formed hooks can cause bars to displace during concrete placement.
- Cover measurement: Confirm correct cover is maintained using a straight edge or laser level. Inadequate cover exposes reinforcement to corrosion and reduces strength.
- Bar spacing: Check bar spacing matches the design. Incorrect spacing can lead to weak spots in the slab.
- Concrete slump: Verify concrete slump is within specified limits before pouring. Excessive or insufficient slump can cause placement issues and affect strength.
- Formwork alignment: Ensure formwork is level, plumb, and aligned with the footing. Misaligned forms can cause slab warping and cracking.
- Joint layout: Check control joints are formed as per design. Inadequate or poorly placed joints can lead to random cracking.
Quick rule: Regular visual checks help catch issues early, saving time and money in the long run.
Conclusion
Keeping slab reinforcement tied into the footing right isn’t cosmetic work. It’s what keeps cracks from propagating, preserves strength under load, and makes the finish look like it belongs there. Safety first should run through every decision on site and every tap of the hammer or tie wire.
First, verify plans and then confirm dowel size and spacing, prep the footing edge and any required templates, keep the bars clean and straight, place and secure ties so the reinforcement stays in position during pour, maintain proper concrete cover and alignment, and finally inspect everything before you pour and again after the concrete is placed. In practical terms, walk the job once to check measurements, once to verify cover, once to test for movement or gap openings, and never pour if any part looks off.
Common mistakes slow you down or ruin the work: misaligned dowels, not keeping the specified cover, bending or damaging bars during tying, letting bars move when you pour, and skipping the final checks. The safety rules are simple: wear eye protection and gloves, keep hands away from sharp edges, secure cords and tools so they don’t trip you, and test a small area if you’re unsure before committing to the whole footing. If you’re unsure about dowel size, spacing, or the amount of cover for your climate and load, don’t force it—recheck the plan or call in a pro.
If you’re still unsure after the checks, it makes sense to bring in a qualified professional rather than push on and risk compromise. Stay deliberate, stay safe, and you’ll have a solid, durable connection between slab and footing that looks and performs right for years to come.
FAQ
What types of dowels and hooks are typically used for tying slab reinforcement into a footing?
Common dowels are plain round bars or epoxy-coated bars that extend from the footing into the slab area. Hooks come in basic shapes like L or J hooks to anchor into the footing and align with the slab rebar. Always check the manufacturer instructions or local rules for what materials are approved in your area.
For durability, some setups use stainless or coated options where moisture is a concern. See labels on the product for corrosion protection details and install requirements.
How should I place and space the dowels and hooks correctly?
Keep dowels centered on the footing face and aligned with the slab rebar. Use chairs or blocks to hold them at the correct cover and height so they don’t sit on the form or touch the ground.
Follow the spacing shown in your plan or the project instructions. If unsure, check the product label or manufacturer instructions and adjust to local practice.
What is the proper way to tie the slab and footing together?
Wrap or loop tie wire around the dowels and the adjacent rebar, then twist securely. Avoid binding too tightly, which can kink the bars or push them out of position.
Keep the ties neat and off the bar surfaces to prevent creating hard spots in the concrete. If you use alternative ties, ensure they are approved by the project specs and local rules.
What about codes, regulations, and project specs I need to follow?
Always follow the project’s plans and any local rules or site requirements. If a spec matters, refer to the label, datasheet, or manufacturer instructions for the approved method.
When in doubt, check with the inspector or the building authority and rely on the documented guidance rather than guessing.