

Introduction
Cutting control joints in stamped concrete is about planning when to cut, choosing the right blade, and making clean edges to prevent cracks. Get your timing right by planning ahead before you stamp, so the concrete has the strength needed when joints are cut. Always check manufacturer instructions and local rules for any timing limits and blade recommendations, then pick a plan that fits your project.
Blade choice should favor a clean edge and compatibility with stamped textures, and you should follow the manufacturer instructions for speed and feed. Prepare the surface by marking joints, cleaning dust, and doing a quick test cut on a scrap area if available. Plan ahead to avoid ragged edges by aligning joints with stamping patterns and using steady, even cuts.
Key takeaways
- Plan joint layout during stamping to align with expected traffic and visuals.
- Cut control joints after stamping when concrete firmness supports clean blade tracking.
- Choose a sharp, appropriate blade and straightedge for clean edges.
- Use consistent depth and spacing to minimize ragged edges and chipping.
- Prepare substrate, remove laitance, and ensure surface is dry before cutting.
- Schedule weather windows, avoid cutting in wet conditions; wear PPE.
Table of Contents
- Introduction
- Key takeaways
- Why Control Joints Matter for Stamped Concrete
- Timing: When to Cut After Stamping
- Blade Choice and Tool Selection
- Cutting Techniques to Avoid Ragged Edges
- Depth, Spacing, and Layout Planning
- Common Mistakes and Troubleshooting
- Maintenance, Inspection, and Prepping Before Sealing
- Cost, Scheduling, and When to Hire a Professional
- Conclusion
- FAQ
Why Control Joints Matter for Stamped Concrete
Control joints serve a dual purpose for stamped surfaces: they help crack control and protect the long-term appearance of the pattern. If joints are neglected or mislocated, cracks can appear where they disrupt the design, and the stamp texture can begin to distort around the joints.
Plan joint placement around the stamp layout so the pattern stays uniform. Think about alignment with major design changes and the depth needed to reduce stress, while choosing a joint method that preserves fidelity and edge quality. Examine the pros and cons of saw-cut, routing, and pre-formed products for stamped concrete, and tailor your choice to the pattern and climate. Consider timing and environmental factors that influence performance, such as how curing conditions and ambient heat affect crack control. Outline practical steps to map joints, avoid cutting through key pattern features, and select sealant colors that blend or intentionally highlight joints. Watch for common pitfalls like over-penetration, misalignment across expansion directions, and jagged edges at the stamp transitions.
Function of control joints
Control joints serve a vital purpose in stamped concrete. They’re designed to relieve tensile stress, which is the pulling force that can cause cracking.
When concrete cures and hardens, it shrinks slightly. This shrinkage causes stress within the slab. Control joints direct this stress and any resulting cracks to planned locations, preventing random cracking that could mar your stamped pattern.
Properly placed control joints maintain surface integrity by allowing the concrete to move naturally as temperatures change. Without them, the slab would be more prone to cracking and delamination.
Special considerations for stamped surfaces
Stamped concrete is unique, so its control joints need special consideration. The textured surface, colored patterns, and grout lines all play a role in joint placement.
Texture: The relief of the stamp pattern can affect how water drains off the slab. Control joints should be placed to encourage proper drainage and prevent water from pooling, which could erode the stamped surface over time.
Color: Stained or colored concrete requires careful joint placement to maintain a consistent appearance. Cutting through prominent color changes can result in visible lines that disrupt the overall design.
Grout lines: Grout lines are an integral part of many stamped patterns. Control joints should be aligned with these grout lines whenever possible to minimize disruption and preserve the uniform texture of your stamped surface.
Timing: When to Cut After Stamping
This topic weighs the trade-offs between cutting while the concrete is still green and delaying the cut until after initial set. Early grooving can risk ragged edges or chipping, while late cutting may allow surface movement that complicates the cut.
Environmental conditions like temperature and humidity shape the workable window, as do the mix and curing methods used. Use manufacturer guidance or a maturity/indentation check to verify timing and ensure consistent joint depth. Develop a simple field flow or checklist to decide when to delay, when to proceed, and which cutting method best suits the stamped pattern.
Early hand grooving vs. saw cutting later
Hand grooving right after finishing can be done when you need to control cracking and prevent ragged edges. It’s quick but risks compressing the surface.
Saw-cutting later, after initial set, gives a cleaner cut but may result in uncontrolled chipping if done too early.
Waiting for concrete to gain strength reduces these risks. But waiting too long might cause unwanted cracking elsewhere.
Environmental and curing factors that change timing
High temperatures speed up set, allowing earlier cutting. In cold weather, wait longer to ensure concrete’s strength.
Wind and low humidity can cause rapid evaporation, accelerating set. Fog curing slows this down, extending the workable window.
Admixtures like accelerators shorten the time needed for cutting, while retarders extend it.
Visual and simple tests to decide readiness
Press a sharp object into the surface. If no mark is left, it’s not ready. If it leaves a slight mark but bounces back, it’s close.
Try the ‘tack test’. Stick a small piece of duct tape on the surface and pull it off quickly. If concrete comes with it, it’s too early to cut.
Document conditions – temperature, humidity, etc. – for consistent results next time.
Blade Choice and Tool Selection
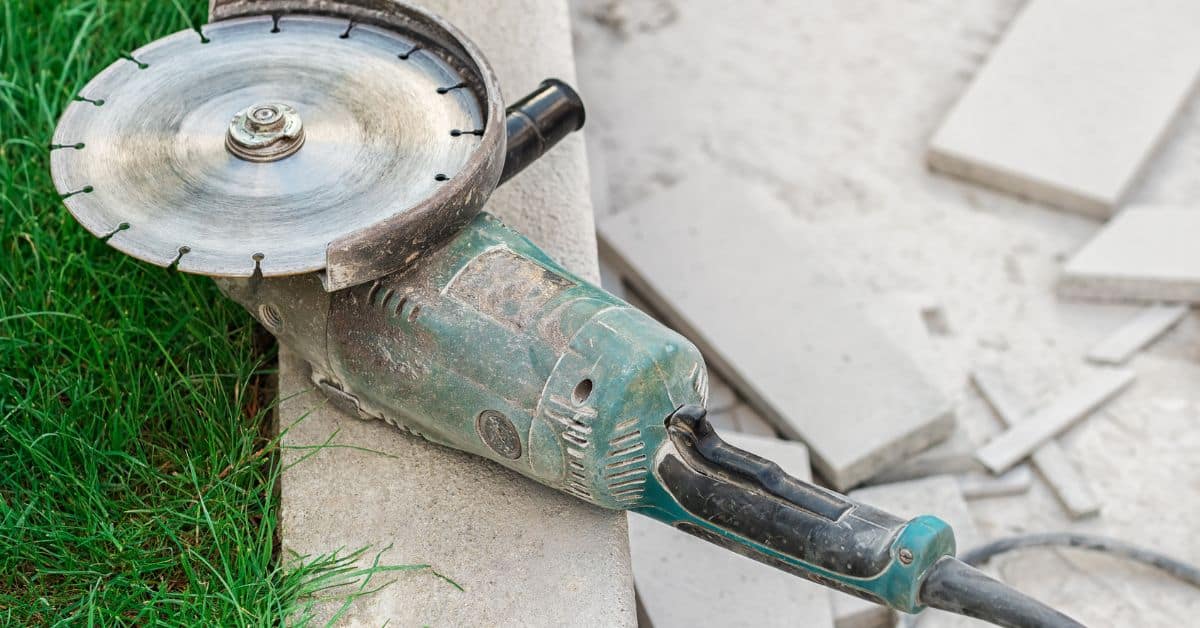
Identify blade types such as diamond segmented, continuous rim, and turbo, and map each to stamped concrete scenarios to explain edge outcomes. Blade geometry and cooling affect the likelihood of clean, non-ragged cuts on textured surfaces.
Match tool options to project size and control needs, comparing walk-behind saws, handheld saws, and groovers for depth accuracy and edge finish. Decide when renting versus buying makes sense, based on project frequency and total cost of ownership. Consider blade life, maintenance requirements, and signs of dulling that impact edge quality, plus safety concerns like kickback and dust control during cutting near stamped edges.
Blade characteristics and when to use each
The blade you choose makes a big difference in your cut’s quality. Here are the main types:
Diamond Segmented Blades: These have segments of diamond particles attached to the blade’s edge. They’re great for detailed work and intricate patterns. They’re pricey but last long.
Continuous Rim Blades: These have diamonds embedded throughout the entire rim. They’re good for straight, deep cuts in larger projects. They’re cheaper than segmented blades but wear out faster.
Turbo Blades: These combine diamond segments with a turbo edge for faster cutting. They’re ideal for quick, clean cuts in sensitive surfaces. They’re mid-range in price and durability.
Tools: saws, groovers, and finishing tools
Choose your tool based on the job’s size and complexity. Here are your options:
- Hand Groovers: These are simple, manual tools for small jobs or touch-ups. They’re cheap but slow.
- Masonry Saws (Handheld): These corded or battery-powered saws offer more power and speed. They’re versatile but can be tiring to use.
- Walk-Behind Saws: These are heavy-duty, gas-powered machines for large projects. They’re fast and efficient but expensive to rent or buy.
- Groovers (optional): These attachments create wider, deeper cuts. They’re great for complex patterns but add cost.
- Finishing Tools: After cutting, use a chisel or router to clean up edges and remove burrs. This step ensures a smooth finish.
Safety equipment and safe tool handling
Safety is key when working with power tools. Here’s what you need:
- Personal Protective Equipment (PPE): Wear safety glasses, work gloves, steel-toed boots, and hearing protection.
- Dust Control: Use a dust extractor or wet-cutting attachment to minimize dust. This keeps your workspace clean and protects your lungs.
- Wet-Cutting: For detailed work, use a wet-cutting blade with water to keep the blade cool and reduce dust.
- Kickback Prevention: Always cut away from yourself. If using a walk-behind saw, follow the manufacturer’s guidelines for kickback prevention.
- Proper Technique: Apply steady pressure while cutting. Don’t force the blade through the concrete. Let the tool do the work.
Cutting Techniques to Avoid Ragged Edges
Outline a cutting sequence that begins with shallow passes to minimize blowout and ragged edges, followed by additional light passes for a crisp joint. Document progression on a scrap panel to refine depth and feed rate before working the actual surface.
Discuss depth strategies and blade geometry, noting how blade width and engine power influence the finish. Favor multiple light passes over a single deep cut to reduce chipping, and plan wet cutting or backing supports to protect the edge during the cut. Include guidance on alignment, tracking, and correcting drift without compromising the stamped surface. Emphasize practice runs, PPE, guards, and dust management for a safe, clean jobsite.
Proper feed speed, blade angle, and pass strategy
The key to smooth joints is steady, slow movement. Don’t rush it.
Start with a shallow cut – about 1/8″ deep. This helps prevent chipping. Use a controlled feed rate, around 2-3 inches per second. Too fast and you’ll blow out the edge.
Make multiple light passes rather than one deep cut. After the first pass, increase depth by another 1/8″. Repeat until you reach your desired joint depth. This gives you better edge control and reduces ragging.
Edge protection and backing tactics
Stamped concrete edges are fragile. Protect them with sacrificial boards or tape before cutting.
For deeper cuts, use temporary supports or shims behind the blade to prevent spalling. This distributes pressure evenly and stops the edge from crumbling.
Remember, stamping creates a lot of pressure on the edges. Without support, you’ll end up with ragged, chipped joints.
Post-cut finishing to tidy edges
After cutting, check for any minor ragging. It happens, even with the best techniques.
Use a soft-bristled brush or gentle hand tooling to clean up loose material. Be careful not to damage the texture.
For deeper chips, use a light grinding stone or patching compound. Work gently and test on a scrap piece first. Less is more here – you don’t want to remove too much material.
Depth, Spacing, and Layout Planning
Explain how joint depth relates to slab thickness and how initial spacing should be considered in relation to the stamped pattern. Plan a layout that complements the design and maintains structural performance.
Outline how to verify dimensions and account for structural guidance, codes, or engineer input for non-standard slabs. Pre-mark the layout on the subbase with chalk or string lines, and confirm joints won’t clash with decorative features. Map timing and tool selection to achieve the desired depth and edge quality while preserving the stamped texture.
Depth and spacing principles
Joint depth should be about a quarter of your slab’s thickness. This proportion helps control cracking under load.
For example, if your slab is 4 inches thick, aim for a joint depth of 1 inch.
Spacing depends on the slab’s behavior and loading. Typical patios use 8–12 feet between joints. But consider concentrated loads or heated slabs – you might need closer spacing there.
Aligning joints with stamped patterns and seams
To minimize visual impact, position your joints to match grout lines or pattern seams. This way, they blend in with the design.
Look for natural breaks in the pattern too – these can be good joint locations.
Remember, avoid placing joints where they’ll bisect key design elements.