
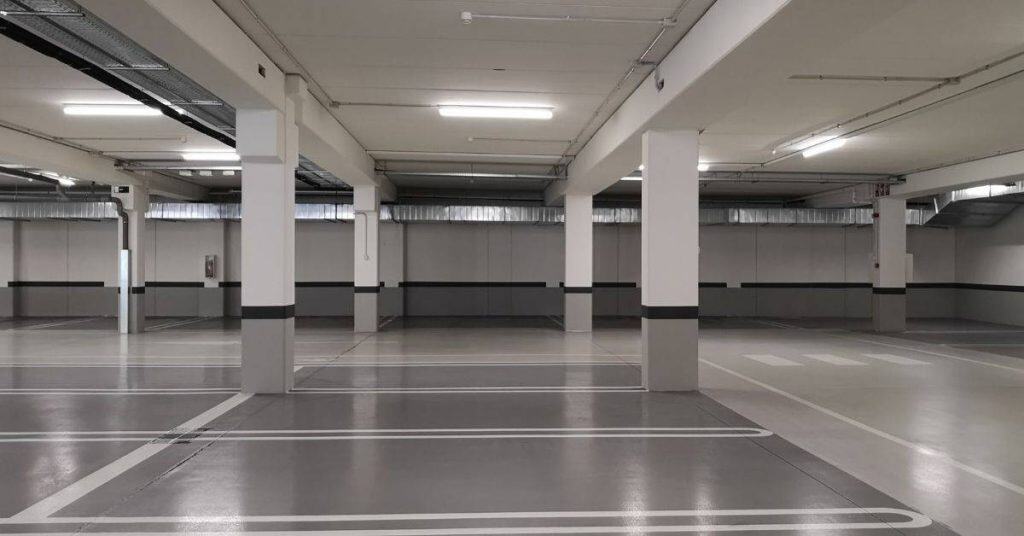
Introduction
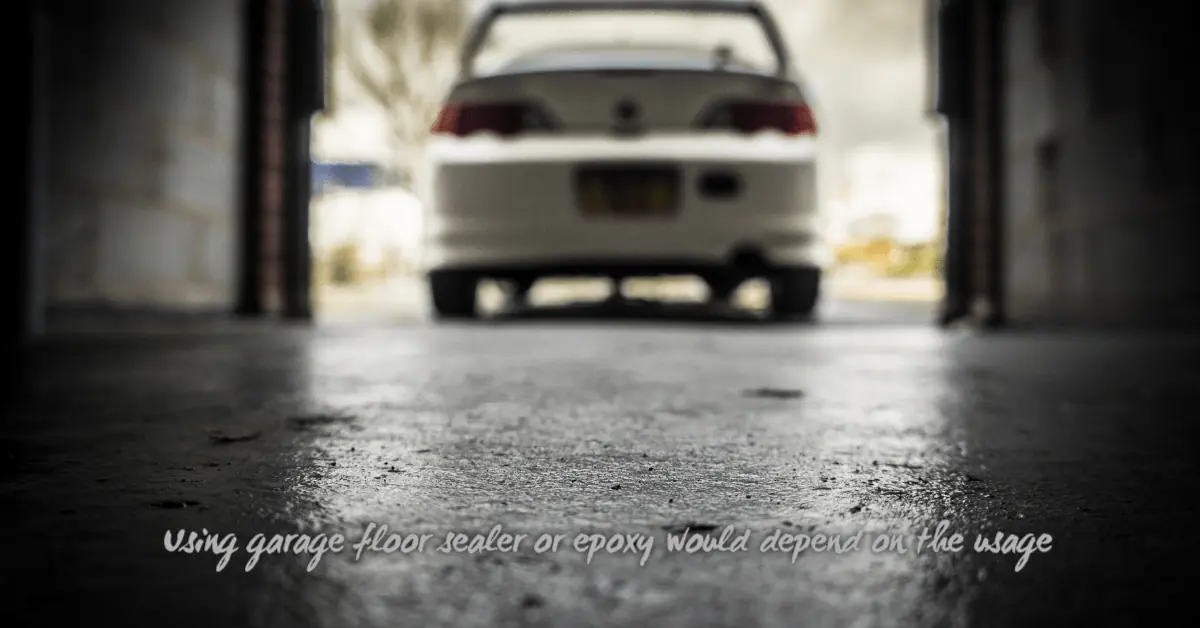
Reducing hot-tire pickup on garage coatings means giving the coating enough cure time and choosing a topcoat that resists softening under heat and rubber contact. In plain jobsite terms: let the base coat harden per the product directions and pick a topcoat designed for vehicular traffic and heat resistance. Check the product label and manufacturer’s cure times and service recommendations before you start.
This guide is written for DIYers who want straightforward, practical steps you can use between coats and after the job is done. I’ll focus on what to watch for on the clock, how to test readiness with simple touch and tape checks, and what kinds of topcoat chemistries to ask about when shopping or talking to suppliers. If you’re unsure about a product’s heat resistance or cure schedule, verify with the manufacturer or a local pro.
Key takeaways
- Verify cure state before applying topcoat to reduce hot-tire pickup risk.
- Choose resin systems with higher chemical resistance for garage floor coatings.
- Control environment: maintain stable temperature, humidity, and avoid dew formation during cure.
- Follow manufacturer cure times and avoid early traffic until fully cured.
- Perform mockups with tire loads to identify pickup tendencies before installation.
- Inspect topcoat for compatibility, observe safety PPE, and apply proper surface prep.
Table of Contents
- Introduction
- Key takeaways
- What Is Hot-Tire Pickup and Why It Happens
- How Cure Time and Cure State Influence HTP Risk
- Topcoat Chemistry: Which Resins Resist Hot-Tire Pickup
- Application Best Practices to Minimize Pickup
- Environmental Control: Temperature, Humidity and Dew Point Management
- Tire and Vehicle Factors That Affect Pickup Likelihood
- Testing, Mockups, and QA Protocols to Predict and Prevent Pickup
- Tools and Materials Checklist for Preventing HTP
- Conclusion
- FAQ
What Is Hot-Tire Pickup and Why It Happens
Hot-tire pickup (HTP) is the transfer of softened tire rubber onto a coated floor surface caused by heat, rolling contact, and adhesive interaction. It shows up as streaks, blobs, or an overall tacky film where tires contacted the coating.
Rubber migrates when tire compounds soften from heat and mechanical action, then stick to a coating that is still tacky or chemically receptive. You’ll commonly see HTP in garages after short runs, idling, or when heavy vehicles sit on a newly coated bay.
Mechanism of rubber transfer
Hot-tire pickup happens when your car’s tires, still warm from driving, press against the garage floor coating. Here’s how it works:
The tire’s surface is tacky due to its rubber compound. When heat and pressure are applied – like when you park your car – this tackiness can bond with the coating’s surface.
Even if the coating seems dry, a thin, tacky film might still be present. This film attracts the tire’s rubber, causing it to stick and transfer onto the coating.
Common symptoms and early signs
Catching hot-tire pickup early can prevent major damage. Here are some signs to look out for:
Imprints: You might see tire tread marks or imprints on the coating’s surface.
Gloss change: The area where tires have been parked may appear duller or less glossy than the rest of the floor.
Soft spots: In severe cases, you might notice soft or sticky areas on the coating. These could indicate that the tire’s rubber has bonded with the coating and is starting to break down its surface.
How Cure Time and Cure State Influence HTP Risk
Coatings develop different levels of cure: a quick surface or handling cure and a longer chemical or full cure that gives final resistance properties. Surface-dry film can still be chemically reactive or soft underneath, so it may accept rubber even though it looks dry.
Introducing traffic before the coating reaches the appropriate cure state raises HTP risk because heat, pressure, and abrasion accelerate transfer and prevent full crosslinking. Check the product label or technical data sheet for the manufacturer’s guidance on handling versus full cure before vehicle exposure.
Cure stages explained
Concrete garage coatings go through three cure stages. Each stage affects how your floor handles traffic.
Pot life is when the coating is mixed and applied. It’s not yet ready for vehicles.
Surface cure happens next, usually within 24 hours. The surface dries but isn’t fully hardened. Be careful with heavy traffic during this stage.
Finally, full cure takes several days to a few weeks. Only then is your floor ready for full vehicle use.
Verifying cure before service use
Before you park your car, make sure your garage floor is fully cured. Here’s how:
Do a tack test. Stick some duct tape on the floor, then pull it off. If there’s residue, the coating isn’t cured.
Check visually for any wet or tacky spots. Also, follow your manufacturer’s cure checklist in the technical data sheet (TDS).
Always confirm recommended cure times in the TDS. Don’t rush traffic onto an uncured floor.
Factors that slow or speed cure
Several factors affect how fast your garage coating cures, and thus your HTP risk:
Temperature: Warmer conditions speed up curing. Cooler temps slow it down.
Humidity: High humidity can delay cure time. Low humidity speeds it up.
Film thickness: Thicker coatings take longer to cure. Thin coats cure faster.
Ventilation: Good airflow helps cure times. Stagnant air can slow curing.
Topcoat Chemistry: Which Resins Resist Hot-Tire Pickup
Different resin chemistries behave differently with heat and mechanical stress; some harden into rigid films while others remain flexible and more resistant to rubber transfer. Epoxy, urethane, polyaspartic, and acrylic systems each have trade-offs in migration resistance, flexibility, and surface tack development.
Match the resin’s flexibility and chemical resistance to the expected service conditions and verify cure/performance characteristics from the product data sheet. If unsure which chemistry suits your garage use, consult the manufacturer instructions or a technical rep for comparative guidance.
High-crosslink vs flexible chemistries
The topcoat’s chemistry plays a big role in hot-tire pickup. You’ve got two main types: high-crosslink and flexible.
High-crosslink coatings are tough, durable, but they’re not as flexible. This means they can’t absorb the tire’s pressure as well. That lack of give makes them more prone to picking up rubber.
Flexible coatings, on the other hand, have some ‘give’ to them. They can absorb the tire’s pressure better, reducing the risk of pickup. But they’re not as hard or durable.
Trade-off alert! You’ve got to balance hardness for durability and flexibility to resist HTP.
Solvents, plasticizers, and migration risk
Some topcoats use solvents or softening agents (plasticizers) to make the coating more workable. But here’s the catch: these can stay mobile in the coating until it’s fully cured.
While the coating is still ‘soft’, these residual solvents or plasticizers can migrate out and into your tires. That’s when you start seeing hot-tire pickup.
So, even if you’ve waited what seems like enough time for the coating to dry, if it’s not fully cured, you’re still at risk of HTP.
Lesson learned: Always check the product data sheet for full cure times and traffic windows.
What to look for on product data sheets
Don’t rely on guesswork or general advice when it comes to cure times. Check the product data sheet (MDS/TDS) for specific info.
Here’s what you should be looking at:
- Recommended recoat windows: This tells you how long to wait before applying another coat.
- Tack-free time: When the coating is tack-free, it’s safe to walk on. But that doesn’t mean it’s fully cured yet.
- Recommended traffic times: This is when the coating can handle light foot or vehicle traffic without damage.
- Temperature limits: Some coatings cure better at certain temps. Make sure your garage’s temp fits the bill.
Application Best Practices to Minimize Pickup
Controlling how you apply the coating reduces trapped volatiles and surface tack: aim for consistent film thickness, prefer multiple thin coats over one thick coat, and maintain good overlap and wet edge techniques. Allow adequate flash-off between coats to let solvents and amines escape instead of becoming trapped.
Work methodically and follow manufacturer-recommended pot life and recoat windows to avoid sticky layers or poor intercoat adhesion. When in doubt, check the product data sheet for cure window instructions and safe application limits.
Controlling film thickness and uniformity
Measuring and following manufacturer’s guidelines for film thickness is crucial. Too thick, and you risk trapped volatiles causing pickup.
Apply multiple thin coats instead of one heavy coat. This lets each layer cure properly before the next. It’s like building a wall with bricks – lay them too thick, they won’t stick.
Pro tip: Use a wet film gauge to measure thickness. Aim for 2-3 mils per coat.
Flash-off and recoat sequencing
Adequate flash-off time between coats lets solvents evaporate, preventing pickup. It’s like waiting for paint to dry before adding another layer.
Follow the recoat window from the Technical Data Sheet (TDS). Too soon, and you’ll mix uncured coatings; too late, and you risk surface tackiness.
Pro tip: Use a moisture meter to check for cure. Aim for 5-10% moisture content before recoating.
Avoiding defects that promote HTP
Defects like runs, sags, bubbles, and solvent entrapment create spots more prone to pickup. Here’s how to avoid them:
- Runs & Sags: Apply evenly with a smooth, steady motion. Don’t overload your roller or brush.
- Bubbles: Roll out bubbles as you go. Use a bubble remover if needed.
- Solvent Entrapment: Ensure surface is dry and clean before applying. Don’t apply in humid conditions.
Remember, prevention is better than cure. Take your time, and inspect your work as you go.
Environmental Control: Temperature, Humidity and Dew Point Management
Ambient and substrate conditions directly affect cure rate and surface formation; colder temperatures slow chemistry while high humidity and low substrate temps can cause condensation or amine blushing. Dew point control is especially important—applying over a damp substrate can trap moisture and compromise cure.
Use heaters, dehumidifiers, or timed shifts to keep conditions within the range specified by the coating manufacturer during application and initial cure. If you can’t maintain recommended conditions, consult the product label or tech sheet for approved adjustments or low-temp formulations.
Managing temperature for reliable cure
Temperature plays a crucial role in the curing process of your garage coating. Both air and substrate temperatures need to be within the recommended ranges for a successful, HTP-resistant finish.
Too cold, and the coating won’t cure properly. Too hot, and it might cure too fast, leading to stress and potential HTP issues. So, keep an eye on your thermometer.
Use heaters if it’s too chilly (< 50°F/10°C), or cool the area down if it’s too warm (> 90°F/32°C). Follow product data sheets for specific temp ranges.
Humidity and dew point considerations
High humidity can cause condensation, which is a big no-no when applying garage coatings. It can lead to poor adhesion and HTP problems.
Before you start, check the dew point. If it’s close to or above the air temperature, expect condensation. Product literature should give you dew-point guidance.
If the dew point is too high, wait for better conditions. Use dehumidifiers if necessary, but don’t apply when there’s a risk of condensation.
Ventilation to remove solvent and speed cure
Proper ventilation is key to removing solvents and allowing your coating to cure quickly. But be careful – too much draft can mess with film formation.
Open windows, use fans, or set up a temporary ventilation system. The goal is to exchange air without creating excessive drafts that could cause issues.
Follow product data sheets for specific ventilation requirements. Remember, good airflow helps cure time and reduces HTP risk.
Tire and Vehicle Factors That Affect Pickup Likelihood
Tire compound, surface temperature, vehicle weight, and behaviors like idling or burnouts change the thermal and mechanical load on the coating and therefore affect pickup probability. Softer and newly heated tires transfer rubber more readily than hard, cool tires under light loads.
Consider limiting hot starts, avoiding heavy static loads on newly coated areas, and rotating vehicle positions during early cure to reduce concentrated stress. Refer to manufacturer guidance for recommended wait times before allowing typical vehicle traffic and whether special restrictions apply for heavy equipment.
Tire composition and heat generation
Hot-tire pickup is all about heat. And where does that heat come from? Your tires, of course.
Soft or high-heat tires tend to transfer more easily onto your fresh garage coating. That’s because they generate more heat under pressure. Think of it like a hot iron on a shirt – the heat makes the tire ‘stick’.
So, test with typical site vehicle tires. Don’t wait until after application to find out they’re too soft or hot.
Vehicle behavior and loading
Now, let’s talk about how your vehicle behaves. Some actions can make pickup worse:
1. Extended idling: Prolonged heat from the exhaust can soften the tire tread, making it stickier.
2. Hot braking: Sudden stops generate a lot of heat in your tires. Too much, too soon on new coatings isn’t good.
3. Tight turning: Corners put extra pressure on the tire tread. New coatings don’t need that kind of stress.
Practical steps for initial vehicle placement
Alright, you’ve chosen your tires wisely and know what to avoid. Now let’s talk about parking:
1. Avoid extended idling. Give your coating time to cool before parking.
2. Limit turning. Try not to make tight turns on fresh coatings. Go wide, go slow.
3. Use wheel chocks. Keep your vehicle from rolling around and putting extra pressure on the coating.
4. Follow manufacturer clearance times. Don’t rush it. Let the coating cure as long as they say, before driving on it.
Testing, Mockups, and QA Protocols to Predict and Prevent Pickup
Before opening a bay, validate your system with small mockups or sample panels that replicate film thickness, ambient conditions, and traffic scenarios you expect on-site. Run spot tests with warmed tires and weight to see if rubber transfer occurs under realistic conditions.
Create a simple QA checklist that covers environmental readings, wet film thickness, pot life, recoat windows, and a documented mockup result before full-scale application. If test results are marginal, consult the product data sheet or manufacturer for troubleshooting and approved mitigation steps.
How to design an effective mockup
Before you coat your entire garage, create a small-scale mockup. This helps predict how your coating will perform under real-world conditions.
A good mockup has the same substrate as your garage floor – concrete, epoxy primer, etc. Use the same film build too. That’s the thickness of your topcoat and any sealers. Keep ambient conditions similar – temperature, humidity, all that.
Now, roll in some tires. Use ones like you’ll have on your vehicles. Let them sit there for a while. This simulates service conditions. If you see any hot-tire pickup, note it down. It’s better to find issues here than after you’ve coated the whole garage.
Inspection checklist for pre-traffic release
Before you let vehicles onto your newly coated garage floor, do a thorough check. This ensures your coating is ready and won’t pick up tire marks.
- Tack-free feel: Gently touch the surface. If it’s sticky or tacky, don’t let vehicles on yet.
- Uniform gloss: Check for any dull spots or variations in sheen. These could be signs of improper curing.
- Absence of impressions: Look for any indentations from tools, debris, or footprints. If you see any, clean them up before vehicles go on.
- Manufacturer criteria met: Make sure your coating has cured for the time recommended by the manufacturer.
Quick rule: If anything’s not right, wait and recheck. It’s worth taking the extra time to ensure a perfect finish.
Recording and interpreting test results
Keep detailed records of your mockup tests. This helps you understand what works and what doesn’t, so you can adjust your approach if needed.
Log the conditions – temperature, humidity, cure time, topcoat used, etc. Note down any issues too. If tires left marks, say so. And mention how long it took for those marks to appear.
If something goes wrong, use that information. Adjust your cure time, try a different topcoat, or tweak your application parameters. The goal is to learn from each test and improve your process.
Remember: Every garage is unique. What works in one might not work in another. Keep testing and adjusting until you get it right.
Tools and Materials Checklist for Preventing HTP
Consistent application and environmental control start with the right tools: reliable wet film thickness gauges, temperature and humidity/Dew Point meters, rollers and squeegees sized for the job, and misc items like respirators and mixing equipment. Having proper curing aids—heaters, dehumidifiers, and fans—lets you manage conditions during the critical initial cure.
Keep manufacturer-recommended consumables and backup supplies on hand so you don’t shortcut procedures mid-job. If you need specifics for compatible tools or meters, check product literature or vendor recommendations to match instruments to the coating system you’re using.
Measurement and monitoring tools
Use this checklist before, during, and after application to ensure quality control.
- Film-thickness gauge: Check coat thickness. Too thin invites pickup; too thick delays cure.
- Hygrometer/dew point monitor: Track humidity and dew point. High levels slow cure, invite pickup.
- Infrared thermometer: Monitor surface temperature. Too hot speeds cure but risks defects; too cold delays cure.
- Tachometer: Measure roller speed. Too fast leaves streaks; too slow causes uneven application.
- Temperature probe: Check ambient and substrate temps. Too low or high affects cure.
- Dew point calculator: Calculate dew point if hygrometer not available. Wrong value risks pickup.
- Tape measure: Ensure even coat application, prevent over-application at edges.
- Stopwatch: Time cure intervals to avoid under-curing or over-curing.
Quick rule: Regular checks keep cure on track, preventing pickup.
Application and safety equipment
Use this checklist before starting work to ensure a smooth application process.
- Rollers/sprayers: Choose ones suited to product. Wrong tool leaves defects inviting pickup.
- Proper PPE: Wear gloves, goggles, and respirator. Safety first; no shortcuts.
- Surface-prep tools: Scrubbers, grinders, or power washers. Clean surface prevents defects.
- Tape measure: Measure area to avoid over-application, waste product.
- Level: Ensure substrate is level before application. Uneven surface invites pickup.
- Drop cloths/tarps: Protect surrounding areas from overspray or drips.
- Safety cones/barriers: Keep people and pets away during cure to prevent pickup.
- Ladders/scaffolding: Reach high areas safely. Wrong access risks injury, poor application.
Quick rule: Right tools and safety measures ensure a smooth, defect-free application.
Curing and conditioning aids
Use this checklist during cure to maintain proper conditions and prevent pickup.
- Controlled heaters: Maintain consistent temp. Too low or high risks pickup, poor cure.
- Dehumidifiers: Keep humidity in check. High levels slow cure, invite pickup.
- Ventilation systems: Remove solvents, speed cure. Stagnant air invites pickup.
- Thermostat: Monitor and control temp. Wrong setting risks poor cure, pickup.
- Humidistat: Monitor and control humidity. Wrong level risks slow cure, pickup.
- Timer: Set cure intervals to avoid over-curing or under-curing.
- Moisture barrier: Protect curing surface from rain, dew. Wet surface invites pickup.
- Cure tent: Enclose area for controlled environment. Wrong conditions risk poor cure, pickup.
Quick rule: Maintain right temp and humidity during cure to prevent pickup.
Conclusion
Getting hot-tire pickup under control pays off in safety, durability, and a clean dry look that lasts. The right cure state and topcoat choice matter more than quick work, so verify readiness and environmental conditions before you lay down any coating.
In practice, you should proceed with a simple, repeatable checkorder: confirm the surface is clean and dry, verify the cure state before coating, set and maintain the proper temperature and humidity, choose a resin that resists pickup, follow the application steps exactly as specified, let the coating cure fully, then test with mockups and perform QA before any real use. Do the work in small, confirmable steps and document the results so you can reproduce success.
Common mistakes to avoid are skipping the cure time or rushing through environmental control, applying too soon after a rough surface or moisture exposure, and ignoring testing or mockups. Safety rules are simple: wear the right PPE, ventilate, and never work when conditions swing outside the recommended temperature and humidity ranges. If the garage space is not controllable, or if the coating must bear heavy tire loads or frequent traffic, call a professional for guidance rather than guessing.
When in doubt, choose a tested, predictable path and plan a cautious rollout with small tests first. With careful prep, correct materials, and disciplined QA, you’ll land a durable, good-looking coating that you can stand behind—and drive on with confidence.
FAQ
What should I check on the label or datasheet before choosing a topcoat for hot-tire resistance?
Read the manufacturer instructions for cure time, film thickness, and cure window. Look for explicit notes on hot-tire contact, abrasion, and chemical resistance. If anything isn’t clear, call the supplier or check the spec sheet for exact guidance.
How can I tell if my concrete is ready for a new topcoat without risking hot-tire pickup?
Follow the stated cure-state criteria in the product instructions. If the surface feels soft, gummy, or releases a fingerprint, wait longer or re-evaluate with a test patch. When in doubt, stop and verify with the product’s QA guidance.
What practical steps reduce the risk of pickup during application beyond choosing the right resin?
Apply coats within the recommended temperature and humidity range from the label. Use proper backrolling or tip-off techniques to avoid thin spots and ensure uniform film thickness. If the enviro conditions aren’t right, wait or adjust to match the spec.
How do I test my garage floor for hot-tire pickup before committing to the full coating?
Do a small mockup in a inconspicuous area and let it cure per the product instructions. Run a test tire over the patch after the cure window to observe any pickup or transfer. If you see issues, revisit cure time, topcoat choice, and surface prep steps per manufacturer guidance.