
Introduction
Cratering in clear coats is when the finish shows tiny pits or craters after drying. This can happen from improper thinning, debris, or moisture in the air, and it spoils the look and protection. To avoid it, stick to careful prep and clean, even application steps.
Use proper dilution only as directed on the label and with the recommended thinner, and test a small sample first. When applying, choose a technique that suits the product—brush evenly or wipe on thin, even coats, and avoid heavy layers that trap solvent. Environmental factors like temperature, humidity, and dust influence cure, so work in a clean space and follow the product instructions for dry times.
Key takeaways
- Always read product labels for thinning recommendations and application guidelines.
- Test small patches before full coats to assess leveling and cure response.
- Brush or wipe-on methods minimize air entrapment when applying thin coats.
- Environmental factors like humidity and temperature affect gloss, bubbles, and worker safety.
- Use compatible thinners and avoid over-thinning to prevent cratering.
- Address bubbles and pinholes by surface defoaming, sanding between coats, and ventilation.
Table of Contents
- Introduction
- Key takeaways
- What Causes Cratering and Related Finish Defects
- Prep and Pre-Planning Before Applying Clear Coats
- Thinning and Choosing the Right Product
- Application Methods That Minimize Cratering
- Minimizing and Removing Bubbles, Pinholes, and Craters
- Preventing and Fixing Cloudy, Streaky, Wavy, or Sticky Finishes
- Tools, Materials Checklist and Visual Checkpoints
- Safety, Storage, and Cost/Time Trade-Offs
- Conclusion
- FAQ
What Causes Cratering and Related Finish Defects
Cratering is a hollowed, crater-like impression in a clear coat or varnish. It looks different from pinholes, fisheyes, or runs because the defect is a surface depression rather than a pinhole or a sweep of excess material. Visual cues include shallow, cup-shaped pits and a missing film in the affected areas.
Root causes typically involve surface contamination, trapped solvents, and mismatched solvent systems or film chemistries. Cleaning, degreasing, and de-waxing steps tailored to the substrate help, along with ensuring compatible coatings across prep coats, sealer, and topcoat to avoid solvent pop and cratering. Environment, film build, and proper drying all influence whether cratering develops between coats.
Surface Contamination and Oils
Cratering often starts with a dirty surface. Grease, silicone, wax, or soap residues repel coatings, creating craters.
Common contaminants include:
- Hand lotions/waxes: These can leave residue that prevents adhesion.
- Silicone-based cleaners/polishes: Silicone is a coating killer; it stops paint from sticking.
- Soap scum: Leftover soap can cause craters in clear coats.
Check surfaces for these contaminants before applying any coatings. Use appropriate cleaners to remove them.
Solvent and Curing Issues
Rapid solvent escape, incompatible solvents, or overly thick films can lead to cratering.
Rapid solvent evaporation causes craters by pulling the film apart. This happens when:
- Temperature is too high: Solvents evaporate faster in heat.
- Humidity is low: Low humidity speeds up drying and can cause cratering.
Incompatible solvents between coats or additives can also trigger defects. Always match products by brand or ensure compatible chemistries.
Application and Tooling Factors
Techniques and tools can either prevent or cause cratering.
- Overworking wet film: Stirring too much can introduce air bubbles that turn into craters. Tip: Work the surface gently.
- Wrong brush type: Using a brush with stiff bristles on delicate surfaces can cause damage and cratering. Spec: Soft, fine-bristle brushes for delicate surfaces.
- Disturbed wet edges: Touching or disturbing wet paint edges can create craters. Tip: Let edges dry undisturbed.
- Spraying technique: Overspray and too much material in one spot can cause cratering. Spec: Light, even coats with proper ventilation.
- Wiping technique: Wiping too hard or not allowing enough drying time between wipes can create craters. Tip: Use a soft cloth and let each wipe dry before the next.
Prep and Pre-Planning Before Applying Clear Coats
Assess the substrate type, existing finishes, porosity, and structural condition before any coating decision. Check for moisture bleed and plan targeted pre-treatments for wood, metal, or plastic so adhesion and cure remain consistent. Map potential cratering risks on the project and reserve steps to address them.
Develop a compatibility testing plan on a representative patch, and run wipe, brush, and spray trials to gauge leveling and cure. Establish practical environmental targets and document how temperature, humidity, and airflow could affect solvent evaporation and film formation. Outline a prep and priming strategy with specified sanding, degreasing, and sealing steps to promote uniform thickness.
Surface cleaning and sanding protocol
Start by degreasing the surface with a suitable cleaner to remove any oils, dirt, or contaminants. Use a tack cloth afterwards to wipe away any remaining dust.
Sanding is crucial for creating a uniform surface and improving adhesion. Begin with 120-grit sandpaper, followed by 180-grit, working in the direction of the grain. Vacuum or wipe off any dust between grits.
For best results, finish with a final pass using 220-grit to ensure a smooth, contaminant-free surface ready for priming.
Compatibility tests and mockups
Before applying your clear coat, create small test panels or swatches on hidden areas of the substrate. This allows you to verify adhesion and appearance with your chosen topcoat.
Test different application methods – wipe, brush, or spray – and observe how the clear coat interacts with existing finishes, fillers, pigments, and any diluents. Check for signs of incompatibility like blushing, wrinkling, or poor leveling.
Document your findings to inform your final application plan. If issues arise, adjust your approach accordingly – change the clear coat, use a sealer, or modify application techniques.
Environmental conditions to control
The workshop environment plays a significant role in how your clear coat cures. Maintain temperature between 65-75°F (18-24°C) for optimal results. Keep humidity levels below 50% to prevent issues like blushing or slow cure.
Ensure proper airflow by opening windows, using fans, or setting up a dust-free tent. This helps control solvent evaporation and prevents dust from settling on the wet surface.
Monitor the dew point, which should be at least 10°F (5°C) lower than the surface temperature to avoid condensation. Allow sufficient cure time between coats, following the manufacturer’s guidelines for cycle times.
Thinning and Choosing the Right Product
Thinning can help with self-leveling pours or high-solid finishes, but it can also worsen cratering if it leads to an uneven film. Consider how thinner mixes affect flow, cure, and durability, and follow the product’s guidance on solvent strength and ratios. The goal is to balance workability with film integrity.
Test compatibility with underlying sealers or primers, and align VOC levels and flash-off times to the substrate. Use a small sample on scrap material to observe film formation and look for cratering or fisheyes before scaling up. Remember that thinner films dry faster but may be less durable, while thicker films resist impact but risk cratering if misapplied.
How and when to thin varnish or polyurethane
Before you start thinning, check the manufacturer’s label. It’ll tell you if thinning is needed and what solvent to use.
Brushing: A little thinning can help improve flow. Aim for 5-10% by volume. Too much thins the film too much, making it less durable.
Wipe-on: More thinning is needed here, around 15-20%. But be careful not to over-thin. It can cause cratering and reduce durability.
Solvent choices and flash/evaporation behavior
Different solvents evaporate at different rates, affecting film formation. Slower evaporation can help prevent cratering.
Mineral spirits: Fast evaporation. Good for quick drying times but can cause cratering if applied too thickly.
Naptha: Medium evaporation rate. A balance between drying time and film formation.
Water (water-based formulas): Slower evaporation. Helps prevent cratering but may take longer to dry.
Selecting product type for the job
Choose your product based on durability needs and sensitivity to cratering.
Oil-based vs water-based: Oil-based are more durable but can yellow over time. Water-based is less durable but doesn’t yellow.
Spar vs interior formulations: Spar varnishes are for outdoor use, offering better UV protection. Interior formulations are for indoor use only.
Epoxy/topcoats: Epoxies provide excellent durability and resistance to chemicals. Topcoats offer a range of finishes but may not be as durable as epoxies.
Application Methods That Minimize Cratering
Cratering arises from how the coating forms a film and releases solvents, so the plan is to minimize trapped solvents across all methods. The goal is to keep a uniform wet edge and avoid heavy builds that trap air and solvents. Stay focused on controlled results rather than speed.
For brush, wipe-on, and spray, follow careful sequencing: keep surface and air temps stable, monitor dust control, and test a patch first. Use proper edge control, even passes, and appropriate dilutions to reduce air entrapment while watching for signs of early crater formation before applying more coats.
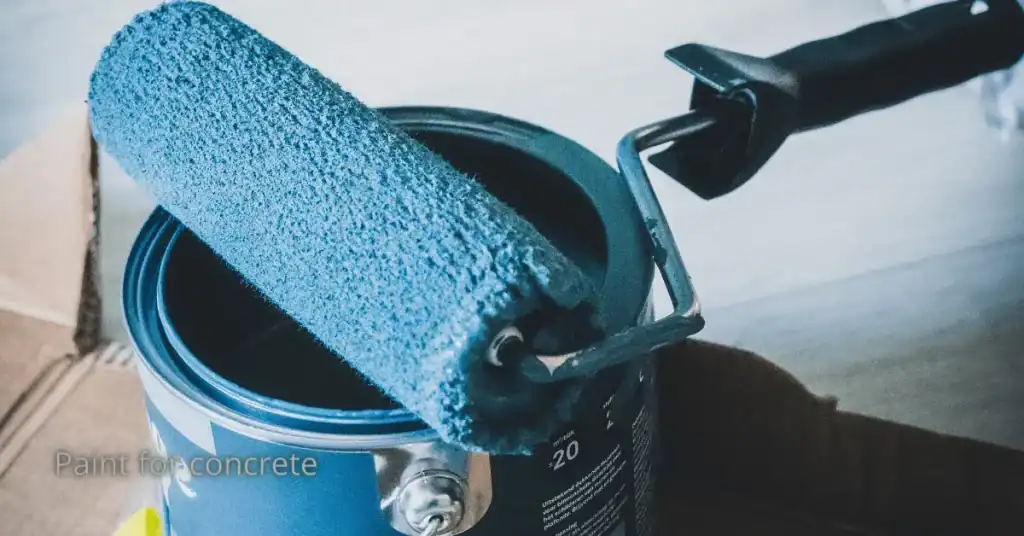
Brush selection and brushing technique
First off, you gotta pick the right brush. A good quality, synthetic bristle brush is your best bet for most jobs. It’s got a nice balance between stiffness and softness to spread the concrete evenly without leaving marks.
Check the label before you buy. You want one with dense bristles that aren’t too long or short. A 3/4″ to 1-1/2″ nap is usually spot on for most DIY jobs.
Now, let’s talk technique. You wanna use smooth, even strokes, like you’re painting a wall. Don’t go crazy with the pressure, either. Too much and you’ll push too much concrete out of the way, leaving craters behind when it dries.
Here’s where a lot of folks mess up: they don’t manage their wet edge right. You wanna keep that edge wet as you work your way across the surface. If you let it dry out, you’ll end up with a rough, cratered finish. So, work in small sections and keep that edge damp.
Lastly, layoff is your friend. That’s when you go back over the concrete with light strokes at a different angle to smooth out any imperfections. It’s like giving your concrete a little face lift. Just be sure not to overdo it; too much layoff can leave marks too.
Wipe-on method (dilution and technique)
The wipe-on method is a great way to minimize cratering. It’s slower than brushing but gives a smoother finish.
Thinning: Start with a 1:1 mix of concrete sealer and denatured alcohol. Check the product label for specific recommendations. You can adjust this ratio based on absorption – more porous surfaces may need a thinner mix.
Applicator prep: Use a clean, lint-free cloth or applicator pad. Synthetic materials work best as they don’t leave fibers behind.
Wipe in one direction, following the grain of the surface if possible. Overlap each stroke by about half to ensure even coverage. Expect to apply 2-3 coats, letting each dry for at least an hour before applying the next. This is fewer than brushing but requires more patience.
Spraying considerations (HVLP and airless)
When spraying concrete, you’ve got two main methods: HVLP and airless. Both can give you a smooth finish if done right.
HVLP – High Volume, Low Pressure. This one’s great for thin coats and detail work. Keep your tip size small (like #3 or #4) and pressure low (around 50-70 psi). Thinning isn’t usually needed, but if you must, use a concrete-specific additive, not water.
Airless – This one packs more punch for thicker coats. Use a tip size of #6 or larger and pressure around 1500-2000 psi. You’ll need to thin your mix with water (around 3-5% by volume), but check the label first.
For both methods, keep your distance consistent – about 8-12 inches away from the surface. Overlap each pass by half to ensure even coverage. And remember, no matter what method you choose, always start with a clean, dry, and properly prepared surface.

Minimizing and Removing Bubbles, Pinholes, and Craters
Preventive mixing and formulation focus on slow, steady stirring and avoiding excessive air incorporation. Maintain steady temperatures during mixing and use a minimal lid disturbance to reduce bubble formation. Degassing and controlled pours help lower the risk of creating surface voids as you coat.
Wet-application techniques emphasize thin, uniform coats and controlled spreading. If bubbles or holes appear, pop them promptly and reflow with light passes after initial cure, then plan a light follow-up coat once the previous layer has cured as appropriate. Diagnose causes such as contamination or cure inhibition to guide patching or recoating decisions.
Avoiding bubbles and trapped air
Preventing bubbles and trapped air is crucial for a smooth, crater-free finish. Here are some mistakes to avoid:
- Mixing too fast: Stir slowly and steadily to avoid incorporating air.
- Pouring or wiping too much: Keep volumes small to prevent excess air release.
- Sealing porous substrates: Apply a thin seal coat before the final coats to minimize air pockets.
- Applying in cold conditions: Warm the surface and product slightly to encourage bubble release.
By avoiding these common pitfalls, you’ll significantly reduce bubbles and trapped air in your clear coats.
Removing bubbles and small craters before cure
If bubbles or small craters appear while the film is still wet, here’s how to remove them without damaging your work:
Gently torch or use a heat gun: Set it on low and pass over the surface to encourage bubbles to rise. Be careful not to overheat and damage the coating.
For isolated pinholes, use a fine needle or toothpick to pop the bubble, then smooth out the area with a light pass of your applicator.
If using a squeegee or roller, apply gentle pressure to release bubbles. Work quickly and carefully to avoid introducing new defects.
Repairing cured craters and pinholes
Once your clear coat has cured, you can still repair minor defects. Here’s how:
Sanding and feathering: Lightly sand the area with fine-grit sandpaper, then apply a thin coat of compatible filler or varnish to fill in craters. Feather the edges to blend with the surrounding surface.
For deeper craters, you may need to strip and recoat the entire affected area. Ensure the substrate is clean and dry before applying new coats.
Post-cure sealing: After repairs are complete, apply a final seal coat to protect your work and prevent recurrence of defects.
Preventing and Fixing Cloudy, Streaky, Wavy, or Sticky Finishes
Clouding, streaks, orange peel, and tackiness often share root causes with cratering—surface contamination, improper prep, or wrong finish formulation. Treat these together with a unified plan that focuses on clean surfaces and compatible products. The aim is a predictable, clear film free of surface irregularities.
Perform pre-application checks on moisture, temperature, and humidity, and ensure thorough cleanliness and porosity management. Apply thinning and dilution strategies, choose wipe or pour applications carefully, and control dwell times to minimize optical defects. If issues occur, diagnose tackiness or cloudiness promptly and remediate through sanding, re-priming, and proper curing conditions.
Controlling moisture and temperature to avoid cloudiness
Cloudy finishes often result from applying clear coats over moist surfaces or in high humidity. Avoid these common mistakes:
- Moist Substrate: Ensure the surface is completely dry before application.
- High Humidity: Apply coatings when relative humidity is below 50%.
- Temperature Fluctuations: Maintain a consistent temperature (between 65-85°F or 18-29°C) during prep and application.
- Proper Ventilation: Ensure good airflow to prevent humidity buildup.
Controlling these factors helps prevent cloudiness and promotes a smooth, clear finish.
Eliminating streaks, swirls, and orange peel
Streaks, swirls, and orange peel effects can mar your finish. Prevent them with proper mixing and application:
Mixing: Stir your clear coat thoroughly but gently to avoid introducing air bubbles.
Application Speed: Apply the finish at a steady pace, neither too fast nor too slow, to maintain an even wet edge.
Tool Choice: Use high-quality brushes or spray equipment for smooth application. For wipe-on methods, use clean, lint-free rags.
If streaks or orange peel occur, lightly sand the affected area with fine-grit sandpaper (400-600 grit) after the finish has fully cured. Wipe off dust and re-coat for a smooth finish.
Troubleshooting tacky or uncured films
Tacky, uncured finishes can result from various issues. Diagnose and fix the problem with these steps:
Insufficient Hardener: If using a two-part product, ensure you’ve added the correct amount of hardener. Mix well to combine thoroughly.
Low Temperature: Check if the application temperature was too low (below 65°F or 18°C). Allow the finish to cure at a warmer temperature if possible.
Over-Thinned Product: If you thinned the clear coat excessively, it may not cure properly. Test a small area first to ensure proper curing before full-scale application.
If the finish remains tacky after addressing these issues, lightly sand the surface with fine-grit sandpaper, wipe off dust, and re-coat with a fresh, properly mixed batch of clear coat.
Tools, Materials Checklist and Visual Checkpoints
Assemble a DIY-friendly toolkit with varnish-friendly brushes and rollers, mixing cups, nitrile gloves, tack cloths, lint-free wipes, thinner, drop cloths, sanding blocks, and painter’s tape. Keep everything organized and ready to maintain a clean work flow. Have extra rags on hand for quick cleanup between steps.
Use visual checkpoints at each stage: pre-application readiness with the right temperature and dust control, between coats with controlled dew point and light scuffing, and final cure with an even sheen and no tackiness. A simple pass/fail cue helps you decide whether to proceed or pause for refinishing and recoating.
Tools and consumables checklist
Before you start your DIY project, ensure you have all the necessary tools and consumables at hand. This will help prevent any delays or mistakes during the application process.
- Brushes and rollers: Choose varnish-friendly brushes and rollers to avoid leaving bristles or lint in your clear coat.
- Foam brushes: Use these for applying varnish thinner or mineral spirits for cleaning up.
- Mixing cups and sticks: Essential for mixing your varnish and ensuring a consistent finish. Avoid using metal utensils to prevent contamination.
- Nitrile gloves: Protect your hands from chemicals and make cleanup easier.
- Dust masks: Ensure you have proper respiratory protection when sanding or working with solvents.
- Tack cloths: Use these to remove dust and debris from the surface before application.
- Lint-free wipes: These are crucial for wiping down surfaces and ensuring no lint is left behind.
- Mineral spirits or varnish thinner: Have both on hand for cleaning tools, brushes, and surfaces as needed.
- Drop cloths: Protect your work surface and floor from spills with drop cloths.
- Sanding blocks: Use these to ensure even sanding pressure and prevent gouging the surface.
- 120–220 grit sandpaper: Have a range of grits on hand for different stages of sanding.
- Painter’s tape: Apply this to protect adjacent areas from overspray or drips.
- Clean disposable tray: Use this for mixing your varnish and ensuring a consistent application.
Quick rule: Always check your tools and consumables before starting any DIY project to avoid mid-job delays.
Visual checkpoints during the job
Regular visual inspections are crucial throughout the application process to ensure a smooth, even finish. Here’s what to look for at each stage.
- Pre-application: Check for any dust or contaminants on the surface. The temperature should be within the recommended range for your varnish.
- Between coats: Look for an even wet-film appearance, with no missed spots or over-applied areas. Ensure there are no edge breaks where the varnish has pulled away from the surface.
- Small substrate defects: Inspect the surface for any small imperfections that may show through the clear coat, such as scratches or gouges.
- Dew point control: Ensure the dew point is within the recommended range to prevent condensation from forming on the surface and causing issues with your varnish.
- Light scuffing: Gently run your hand over the surface after each coat to check for any rough spots or imperfections that need to be sanded out.
- Wipe-down: Before applying the next coat, wipe down the surface with a lint-free cloth dampened with mineral spirits to remove any dust or residue.
- Final cure: After the last coat has dried, check for any tackiness. The finish should be smooth and even with no dull spots or streaks.
Quick rule: Regular visual inspections help catch potential issues early, allowing you to address them before they become major problems.
Patch-testing and documenting results
Before applying varnish to your entire project, it’s essential to run a small test area to ensure you achieve the desired result. Here’s how to patch-test and document your findings.
- Small test area: Apply your varnish to a small, inconspicuous area of your project to see how it looks and behaves under real-world conditions.
- Photograph results: Take pictures of the test area from different angles to document its appearance. This will help you make adjustments if needed.
- Note mix ratios/conditions: Record the exact mix ratio, temperature, humidity, and other relevant conditions during your test application. This information will be crucial for reproducing successful results or learning from failures.
- Observe curing process: Keep an eye on the test area as it cures to ensure there are no unexpected issues, such as tackiness or discoloration.
- Compare to expectations: Compare your test results to what you expect from your varnish. If there are any discrepancies, adjust your application process accordingly.
Quick rule: Patch-testing is a vital step in ensuring consistent, high-quality results on your DIY projects.
Safety, Storage, and Cost/Time Trade-Offs
Follow basic safety fundamentals: wear appropriate PPE, ensure ventilation, keep fire safety in mind, and know first-aid steps for solvent exposure. Store items in a manner that reduces risk during handling and future use. Keep work areas organized to prevent spill and exposure hazards.
Consider storage, shelf-life, and disposal implications when choosing methods to reduce cratering. Weigh upfront safety and storage costs against potential losses from coating failures and health risks, and balance faster drying with finish quality. Use a practical decision framework to select methods based on project size, conditions, and desired outcomes.
Safety precautions and PPE
Your safety is paramount when working with solvents and coatings. Here’s what you need:
Respiratory protection: Use a respirator with a particulate filter for sanding or spraying, especially with oil-based products.
Gloves: Wear chemical-resistant gloves to protect your hands from solvent exposure.
Eye protection: Goggles or safety glasses are essential. Consider side shields for extra protection.
Proper storage and shelf-life guidance
Store your finishes and thinners properly to maintain their quality:
Labeling: Keep labels intact. They provide crucial usage and storage info.
Temperature: Store in a cool, dry place, away from heat sources. Most products perform best between 60-80°F (15-27°C).
Segregation: Keep solvents and coatings separate to prevent contamination.
Humidity and sunlight: Avoid high humidity and direct sunlight, which can degrade products or cause crystallization.
Cost, time, and durability trade-offs
Each application method has its pros and cons:
Brushing: Upfront material cost is low. Labor time can be high due to multiple thin coats needed for even coverage.
Wipe-on: Labor time is lower, but you may need extra materials like rags or pads. Cost per application might be higher due to these consumables.
Spraying: Upfront material cost can be high due to overspray loss. Labor time is often faster, but you’ll need equipment and potentially a respirator.
Testing: Always test your application method on a small, hidden area first. This ensures you’re happy with the finish and helps avoid costly mistakes.
Conclusion
Cratering and related finish defects are a signal to slow down, test, and use the right steps. When you keep safety and durability at the top, the result will look good and last longer on DIY projects.
Start by cleaning and inspecting the surface, pre-plan your coats, choose and thin the product correctly, apply in light, even passes, monitor temperature and humidity, sand between coats as needed, and store and cure the finish properly. Do this in sequence and you’ll minimize issues and avoid costly rework. safety first and test in a small area before you commit to a full project, and don’t skip the visual checks as you go.
Avoid these common traps: rushing the cure, using the wrong thinner or too-hot/too-cold conditions, and skipping prep or sanding between coats. Keep the work area clean, wear appropriate protection, and follow the manufacturer’s guidance. If the project demands complex shapes, multiple coats, or you’re unsure about product compatibility, don’t push on blindly—call a professional if needed. Stay steady, take it coat by coat, and you’ll finish with a clear, durable, and professional-looking finish. Stay focused and finish strong.
FAQ
What’s the right way to dilute varnish or polyurethane for a clear coat?
Always follow the product label or manufacturer instructions for thinning. Do a small test on a scrap area to confirm the flow before committing to the whole project, and don’t over-thin beyond what’s recommended. If in doubt, use the recommended method for thinning and avoid guessing.
Should I brush or wipe when applying a clear coat to minimize cratering?
Brushing can work if you use even, smooth strokes and keep a wet edge. Wipe-on and wipe-off methods can reduce brush marks and air traps, but only if the product supports that technique. Choose the method the product instructions say is appropriate and stick with it.
How do I troubleshoot cloudy finishes or bubbles in epoxy?
Cloudiness usually comes from moisture, improper mixing, or temperature issues. Air bubbles come from vigorous mixing or pouring too quickly. Follow the product’s instructions for mixing and application, and avoid applying in conditions that promote bubbles or clouding.
What environmental factors affect finish quality and what should I watch for?
Watch for temperature, humidity, dust, and airflow. Work in a clean, well-ventilated area and avoid extremes of heat or cold as well as direct sun. Protect the surface from dust and debris during cure and follow any site-specific safety guidelines for solvents.