
Introduction
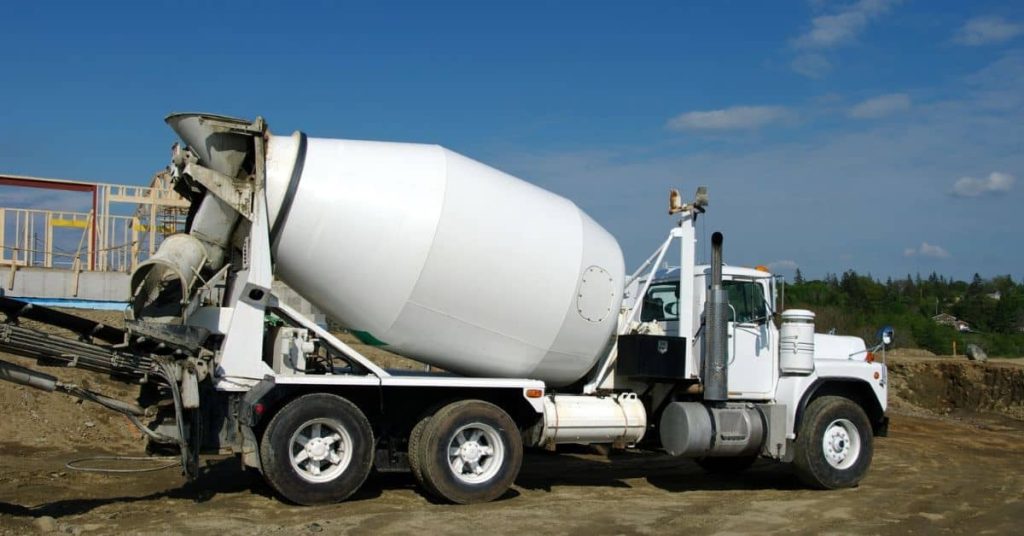
This article compares three concrete repair options for a heaved sidewalk: mudjacking, polyjacking, and full replacement. Mudjacking uses a cement slurry to lift the slab from below, while polyjacking uses a foam material to fill voids and lift. Full replacement means removing the old slab and pouring a new one.
Each method has its benefits and drawbacks, and the choice depends on the site and your goals. For the two lifting methods, the process is generally quicker and less invasive than a full replacement, but durability and final appearance can vary. Always check product labels, manufacturer instructions, and local rules to confirm what is allowed and what prep or warranties are needed.
Key takeaways
- Mudjacking uses grout slurry to lift sunken sidewalks; verify access and cleanup.
- Polyjacking offers faster cure with foam; confirm substrate compatibility and weight limits.
- Full replacement may be necessary where cracks, hollow sounds, or drainage issues persist.
- Costs vary by method; compare scope, downtime, and contractor warranties before choosing.
- Safety: shut off utilities and wear eye protection; hire licensed pros for lifts.
- Longevity depends on soil, drainage, and proper repair; plan for future checks.
Table of Contents
- Introduction
- Key takeaways
- Why Sidewalks Heave or Sink — Causes and When to Act
- Overview of Repair Options (Mudjacking, Polyjacking, Replacement, Other Fixes)
- Mudjacking (Slurry) — How It Works, Materials, and Suitability
- Polyjacking / Polyurethane Foam Lifting — Process, Benefits, and Limits
- Full Removal and Replacement — Scope, Process, and When It’s Required
- Direct Comparison: Mudjacking Vs Polyjacking Vs Full Replacement
- Safety, DIY Considerations, and Common Mistakes to Avoid
- Homeowner Planning Guide — Costs, Contractor Vetting, and Inspection Checklist
- Conclusion
- FAQ
Why Sidewalks Heave or Sink — Causes and When to Act
Sidewalks move for several reasons, and understanding them helps you spot urgency. Common causes include soil movement from settling or sliding, frost heave from freeze-thaw cycles, invasive tree roots, poor soil compaction, and water erosion or poor drainage. Each factor can lift or drop slabs over time, creating trip hazards.
Act when you see sharp cracks, vertical misalignment, posts or railings pulling away, or noticeable slope. Signs of trouble demand timely action, with safety concerns often needing attention within weeks and cosmetic issues within months. Delayed repairs can worsen trip risks, invite water intrusion, and lead to more costly fixes later on.
Common Underlying Causes
The movement of your sidewalk is often due to a combination of factors. Let’s dive into the main culprits:
Soil Types and Drainage Issues: Expansive soils, like clay, can swell when wet and shrink when dry, causing your sidewalk to heave or sink. Poor drainage can exacerbate this problem by keeping the soil consistently moist.
Root Intrusion: Tree roots can grow underneath your sidewalk, pushing slabs upward as they seek water and nutrients. This is especially true for large trees with aggressive root systems.
Freeze-Thaw Cycles: In colder regions, moisture in the soil freezes and expands during winter, lifting sidewalks. When it thaws in spring, the soil settles, causing the sidewalk to sink. This cycle can repeat year after year, leading to significant movement.
Poor Original Installation: If your sidewalk wasn’t properly installed, it may have been laid on an unstable base or without proper compaction. Over time, this can lead to settling and heaving.
Signs You Need Repair vs Replacement
Before deciding on a fix, it’s crucial to assess the damage. Here are some signs to look out for:
Repair (Leveling) May Be Viable: Small cracks (<1/4 inch wide), minimal settling or heaving (<1/4 inch rise per 6 feet), no visible root intrusion, and no drainage issues may indicate that leveling techniques like mudjacking or polyjacking could be sufficient.
Full Replacement Likely Required: Large cracks (>1/4 inch wide), severe tilting or settling, repeated resettlement after previous repairs, crumbling concrete, visible root intrusion, and persistent water pooling or drainage issues often signal that a full replacement is necessary. If your sidewalk has become a trip hazard or is affecting adjacent structures, it’s time for immediate action.
Overview of Repair Options (Mudjacking, Polyjacking, Replacement, Other Fixes)
This section defines the major approaches: mudjacking, polyjacking/polyLevel, full removal and replacement, grinding/shaving, and overlays. Each option has its own typical use in response to cracks, voids, and settlement. Understanding them helps you choose based on condition and goals.
Consider slab condition, accessibility, climate and soil, load needs, and downtime when weighing leveling, surface fixes, or full replacement. Pros and cons include cost, cure time, durability, and future settlement risk. Some methods are reversible or adjustable, while others set the final result more permanently.
Typical use-cases for each method
Each repair option has its sweet spot. Here’s where they shine:
Mudjacking: Ideal for small, localized sinks or areas with poor drainage. It’s heavy-duty, so it handles high loads well.
Polyjacking/PolyLevel: Great for long stretches of sunken sidewalk. It’s lightweight and fast-curing, making it perfect for quick fixes.
Full Removal & Replacement: Crumbled slabs or sections with severe damage need this heavy-duty approach. It’s the only way to fix underlying issues like unstable soil.
Quick pros and cons summary
Here’s a quick rundown of each method’s strengths and weaknesses:
Pros
- Mudjacking: Cost-effective, long-lasting, handles heavy loads.
- Polyjacking/PolyLevel: Fast cure time, lightweight, minimal downtime.
- Full Removal & Replacement: Fixes underlying issues, durable, high load capacity.
- Grinding/Shaving: Quick, non-invasive, reduces trip hazards.
- Overlays: Improves appearance, can fix minor cracks, quick installation.
Cons
- Mudjacking: Slower cure time, heavier equipment needed.
- Polyjacking/PolyLevel: Less durable than cement-based lifts, may not handle heavy loads as well.
- Full Removal & Replacement: Long downtime, high cost, invasive.
- Grinding/Shaving: Only fixes high spots, doesn’t address underlying issues.
- Overlays: Can hide underlying issues, may crack or delaminate over time.
Choose based on your specific needs. Leveling methods are quick and cheap but might not fix underlying issues. Replacement is heavy-duty but invasive. Overlays and grinding are surface fixes that won’t address major problems.
Mudjacking (Slurry) — How It Works, Materials, and Suitability
Outline the mudjacking workflow: access holes, slurry preparation, pumping, and leveling checks. This method uses a cement/soil mix to lift the slab from beneath. The process is designed to be straightforward but requires careful sequencing.
Materials typically include a cement/soil slurry with water adjustments to achieve workable consistency. Hole sizes and placement patterns are chosen to minimize surface disruption while delivering even lift. Best results come with stable soils and moderate settlement.
Materials, equipment, and process details
The mudjacking process involves drilling, pumping, and lift control. Here’s what you need to know:
- Drilling: Holes (usually 1-1/4″ or 2″ diameter) are drilled through the slab at regular intervals using a hammer drill or core drill. Tip: Keep holes close enough for proper support, about every 18″ to 36″.
- Slurry preparation: A cement-soil slurry is mixed on-site in a portable mixer. Aim for a slump of around 4-5 inches and water content of 20-25%. Tip: Renting a mixer can save you money.
- Pumping: The slurry is pumped under high pressure into the voids beneath the slab through these holes using a mudjack pump. Tip: Ensure the pump has enough power for your job’s depth and volume.
- Lift control: A leveling device helps monitor and adjust the lift as needed during pumping. Tip: Rent or borrow one to ensure a smooth, even lift.
- Site prep/cleanup: Tape off work areas, cover nearby plants, and remove any obstacles. After pumping, temporarily patch holes with cement-based filler. Tip: Wear safety gear; cleanup involves heavy equipment and materials.
Cost factors and when mudjacking is economical
Mudjacking costs vary based on several factors:
Area and depth: Larger areas and deeper lifts increase material volume and labor time, driving up cost.
Material volume: More slurry means higher material costs. Expect to pay around $0.50 – $1 per cubic foot for materials alone.
Access, contractor mobilization: If your job requires extra access equipment or travel time for contractors, expect additional charges.
When getting quotes, ensure they itemize these factors: area, depth, material volume, access needs, and mobilization costs. Tip: Compare apples to apples; some contractors may include prep work while others charge separately.
Polyjacking / Polyurethane Foam Lifting — Process, Benefits, and Limits
Define polyjacking as a polyurethane foam-based lift that expands to fill voids and support slabs. This differs from mudjacking in material behavior and precision of lift. The chemistry enables fast setting and less weight on the repaired area.
Injection uses small holes and targeted placement to achieve even lifting. Cure times are generally quick, with traffic restrictions depending on the project. It suits soils where lighter weight and fast access are important, but consider cost and void size limits.
Materials, equipment, and timelines
The heart of polyjacking is a two-component foam system: resin and hardener. You’ll need to mix these on-site just before application.
Check the manufacturer’s instructions for exact mixing ratios, but it’s typically around 1 part hardener to 4 parts resin. Use a static mixer or a drill with a mixing paddle to ensure a thorough blend.
The foam expands rapidly after injection, filling voids and lifting settled concrete. It reaches about 20-30 times its liquid volume in just 30 seconds. After expansion, it cures within minutes, allowing for quick return to service.
As for equipment, you’ll need:
- A foam proportioner and pump
- Injection ports (usually plastic or brass)
- Hoses and fittings
- Drill with mixing paddle (if not using a static mixer)
Check local rules for any permits required before starting work. The whole process, from setup to completion, typically takes around 2-4 hours per section of slab, depending on size and complexity.
Cost drivers and performance considerations
Polyjacking costs vary based on a few factors. First, foam volume needed depends on the size of the settlement. More foam means more cost. Check your area’s typical volumes per square foot to get an idea.
The complexity of the lift also affects price. If you’ve got limited access or tricky setups, expect labor costs to rise. It might take longer to prep and pump the foam in tough spots.
Foam’s material cost is higher than mudjacking, but it’s often offset by faster labor and a longer life. A job that’d take hours with mud could be done in minutes with foam. Plus, foam doesn’t break down like cement-based grouts. Check local suppliers for pricing and options.
Full Removal and Replacement — Scope, Process, and When It’s Required
Clear criteria for replacement include extensive cracks, shifting subsidence, damaged reinforcement, or unusable subgrade. When leveling isn’t viable, replacement becomes the practical endpoint. This option fundamentally rebuilds the sidewalk structure.
Expect a demolition scope that covers utilities, debris handling, and site cleanliness, followed by subgrade repair and new reinforcement. The pour involves form work, joint planning, curing, and proper protection, which influences overall timeline and cost.
Pros, cons, and disruption expectations
Full replacement offers a permanent fix. Your sidewalk will look new again.
Aesthetics: You can match or upgrade the existing concrete’s finish and color.
Cons: It’s time-consuming. Expect longer downtime while work is done.
Cost is higher than leveling methods. More site disruption means more noise, dust, and traffic.
Environmental, permitting, and drainage implications
Replacement affects drainage. Ensure your new slab slopes properly to direct water away from buildings.
Permitting: Check local codes. You may need permits for demolition and new construction.
Waste disposal: Old concrete goes to a recycling center or landfill. Consider eco-friendly disposal options.
Upgrade base materials if needed. Improve slope for better drainage, preventing future heaving.
Direct Comparison: Mudjacking Vs Polyjacking Vs Full Replacement
Durability and longevity vary by method, with each carrying different expectations for service life and failure modes. Compare options on how they hold up under ongoing loads and seasonal movement. This helps you pick the right approach for your site.
Speed, downtime, cost drivers, and surface finish differ between methods. Consider hole size, plugs, patch needs, and how surface smoothness is affected when planning the repair. A practical flowchart can guide which method fits your scenario.
Homeowner decision checklist
Before you choose a repair method, consider these factors to make an informed decision.
- Condition: Assess the severity of the heave. Minor issues may not warrant full replacement.
- Budget flexibility: Consider your budget and whether it allows for immediate repairs or if you need a more affordable, long-term solution.
- Desired downtime: Evaluate how quickly you need access to the area. Some methods have longer curing times.
- Long-term expectations: Think about your long-term plans for the property. If you’re planning to sell soon, a quick fix might be sufficient.
- Soil/drainage issues: Check if there are underlying soil or drainage problems causing the heave. Some methods may not address these root causes.
- Surface condition: Consider the current state of the sidewalk. Cracks and other damage may affect which method is best.
- Traffic type: Determine if the area experiences pedestrian or vehicular traffic. This can impact load capacity needs.
- Environmental concerns: Think about the environmental impact of each method and whether that’s a priority for you.
Quick rule: The best method depends on your specific situation, so consider all factors before making a decision.
Durability and maintenance expectations
Each repair method has its own lifespan and maintenance requirements. Here’s what to expect:
Mudjacking: Typically lasts 5-10 years with proper maintenance. It may require occasional re-leveling due to settling or further soil movement.
Polyjacking: Offers longer durability, often lasting up to 20 years or more. However, it’s still susceptible to soil movement and may need periodic touch-ups.
Full replacement: Provides the longest lifespan, potentially lasting decades with proper installation and maintenance. It requires regular inspection for cracks and other damage.
When discussing warranties, ask about coverage for labor, materials, and any specific issues like settling or further heaving. Also, inquire about transferability in case you sell your property.
Safety, DIY Considerations, and Common Mistakes to Avoid
Safety comes first: uneven slabs create trip hazards, and soil issues can affect bearing. Use proper PPE and establish safe work zones to protect pedestrians. If you’re unsure, pause and call a professional.
Permits, codes, and accessibility rules matter for sidewalk work. DIY may be feasible for small, simple fixes, but complex subsurface issues or proximity to utilities usually demand a licensed contractor. Use clear criteria to decide when to DIY or hire out.
Common DIY pitfalls and red flags for hiring pros
Knowing what to avoid can save you time, money, and headaches. Here are common mistakes and warning signs when tackling sidewalk repairs yourself or hiring a pro.
- Inadequate base repair: Skipping fixing weak subgrade leads to repeated heaving. Always address the root cause.
- Improper lift: Overfilling or underfilling slabs results in uneven surfaces. Follow manufacturer guidelines for material amounts.
- Poor drainage fixes: Neglecting water flow can cause further damage. Ensure proper grading and slope.
- No insurance: Hiring uninsured contractors leaves you liable if something goes wrong. Always ask for proof of coverage.
- Vague warranty: A solid warranty protects your investment. Insist on clear details and duration.
- Lack of references: Check past work and customer satisfaction before hiring. Word-of-mouth is gold.
Remember, prevention is better than cure. Be proactive in spotting these pitfalls.
Safety, accessibility, and site-protection tips
Safety first: Wear a hard hat, eye protection, ear protection, and gloves. Keep pedestrians away from work zones with clear signage.
Utility locate: Before digging or drilling, call 811 to have underground utilities marked. It’s free and prevents accidents.
Protect your landscaping by laying down protective sheets around the work area. This keeps debris from damaging plants and makes cleanup easier.
Temporary barriers: During repair and curing time, use barriers to keep people off the sidewalk. This ensures a safe, even cure and prevents damage.
Homeowner Planning Guide — Costs, Contractor Vetting, and Inspection Checklist
Start by defining lift versus level goals and consider drainage improvements. Identify which repair method best fits your sidewalk condition. Clarity now saves surprises later.
Gather estimates with clear line items, check licenses and warranties, and confirm permit needs. An inspection checklist should document height, slope, cracks, drainage, utilities, and any upcoming landscaping concerns to inform the plan.
Cost breakdown items to request and compare
Before signing any contract, ensure you understand the cost breakdown. Here’s a checklist of items to ask for.
- Material: Ask for the type (mud or poly) and quantity needed.
- Labor hours: Understand how many man-hours are included in the estimate.
- Mobilization: Check if equipment setup, tear-down, and travel costs are included.
- Hole repair: Ask about patching or filling holes after lifting.
- Joint sealing: Ensure joints will be sealed to prevent water intrusion.
- Warranty: Inquire about the warranty period and what’s covered.
- Local variables: Verify local fuel, labor, and material costs aren’t inflated.
Quick rule: Don’t rely on a single number. Break down the estimate to understand where your money is going.
Tools & materials checklist and visual checkpoints
Before work begins, use this checklist to photograph visible signs of damage and validate contractors’ tools and materials.
- Cracks: Photograph crack widths and lengths. Ask contractors how they plan to address them.
- Height differences: Measure height differences across the sidewalk. Contractors should match these measurements post-repair.
- Slope issues: Check for any sloping or tilting. Contractors should level this out.
- Tools: Ensure contractors have proper lifting equipment (pump, hoses, etc.) and safety gear.
- Materials: Verify they’re using the agreed-upon material (mud or poly) and that it’s in good condition.
Quick rule: Regular inspections help ensure contractors are using the right tools and materials and following your agreed plan.
Conclusion
Careful assessment now pays off later: identify whether the issue is heave, lift needed, or full replacement so you pick the right path for safety, durability, and appearance. If you’re unsure after a quick check, or the sidewalk shows wide cracks, open joints, or sinking beyond a few inches, plan for a professional evaluation before you commit to a method or material.
To act, start with a simple, logical sequence: inspect the area and test small sections first, compare options (mudjacking, polyjacking, or replacement) against the extent of damage, check local codes and access, get a couple of clear quotes, and review the contractor’s safety plan and timing. Make sure any lifting is done gradually, test the new level against adjacent slabs, and verify proper drainage to prevent future heave. Don’t proceed on guesses—document measurements, surface cleanliness, and substrate conditions before and after any lift.
Common mistakes to avoid are trying a fix that’s too small for the problem, skipping a test lift in a visible area, or ignoring drainage and soil conditions that caused the issue in the first place. Always wear eye protection and gloves, keep bystanders away during lifting, and never work under a partially raised slab. If you’re tempted to DIY heavy lifting without proper equipment, or the job spans more than a few square feet or shows widespread damage, pause and reevaluate safety and feasibility.
If the signs point to large-scale movement, poor soil, or uncertain soil bearing, call in a contractor rather than pushing ahead solo. A pro can confirm the cause, choose the appropriate method, and ensure the job won’t compromise nearby walks or utilities. Stay practical, stay safe, and you’ll land on a lasting, cost-effective solution that looks right and stays right.
FAQ
What are the main benefits and drawbacks of mudjacking, polyjacking, and full replacement?
Mudjacking is usually cheaper and quicker but can fail if the soil is unstable or the voids are large. Polyjacking offers faster cures and less mess with lighter material, but it can be more expensive and may have limits on lift. Full replacement fixes the problem long-term but costs more and takes longer; it’s often used when the slab is severely cracked or too unstable to lift.
How do the repair methods compare in cost and what to expect?
Costs vary by location, slab size, and soil. Mudjacking generally costs less than polyjacking, while full replacement is usually the highest up front. For an accurate comparison, get quotes that itemize material, labor, access, and site preparation from local contractors.
What’s the typical process for mudjacking and polyjacking?
Mudjacking: drill holes, pump slurry under the slab, fill voids, and seal holes. Polyjacking: drill holes, inject polyurethane foam to lift and fill voids, then seal. Both need a stable access path and proper ventilation and safety during the job; follow manufacturer or contractor instructions for best results.
How durable are these repairs and what affects longevity?
Durability depends on soil conditions, load, and drainage. Mudjacks can settle again if the soil argument isn’t addressed; polyjacking often lasts longer but isn’t immune to shifting soil. If the slab has ongoing movement, replacement might be the only reliable option.