
Introduction
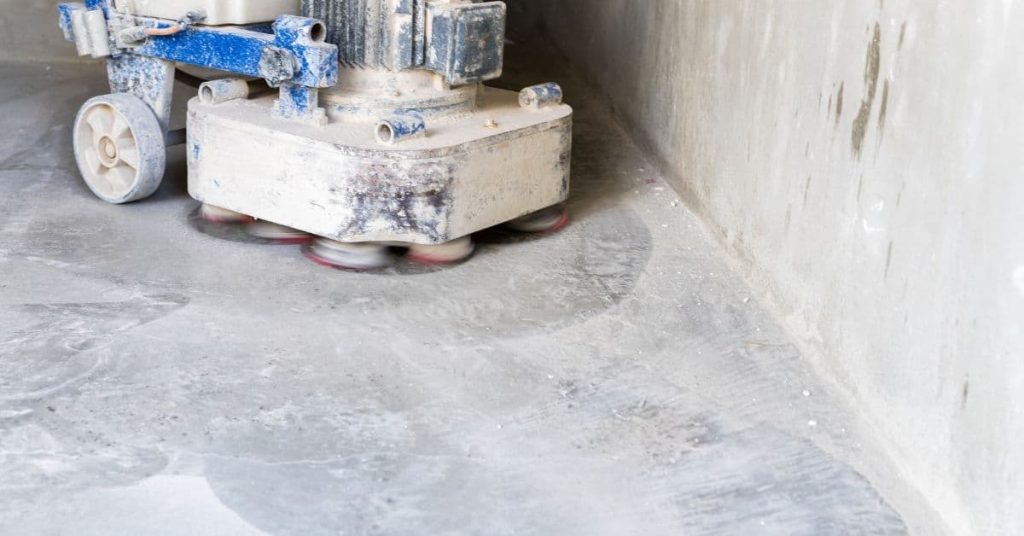
Grinding to fix trip hazards is removing small amounts of material from high spots so the surface becomes even. Do not remove more than necessary, since over-grinding can create new problems. Check the material, tool, and surface before you start, and follow manufacturer instructions and local rules.
Do small passes and check your progress often to avoid creating gouges or uneven edges. Use the right grinding tool, keep it flat to the surface, and work across the edge. If in doubt, stop and consult the product label, manufacturer instructions, or local building rules before proceeding.
Key takeaways
- Assess if grinding is appropriate before removal, considering edge geometry and substrate.
- Verify local regulations and ADA requirements before modifying floor surfaces.
- Measure trip height properly using consistent reference points and slow movements.
- Respect structural limits; stop grinding when you risk reducing strength or screed integrity.
- Use proper PPE and maintain dust control to protect yourself and neighbors.
- Document post-grind sealing and repairs for long-term performance checks.
Table of Contents
- Introduction
- Key takeaways
- When Grinding Is the Right Solution
- Regulations, ADA, and Municipal Policies to Check First
- How to Assess and Measure a Trip Hazard Correctly
- Safe Removal Limits and Structural Risks to Avoid
- Tools, Abrasives, PPE and Materials Checklist
- Step-by-Step Grinding Procedure for a Safe Repair
- Post-Grind Repairs, Sealing and Long-Term Prevention
- Visual Checkpoints and Quality-Assurance Criteria
- Conclusion
- FAQ
When Grinding Is the Right Solution
Decide based on the scope of the trip hazard and the material it sits on. If the surface is concrete and the rise is localized, grinding can smooth the edge without removing the entire slab. Compare this approach to lifting, shaving, or full replacement by considering cost, disruption, and the surface type.
Check product labels and manufacturer guidance for any surface limitations or safety notes. If in doubt, verify with local rules or a qualified pro before proceeding to ensure this method won’t compromise structure or drainage. Keep the goal in sight: reduce trip risk while preserving functionality and lifespan.
Appropriate scenarios for grinding
Grinding is your best bet when you’ve got small trip hazards. Think about these common cases:
Small offsets on concrete. If it’s just a little bump, grinding can smooth it out. But remember, you’re limited by the thickness of the slab.
Pavers with minor high spots. A bit of grinding can level them up. Just make sure the pavers are solid and not wobbly.
Thresholds causing tripping. If it’s a slight lip, grinding can take care of that. But be careful not to grind too much and weaken the threshold.
When grinding is not recommended
There are times when grinding just won’t cut it, safety-wise. Here are some red flags:
Exposed reinforcement. If you see rebar or wire mesh, stop right there. Grinding could damage them and cause bigger problems.
Deep cracks. Cracks that go deep into the slab need more than just a grind. They might need lifting or even replacement.
Undermined slabs. If the ground beneath has settled, causing the slab to dip or rise, grinding won’t fix that. You’ll need to lift and re-level it.
Roots or large differential heights. These are signs of serious issues underneath. Grinding won’t solve those problems. You might need to replace the whole slab.
Regulations, ADA, and Municipal Policies to Check First
Before grinding, confirm sidewalk or curb codes and permit requirements in your area. Some jurisdictions restrict how much you can remove or require inspections after work is done. ADA standards may influence edge profiles and ramp transitions that you must maintain.
Document the standards you verify and keep copies of any approvals or notes from the issuing authority. If you find conflicting guidance, seek clarification from the authority or a licensed professional. Use this step to prevent noncompliance that could trigger repairs or fines later.
Local Municipal Rules and Permit Requirements
Before you start grinding, check with your city or county’s sidewalk program. They’ll tell you what repairs are allowed and if you need any permits.
Some places require contractors to be registered. If you’re doing it yourself, make sure you understand the rules. Ignoring them could lead to fines or having to redo your work.
Permits might be needed for grinding sidewalks. Check with your local building department to find out.
ADA and Accessibility Considerations
Grinding can affect how people move around, especially those using wheelchairs or walkers. You need to make sure your work is up to ADA standards.
Transitions between surfaces should be smooth. Slopes shouldn’t be too steep. And you might need detectable warnings – those textured surfaces that let people know where one surface ends and another begins.
Check with the ADA or your local accessibility office to make sure your work is up to code.
Liability, Insurance, and Recordkeeping
If you grind too much, you could create a new trip hazard. That’s why it’s important to keep records of what you’ve done.
You should also understand who’s liable if someone gets hurt. It might be you, the homeowner, or both. Insurance can help protect you, but make sure you have the right kind.
Keep good records and consider getting liability insurance to protect yourself.
How to Assess and Measure a Trip Hazard Correctly
Start with a systematic walk and note every lift, crack, or edge that could catch a shoe. Use simple tools to measure perceived height differences and distances between surfaces. Prioritize hazards based on their frequency of use and risk exposure.
Document findings with a consistent method you can repeat. Define acceptance criteria in plain terms (for example, a smooth, continuous plane with no abrupt steps). If measurements seem unclear, verify using manufacturer guidance or local standards to set safe targets.
Step-by-Step Process
Follow these practical steps to assess and measure a trip hazard correctly, ensuring safety and accuracy.
- Preparation: Gather tools (straightedge, tape measure, level), wear safety gear (gloves, safety glasses).
- Safety Check: Ensure the area is clear of people and potential hazards before starting.
- Main Work: Use a straightedge to trace the hazard’s outline. Measure offsets with a feeler gauge or calipers, slopes with a level or inclinometer.
- Documentation: Photograph and record measurements, location, environmental conditions for future reference.
- Final Check: Verify your measurements are accurate and consistent before proceeding with any corrections.
Tools and measurement methods
Use these tools to quantify offsets and slopes accurately.
- Straightedge: Helps trace hazard outlines. Use a long, sturdy one for best results.
- Ruler/Feeler Gauge: Measures small offsets. A set of feeler gauges can help measure varying heights accurately.
- Level: Checks slopes. Use a 2-3 foot level for better accuracy on larger surfaces.
- Tape Measure: Measures distances and lengths. Retractable, locking tape measures are most convenient.
- Camera: Photographs hazards before and after work. A smartphone camera is sufficient for most jobs.
Mapping, photographing, and recording hazards
Use these templates to document trip hazards effectively:
Before/after photos: Take pictures from the same angle and distance. Include a reference object (tape measure, ruler) for scale.
Notes: Record location, measurements, environmental conditions, and any relevant observations.
Templates: Use simple sketch maps or apps to record hazard locations relative to your property. Some are free or low-cost.
Common threshold values to verify with local rules
Many jurisdictions have specific trip hazard thresholds:
Offsets: Commonly in the small millimeter to ~1/4–1/2 inch range. Check your local code for exact figures.
Slopes: Typically 1:48 or steeper. Again, check local codes for specifics.
Always verify these values with your local building department before proceeding with any corrections.
Safe Removal Limits and Structural Risks to Avoid
Understand that over-grinding can weaken a surface, expose reinforcement, or destabilize edges. Avoid removing material near joints or status points that carry load or help drainage. Plan to preserve sufficient thickness and structural integrity.
Learn to recognize signs of risk, such as exposed wire or hollow sounds, and stop if you encounter them. Check relevant guidance from product labels or installation manuals to determine safe depth limits. When in doubt, lean on conservative steps and consult a professional or inspector.
When grinding will expose reinforcement or weaken slabs
Before you start grinding, check for signs of underlying reinforcement. Look for any visible rebar, mesh, or wire in the concrete.
Use a magnet to sweep over the surface. If it sticks, there’s likely reinforcement beneath. Be cautious around these areas; grinding too deep can expose them and weaken the slab.
If you suspect thin slabs, consult an engineer before proceeding. They can assess the structural integrity and advise on safe removal limits.
Drainage, slope changes, and ponding risks
Removing material can change your slab’s surface slope. This can lead to water pooling or runoff onto adjacent properties.
Before grinding, check for existing drainage patterns. Look at how water flows after rain. If you’re unsure, wet the area to observe.
Be mindful of changes in slope. Too much removal can encourage ponding, creating new trip hazards and potential damage to your slab.
Creating new edge hazards and cracking
Grinding can leave sharp edges or unsupported thin sections. These become new trip points and can initiate cracks, creating more problems than you started with.
Pay close attention to edges and corners. Don’t grind too close to these areas. Leave a buffer to maintain structural integrity.
After grinding, inspect the area for any signs of cracking or new trip hazards. Address them promptly to prevent further issues.
Tools, Abrasives, PPE and Materials Checklist
Assemble a DIY-friendly set of grinders, appropriate grinding accessories, and depth-control aids. Distinguish between diamond cup wheels and flap discs by their intended use and material compatibility. Include dust control measures and basic repair materials for quick fixes after grinding.
Wear appropriate PPE and follow the manufacturer’s instructions for each tool. Verify any compatibility notes and safety warnings on product labels. If you’re unsure about a part or accessory, check the instructions or contact the maker for clarification.
Grinder types and wheel selection
Choose the right grinder and wheel for your surface type to avoid damage.
- Walk-behind grinders: Ideal for large, flat areas. Check if you have enough space to maneuver.
- Handheld angle grinders: Great for tight spots and edges. Ensure you’re comfortable with the weight and control.
- Concrete grinding wheels: Use for concrete surfaces. Confirm they’re diamond-impregnated for durability.
- Paver grinding wheels: For pavers, ensure they won’t damage the surface or grout lines.
- Asphalt grinding wheels: Suitable for asphalt. Check if they can handle the material’s flexibility.
- Depth-stop accessories: Attach to prevent over-grinding. Test before use to ensure correct depth.
- Diamond cup wheels vs flap discs: Cup wheels are slower but cooler; flap discs are faster but hotter. Choose based on your needs and surface type.
Quick rule: Always match the grinder and wheel to the surface type for best results.
PPE and dust control measures
Protect yourself and others from dust and debris during grinding.
- Safety glasses: Essential to protect eyes. Check they fit well and provide adequate coverage.
- Respirator or dust mask: Mandatory for breathing protection. Ensure it fits properly and is suitable for the task.
- Ear protection: Required for noise reduction. Test before use to ensure comfort and effectiveness.
- Gloves:</