
Introduction
Heat guns are handheld tools that soften paint with directed hot air while infrared paint removers heat a surface more evenly without open flames; choose by what you need to remove and the risks you can manage. For small, detailed work a heat gun gives control; for larger flat areas infrared can speed things up but watch for hidden hazards. Check product labels and local regulations for temperature limits, ventilation, and lead paint safety before starting.
Both methods are practical for a DIYer but they behave differently on old, thick, or potentially leaded finishes and around trim or fragile materials. Use heat guns when you need precision and can contain the heat, and consider infrared when you want less surface scorching and are prepared to shield nearby items and control dust; always verify safety instructions and wear proper PPE. If you suspect lead, follow local rules and testing procedures before any paint removal.
Key takeaways
- Choose heat gun for rapid spot work but monitor surfaces for scorching.
- Infrared paint removers excel on large flat areas with minimal surface contact.
- Always use eye, skin, and respiratory protection when heating coatings.
- Test heat exposure on an inconspicuous edge to judge finish impact.
- Ventilate workspace and keep flammable materials away from heat sources.
- Match method to substrate and finish goals before starting work.
- Document real-world case results to refine your heat-removal planning practices.
Table of Contents
- Introduction
- Key takeaways
- Quick Overview: What Heat Guns and Infrared Paint Removers Are
- Speed and Efficiency Comparison
- Risks and Safety Considerations
- Surface Suitability and Finish Outcomes
- Controlled Testing and Real-World Case Studies
- Tools, Materials Checklist and Setup
- Step-by-Step Procedures and Technique Tips
- Decision Framework: Which to Choose for Your Project
- Conclusion
- FAQ
Quick Overview: What Heat Guns and Infrared Paint Removers Are
Heat guns are handheld devices that direct convective hot air at a small area to soften or bubble up paint so it can be scraped away; infrared paint removers use directed radiant heat to warm coatings through electromagnetic waves without a moving air stream. Both rely on raising the coating’s temperature to break adhesion or baking chemistry loose, but they do it by different heat-transfer modes.
DIYers commonly use heat guns for small trim, doors, or tight spots, while professionals may choose larger infrared panels for stripping full doors, sash, or wide trim runs. Check product labels or the manufacturer instructions for safe operating distances and recommended material limits before you start.
How each tool works
The key to paint removal lies in heating the surface to break down the paint’s adhesion.
- Heat Gun: Uses forced hot air. It’s like a hair dryer on steroids, blasting heat onto the surface.
- Infrared Paint Remover: Emits radiant heat. It warms objects without direct contact, like how you feel the sun’s warmth before it reaches your skin.
- Heat Gun Effect: Directly heats the paint and substrate. Be careful with sensitive materials as it can warp or damage them.
- Infrared Effect: Penetrates deeper, heating both paint and substrate simultaneously. Less risk of warping but may take longer to work on thick paints.
- Optional Tools: Some models come with scrapers or attachments for easier paint removal once heated.
Typical features and what to check before buying or renting
Before investing in a tool, ensure it suits your needs. Here’s a quick checklist.
- Temperature Control: Adjustable heat settings for different paint types and surfaces.
- Wattage/Power: Higher wattage means more power and faster heating. But beware, too much can cause damage.
- Weight & Ergonomics: Lightweight with a comfortable grip for extended use without straining your arm.
- Cord Length: Long enough to reach all areas without needing an extension cord.
- Safety Features: Overheat protection, cool-touch handles, and automatic shut-off when dropped.
- Noise Level: Some tools can be loud. Consider ear protection if you’re sensitive to noise.
- Accessories: Scrapers, nozzles, or other attachments for different tasks.
- Rental Options: Check local rental stores for availability and pricing. It’s often cheaper than buying for one-time use.
Quick rule: Always prioritize safety features and comfort over raw power to prevent accidents and fatigue.
Speed and Efficiency Comparison
Heat guns often give faster, localized results on small areas because they concentrate high-temperature air onto a spot, though frequent repositioning and scraping adds time on large surfaces. Infrared units tend to be more efficient on larger, flat pieces because they heat through the coating more uniformly and let several layers soften simultaneously without constant moving.
Which one finishes faster depends on the job scale and access: test on a sample panel to compare actual cycle times and verify the manufacturer data sheet for heat output and recommended exposure times. For multi-piece work like stacked doors or window sashes, compare setup and cycle throughput rather than single-pass speed.
Time-to-strip by paint type and number of layers
Paint removal speed varies greatly depending on the type and number of paint layers. Here’s what to expect:
Heat Guns: Work faster on thin, water-based paints like latex. Thick, oil-based paints take longer.
Test a scrap piece first. Apply heat evenly, moving slowly. If it starts peeling quickly, you’re good to go. If not, adjust your technique or switch tools.
Surface geometry and access: flat vs detailed profiles
Tool efficiency changes with surface complexity:
Flat Panels: Both tools work well. Infrared might be faster due to its wider heat distribution.
Mouldings & Crevices: Heat guns win here. They can direct heat into tight spaces where infrared struggles.
Access matters too. If you can’t position the infrared tool close enough, it won’t work efficiently. Always check access before starting.
Risks and Safety Considerations
Heat guns carry a higher immediate fire risk and can scorch or ignite nearby materials because of their convective hot air and small high-temperature zone; they can also produce hazardous fumes when heating old coatings. Infrared removers reduce airborne particle movement but still generate toxic vapors and can overheat layers if panels are too close or left too long.
When working on old paint, especially suspected lead, follow local regulations and testing procedures and consult product safety sheets or local rules for containment and disposal requirements. Always use appropriate respiratory protection, have fire suppression ready, and verify ventilation guidance from the manufacturer instructions or safety data sheets.
Fire, scorching, and surface damage risks
Heat guns and infrared paint removers work by heating up the paint to make it easier to remove. However, this heat can pose risks if not controlled properly.
Scorching: Applying too much heat or leaving the tool in one spot for too long can scorch the surface. This is especially true on porous materials like wood. To prevent scorching, keep the tool moving and maintain a consistent distance from the surface.
Ignition: Heat guns can ignite flammable materials if they get too hot. Never use them near combustible materials or in areas with high dust concentrations. Infrared paint removers are less likely to cause ignition as they heat the paint indirectly, but they can still pose a risk if used improperly.
To minimize these risks, always monitor the temperature of your tool and keep it within the recommended range for your specific surface material. If you’re unsure, start with a lower setting and gradually increase the heat as needed.
Lead paint, fumes, and environmental toxicity
Older homes may contain lead paint. Disturbing this paint can release toxic dust and fumes into the air.
Lead Testing: Before starting any paint removal project, test for lead using a certified testing kit. If lead is present, consider hiring a professional abatement service or at least use specialized equipment to minimize exposure.
Containment: When working with lead paint, contain the work area using plastic sheeting and tape. This helps prevent lead dust from spreading throughout your home. Always wear a respirator rated for lead dust when working in the contained area.
HEPA Vacuums: Use HEPA vacuums to clean up any lead dust. Regular vacuums can disperse the dust back into the air. If you don’t have access to a HEPA vacuum, consider renting one. They typically cost around $50-$100 per day.
Personal protective equipment and ventilation
Proper PPE and ventilation are crucial to protect yourself from harmful fumes, dust, and chemicals.
- Respirator: Wear a respirator rated for the specific hazards you’re facing. For paint removal, a respirator with a particulate filter is usually sufficient. Make sure it fits properly and change the filters as needed.
- Goggles: Protect your eyes from splashes and debris using safety goggles or glasses with side shields.
- Gloves: Wear gloves to protect your hands from chemicals and heat. Choose gloves that are rated for the specific chemicals you’re working with.
- Ventilation: Ensure there’s adequate ventilation in the work area. This can be as simple as opening a window or using fans to blow fresh air into the room. For larger jobs, consider renting an industrial fan with a HEPA filter for around $100-$200 per day.
- Clothing: Wear long sleeves and pants to protect your skin from chemicals and heat. Consider wearing disposable coveralls over your clothing to keep it clean.
Surface Suitability and Finish Outcomes
Heat guns are good for detailed work on hardwood trim, intricate profiles, and small patches where you want to preserve edges, but they can leave scorch marks or raise wood grain if overheated. Infrared units usually produce a cleaner multi-layer lift on flat, thick components and tend to preserve substrate integrity better when used with correct spacing and cycle times.
Different substrates—softwoods, hardwoods, metal, and composite—react differently, so try a discreet scrap or test area and check the product label or manufacturer instructions for material compatibility. Expect more scraping and sanding after either method to reach a smooth finish and confirm how aggressive you need to be before finishing.
Wood and Furniture Finishes
Heat guns can raise the grain on wooden surfaces, so be prepared for extra sanding afterwards. Scorching is a risk with heat guns, especially on dark woods or pieces with intricate carvings. To preserve patina, use infrared paint removers instead. They work slower but won’t damage the wood’s natural beauty.
Tip: Always test your method on a hidden area first to check for any adverse reactions.
For best results, use gentle scraping or wire brushing after applying heat to remove loosened paint. Be patient; rushing can cause damage.
Metal, Masonry, and Synthetic/Composite Surfaces
Heat guns can warp metal or cause it to expand and contract unevenly, leading to warping. Infrared works better here as it heats evenly without causing these issues.
Note: Both methods may struggle with adhesion on masonry surfaces due to the paint’s strong bond. Consider chemical strippers for tough cases.
Synthetic and composite materials can melt or warp under high heat. Infrared is safer, but test first to ensure no damage occurs. For these surfaces, mechanical stripping might be your best bet.
Controlled Testing and Real-World Case Studies
Set up simple side-by-side tests on representative scraps: same substrate, same paint system, and compare cycle time, ease of removal, and surface damage for heat gun versus infrared. Record variables like distance, exposure time, and scraping effort so you can reproduce results and make a reliable decision for your project.
Common real-world outcomes show heat guns winning on tight detail but costing more time on large runs, while infrared often reduces labor on flat assemblies but needs more setup and handling care. If you lack data for your specific material or paint type, consult the manufacturer instructions or run small trials before committing to a full removal plan.
DIY time-and-quality test to run on a scrap piece
Before you tackle your whole project, do a test run. Grab a small, hidden scrap of the surface you’re working on.
For each tool, time how long it takes to strip a specific area. Note any scorching or damage. Clean up and see how easy it is.
Heat gun: It’s faster on thick paints but can scorch if left too long.
Infrared: Slower on thin paints, but less likely to damage the surface.
Interpreting results and common findings from DIYers and pros
After your test, compare notes. Here’s what to look for:
Speed: Heat guns usually win on thick paints. Infrared is slower but safer.
Surface impact: Infrared preserves the substrate better. Heat guns can scorch or damage if not careful.
Cleanup: Both tools require some elbow grease. Infrared might leave more residue on thin paints.
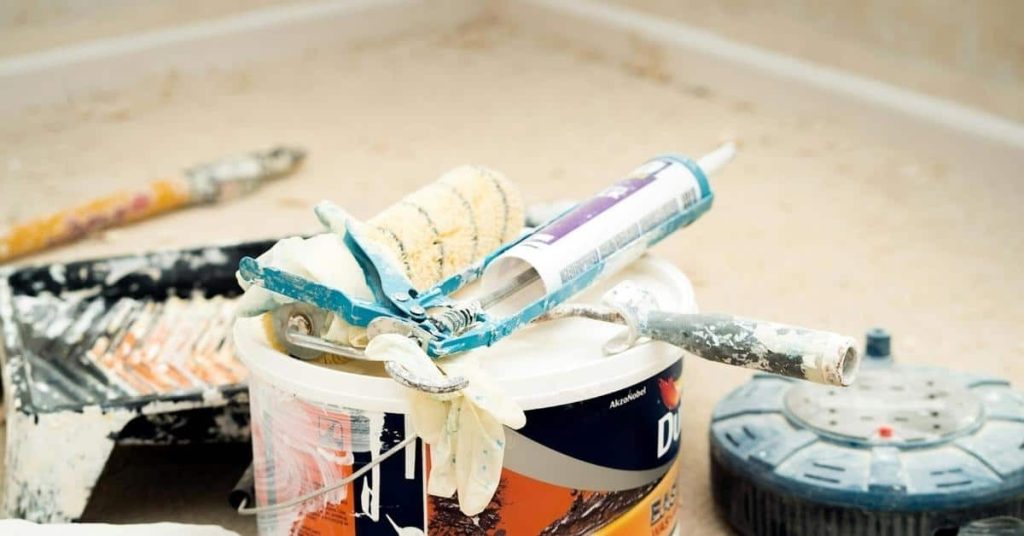
Tools, Materials Checklist and Setup
For heat-gun work gather the gun with multiple nozzles, assorted scrapers and putty knives, heat-resistant gloves, a respirator, drop cloths, and fire-extinguishing means; for infrared, add panels or racks, spacers, clamps, thermal-resistant barriers, and similar PPE. Include consumables like plastic sheeting for containment, masking tape, mineral spirits or recommended cleaners for residue, and sandpaper for finish prep.
Set up a well-ventilated, non-combustible work area with good lighting and a plan for waste containment and disposal that follows local rules; verify PPE and containment details on product data sheets or safety labels. Keep a clear escape path, a charged extinguisher nearby, and power access arranged to avoid tripping over cables.
Essential accessories for heat-gun projects
Before you start stripping paint with a heat gun, make sure you’ve got these essential accessories to improve control and outcomes.
- Nozzles: Use the right nozzle for your job. Flat nozzles are best for large, flat surfaces while concentrator nozzles are ideal for detailed work.
- Scrapers: Have a variety of scrapers on hand to remove loosened paint. Choose from straight, curved, or flexible blades depending on the surface profile.
- Heat-resistant pads: Protect surfaces and your hands with heat-resistant pads. They’ll keep you safe and prevent damage.
- Safe-hold fixtures: Use clamps, vises, or other fixtures to secure the piece you’re working on. This ensures safety and better control while stripping.
- Thermometer: Monitor surface temperature to prevent scorching. Ideal temp for paint removal is around 400°F (205°C).
- Timer: Keep track of time spent heating an area. Prolonged heat can damage surfaces.
- Gloves and safety glasses: Protect your hands and eyes from hot paint chips with heavy-duty gloves and safety glasses.
Quick rule: Always use the right tool for the job. The wrong nozzle or scraper can lead to poor results or even damage.
Essential accessories for infrared removers
Infrared paint removal systems require specific accessories to work effectively and safely. Here’s what you need:
- Reflectors: Use reflectors to direct heat onto the surface. They come in various shapes and sizes, so choose one that fits your project.
- Stands: A sturdy stand will keep your infrared unit stable and at the right height for comfortable use.
- Scrapers: As with heat guns, have a variety of scrapers ready. Infrared systems often require wider blades to remove loosened paint efficiently.
- Thermocouple: This measures surface temperature. Keep it around 200°F (93°C) for optimal paint removal with infrared units.
- Timer: Just like heat guns, keep track of heating time to prevent damage.
- Gloves and safety glasses: Protect your hands and eyes from hot paint chips with heavy-duty gloves and safety glasses.
Quick rule: Always use reflectors with infrared units. Without them, you won’t get the heat concentration needed for effective paint removal.
Consumables, containment, and disposal supplies
To keep your workspace clean and safe while stripping paint, use these consumables, containment, and disposal supplies.
- Drop cloths: Protect floors and surfaces with drop cloths. They’ll catch falling paint chips and prevent mess.
- Masking tape: Use it to seal edges of drop cloths or to protect areas you don’t want to strip.
- Waste containers: Have separate containers for different types of waste (e.g., paint chips, rags).
- Rags and paper towels: Use these to wipe up spills and clean up after scraping.
- Trash bags: Line your waste containers with trash bags for easy disposal.
- Disposal approach: Check local regulations for paint waste disposal. Often, it needs to be dried out before going in the trash or being taken to a hazardous waste facility.
Quick rule: Always contain and separate your paint waste. This keeps your workspace clean and makes disposal easier.
Step-by-Step Procedures and Technique Tips
For heat guns: start at the lowest effective temperature, hold the nozzle at a steady distance, work in small sections, scrape as the paint softens, and back off heat if smoke appears or the substrate darkens. For infrared: lay out panels or position the lamp per the manufacturer instructions, allow even warm-up, peel or scrape softened layers, and rotate or flip pieces as required for uniform results.
Key jobsite tips include keeping tools moving to avoid hotspots, using the right scraper edge for the profile, protecting nearby surfaces with heat shields, and doing a test strip to dial in technique. If anything in the procedure is unclear for your tool model, check the manual or product label before proceeding.
Step-by-Step Process
This section guides you through the entire paint removal process, from preparation to cleanup.
- Inspect surface for damage or instability. If unsure, consult a pro.
- Put on PPE and set up ventilation as explained in the earlier sections.
- Test your chosen method (heat gun or infrared) on a scrap piece to ensure it works safely and effectively.
- Maintain a consistent pace while working. Don’t rush to avoid mistakes.
- After removing paint, clean up properly, dispose of waste responsibly, and perform final checks.
Using a heat gun safely and effectively
Position the heat gun about 2-4 inches away from the surface. Move it steadily back and forth, keeping the nozzle in constant motion to avoid overheating.
Never leave the heat gun stationary on one spot for more than a few seconds. Scrape paint after it starts bubbling but before it hardens again.
Allow surfaces to cool between passes. This helps prevent warping and ensures you’re working with a stable surface.
Using an infrared paint remover safely and effectively
Position the infrared device firmly against the surface. Apply steady, even pressure to maximize heat transfer.
Leave it in one spot for about 10-20 seconds (dwell time), then move it to the next area. This allows the paint to soften without damaging the substrate.
Scrape paint immediately after removing the device. The paint should lift easily, but if not, repeat the process briefly before scraping again.
Combining methods: hybrid workflows and when to switch
For large areas with multiple paint layers or different surface types, consider starting with the heat gun for faster initial removal.
Once you’ve removed the bulk of the paint, switch to infrared for more precise work around edges, details, and on sensitive surfaces like metal or masonry.
If you encounter tough spots that resist both methods, it might be time to call a pro. Don’t force it; safety first.
Decision Framework: Which to Choose for Your Project
Base your choice on project size, access, substrate sensitivity, and contamination risk: pick a heat gun for intricate areas and touch-ups, and consider infrared for multiple flat pieces where throughput and substrate preservation matter. Factor in containment and regulatory requirements, especially if testing suggests lead or other hazardous coatings are present.
Create a short checklist: test area results, safety and ventilation readiness, waste plan, and required PPE, then choose the method that meets those conditions while delivering the finish you need. When in doubt about hazardous materials or specific tool limits, consult product documentation or local rules before starting.
Quick project checklist (size, paint type, lead risk, finish goals)
Use this one-page decision checklist to match your project’s attributes to the preferred method – heat gun or infrared paint remover.
- Project size: Small areas (< 10 sq. ft.)? Heat gun is quicker.
- Paint type: Latex or water-based paints? Infrared works better.
- Lead risk: High risk (old homes, unknown paint history)? Use heat gun for lower contamination risk.
- Desired finish: Smooth surface needed? Infrared provides a better finish.
- Time constraint: Tight deadline? Heat gun is faster but requires more effort.
- Budget: Limited funds? Consider rental costs and DIY approach.
- Accessibility: Hard-to-reach areas? Infrared’s portability helps.
- Safety concerns: Near flammable materials? Infrared is safer.
Quick rule: If you’re unsure, start with a small test area using both methods to see which works best for your specific project.
Budget, rental vs buy, and when to hire a pro
Consider these cost factors, rental thresholds, and red flags when deciding between DIY heat gun or infrared paint removal, renting equipment, buying, or hiring professionals.
Renting: Ideal for one-time projects. Rental costs vary but expect around $50-$100 per day for each tool.
Buying: Cost-effective if you plan to use the equipment frequently. Heat guns range from $20-$70, while infrared removers start at $300 and go up to $800.
Hiring professionals: Consider if your project is large, complex, or involves lead-based paint. Pros charge around $1-$4 per sq. ft., depending on the region and job specifics.
Visual checkpoints and quality control: how to know the job is done
Use these visual and tactile cues to confirm complete paint removal and substrate readiness for refinishing.
- Color: Substrate should match its original color or be completely bare. Any remaining paint indicates incomplete removal.
- Texture: Surface should feel smooth, with no raised edges or residual paint. Rough spots need reworking.
- Adhesion: Lightly scratch the surface to check for any remaining paint layers. They should not flake off.
- Edges: Check corners and hard-to-reach areas for complete removal. These spots often get overlooked.
- Cleanliness: Substrate should be clean, with no visible residue or debris. Wipe with a damp cloth to check.
Quick rule: Inspect your work thoroughly and from different angles to ensure complete paint removal and a smooth surface ready for refinishing.
Conclusion
Choosing between heat guns and infrared paint removers comes down to the project, the material you’re dealing with, and your willingness to work carefully. When you respect heat limits and test on a small patch, you protect the surface, get a clean finish, and avoid costly mistakes.
Begin with a quick, practical check: verify the surface compatibility, run a test patch in a hidden spot, and confirm you’ve got the right tool settings and safety gear before you touch paint. Move in deliberate passes, keep the heat moving across the area, and stop as soon as you see the paint blistering or softening—don’t dwell in one spot. Protect nearby materials, have a clear plan for how you’ll handle softened edges, and document your results so you can adjust your approach if needed.
Common mistakes to avoid are overheating a spot, which can scorch wood or warp panels; neglecting to shield surrounding surfaces or wiring; and skipping a test patch that would reveal how the finish will react. Use the patience and discipline you’d expect on a critical job: never push beyond recommended temps, always ventilate, and keep a fire-safe area clear. If you’re unsure about the substrate or if the paint lines extend into tricky areas, stop and reassess.
If the job involves delicate finishes, old linings, or large areas, or if you’re not confident in your ability to manage heat control, it makes sense to call a professional. Otherwise, stay focused, follow your test results, and work methodically. With the right approach and steady hands, you’ll finish cleanly while keeping safety at the front of every move.
FAQ
How do I decide which tool is safer for painted exterior surfaces?
Read the surface label and the tool instructions. Start with the tool set on a low heat or the gentlest infrared setting and test a small area first. If you see discoloration, scorching, or melted finish, stop and switch approaches.
What signs indicate heat damage to wood or siding when using heat guns?
Watch for raised grain, dark spots, or bubbles in the paint. If the substrate starts to look scorched or the surface texture changes, pause and reassess. Stop immediately if you see smoke or a strong burning odor.
How should I prep the surface before using either tool?
Clear the area, remove loose debris, and cover nearby materials that could be damaged. Use a scraper to loose the worst of the coating first, then test a small area with your chosen tool. Follow the manufacturer’s instructions for any required PPE on the label.
What are the common mistakes to avoid during removal and cleanup?
Don’t rush along edges or corners; heat can jump and scorch adjacent material. Don’t apply the tool too close or stay in one spot too long. Always cool and inspect the surface after each section before continuing.