
Introduction
Form tie holes on concrete walls are the small openings left where form ties passed through the forms, and cleaning and filling them correctly prevents staining and “halos” after you seal the wall. For a DIYer that means choosing a compatible fill material, preparing the hole and surrounding concrete, and using application techniques that avoid trapped moisture or excess sealant. Check product labels and manufacturer instructions for compatibility and cure times before you start.
Practical approaches range from tight-fitting plugs and non-shrinking patch mortars to flexible sealants and grout-like fills, with the choice driven by how the wall will be finished and whether the surface will be exposed to weather. Prep, tool control, and allowing full cure before sealing are the things that stop halos; if you’re unsure about a product or local requirements, consult the label or local building rules. Plan simple maintenance: inspect sealed holes after the first wet season and re-seal any spots showing moisture or staining.
Key takeaways
- Identify all form tie holes and assess surrounding damage before repairs.
- Choose fill materials compatible with concrete and sealant systems used.
- Use clean, dry fill compound and pack from bottom to reduce voids.
- Apply sealant in stages, allowing curing time to minimize halo.
- Prefer multiple sealant methods and test on a hidden area first.
- Wear eye protection, respirator, gloves; maintain ventilation and avoid dust.
- Monitor treated walls for cracks and haloing during initial months.
Table of Contents
- Introduction
- Key takeaways
- What Form Tie Holes Are and Why Haloing Happens
- Planning and Site Assessment Before Repair
- Tools, Materials, and Eco-Friendly Alternatives
- Step-by-Step Clean Fill Technique to Avoid Haloing
- Sealing Methods That Minimize Haloing
- DIY Solutions Vs Professional Products and When to Hire a Pro
- Evaluating Results and Routine Maintenance
- Safety, Common Mistakes, and Environmental Impact
- Conclusion
- FAQ
What Form Tie Holes Are and Why Haloing Happens
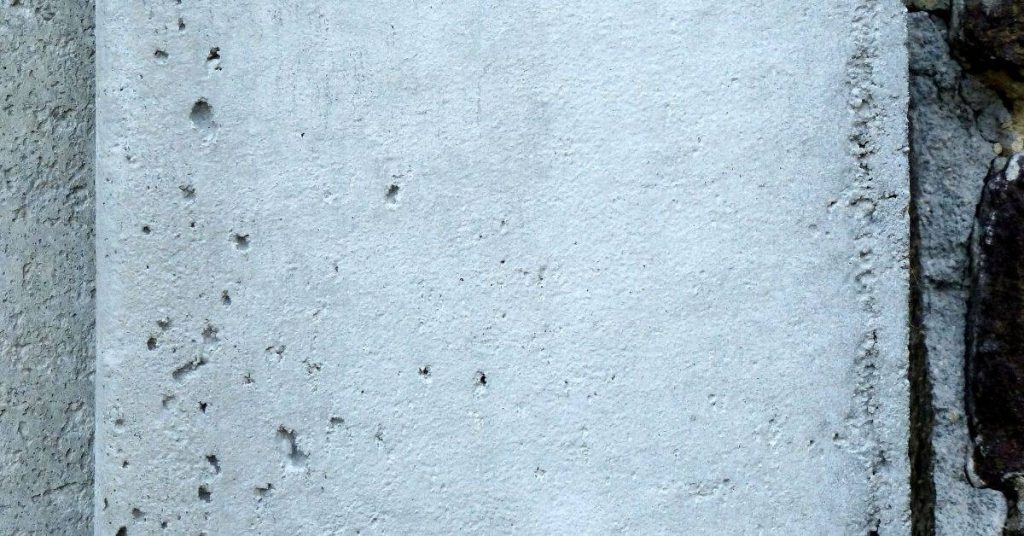
Form tie holes are the circular or elongated voids left where the temporary ties passed through concrete formwork; they appear on the face of cast walls and are distinct from cracks, bugholes, or intentionally cut openings. These holes expose concrete mortar and sometimes embedded oils or release agents from the formwork.
Haloing occurs when residual form oils, migrating moisture, soluble salts, or differences in pigment/aggregate interaction with a patch or sealer alter the appearance around the repair. Understanding which of those factors is active—by checking product labels, contractor notes, or simple surface tests—lets you choose cleaning, filler, and sealer methods that limit later discoloration and adhesion problems.
Anatomy of a form tie hole
A form tie hole is what’s left behind after removing forms from freshly poured concrete. It’s typically a small, round or oval hole, depending on the type of tie used – like tapered board, cone, or screw ties.
These holes can be contaminated with bits of wood, metal, or other debris from the formwork. They might also have residual form-release agents that make them look shiny or feel greasy to touch.
Understanding what’s left behind in these holes is key to cleaning and filling them properly. It helps prevent halos – those ugly discolored rings around repairs.
Mechanisms behind haloing and staining
Halos happen when moisture, soluble salts, and form-release agents move through the concrete. Here’s how:
– Bleed water rises to the surface during curing. It carries with it any soluble salts (efflorescence) and residual form oils.
– These contaminants get pushed towards the edges of repairs as the concrete dries and shrinks.
The result? A discolored ring – a halo – around your repair. The color can vary: brown, gray, or even white if it’s just efflorescence.
Surface absorption plays a big role too. If the surface is too porous, contaminants can wick back into the concrete, making halos worse.
And here’s where sealants come in. They can trap moisture and contaminants under them, causing halos to appear even after sealing.
Planning and Site Assessment Before Repair
Start with a structured condition check of the wall: note exterior vs interior exposure, existing form-finish texture, nearby cracks, and any interior finishes behind the wall; document findings with photos and a quick sketch. Record visible salts or stains and mark suspect tie holes for testing.
Assess active moisture and weather timing using a moisture meter or relative-humidity readings and avoid repairs during active rain, freeze-thaw events, or when humidity is high; verify cure-stage and manufacturer timing before sealing. Also confirm permit needs and align repairs with finish schedules so painting, staining, or trade sequencing won’t trap moisture or cause rework.
Choosing the right form tie type and hole strategy
The first step in repairing form tie holes is choosing the right approach. It depends on the size of the holes, the type of tie system used, and your desired final finish.
Small holes (less than 1/2 inch): These can often be filled with a concrete patching compound or a two-part epoxy filler.
Large holes (greater than 1/2 inch) or visible tie systems: Here, you might need to use a two-stage repair. First, fill the hole with a backer rod and caulk, then apply a concrete patching compound or mortar.
Checklists for timing, temperature, and substrate readiness
Before you start repairing form tie holes, use this checklist to ensure the right conditions. It’s crucial for a successful repair that lasts.
- Concrete curing: Wait until the concrete has cured for at least 28 days before starting repairs. This ensures the concrete is strong enough and won’t absorb moisture from the fill materials.
- Ambient temperature: The ideal range is between 50°F to 90°F (10°C to 32°C). Too cold or too hot can affect adhesion and curing time.
- Relative humidity: Keep it below 85% to prevent excessive moisture buildup, which could lead to haloing or staining.
- Moisture content in the substrate: Use a moisture meter or hygrometer to check. If it’s above 15%, wait until it drops or consider using a moisture-tolerant repair material.
- Efflorescence: Check for salt deposits on the surface. If present, clean them off before starting repairs to prevent staining.
- Weather forecast: Avoid repairing during active rain or freeze-thaw periods to prevent water intrusion and adhesion issues.
- Concrete surface preparation: Ensure the area is clean, dry, and free of contaminants. Any dirt, grease, or other substances can hinder adhesion.
- Test patch (if unsure): If you’re uncertain about any aspect, perform a small test repair to confirm your chosen materials work as expected.
Quick rule: Always prioritize safety and wait for the right conditions before starting repairs. Rushing can lead to costly mistakes.
Tools, Materials, and Eco-Friendly Alternatives
Gather durable hand tools (wire brushes, chisels, trowels), mixing gear, caulking guns, and PPE—gloves, eye protection, and a respirator when using epoxies or strong solvents—and plan ventilation for enclosed work. Keep dedicated brushes and clean rags for oil removal to avoid cross-contamination.
Choose materials by application: cementitious patch for nonstructural cosmetic fills, epoxy or urethane for structural or moisture-sensitive fills, and a compatible penetrating or film-forming sealer for final protection. Check manufacturer data sheets for compatibility and consider low-VOC sealers, recycled-content fillers, or sustainable cement blends as greener options while following disposal rules.
Materials needed for clean fill and sealing
The right materials ensure a smooth, durable repair that won’t halo after sealing.
- Bonding Agents: Enhance adhesion between old and new concrete. Pros: Improved bond strength. Cons: Can be messy if not applied correctly.
- Fill Mortars (Cementitious Patch): Recommended for non-structural repairs. Pros: Easy to apply, cost-effective. Cons: Not suitable for structural repairs or high-traffic areas.
- Epoxies/Urethanes: Ideal for structural repairs and high-traffic areas. Pros: Strong bond, durable. Cons: More expensive, requires proper ventilation during application.
- Topcoat Sealants: Protects repaired area from moisture and stains. Pros: Prevents halos, enhances appearance. Cons: Incorrect choice can lead to staining or weak bond.
- Low-VOC Sealants (Sustainable): Reduces environmental impact and improves indoor air quality. Pros: Eco-friendly, healthier for users. Cons: May have limited color options.
Tools and personal protective equipment
The right tools and PPE ensure a safe, efficient repair process.
- Wire Brush: Cleans form tie holes. Specs: Stiff bristles for concrete surfaces. Tip: Use with a drill for faster cleaning.
- Mixing Paddle: Blends fill materials. Specs: Compatible with your drill’s chuck. Warning: Avoid over-mixing to prevent air bubbles.
- Trowel/Caulking Gun: Applies fill and sealants. Specs: Size depends on hole diameter. Tip: Use a flexible trowel for better control.
- Respirator: Protects from harmful fumes (epoxy/urethane). Specs: NIOSH-rated filter. Warning: Always use when working with chemicals.
- Safety Glasses/Jaw Protection: Shields eyes and face from debris. Specs: ANSI-approved. Tip: Wear both for full protection.
- Work Gloves: Protects hands from chemicals and rough surfaces. Specs: Durable, flexible material. Warning: Avoid gloves with poor grip in wet conditions.
Step-by-Step Clean Fill Technique to Avoid Haloing
Begin by removing loose concrete, dust, and any form-oil residue using mechanical cleaning and an appropriate cleaner; aim for a sound, textured surface and confirm dryness or existing moisture levels per product guidance. For oil stains, follow label instructions for degreasing and rerun cleaning until no visible residue transfers to a white rag.
Select a filler compatible with the concrete and the chosen sealer, pre-wet or prime the hole if required, and apply in thin passes, feathering edges to blend with surrounding masonry. Let the fill cure per manufacturer directions under controlled humidity and temperature, then sand or dress flush before doing a small patch seal test to confirm color and adhesion before full sealing.
Step-by-Step Cleaning Process
Follow these practical steps to clean and prepare form tie holes for a seamless, halo-free repair.
- Safety first: Put on gloves, goggles, and a dust mask. Tape off surrounding areas to protect from debris.
- Remove loose concrete and dust using a wire brush or shop vacuum. Be thorough but gentle to avoid damaging the substrate.
- Check moisture content with a dampness meter. Aim for 12-15% for patch adhesion. If it’s too dry, mist lightly; if too wet, let it dry naturally.
- Inspect surface roughness. It should be slightly rough like 80-grit sandpaper for good patch adhesion. Lightly abrade with a diamond blade or grinding tool if needed.
- Wipe away form tie residue and any remaining dust with a damp cloth. Let it dry before proceeding.
Cleaning and preparing the hole
Thorough cleaning is key to prevent haloing. Use these methods to remove contaminants:
Mechanical: Brush away loose material with a stiff-bristle brush or wire brush. For tougher spots, use a pressure washer with a wide-angle nozzle.
Chemical: Solvent wiping is effective for removing oils and laitance. Use a suitable solvent like acetone or lacquer thinner on a clean cloth, then wipe the hole’s surface. Be sure to follow safety guidelines when handling solvents.
For salt efflorescence, use a solution of muriatic acid (1 part acid to 5 parts water) applied with a brush, then rinse thoroughly and let dry.
Filling, compacting, and profiling the repair
Proper placement and consolidation ensure a strong bond between patch and parent concrete:
Mix your chosen patch compound according to manufacturer’s instructions. Pre-wet or prime as required for better adhesion.
Apply in thin passes using a serviceable putty knife or trowel, feathering edges to blend with the surrounding wall. Overfill slightly to accommodate shrinkage during curing.
Compact the fill using a vibrating tool or by tapping gently with a hammer and a suitable chisel. This removes air pockets and ensures a dense fill. Once cured, lightly sand or grind flush with the parent concrete’s surface.
Curing and preparing for the final seal
Proper curing prevents haloing by allowing the patch to hydrate evenly:
Follow product guidelines for covered curing or gentle misting. Keep humidity between 70-85% and temperature around 70°F (21°C) during cure time, extending it if ambient conditions slow hydration.
Once cured, lightly sand any high spots with fine-grit sandpaper to ensure a smooth surface for sealing. Wipe away dust with a damp cloth and let dry.
Before applying the sealer, perform a halo-prevention check: verify color match, edge feathering, and blot test (apply a small amount of sealer, let it sit briefly, then wipe off; if it leaves a residue, you may need to sand lightly again).

Sealing Methods That Minimize Haloing
Decide between penetrating sealers, which soak in and preserve texture, and film-forming sealers, which create a surface layer; each has different halo risks depending on how they interact with residual salts, oils, or patch materials. For many spot repairs, a targeted local seal with a compatible chemistry reduces the area affected and limits appearance changes.
Control film thickness when using coatings to avoid buildup that highlights edges—follow manufacturer guidance and test a small area first. Always run a compatibility check between patch and sealer on an inconspicuous spot and confirm substrate dryness and cure time before applying the final coat to reduce the chance of haloing after the sealer cures.
Selecting sealants for appearance and durability
Choosing the right sealer is crucial to minimize halos. Here’s a quick rundown:
Cementitious topcoats are cheap, breathable, but can stain if not fully cured.
Silanes/siloxanes offer excellent waterproofing and stain resistance, but may appear shiny or change wall color slightly.
Acrylics provide good appearance match, flexibility, but less durability. Epoxies are durable, stain-resistant, but can yellow over time.
Application best practices to prevent bleed and migration
Proper application technique is key to preventing sealant migration:
Edge feathering ensures a smooth transition from sealed to unsealed areas. Mask off adjacent surfaces for clean lines.
Dilution can help control film thickness, but be careful not to compromise performance. Always test on small patches first.
Allow sealants to cure according to manufacturer’s guidelines before exposing to moisture or heavy traffic to prevent discoloration.
DIY Solutions Vs Professional Products and When to Hire a Pro
DIY kits can work for small, nonstructural tie-hole repairs if you follow product instructions closely, but professional-grade systems and contractors offer higher performance for structural fills and complex finishes. Compare long-term maintenance and the likelihood of rework when choosing between a consumer kit and contractor materials.
Hire a pro when the wall has hidden cavities, structural concerns, complex form finishes that must match, or when warranties and documented moisture control are required. If in doubt about structural loads, complicated waterproofing, or persistent moisture sources, get a licensed contractor or engineer to evaluate the situation.
Cost, performance, and warranty trade-offs
DIY repair kits are usually cheaper upfront. But consider long-term costs. Lower-quality fills may shrink or crack over time, leading to rework and more sealing issues.
Professional-grade systems cost more but offer better durability and performance. They’re designed for heavy-duty use and come with warranties that DIY kits often lack.
For small, non-structural holes, DIY kits might suffice. But for critical areas or long-term peace of mind, professional systems are worth the investment.
Signs you should hire a professional
If your wall has large holes, it’s best to call in a pro. They can assess structural integrity and fill cavities safely.
Ongoing leaks or signs of water damage indicate a bigger problem. A professional can identify the source, fix it, and prevent future issues.
Complex architectural finishes or form-tinish coatings require expertise to match. Pros have experience working with these surfaces and can ensure your repair blends seamlessly.
Evaluating Results and Routine Maintenance
After the repair cures, inspect visually for discoloration, halos, cracking, and signs of efflorescence, and run a small adhesion check by tapping or gently prying a corner of the patch. Perform a short water spray or bucket test to confirm water resistance at the repair site.
Keep a simple maintenance log and inspect repairs after seasonal shifts; clean deposits and reseal when the sealer shows wear or loss of repellency per the product’s guidance. If halos recur, document conditions and consider re-cleaning and testing alternate cleaners, fillers, or sealers before wide-area work.
Visual and performance checkpoints
Use this checklist after curing to spot early issues with your concrete repairs.
- Haloing: Look for discoloration or rings around fill holes. This indicates seal failure.
- Cracking: Check for hairline cracks, especially at edges of fills. Cracks can compromise water resistance.
- Delamination: Gently tap filled areas. A hollow sound may indicate delamination from the substrate.
- Efflorescence: Inspect around fill holes for white, powdery deposits. This could signal moisture issues.
- Surface sticking: Try to gently pull off any debris or dirt. If it sticks, you may have a surface adhesion problem.
- Adhesion test: Gently pry at fill edges with a flathead screwdriver. No movement indicates good adhesion.
- Water resistance test: Spray filled areas briefly with water. Check for absorption or beading issues.
- Seal integrity: Inspect sealed areas for any signs of peeling, bubbling, or delamination.
Quick rule: Address minor issues promptly to prevent them from worsening and requiring major resealing work.
Maintenance schedule and touch-up procedures
Regular inspections and quick touch-ups can extend the life of your concrete repairs.
Inspect repaired areas quarterly, or after significant weather changes. This helps catch minor issues early.
For small failures, like hairline cracks or minor haloing, perform a quick touch-up:
– Clean and prepare the area as you did originally.
– Apply a thin layer of compatible sealant.
– Allow it to cure according to manufacturer’s instructions.
Resealing is typically needed every 3-5 years, depending on your sealant product. Keep records of these touch-ups and resealings for future reference.
Safety, Common Mistakes, and Environmental Impact
Follow basic jobsite safety: use gloves, eye protection, and respirators as required, work in well-ventilated areas, and consult product SDS for chemical hazards and first-aid measures. For confined spaces or elevated work, add appropriate rescue and fall-protection precautions.
Common mistakes that promote halos include inadequate cleaning, using incompatible sealers, and sealing over active moisture or salts; avoid these by testing materials, following labels, and running small trial patches. Prefer low-VOC or water-based products when possible and follow local disposal rules for leftover material and contaminated rags to minimize environmental harm.
Common mistakes to avoid
To achieve a halo-free finish, steer clear of these common pitfalls.
- Insufficient cleaning: Dirt and contaminants prevent proper adhesion. Clean holes thoroughly before filling.
- Incompatible materials: Using incompatible fillers or sealants can cause halos. Always check compatibility.
- Poor curing: Inadequate cure time allows moisture to escape, leading to halos. Follow manufacturer’s guidelines.
- Applying sealant over contaminants: Any residue on the surface will show up as a halo. Ensure surfaces are clean and dry before sealing.
Preventing these mistakes ensures a smooth, lasting finish.
Environmental and disposal considerations
Consider the environmental impact of your materials and practices:
Low-VOC products: Prefer low-volatile organic compound (VOC) sealants to reduce air pollution. Water-based alternatives are also eco-friendlier.
Recyclable materials: Opt for fillers made from recycled or renewable resources where possible.
Proper disposal is crucial: Follow local regulations for chemical waste, minimize runoff and waste on site, and consider using recyclable packaging.
Conclusion
Focus on the fundamentals: keep form tie holes clean, control haloing now, and you protect the wall for years. Safety, a solid seal, and a neat appearance all ride on the quality of your fill and seal work.
Check it this way: assess the site, gather the right tools and materials, test a small area first, prepare a clean fill that matches the wall, apply flush and seal with methods that minimize haloing, let it cure properly, then inspect and plan for routine maintenance. Do the work in logical steps, verify each stage before moving on, and document any tweaks for next time.
Common mistakes to avoid are rushing the fill, using the wrong substrate or sealant, skipping the test patch, and skipping safety gear. Keep your PPE on, work in good light, and never overwork the material—test small areas, clean as you go, and confirm the result before full-scale application. If you’re unsure about the substrate, the climate, or the sealing choice, pause and reassess rather than guessing.
If the hole pattern or condition is severe, or if you’ve tried the approach and still see haloing after sealing, don’t push on alone. A professional can evaluate structural implications and provide a durable, code-compliant finish. Stay practical, stay safe, and you’ll finish with a repair that looks good and lasts.
FAQ
What are the different methods to seal form tie holes after cleaning?
You can fill with quick-set or polyester filler, epoxy paste, or vinyl concrete patching compounds. Each method has its own look and work time, so pick one that matches your wall texture and how you plan to seal later. Check the product label for curing steps and any prep requirements.
What materials do I need for clean fill techniques?
Grab a filler or patching compound suitable for concrete, a putty knife or trowel, a damp sponge for smoothing, and a brush or cloth for finish touch-ups. You’ll also want a sealer that matches your repair choice and a suitable cleaner for the hole area. Always follow the manufacturer’s instructions and local guidelines.
What steps help prevent haloing after sealant application?
Prepare the surface well: remove dust, oil, and loose concrete. Apply the filler evenly and feather the edges to blend with the surrounding wall. Let each layer cure as directed and seal the area with a compatible sealant to reduce color difference.
How should I maintain concrete walls with sealed form tie holes?
Inspect for cracks or new voids after seasonal changes and touch up any recessed spots promptly. Clean regularly with a mild cleaner and water; avoid harsh scrubbing that can wear the repair. If haloing reappears, reassess sealant choice and surface prep per product instructions.