
Introduction
Form liner basics mean using flexible surface liners in concrete forms to shape texture and finish. They define the pattern you pull from the concrete and help control air pockets as the mix cures. We’ll cover how to choose liners, how they sit in the frame, and what to look for during setup.
To get consistent texture, work the liner into the frame cleanly and press evenly with the concrete pour. Watch for trapped air and use careful lifting, tapping, and lift-off methods to minimize bubbles. If you see rough patches or dimples, check liner fit, gasket seals, and material compatibility, and adjust methods accordingly.
Key takeaways
- Choose form liner material suited to texture goals and cure room conditions.
- Match liner texture to concrete mix and pour rate for uniform finish.
- Inspect liners for defects; replace warped panels to prevent pattern shifts.
- Compact and tap forms to minimize trapped air pockets during pour.
- Use proper venting and air release practices along with steady vibration; wear PPE.
- Document texture tests and inspection notes to guide future form liner choices.
Table of Contents
- Introduction
- Key takeaways
- What Is a Form Liner and When to Use It
- Types of Form Liners and Material Properties
- Tools and Materials Checklist
- Planning and Design Considerations for Optimal Results
- Surface Preparation and Liner Installation
- Application Process: Mixing, Pouring, and Air Management
- Understanding Trapped Air: Causes and Visual Patterns
- Techniques for Achieving Consistent Texture and Quality Control
- Conclusion
- FAQ
What Is a Form Liner and When to Use It
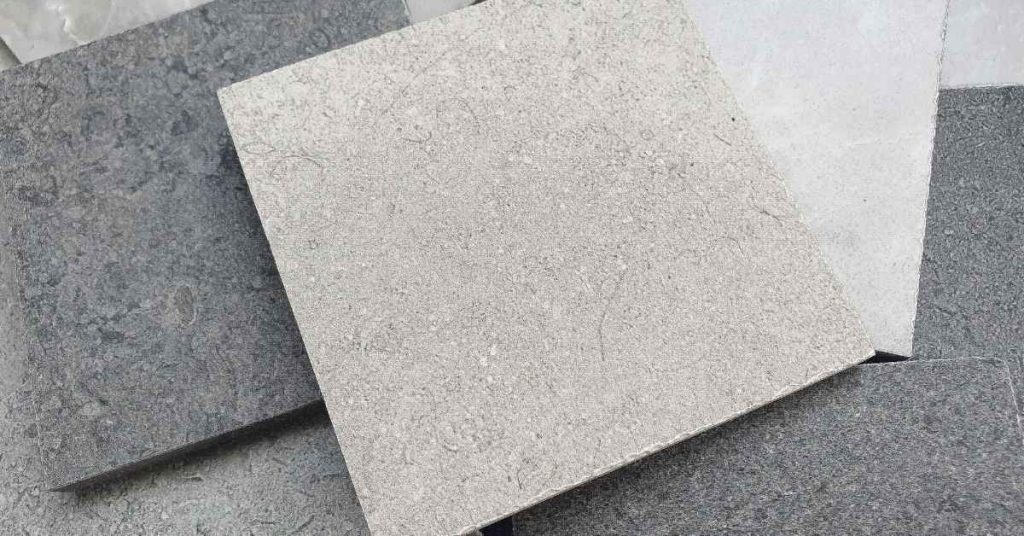
A form liner is a textured surface applied inside a mold to shape the visible skin of concrete. It can be made from rubber, silicone, plastic, or foam, with thickness that suits the project and mold system. Check the label or manufacturer instructions to confirm compatibility with your form setup.
Typical uses include architectural concrete, decorative panels, and precast elements. Designers seek textures or patterns that stay faithful to the design while remaining durable through handling and curing. Consider how texture fidelity, uniformity, and release behavior influence the final result and plan accordingly.
Definition and core functions
A form liner is a flexible, reusable material that creates the surface texture of concrete. It’s like a giant stamp for your concrete.
Liners come in different materials – rubber, silicone, plastic, foam – and thicknesses, usually between 1/8″ to 1/2″. They’re compatible with most mold systems.
Unlike one-off molds, liners create negative impressions. That means they leave a positive texture on your concrete. And because they’re reusable, you get consistent results across multiple pours.
Typical applications and benefits
Form liners are used in various projects. You’ll find them in architectural concrete for walls, floors, or countertops. They’re also great for decorative panels and precast elements like retaining walls or cladding.
The main benefit is the texture they create. Designers use liners to mimic natural stone, wood, or other materials. Or they might choose a geometric pattern for a modern look.
Liners help reduce surface defects and control air-trap behavior. They also influence release and curing by providing a smooth, even surface for the concrete to bond with.
Scale and production volume matter too. Liners are ideal for large projects or when you need consistent results across multiple pours. But they’re not always necessary for small, one-off jobs.
Types of Form Liners and Material Properties
Primary liner materials include hardboard or plywood textures, modular fiberglass or HDPE panels, silicone rubber or urethane liners, and built-up textures for plaster or concrete. Each type offers different edge detail, depth control, and texture fidelity. Review product data sheets to verify suitability for your texture goals.
Construction methods range from single-use to reusable panels and from modular systems to custom textures or inflatable options. Setup affects cycle time and consistency, so align choice with project scale and repetition needs. Consider how simple maintenance and cleaning impact reuse life and overall costs.
Common liner materials (rubber, urethane, silicone, plastic, foam)
Material choice significantly impacts your final texture. Here’s what you need to know about each.
- Rubber: Soft, flexible. Great for fine details and complex patterns. Avoid hard concrete mixes as they can crack the liner.
- Urethane: Tough, durable. Holds detail well under high pressure. Not ideal for deep textures due to demolding issues.
- Silicone: Soft, flexible like rubber but with better tear resistance. Ideal for intricate patterns and large format panels.
- Plastic (HDPE): Rigid, cheap. Good for simple textures and large-scale projects. Not suitable for fine details or complex shapes.
- Foam: Lightweight, easy to handle. Best for temporary or low-budget jobs. Not durable; expect replacements after a few uses.
Material specs and what to check
Before ordering, review these specs to ensure the liner suits your project needs.
- Durometer/Hardness: Check it matches concrete pressure. Too soft can distort; too hard may crack.
- Tear Strength: High tear strength prevents damage during demolding.
- Elongation: High elongation allows the liner to stretch and release from complex shapes.
- Temperature Resistance: Ensure it can handle cure temperature. Too low may crack; too high may distort.
- Chemical Resistance: Check against your concrete mix, sealers, and curing compounds.
- Thickness: Thicker liners last longer but may require more release agent.
- Surface Finish: Smooth surface reduces trapped-air patterns. Textured surfaces can telegraph onto the concrete.
- Release Agent Compatibility: Ensure your release agent works with the liner material to prevent bonding.
Quick rule: If in doubt, consult the supplier or test a small batch first.
Tools and Materials Checklist
Identify must-have items such as a mixer, trowels, release agent, form release wax, molds, a level, and measuring tools. Add optional tools like a vacuum, air removal devices, a vibration pad, or an air blower to help minimize trapped air. Tailor the list to your texture target and crew preference.
Organize the kit by workflow stages: surface prep, form setup, release prep, mixing, pouring, and curing. Include checks at each stage to prevent defects and maintain consistency. Keep substitutions in mind and note any compatibility concerns with sealers or additives.
Essential tools and consumables
Before you start casting, make sure you have all these essentials to ensure a smooth process.
- Concrete Mixer: To mix your concrete evenly. Inconsistent mixing can lead to trapped air and inconsistent texture.
- Trowels ( various sizes): For applying release agents, smoothing surfaces, and edging.
- Release Agent: To prevent the concrete from sticking to the form liner. Using the wrong agent can cause adhesion issues.
- Form Release Wax: For protecting and releasing forms. Skipping this can result in damaged forms and stuck concrete.
- Molds/Forms: To shape your concrete. Inadequate form preparation can lead to trapped air and inconsistent texture.
- Level: To ensure a flat, even surface. An unlevel surface can cause air pockets and an uneven finish.
- Measuring Tools (tape measure, ruler): For accurate cutting and placement of forms and liners.
- Clamps: To secure forms in place. Loose forms can shift, causing trapped air and inconsistent texture.
- Sealants: To seal joints and prevent leaks. Leaks can cause air pockets and weaken the concrete.
- Brushes (various types): For applying release agents and cleaning surfaces.
Quick rule: Always inspect your tools before use to ensure they’re in good working condition. Damaged tools can cause defects in your final product.
Optional aids to prevent air entrapment and improve finish
These optional tools can help you achieve a better finish with fewer air pockets.
- Vacuum or Air Removal Tools: To remove excess air from the concrete before it sets. Trapped air can cause bubbles and weak spots in your concrete.
- Vibration Pad/Internal Vibrator: To help consolidate the concrete and release trapped air. Without vibration, air pockets can form and weaken the concrete.
- External Vibrators: For larger pours where internal vibrators aren’t feasible. Inadequate vibration can lead to trapped air and inconsistent texture.
- Air-Release Vents: To allow excess air to escape during curing. Without vents, air pressure can build up and cause cracking or delamination.
- Inspection Lights: For checking for trapped air and other defects before the concrete sets. Missed defects can lead to costly repairs later on.
Quick rule: Always test your optional tools before use to ensure they’re working properly. Faulty tools can cause more harm than good.
Planning and Design Considerations for Optimal Results
Early design decisions shape texture consistency and air entrapment risk, including pattern choice, liner material, surface finish, and anticipated consolidation methods. Align these choices with field realities and workflow capabilities. Verify requirements against project documentation before proceeding.
Identify risk factors tied to liner design, such as seams, gaps, venting provisions, and liner curvature. Plan for coordination with design and field teams to minimize surprises during pours. Use a practical pre-pour validation approach to spot issues early.
Pattern selection, scale, and repetition
The pattern you choose sets the tone for your finish. Deeper patterns need more concrete to fill them, so plan your mix design accordingly.
Smaller repeat sizes mean more seams per square foot. More seams mean more potential air pockets. Keep that in mind when planning your layout.
Complex reliefs can trap air if not designed properly. Simpler patterns are easier to keep consistent and air-free.
Designing vents, seams, and registration features
Vents let air escape as concrete flows in. Place them at high points and along seam lines.
Seam locations should align with structural joints or other natural breaks. This helps hide any slight misalignments.
Registration features – like alignment keys or pins – help keep your liners straight and true. They also provide a reference point for measuring and marking.

Surface Preparation and Liner Installation
Evaluate the substrate for flatness and cleanliness; remove debris, oil, and coatings that could trap air. Ensure the surface is dry and sufficiently grab-friendly for liner seating. Check primer compatibility to avoid release problems later.
Attach and align the liner using your chosen method, keeping seams staged to prevent air pockets. Confirm the liner sits flush with no folds, and verify edge supports and tolerances before the pour begins. Plan a quick pre-pour inspection to catch issues now.
Substrate cleaning, priming, and seal checks
Before applying your form liner, the substrate must be clean and flat. Start by removing any old coatings, debris, or dust using a wire brush or scraper.
Oil and other contaminants can prevent the liner from sticking properly. Use a degreaser to ensure a clean surface.
Check for flatness. If there are low spots, roughen them up with a grinder to improve grip. Fill any gaps or holes with a patching compound to prevent leakage and air pockets.
Finally, apply a suitable primer that’s compatible with your chosen curing compound. This helps the liner adhere better and prevents trapped air.
Installing, sealing, and aligning the liner
Secure your form liner to the face of the forms using one of these methods: PVC/HDPE tape, mechanical fasteners, or adhesive systems. Always follow the manufacturer’s instructions.
Tape is quick and easy but may not be suitable for large surfaces. Fasteners are more secure but require drilling holes. Adhesives provide a strong bond but need time to cure.
Seal seams tightly using the appropriate sealant or tape to prevent air from getting trapped. Ensure the liner is fully seated with no folds or wrinkles that could cause imperfections in your finish.
Align the liner carefully, checking it’s parallel to the pour plane and sitting flush against the forms. Use a level or straight edge to ensure consistency across the surface.
Application Process: Mixing, Pouring, and Air Management
Prepare a repeatable mix plan and have the materials ready, including any air-release additives or anti-foam aids. Consider how these choices affect texture fidelity while controlling air. Document the approach for consistency on future pours.
Prep the liner area, ensure seals are sound, and place vents or bleeds as needed. Use a controlled sequence for mixing, degassing, and pouring to reduce air pockets. Monitor pour behavior and adjust technique to protect texture integrity.
Mixing and Pouring Best Practices
Consistency is key when mixing concrete for form liners. Start by measuring your dry components – cement, aggregates, and any admixtures – precisely.
Next, add water slowly while mixing at low speed to maintain a target water-to-cement ratio. This ensures consistent texture and strength in your final product.
Once mixed, pour the concrete into your form liner. Maintain a steady, controlled rate to avoid air entrapment. Pour from one direction if possible, working your way across the form. This helps direct any trapped air out of the liner.
Time your pours carefully. Too fast and you risk trapping air; too slow and the concrete may set before you’re finished, leading to an inconsistent finish.
Active Air-Release Methods
To minimize trapped air in your form liners, use active release methods. Internal vibration is one such method. Insert a vibrator into the concrete mix to break up any air pockets and encourage settlement.
External vibration can also be used. Place a vibrator against the outside of the form liner to dislodge air bubbles from the surface. Be careful not to over-vibrate, as this can disturb your texture.
Vacuum-assisted release is another effective method. Connect a vacuum pump to the form liner and apply suction to draw air out of the cavities. This works best when combined with other methods like vibration or tapping.
Gentle tapping or rolling can also help release trapped air. Use a rubber mallet or roller to lightly tap the outside of the form, encouraging air bubbles to rise and escape. Priming your form liner before pouring can also help prevent air entrapment by creating a barrier that stops air from sticking.
Understanding Trapped Air: Causes and Visual Patterns
Trapped air forms as concrete flows, due to viscosity, agitation, pour rate, and vibration. It can appear at seams, corners, or textured peaks depending on the setup. Recognize the root causes by reviewing the process and liner design.
Common defects include dimples, craters, pinholes, and subtle repeating patterns. Visual cues help you identify underlying air pockets before the next cycle. Use pre-wetting, controlled pours, and venting adjustments to reduce entrapment.
Mechanisms of air entrapment and common defect types
Air gets trapped in form liners during mixing, pouring, and setting. Here’s how:
- Viscosity: High-viscosity mixes resist flowing out of recesses, trapping air.
- Agitation: Rapid mixing or pouring incorporates air into the mix.
- Pour rate: Too-fast pours don’t give air time to escape through vents.
- Vibration: Excessive vibration can force air into tiny crevices.
These cause defects like:
- Pinholes: Tiny air bubbles trapped under the surface.
- Craters: Larger air pockets that leave hollows on the surface.
- Mottled textures: Irregular patterns from varying amounts of trapped air.
Visual checkpoints and diagnostic workflow
Use this checklist right after pouring and before curing to diagnose issues.
- Fresh pour surface: Check for bubbles, ripples, or unevenness. Air entrapment may cause these.
- Vents and seams: Ensure they’re clear of obstructions. Blockages trap air.
- Liner alignment: Check for gaps or misalignment. Poor alignment can trap air.
- Release agent application: Verify even coverage. Insufficient release agent may cause adhesion issues, not just air entrapment.
- Cured surface (after initial set): Look for repeating patterns or lines. These often indicate trapped air.
- Edge and corner areas: Check for excessive air pockets. Edges and corners are prone to air entrapment.
- Temperature and humidity: Ensure they’re within acceptable ranges. Extreme conditions can affect curing and air release.
- Mix consistency: Check for lumps or inconsistencies. Air isn’t the only culprit; mix issues cause defects too.
- Liner condition: Inspect for tears, holes, or other damage. Damaged liners can trap air and cause defects.
Quick rule: If you find repeating patterns or lines on the cured surface, trapped air is likely the culprit.
Techniques for Achieving Consistent Texture and Quality Control
Standardize a mix protocol that supports repeatability across pours and batches. Document target proportions and ingredient handling to ensure consistency. Keep labels and notes accessible for the crew to follow.
Focus on controlled compaction, proper mold prep, and reliable release methods. Establish texture checks and simple measurements to verify uniformity. Maintain batch records and a straightforward anomaly-tracking workflow to guide adjustments.
Process controls and timing
The devil’s in the details when it comes to maintaining consistent texture. Here’s how to control key variables:
Release Agent Timing: Apply release agents just before pouring. Too early, they lose effectiveness; too late, they won’t prevent adhesion.
Concrete Set Window: Keep an eye on your concrete’s set time. Pour and strip forms within the right window to avoid texture issues.
Environmental Controls: Maintain consistent temperature and humidity levels around your pours. Too hot, too cold, or too humid can mess with your texture.
Curing Regime: Follow a consistent curing process. Insufficient curing can lead to surface defects and inconsistent texture.
Record-keeping, test panels, and acceptance criteria
Keeping records and using test panels helps ensure repeatability. Here’s how:
Test Panels: Pour small test panels before each major pour. This lets you check texture quality and make adjustments if needed.
Take Photographic Standards. Snap pics of your test panels and use them as a visual reference for acceptance criteria.
Log Mix, Equipment, and Environmental Data. Keep detailed records of mix proportions, equipment used, and environmental conditions. This helps identify trends and troubleshoot issues.
Conclusion
Keeping the texture even and free of trapped air isn’t optional; it protects durability and the look of the finished surface, and it keeps you safer on the job site.
In practice, stay focused on the core steps: confirm the right form liner and material for the job, prep the surface and tooling, mix and pour with the manufacturer’s guidance, manage air as you work, and monitor the texture as it cures. Safety first means double-checking connections and supports, masking edges, and wearing the right protection. Test a small area to confirm your mix and flow before committing to the full surface, and stay within the recommended working times and temperatures so you don’t overwork or underfill the liner.
Common mistakes to avoid are rushing the setup, skipping surface prep or release-chemical checks, and ignoring air management cues during pouring. Don’t oversqueeze the liner or overwork the concrete mix, and never skip testing in a hidden corner. watch for air patterns as you pour and neat, methodical checks as you pull the liner, so you don’t trap voids or over-texture in one spot.
If the project demands more control than you can safely achieve—complex shapes, large areas, or unfamiliar materials—consider bringing in a professional. When in doubt, pause, reassess, and plan a limited trial run before proceeding full scale. You can finish strong by staying disciplined, documenting what works, and applying the same method to the next surface with confidence.
FAQ
What are form liners really doing for your texture and why should you care?
Form liners imprint the concrete surface. They create the pattern you want and protect the form from wear. If the liner isn’t clean or seated properly, the texture will be inconsistent.
How can I get consistent texture across the whole pour?
Use the same liner type and size for the whole job. Clean and inspect liners between uses. Keep pour timing steady and watch for edge inconsistencies as you pour.
What should I do about air bubbles and trapped air in the finish?
Check that the liner seals fully and there are no gaps. Use proper compaction technique around the liner and work slowly to avoid lifting air. If bubbles appear, pause and inspect the liner contact areas before continuing.
What are common liner issues, and how do I fix them quickly on site?
Common problems are torn textures, misalignment, and residue transfer. Replace damaged liners or reseat them, and clean the contact surfaces before the next section. If issues persist, review manufacturer instructions for the liner and adjust handling or layout accordingly.