

Introduction
Fiberglass mesh and metal lath are both used to reinforce thin cement coats.
Fiberglass mesh is lightweight and easy to handle, while metal lath provides more rigid support for tougher jobs. Check manufacturer instructions and local rules to confirm suitability for your project, and look for guidance on compatible mixes and application methods. For DIY work, plan around the substrate, surface prep, and the type of thin coat you’re applying, and keep your expectations realistic about crack control and adhesion.
Key takeaways
- Choose reinforcement based on coat thickness, substrate, and expected movement.
- Fiberglass mesh offers corrosion resistance and easier cutting for small repairs.
- Metal lath provides higher rigidity for larger panels and sheen control.
- Follow manufacturer guidance for mesh or lath compatibility with your cement.
- Use proper fasteners, lath bonding coats, and wet cure routines to prevent cracks.
- Safety: wear eye protection, gloves, and dust mask when mixing and embedding.
Table of Contents
- Introduction
- Key takeaways
- Overview: Why Reinforcement Matters for Thin Cement Coats
- Fiberglass Mesh — Properties, Benefits, and Limitations
- Metal Lath (Expanded Metal Lath) — Properties, Benefits, and Limitations
- Performance Comparison: Strength, Durability, and Longevity
- Installation Best Practices for Thin Cement Coats
- Codes, Manufacturer Recommendations, and Compatibility
- Cost, Sourcing, and DIY Vs Professional Installation
- Maintenance, Repairs, Common Mistakes, and Decision Checklist
- Conclusion
- FAQ
Overview: Why Reinforcement Matters for Thin Cement Coats
Reinforcement in thin cement coats acts as a structural helper, bridging minor movements and preventing surface cracks from widening. It also helps keep the coat bonded to the substrate and forms a barrier against water paths that can lead to moisture intrusion. The choice of reinforcement should match how the substrate moves under weather, vibration, and seasonal changes, so the finish remains intact and closely bonded.
You’ll decide when reinforcement is truly needed based on coat thickness, substrate type, and exposure conditions, rather than a blanket rule. Compare fiberglass mesh and metal lath for their ability to resist crack growth, corrosion, and impact on the finish look. Use a practical checklist that covers coat depth, substrate prep, expected movement, climate, and manufacturer or code guidance to guide your choice.
When thin-coat systems require reinforcement
Thin cement coats, typically ranging from 1/8″ to 1/4″ (3mm to 6mm), are vulnerable to cracking and delamination due to their low thickness. Reinforcement is mandatory to control cracks, prevent delamination, and act as a barrier against water ingress.
Thin-coat systems require reinforcement when:
- Thermal movement: Extreme temperature changes cause the substrate to expand and contract, putting stress on the thin coat.
- Substrate movement: Settling foundations, structural movements, or other substrate shifts can lead to cracks in the thin coat.
- Impact: Physical impacts from nearby construction activities, falling objects, or even foot traffic can cause damage to thin coats.
Key decision factors to consider
Choosing the right reinforcement for your thin-coat system depends on several critical factors:
Substrate type: The nature of the substrate (concrete, brick, plywood, etc.) influences the choice of reinforcement. Some substrates may require specific types of lath or mesh to ensure proper adhesion.
Expected movement: Assess the expected movement of the substrate due to thermal changes, settling, or other factors. Higher movement requires stronger, more flexible reinforcement.
Exposure: Consider the climate and UV exposure conditions. Harsh environments may necessitate corrosion-resistant reinforcements like fiberglass mesh.
Finish thickness: Thicker coats (up to 1/2″ or 12mm) may require heavier-duty reinforcement, while thinner coats can use lighter, more flexible options.
Compatibility with the render system: Ensure the chosen reinforcement is compatible with your specific cement coat and render system. Consult manufacturer guidelines for recommendations.
Fiberglass Mesh — Properties, Benefits, and Limitations
Fiberglass mesh for thin coats is built from alkali‑resistant glass fibers woven into a fabric that resists distortion and provides crack‑bridging capabilities. Look for mesh weight, density, and AR formulations that suit polymer‑modified renders and ensure smooth finish ability. These specs influence how well the mesh controls cracks without creating bond failures at joints.
AR fibers resist the harsh alkaline environment inside cementitious coatings, extending durability when properly mixed and embedded. But you should verify the manufacturer guidance on priming, bonding agents, and primer compatibility to avoid delamination or back‑bonding. Preparation steps like cleaning and laitance removal matter for a solid embedment and reliable adhesion to the substrate.
Material properties and grades to check
The right fiberglass mesh makes all the difference. Here’s what you need to look for:
- Alkali Resistance (AR): Essential for longevity in cement coatings. AR fibers resist alkaline environments, preventing degradation.
- Mesh Weight (gsm): Lighter meshes (e.g., 17-23 gsm) are suitable for thin coats. Heavier ones (>50 gsm) may be too stiff and not embed well.
- Tensile Strength: Higher strength means better crack-bridging capability. Look for ratings above 600 MPa.
- Mesh Opening Size: Smaller openings (e.g., 1/4″ or 3mm) provide more mechanical keying and better adhesion, but may be harder to embed in thin coats.
- Compatibility with Renders: Ensure the mesh works well with your chosen render. Some meshes may stain or discolor certain renders.
Advantages and limitations for thin coats
Fiberglass mesh offers several benefits when used in thin-coat cement systems:
Lightweight: Easier to handle and install compared to metal lath. Ideal for DIY projects.
Corrosion-Resistant: Unlike metal, fiberglass won’t rust or corrode over time, ensuring long-term durability.
Easy to Embed: Fiberglass meshes can be easily embedded in thin coats (1/8″ to 3/8″), providing good surface coverage and adhesion.
However, there are some limitations:
Fiberglass mesh has lower mechanical keying on unstable substrates. It may not provide the same level of grip as metal lath in very unstable or cracked surfaces. Always ensure your substrate is sound before applying thin-coat systems.
Additionally, sensitivity to cutting and installation errors can lead to reduced performance. Careful handling and proper installation techniques are crucial.
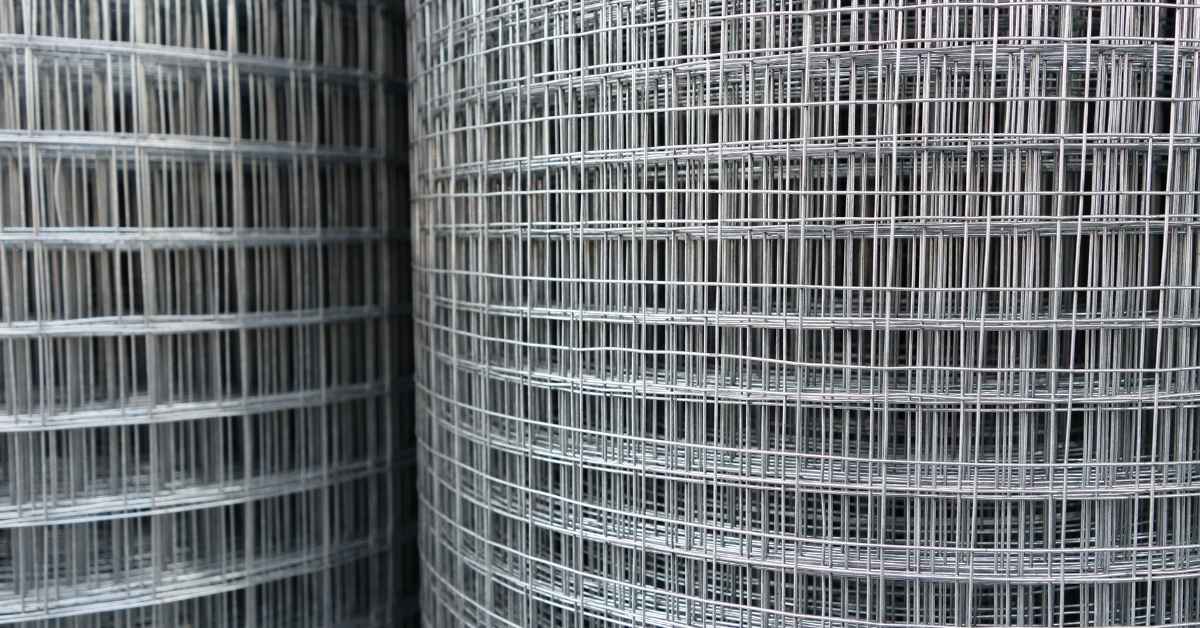
Metal Lath (Expanded Metal Lath) — Properties, Benefits, and Limitations
Expanded metal lath is formed by expanding sheet metal to create a rigid, knurled surface that keyes into cement render and aids load distribution. It remains common where substrate instability or traditional methods require a sturdier reinforcement. Its open pattern helps unify the coating with rough or uneven bases.
Variants include galvanized, stainless, and self‑furring options, each with different corrosion resistance and installation practicality. Be mindful of weight and the additional labor for fastening and alignment, and verify substrate prep and scratch coat steps with the local guidelines or system data sheets before proceeding.
Types of metal lath and coatings
Expanded metal lath comes in various types, each suited to different conditions. The two main variants are galvanized and stainless steel.
Galvanized lath is zinc-coated for corrosion resistance. It’s suitable for most indoor and protected outdoor applications. For exposed or aggressive environments, stainless steel lath is the better choice. It’s more expensive but offers superior corrosion resistance.
Self-furring lath is another variant with small hooks that penetrate the substrate, providing extra holding power. It’s useful on unstable substrates or where extra security is needed.
Advantages and limitations for thin and traditional coats
Expanded metal lath excels in heavy sand/cement renders, providing strong mechanical keying. This makes it ideal for traditional thick renders.
For thin coats, its heavier profile can be a downside. It may not be suitable for very thin basecoats as it could show through the finish. Corrosion is also a risk if not properly protected in aggressive environments.
On the plus side, lath’s open structure allows for good bonding and load distribution on unstable or rough substrates. It’s also compatible with older structures needing repair or reinforcement.
Performance Comparison: Strength, Durability, and Longevity
Fiberglass mesh and metal lath each arrest cracks in thin coats, but they do so through different mechanisms. Mesh provides a continuous fabric that distributes stress across the surface, while lath provides a rigid scaffold that concentrates load transfer at the interface. The choice influences how well the coat resists opening cracks under movement.
Durability factors include corrosion resistance and moisture management, along with how the system handles freeze‑thaw or salt exposure in the local environment. Adhesion and compatibility with thin coats depend on surface prep and bonding requirements, so follow the manufacturer instructions and verify the exact test methods or criteria used during installation and inspection.
Structural performance and crack control
Fiberglass mesh and metal lath both reinforce thin cement coats, but they differ in how they handle tensile stress and cracks.
Fiberglass Mesh: It’s flexible, allowing it to distribute stress evenly across the surface. Its open weave lets cement penetrate deep, creating a strong bond. Smaller mesh sizes (e.g., 1/2″ or 3/4″) offer better crack control in thin coats.
Metal Lath: It’s rigid, so it resists tensile stress well but can concentrate stress at lath seams if not properly overlapped. Larger gauge sizes (e.g., 16-20) work best for thin coats due to their smaller opening size.
Environmental durability and expected lifespan factors
Both materials face environmental challenges, but they handle them differently.
Fiberglass Mesh: It’s resistant to UV rays and alkali, ensuring long-term color stability. However, it can degrade under prolonged exposure to moisture or freeze-thaw cycles. Proper substrate preparation and installation quality are crucial for longevity.
Metal Lath (Aluminum/Mild Steel): Aluminum resists corrosion but can be more expensive. Mild steel is cheaper but prone to corrosion, especially in humid environments. Both need proper priming and surface preparation to prevent delamination and extend lifespan. Regular maintenance, like recoating or sealing, can help protect against moisture exposure.
Installation Best Practices for Thin Cement Coats
Define the thin coat requirements clearly and ensure you can embed the reinforcement with the right orientation and coverage. The workflow should cover substrate prep, defect repair, sizing, overlaps, embedding, and spacing for fasteners or adhesives within the guide lines from the system data sheets. Plan for proper cure conditions to avoid premature failures.
Bonding methods and material compatibility hinge on the chosen reinforcement type. Slurry bonds, primers, or mastics must be compatible with the thin coat mix, manage suction, and support uniform embedment. Establish checks for straight layout, full embedment, and continuous reinforcement across joints to prevent gaps and delamination.
Tools and materials checklist
Before you start, make sure you have the right tools and consumables for a smooth installation. Here’s a quick checklist to help you.
- Cutting tool: For metal lath, use tin snips or aviation snips. For fiberglass mesh, use scissors or a utility knife.
- Trowels: You’ll need a straight edge trowel and a hawk to mix and apply the cement coat.
- Fixings: Nails, screws, or staples for attaching mesh/lath. Use appropriate ones based on your substrate.
- Protective gear: Safety glasses, gloves, and a dust mask are essential when cutting metal lath and handling cementitious mixes.
- Measuring tape: To ensure accurate sizing and overlaps of the reinforcement.
- Level or straight edge: To create layout lines and check for level surfaces.
- Primer or mastic: Depending on your chosen reinforcement, you might need a primer or mastic to enhance bonding.
- Cement mix: Ensure you have the right thin-coat cement mix for your project.
Quick rule: Always double-check your tools and materials before starting. Missing something can lead to delays or poor results.
Embedding, overlaps, fixings, and curing guidance
Proper embedding is key for reinforcement performance. Here’s how to do it right.
Embedment: For thin coats, embed the mesh/lath at least 1/4″ into the cement mix. Use a straight edge trowel to ensure full embedment and remove any air pockets.
Overlaps: Overlap mesh/lath by at least 2″ when installing on adjacent surfaces or around corners. This ensures continuous reinforcement and better crack control.
Fixings: Space fixings evenly, about 6″ to 8″ apart for metal lath and 4″ to 6″ apart for fiberglass mesh. Use appropriate spacing based on your substrate and cement mix.
Curing: Follow manufacturer guidelines for curing times. Typically, thin-coat systems need at least 7 days of cure time under controlled humidity conditions (between 40-80% RH).
Safety precautions during installation
Safety should always be your top priority. Here are some key safety precautions to keep in mind.
PPE: Wear appropriate personal protective equipment, including safety glasses, gloves, and a dust mask when handling cementitious mixes or cutting metal lath.
Cutting safety: When cutting metal lath, use the right tool for the job. Tin snips or aviation snips are best. Always cut away from your body to avoid injury.
Dust control: Keep dust levels down when mixing and applying cementitious mixes. Use a damp cloth or misting system to control dust and prevent inhalation.
Handling safety: Be careful when handling alkali-resistant meshes and fasteners. They can cause skin irritation or burns if not handled properly. Always wash your hands after handling these materials.
Codes, Manufacturer Recommendations, and Compatibility
Understand the regulatory landscape and the local amendments that influence acceptable reinforcement types for thin coatings. Look for inspector expectations and permit conditions that affect installation and follow up. Use the code references and AHJ guidance as a baseline for compliance and quality control.
Manufacturer specifications guide substrate compatibility, coat thickness, curing, and adhesion requirements. Confirm that chosen reinforcement aligns with substrate type, bonding agents, and joint treatments so warranties and listings stay valid. Keep a clear record of approved combinations and batch numbers for inspection readiness.
Relevant building-code and fire/safety considerations
The International Building Code (IBC) and International Residential Code (IRC) dictate reinforcement types for thin cement coatings. Always check local codes for adaptations.
Fire performance: Some areas require non-combustible materials like metal lath in exterior wall assemblies. Fiberglass mesh may not meet these requirements.
Exterior wall assemblies: Codes may specify reinforcement types based on the specific wall assembly, such as EIFS or stucco systems. Always verify local code requirements before starting your project.
Manufacturer specifications, warranties, and system compatibility
System datasheets outline approved mesh/lath types, weights, and installation details. Following these ensures your warranty remains valid.
Approved types: Check the datasheet for approved reinforcement types. Using unapproved materials may void the warranty.
Installation details: Follow manufacturer guidelines for substrate prep, coating thickness, and curing/adhesion requirements to maintain system performance and warranty terms.
Material specs and standards explained
Understanding material specifications helps ensure a successful installation. Here are key factors to consider:
- Alkali resistance (fiberglass mesh): Look for mesh with high alkali resistance to prevent degradation over time.
- Galvanization (metal lath): Check for proper galvanization to prevent corrosion and maintain longevity.
- Wire diameter and gauge: Choose the appropriate size based on coating thickness and substrate type. Too small may not provide adequate support, while too large can cause cracking.
- Mesh/lath spacing: Select a mesh or lath with suitable opening sizes to ensure proper bonding with the cement coat.
- Edge protection (fiberglass mesh): Ensure the mesh has edge protection to prevent fraying and maintain reinforcement integrity.
Cost, Sourcing, and DIY Vs Professional Installation
Assess the main cost drivers, including materials, surface preparation, and any scaffolding or containment needed for safe work. Availability and lead times can impact scheduling, so check local supply options and regional variations before committing to a plan. Weigh the price against expected performance and longevity in the project area.
Evaluate whether DIY is practical or if professional installation is warranted. Consider safety, code requirements, necessary tools, and warranty implications when deciding who should perform the work. Use a clear cost and performance framework to compare fiberglass mesh versus metal lath in your specific situation.
What drives cost and how to compare quotes
When comparing costs, consider the following:
Material Type: Fiberglass mesh is generally cheaper than metal lath. But, it might not last as long in certain conditions.
Mesh Weight or Lath Gauge: Heavier meshes and thicker laths cost more but provide better reinforcement.
Substrate Preparation: Proper surface prep can save labor costs later. Ask suppliers about their recommendations.
Request itemized quotes from both suppliers and contractors to understand what’s included in the price. This helps you compare apples to apples.
Local availability, brand compatibility, and procurement tips
Before you buy, check these:
Local Supplier Stock: Call around. Some suppliers might have better stock than others.
Brand Compatibility: If you’re using a proprietary render system, ensure the mesh or lath is compatible. Contact the manufacturer if unsure.
Ask suppliers for Compatibility Statements. They should provide this in writing to protect your purchase.
If you’re buying in bulk, ask about discounts. Some suppliers offer them for larger quantities.
Maintenance, Repairs, Common Mistakes, and Decision Checklist
Establish routine inspection steps that cover surface condition, crack activity, moisture intrusion, and anchorage integrity for both reinforcement types. Plan repairs that match the reinforcement material, whether reapplying a thin coat or reanchoring sections as needed. Keep your approach aligned with the substrate condition and coating history.
Develop a simple decision checklist to choose between fiberglass mesh and metal lath based on coating thickness, movement, climate, and budget. Note quick maintenance rhythms and how to document findings for future repairs, including seasonal checks and keeping repair records for warranty purposes.
Maintenance and Repair Strategies by Material
Regularly inspect your cement coats to catch issues early. Use this checklist for both fiberglass mesh and metal lath systems.
- Surface Condition: Check for cracks, chips, or delamination. Confirm with a visual inspection. Cracks can lead to moisture intrusion if left untreated.
- Crack Patterns: Identify hairline vs. wide cracks. Narrow cracks may indicate minor settling; wider ones could signal structural issues.
- Corrosion (Metal Lath): Look for rust or discoloration. Confirm with a visual inspection. Corrosion weakens the reinforcement.
- Moisture Intrusion: Check for dampness, mold, or mildew. Confirm with moisture meters. Moisture can cause delamination and structural damage.
- Anchorage Integrity: Ensure fixings are secure and not pulling out. Confirm by tugging gently on fixings. Loose anchorage can lead to coating failure.
- Coating Wear: Assess the condition of the cement coat. Confirm with a visual inspection. Worn coatings may need reapplication.
- Repair Approach: Use fabric/mesh repairs for small cracks, re-anchoring for loose fixings, patching for localized damage, and reapply cementitious coat as needed. Replace sections or recoat full areas based on extent of damage.
- Reinforcement-related Failure: Inspect for signs of reinforcement failure like widespread cracking or delamination. Confirm with a visual inspection. Reinforcement failure may require replacement.
Quick rule: Regular inspections help catch issues early, preventing costly repairs and structural damage.
Common Mistakes and Troubleshooting
Prevent failures by avoiding these common installation and maintenance errors.
- Tension/Mesh Sag: Check for excessive tension or sagging in the mesh. Confirm with a visual inspection. Excessive tension can cause cracking; sagging leads to poor reinforcement.
- Improper Embedment: Ensure mesh/lath is fully embedded in the cement coat. Confirm with a visual inspection. Inadequate embedment reduces bond strength and reinforcement effectiveness.
- Inadequate Keying: Check for proper keying of the lath/mesh into the substrate. Confirm with a visual inspection. Poor keying can lead to delamination.
- Corrosion of Metal Lath: Inspect metal lath for signs of corrosion. Confirm with a visual inspection. Corrosion weakens the reinforcement and can cause cracking.
- Improper Mortar Mix Ratios: Ensure mortar mix is correct. Confirm with manufacturer’s guidelines. Incorrect ratios weaken the bond between reinforcement and cement coat.
- Skipping Cure Time: Allow proper curing time for the cement coat. Confirm with manufacturer’s guidelines. Skipping cure time can lead to weak, brittle coatings.
- Incorrect Overlaps: Ensure mesh/lath overlaps are adequate and properly secured. Confirm with a visual inspection. Inadequate overlaps reduce reinforcement effectiveness.
- Ignoring Substrate Assessment: Properly prepare the substrate before application. Confirm with a visual inspection. Poor substrate preparation can lead to coating failure.
Quick rule: Regular maintenance and proper installation techniques prevent most common mistakes.
Final Decision Checklist for Homeowners and Specifiers
Use this checklist to finalize your choice between fiberglass mesh and metal lath.
- Verify Substrate: Ensure the substrate is clean, dry, and structurally sound. Confirm with a visual inspection and moisture meters.
- Check Movement Risk: Assess potential movement due to settling or expansion/contraction. Consult structural engineer if unsure.
- Consult System Datasheet: Review manufacturer’s datasheets for system specifics and compatibility. Confirm with manufacturer’s website or local supplier.
- Confirm Local Code Compliance: Ensure chosen reinforcement meets local building codes. Confirm with local building department.
- Check Climate Exposure: Consider exposure to extreme temperatures, moisture, and UV. Consult manufacturer’s guidelines for best suited reinforcement.
- Expected Movement: Assess expected movement due to settling or expansion/contraction. Consult structural engineer if unsure.
- Budget Considerations: Compare costs of materials, installation, and long-term maintenance. Consider life-cycle cost analysis.
- Choose Installer: Select a qualified installer with experience in the chosen reinforcement system. Confirm with local references and credentials.
- When in Doubt: Consult a structural engineer or experienced contractor for advice. Professional input can prevent costly mistakes.
Quick rule: Thorough assessment of substrate, climate, and movement risks helps choose the best reinforcement system.
Conclusion
Choosing the right reinforcement for thin cement coats matters for safety, durability, and how it looks in the end. Use the guidance from the product specs and codes, test a small area, and don’t rush the cure or skim surface prep.
First verify safety first by wearing proper PPE and checking substrate condition, then confirm code compliance and manufacturer recommendations, measure the wall, decide between fiberglass mesh or metal lath, gather the correct fasteners or adhesives, follow the installation steps in the proper order, test a small patch, and observe cure and environmental limits before moving to larger areas.
Common mistakes to avoid are skipping or sabotaging surface prep, using the wrong reinforcement for the substrate, applying too thick a coat or proceeding with poor edge detailing, and neglecting cure time or moisture control. Keep it simple: plan the job, follow the recommended materials, and work in good light with dry conditions for best results.
If you encounter uncertain substrate conditions, structural concerns, large exterior work, or local code questions, don’t push through alone. Consider a professional for those scenarios, and stay focused on the basics: protect people, protect the substrate, and finish with a solid, well-supported coat for a durable, professional look.
FAQ
What are the main benefits of fiberglass mesh over metal lath for thin cement coats?
Fiberglass mesh is lighter and easier to embed in the first coat, which helps reduce handling strain. It resists corrosion better in damp environments and is less likely to dent or warp during installation. Check manufacturer instructions for compatibility with your cement mix and substrate.
What types of thin cement coats typically need reinforcement like mesh or lath?
Thin cement coats such as base coats under stucco or decorative thin mortars usually require some reinforcement to prevent cracking. The exact type and thickness depend on the product you’re using and the substrate, so always follow the label and local guidelines.
What installation steps and tools are essential when using fiberglass mesh or metal lath?
Key steps are clean and anchor the substrate, embed the mesh or lath in the first coat without gaps, and overlap seams per the product instructions. Tools you’ll often need include a trowel, hawk, knockout scissors, and a level; always verify that your mesh or lath is rated for your cement type.
How should I assess long-term durability and plan for maintenance or repairs?
Look for signs of cracking, delamination, or corrosion around edges and fasteners. For repairs, match the reinforcement type and coat system to the existing work, and consult the product label or manufacturer instructions for patching guidance and recoat intervals.