

Introduction
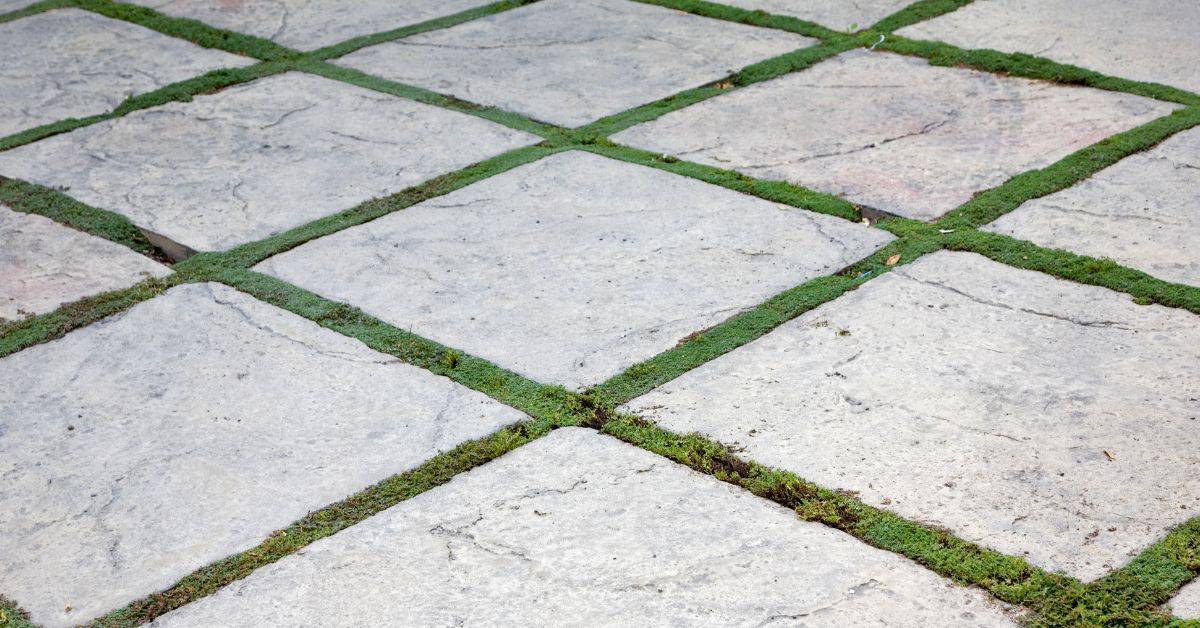
Edge restraint is the sturdy edge that keeps a paved area from spreading, sinking, or cracking. Without it, slabs and pavers are more likely to shift under load or frost, which is why proper edging matters. Check local rules and the product label to choose the right type and install method for your site.
There are several common materials for edge restraints, from simple timber or metal to commercial curb edging, each with its own setup needs. Follow the manufacturer’s instructions or product label for how to install and secure the edge, and adapt to your soil and load expectations. Using a proper edge saves time and trouble later by keeping the paving stable and reducing movement at the borders.
Key takeaways
- Proper edge restraint prevents lateral movement, preserving alignment and reducing slab cracking.
- Common restraint materials: concrete curbs, metal edging, sturdy landscape boards.
- Install continuous edging along edges before setting pavers or slabs.
- Wear eye and hand protection when cutting or installing restraints.
- Inspect edges during maintenance and promptly address movement or gaps.
- Use manufacturer-recommended fasteners or anchors per local code guidance.
Table of Contents
- Introduction
- Key takeaways
- Why Edge Restraint Matters
- Causes of Edge Cracking in Unrestrained Pavers and Slabs
- Types of Paver and Slab Edge Restraint Systems
- Materials, Tools, and Specs Checklist
- Step-by-Step Installation Methods
- Common Methods to Prevent Edge Cracks and Best Practices
- Long-Term Maintenance, Inspection, and Repair
- Costs, Common Mistakes, and Safety Precautions
- Conclusion
- FAQ
Why Edge Restraint Matters
Edge restraints define the boundary of your paved or slab surface and are the first line of defense against lateral movement. They help keep joint widths uniform and preserve interlock so pavers or slabs stay in place under traffic. The right restraint links to structural integrity by distributing loads and reducing edge creep, which extends pavement life in typical use and seasonal cycles.
Installations vary from perimeter curbs to plastic edging or metal edging, and may incorporate rebar or mesh to improve grip and durability. Each option changes how the edge behaves at the boundary, influencing maintenance needs and long-term performance. Start with proper substrate prep, a compacted base, and continuous edge support to prevent gaps, spalling, and misalignment that worsen with time.
Function of edge restraint
Edge restraints play a crucial role in keeping your pavers and slabs in place. They do three main jobs:
Transfer lateral loads. When vehicles drive over, they push sideways on the pavement. Restraints take this force and distribute it evenly across the base, preventing movement.
Keep joint sand in place. Without restraints, wind or water can wash out joint sand. This leaves gaps where more sand can be lost, leading to instability.
Maintain alignment under traffic and thermal movement. Pavements expand and contract with temperature changes. Restraints help keep everything aligned, preventing buckling or warping.
Consequences of unrestrained edges
Without proper edge restraints, your pavement will suffer. Here’s what happens:
Shifting. Pavers or slabs can shift out of place under traffic load. This causes uneven surfaces and tripping hazards.
Edge spalling. The outer edges bear the brunt of traffic loads. Without restraints, they can crumble or spall (flake off) over time.
Accelerated cracking. Movement causes stress on pavers and slabs. This leads to cracks, which grow bigger with each passing vehicle. You’ll see visible signs like diagonal cracks, gaps between units, or lifted edges.
Causes of Edge Cracking in Unrestrained Pavers and Slabs
Mechanical failures at the edge arise from concentrated or transverse loads, edge cantilever effects, and insufficient edge thickness or restraint. These factors contribute to hairline cracks, chipping, and edge spalling when traffic or heavy equipment pass along the boundary. Observable symptoms include slight edge lift and cracking patterns that radiate from the perimeter.
Environmental and installation-related causes compound the issue: freeze-thaw action, moisture infiltration, salt exposure, and UV damage accelerate micro-cracking and deterioration at unrestrained edges. Common installation mistakes such as inadequate base preparation, edge not secured, or improper joint sizing allow movement and settlement to creep outward. Look for edge geometry that concentrates stress and plan remediation before cracks widen.
Lateral movement and settlement
Unrestrained edges allow pavers and slabs to shift sideways, creating voids under the edge. This uncontrolled lateral displacement causes stress concentrations at the boundary.
Base or subbase settlement can also push edges upwards, creating a ‘domino effect’ where one slab lifts another. This movement leads to cracks and chipping along the perimeter.
Tip: Ensure proper compaction of base/sub-base materials to minimize settlement and use edge restraints to control lateral movement.
Freeze-thaw cycles and water migration
Moisture infiltrates through unprotected edges, freezing in cold temperatures. This expansion forces the edge upwards, causing heaving and loss of support.
As temperatures rise, ice melts, leaving voids that allow more water to enter. This cycle repeats, accelerating deterioration at the edge.
Tip: Seal edges with a suitable sealer to prevent moisture infiltration and use edge restraints to maintain support during freeze-thaw cycles.
Heavy loads, traffic, and concentrated stresses
Vehicular loads and point loads near unrestrained edges create bending moments and tensile stresses. These forces are highest at the edge, where there’s no restraint to distribute them.
Over time, these concentrated stresses exceed the material’s strength, initiating hairline cracks that propagate along the perimeter.
Tip: Use edge restraints to distribute loads evenly and minimize stress concentrations at the boundary. Also, ensure proper slab thickness for expected traffic loads.
Types of Paver and Slab Edge Restraint Systems
Restraint categories fall into rigid, semi-rigid, and flexible groups, each with typical materials and different responses to loads and climate. Rigid systems resist uplift and rutting firmly, ideal for drives and large slabs where long-term movement must be minimized. Semi-rigid systems strike a balance for moderate loads and irregular shapes, while flexible options accommodate some movement and decorative applications where joints are wide or anticipated shifting.
Rigid examples include concrete curbs and heavy edging, or solid metal edging, installed with fundamental anchoring to resist pull-out. Semi-rigid options cover modular precast segments or reinforced plastics that can adapt to uneven edges. Flexible restraints use lightweight plastic or rubber profiles to permit small shifts without failure, especially on narrower joints or surfaces with planned movement.
Concrete curbs, poured/formed concrete edges
Cast-in-place or preformed concrete edges are rigid restraints that provide excellent edge stability. They’re best used in areas with heavy loads and traffic, like driveways or large slabs.
Rigid systems resist uplift and rutting by transferring forces evenly across the slab’s surface. Concrete curbs create a solid barrier, preventing lateral movement and maintaining joint integrity.
Installation involves pouring concrete into forms along the edge of your paver or slab project. Ensure proper base preparation and alignment with control joints to prevent cracking. Allow adequate curing time before applying any loads.
Plastic and metal perimeter restraints
Flexible or semi-rigid extruded restraints made from plastic or metal offer adaptability for various applications. They’re suitable for decorative installations, slabs with wide joints, or projects expecting some movement.
These systems permit slight shifting without failure due to their flexibility. However, they may not be ideal for heavy loads or frost conditions as they can bend or deform under extreme forces.
Installation involves securing strips along the edge using compatible fasteners and anchors. Ensure proper base preparation and alignment with control joints to prevent pull-out. Regular checks after seasonal freezes or heavy loads are crucial to maintain their effectiveness.
Interlocking unit and modular restraints
Manufactured block, edging units, and composite restraints integrate with paver systems for both aesthetic and structural needs. They’re ideal for projects requiring a continuous look or needing additional stability in specific areas.
Modular restraints can be semi-rigid to rigid depending on the material used. Precast concrete segments provide more rigidity, while reinforced plastic edging offers flexibility with added strength.
Installation involves interlocking units along the edge of your paver or slab project. Ensure proper base preparation and alignment with control joints to prevent movement. Use compatible fasteners and anchors as needed for additional security. These systems can be used in combination with other restraint types for optimal performance.
Materials, Tools, and Specs Checklist
Common restraint types include edges, kerbs, plinths, and flexible edging, each requiring specific fasteners and edge supports. Gather materials that suit your project size, expected loads, and climate, and list fasteners, anchors, and edge detailing that work with your base. Verify compatibility with pavers or slabs and plan for expansion joints to prevent binding at the edge.
Before purchase, check material specs such as load rating, climate suitability, frost resistance, UV exposure, and chemical tolerance. Compare substrates and installation conditions across stone, concrete, or paver types, noting base compaction and edge support requirements. Confirm supplier data sheets and test reports, and keep notes on packaging, lead times, and on-site handling.
Materials selection guidance
Use this checklist to choose the right restraint materials for your project.
- Concrete curb/kerb: Ideal for heavy loads and longevity. Check soil conditions; avoid expansive soils.
- Metal (aluminum, steel): Durable, strong. Check expected loads; heavier loads need thicker metal.
- Plastic (HDPE, PVC): Flexible, affordable. Check freeze-thaw cycles; some plastics degrade in extreme cold.
- Composite: Strong, durable. Check UV exposure; ensure it’s rated for your climate.
- Load rating: Ensure material can handle expected loads (vehicular vs. pedestrian).
- Climate suitability: Check temperature range and freeze-thaw cycles to prevent cracking or degradation.
- Frost/chemistry resistance: Important in areas with de-icing salts or freezing temps.
- UV exposure: Consider if restraints will be exposed to direct sunlight.
- Compatibility: Ensure material works well with your chosen pavers or slabs.
Quick rule: Prioritize longevity and load capacity over initial cost.
Tools and equipment needed
Use this checklist to gather all necessary tools for a smooth restraint installation.
- Hand tools: Tape measure, level, shovel, trowel, rubber mallet. Check your toolbox; borrow if missing.
- Power tools: Circular saw (for concrete), drill with masonry bit, screwdriver (if using screws).
- Compaction equipment: Plate compactor for base preparation. Rent if needed.
- Safety gear: Safety glasses, work gloves, ear protection (if using power tools).
- Fasteners: Check restraint type; you’ll need screws, nails, or expansion anchors.
- Miscellaneous: String line for straight edges, wheelbarrow for mixing and transporting mortar.
Quick rule: Don’t skimp on safety gear. It’s cheap insurance for your well-being.
Material specs and standards to verify
Use this checklist to ensure you’re meeting local codes and manufacturer recommendations.
- Load rating: Check manufacturer’s data sheet. Ensure it matches your project’s needs.
- Embedment depth: Follow manufacturer’s guide; deeper embedments provide better support.
- Local standards: Check with local building department; they may have specific requirements.
- Frost/chemistry resistance: Verify material meets required standards (e.g., ASTM C1581 for concrete).
- UV exposure rating: Ensure material can withstand expected sunlight exposure.
- Compatibility with pavers/slabs: Check manufacturer’s recommendations; some materials may damage or discolor pavers.
- Warranty conditions: Review warranty details; ensure proper installation won’t void coverage.
Quick rule: Always follow manufacturer’s guidelines. They know their product best.
Step-by-Step Installation Methods
Prepare the substrate by assessing base compaction and moisture, ensuring a clean, level surface before restraint installation. Decide on restraint type and material based on paver size, load, and climate, and plan for expansion joints. Lay out straight lines with reference points, then check elevation and edge continuity with string lines or lasers before setting edgings.
Anchoring methods vary by restraint type; detail depth, spacing, and corrosion-resistant hardware, and consider weather effects on setting. When pouring or placing, set pavers to create clean edges, accommodate chamfers, and maintain consistent joint gaps. During curing, protect edges from movement and debris to avoid misalignment, then perform post-install checks for alignment and joint width.
Step-by-Step Installation Process
Follow this clear, numbered sequence to install edge restraints like a pro. It starts with prep and safety checks, moves through the main work, and ends with final checks.
- Prep site: Clear debris, mark lines, set up reference points.
- Check base compaction: Ensure it’s solid before installing restraints.
- Install restraints: Follow specific methods for each type (plastic, metal, concrete).
- Set pavers/slabs: Maintain joint gaps, handle chamfers/bevels cleanly.
- Compact and cure: Protect edges during curing to prevent settlement.
- Perform QCs: Check moisture, alignment, joint spacing, rideability.
Preparing the base and setting profile
Create a stable edge profile before installing restraints. Start with proper grading and compaction.
Grade the base to ensure water drains away from structures. Set edge batter/grade for stability. Screed and compact the base for a solid foundation.
Use a straight edge or laser level to set the profile. Ensure it’s consistent and level across the entire area.
Installing plastic and metal edge restraints
Anchoring patterns, trimming/fastening techniques, and maintaining straight/curved lines are key to successful installation.
Use stakes or screws to anchor restraints at regular intervals. Ensure hardware is corrosion-resistant. Trim restraints to fit curves precisely.
Maintain straight lines using string lines or laser checks. Keep edges continuous and aligned for a professional finish.
Installing concrete edge restraints and cast-in-place methods
Form setting, reinforcement considerations, curing practices, and integration with paver units/slab edges are crucial for concrete restraints.
Set forms accurately to achieve desired edge profile. Reinforce with rebar or wire mesh for strength. Ensure proper curing to prevent cracking.
Integrate concrete restraints with pavers/slabs by leaving space for units during form setting. Maintain consistent joint gaps and chamfer/bevel details.
Common Methods to Prevent Edge Cracks and Best Practices
Explain that proper edge restraint prevents movement and reduces cracking, with rigid systems delivering greater resistance to edge uplift than flexible options. Use this knowledge to guide subbase and reinforcement choices that suit the site conditions and anticipated loads. Balance design with practical constructability to minimize edge concerns from day one.
Detail subbase preparation, edge support forms, and appropriate joint spacing to relieve shrinkage stresses. Compare restraint options and outline installation steps, pros and cons, and common failure modes to avoid. Include workflow guidance for patios, driveways, and slabs, plus curing, jointing, and load management practices to extend edge life and reduce maintenance.
Design considerations and spacing recommendations
Proper design is key to preventing edge cracks. Plan for load paths, control joints (for slabs), and continuous edge restraints.
Follow manufacturer or engineer guidance for spacing and joint placement. This ensures your paving system can handle expected loads and relieve stresses caused by shrinkage.
For slab-on-grade, control joints should be placed every 6-8 feet to control cracking. For pavers, follow the manufacturer’s recommendation for joint width and spacing.
Drainage and subbase preparation
Proper drainage prevents water from undermining edges. Ensure your base has a slight slope (<1%) for water to drain.
Use geotextile fabric between the subgrade and base to prevent fines from mixing. This keeps your base stable and strong.
Compact the subbase thoroughly using a plate compactor. This ensures a solid foundation for your paving system, reducing settlement and edge cracking.
Load management and reinforcement strategies
Edges near heavy loads need extra support. Specify heavier restraints, steel reinforcement, or thicker bases to reduce stress-related cracking.
For driveways, use concrete curbs or metal profiles with embedded rebar for added strength. For heavy traffic areas, consider using thicker base materials like 12-inch crushed stone.
Always check local building codes and consult an engineer if you’re unsure about load-bearing requirements.
Long-Term Maintenance, Inspection, and Repair
Adopt a practical lifecycle approach that covers 15–20 years of service, with regular inspections, performance checks, and documented maintenance history. Establish inspection frequency, track settlement tolerance, crack width, and joint integrity, and keep simple records to monitor aging and component replacement needs. Use a scoring approach to quantify condition over time.
Implement routine seasonal checks, visual edge displacement, exposed fasteners, and drainage issues, then capture notes with photos. Perform preventive tasks like cleaning joints, resealing where needed, and addressing minor settlements through targeted compaction. For repairs, use severity-based methods from minor fillers to re-tensioning or component replacement, and plan partial versus full replacement where needed.
Routine Inspection Checklist
Use this checklist every season to catch issues early.
- Edge displacement: Check for any movement or misalignment. If skipped, it can lead to further damage and costly repairs.
- Exposed rebar/anchors: Look for any exposed reinforcement. Exposure leads to corrosion and loss of strength.
- Joint openings: Measure joint widths. Widening joints indicate settlement or movement.
- Surface scaling: Check for flaking or peeling. Scaling can lead to further deterioration and water penetration.
- Drainage issues: Ensure water drains away from edges. Pooled water can cause frost heave and erosion.
- Settlement: Check for dips or depressions. Settlement can cause cracking and edge failure.
- Cracking: Inspect for new cracks, especially around edges. Cracks allow water intrusion, leading to further damage.
- Gaps between paver/slab and restraint: Measure gaps. Widening gaps indicate movement or settlement.
Quick rule: Inspect edges every spring and fall, and after heavy rain or snowmelt.
Repair Techniques for Edge Failures
Use these repair options based on the severity of damage.
- Surface cracks: Fill with compatible filler and seal. Prompt repair prevents water intrusion and further cracking.
- Loose restraints: Re-tension or replace components. Loose restraints can cause edge displacement and failure.
- Settled sections: Restore joints, rework base, and recompact. Settlement causes cracking and edge failure.
- Exposed components: Replace affected restraints or anchors. Exposure leads to corrosion and loss of strength.
- Partial replacement: Consider if damage is localized. Full replacement may be needed if damage is extensive or recurring.
- Full replacement: Evaluate for widespread damage or recurring failures. Full replacement ensures long-term performance and safety.
Quick rule: Address minor issues promptly to prevent major repairs.
When to Replace or Upgrade Restraints
Use these criteria to decide when to upgrade or replace edge restraints.
- Recurring failures: If issues keep happening, consider upgrading. Repeated repairs indicate a need for stronger restraints.
- Increased loads: Upgrade if loads have increased (e.g., heavier vehicles). Higher loads may require sturdier restraints.
- Landscaping changes: Review if adjacent landscaping has changed. Changes may affect drainage or load demands on edges.
- Aging and degradation: Inspect for signs of aging or deterioration. Worn-out restraints should be replaced to maintain edge stability.
Quick rule: Don’t wait until failure occurs. Upgrade proactively based on changes in use, loads, and climate.
Costs, Common Mistakes, and Safety Precautions
Budget around the major cost drivers: restraint material, base preparation, paver or slab size and thickness, traffic expectations, and drainage considerations. Get multiple local quotes and factor delivery, long-term maintenance, and a contingency for site-specific challenges. Base decisions on site conditions rather than lowest upfront price.
Common installation mistakes speeding cracking include inadequate sub-base compaction, insufficient restraint height or misalignment, poor drainage, and skipping cure or setting times. Emphasize safety practices such as proper PPE, safe handling of heavy restraints, edge protection, tool maintenance, and weather-aware scheduling. Obtain local quotes and verify product guidance during procurement to stay within warranty and optimize performance.
Cost drivers and budgeting tips
The cost of edge restraints varies based on several factors. Material type, labor, site preparation, and access all play a role.
Edge restraint material is one of the biggest cost drivers. Plastic is usually the cheapest, followed by metal, with concrete being the most expensive. But remember, you get what you pay for in terms of durability and lifespan.
Don’t skimp on site preparation. A solid base means less maintenance later. And consider long-term performance, not just upfront cost. Factor in delivery, maintenance, and a contingency (10–20%) for surprises.
Common installation mistakes and how to avoid them
Steer clear of these common pitfalls to ensure your edge restraints last. Here’s what to watch out for:
- Inadequate anchoring: Ensure restraints are securely fastened to prevent movement.
- Poor base compaction: A solid sub-base prevents settling and cracking.
- Improper drainage: Water buildup can cause heaving and damage.
- Cutting corners during jointing: Properly filling joints with sand or other material supports the pavers and prevents weed growth.
Follow product guidelines, allow proper cure times, and don’t rush through installation. It’s worth taking the time to do it right.
Safety and site-protection precautions
Prioritize safety during installation. Here are some key precautions:
Personal protective equipment: Wear appropriate gear, including gloves, safety glasses, and steel-toed boots.
Safe handling of heavy materials: Use proper lifting techniques to prevent injury. If needed, use machinery like forklifts or cranes.
Protect adjacent finishes and utilities by controlling traffic around the work area. Use barriers or signs to keep people and vehicles away from active zones.
Conclusion
Edge restraint is the difference between a solid, long-lasting surface and a crack-prone mess. Do the right restraint work now and you protect safety, appearance, and investment for years to come.
First, assess the area for movement, pick a restraint system that fits the paver or slab type, confirm the subbase is stable and dry, gather the materials and tools, lay out the perimeter and joints, install the restraint firm and square, compact the base and edges, allow proper cure or set time, and finally test the system with light pressure before opening to traffic or use. Do the steps in that rough order and verify each item as you go to avoid rework.
Common mistakes to avoid are skipping planning and measurement, using the wrong restraint type or fasteners, and neglecting proper compaction and backfill. Safety rules are simple: wear the right PPE, keep hands clear of rollers and cutting tools, test new work in a small area first, and never force material into spaces where it won’t sit square. If anything looks questionable, stop and re-check before proceeding.
If the project wires into structural movement, or you’re unsure about soil conditions, call a professional rather than pushing on. With careful checks and disciplined work, you’ll finish clean, strong, and ready for years of use.
FAQ
Why is edge restraint so important for pavers and slabs?
Edge restraint keeps paving from spreading out and pulling apart under load. It helps prevent loose edges, shifting, and rutting that can lead to cracks. A solid edge saves you bigger repairs later.
What materials are commonly used for edge restraints?
Common options include concrete curbs, metal or plastic edging, and compacted stone or block edging. Choose based on load, exposure, and how your surface will be used. Always check the product label, manufacturer instructions, and local guidance for compatibility.
What installation steps help ensure a long-lasting edge restraint?
Set the edge to a straight line and secure it firmly before laying the rest of the surface. Backfill and compact behind the edge as you go to prevent movement. Follow the specific product instructions and verify height, overlap, and connection details with the manufacturer.
Should I DIY the edge restraint or hire a pro?
DIY is possible for simple edging and small areas, but bigger loads or complex layouts require a pro. If you’re unsure about soil conditions, drainage, or fasteners, consult local guidance or a contractor. Always review label instructions and local rules before starting.