
Introduction
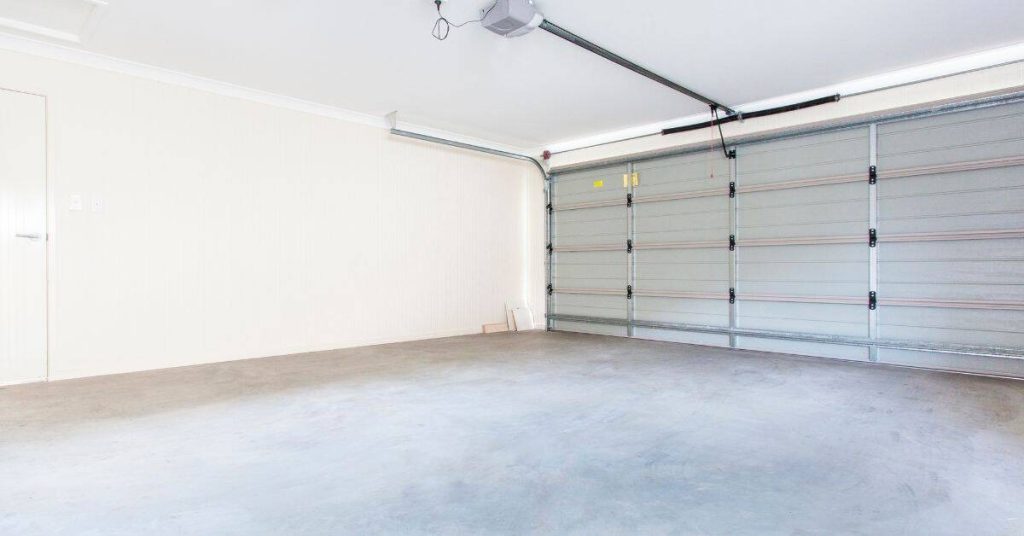
Dusty garage slabs are concrete floors that shed fine dust from the surface as you walk on them. Causes include worn surface, moisture, and exposure to chemicals or abrasion from vehicles and tools. Keeping the area swept and free of grit helps you see how bad the dust problem is and what needs doing next.
Regular sweeping helps control dust by removing loose particles and grit from the surface. If dust remains stubborn, a densifier may be considered, but always follow the product label, manufacturer instructions, and any local rules. Resurfacing becomes the only fix when the surface is deeply pitted, oxidized, or the wear is extensive enough that simple cleaning and treatment won’t hold up.
Key takeaways
- Dustiness often starts from dry concrete surfaces with heavy foot traffic.
- Sweeping reduces surface dust before applying densifiers or sealers.
- Densifiers help harden dust prone slabs but must suit the concrete.
- Resurfacing becomes practical when dust returns after densification or pitting appears.
- Epoxy coatings lock in dust but require surface prep and cure time.
- Plan steps: assess condition, test moisture, and outline a safe sequence.
- Safety: always wear dust mask and eye protection when working dusty slabs.
Table of Contents
- Introduction
- Key takeaways
- Causes of Dustiness on Garage Slabs
- When Sweeping Alone Is an Effective Fix
- How Densifiers Work and When They Help
- When Resurfacing Is the Only Practical Fix
- Comparing Epoxy Coatings and Concrete Resurfacing Materials
- Step-by-Step DIY Planning and Preparation
- Cost Considerations, Longevity, and Maintenance
- Common Mistakes, Safety, and Environmental Impact
- Conclusion
- FAQ
Causes of Dustiness on Garage Slabs
Dusty slabs usually come from three main sources. One is loose powder from a failing surface, sometimes called powdering concrete. A second is efflorescence and moisture-driven salts that appear as crystalline residue. A third is fine surface debris from improper finishing or sealing patterns.
On site, perform quick checks to tell them apart: feel for powdery dust, look for crystalline buildup, and note how dust behaves when wiped away. Quick tests help you decide if this is a surface issue or a sign of deeper decay. Use these clues to guide your next steps in curing, sealing, or resurfacing decisions.
Concrete Porosity and Surface Powdering
High porosity is a common cause of dusty garage slabs. This happens when there are too many tiny holes in the concrete’s surface, allowing particles to escape easily.
Cement laitance, a weak layer that forms on top during curing, can also contribute to powdering. If not properly removed, it flakes off over time, turning into dust.
Surface carbonation occurs when carbon dioxide from the air reacts with concrete’s calcium hydroxide. This makes the surface more porous and prone to dusting.
To identify these conditions, run your hand over the slab. If it feels powdery, that’s a sign of high porosity or laitance. For carbonation, use a pH test kit. Concrete should read 12-13; if it’s lower, carbonation may be present.
Environmental and Usage Factors
Moisture cycles can cause dusting. When water evaporates from the slab, it leaves behind salts that break down the concrete’s surface over time.
Salt itself, often present in de-icing agents or coastal regions, accelerates this process. Vehicle traffic grinds these particles into a fine dust, while stored chemicals may react with the concrete, further weakening its surface.
Temperature swings also play a role. As concrete expands and contracts with heat and cold, it can flake off tiny particles that turn into dust.
To mitigate these factors, ensure proper ventilation, keep the area dry when possible, and use compatible sealers to protect the slab from chemical reactions.
Poor Finishing, Curing, and Age-Related Degradation
Improper finishing leaves a weak surface layer that sheds dust over time. This can happen if the concrete was not properly screeded or floated, leaving an uneven, porous surface.
Early traffic on fresh concrete can also cause dusting. If the slab wasn’t given enough time to cure and harden, it will wear away faster under foot or vehicle traffic.
Age-related degradation is inevitable. Over decades, even well-maintained slabs will start to powder as their surface wears down. This is especially true in high-traffic areas like garages.
To combat these issues, ensure proper finishing and curing techniques are used during construction. For older slabs, regular maintenance with compatible sealers and densifiers can help extend their lifespan and reduce dusting.
When Sweeping Alone Is an Effective Fix
Mechanical removal works best when the dust is dry concrete dust or tracked-in soil on a fairly sealed or dense surface. It also helps if the finish is intact and there are no active leaks. Gypsum or cement dust tied to surface porosity responds to thorough brushing and vacuuming too.
Set realistic expectations for cleanliness: a thorough sweep should look and feel free of loose dust after the final pass. Longevity depends on moisture, traffic, and how well you keep up with routine cleanings. If moisture or movement remains, sweeping alone may not hold up long term.
Best sweeping and cleaning practices
Regular, thorough cleaning is key to keeping your garage slab dust-free. Here’s how to do it right.
Frequency: Aim for weekly sweeps. Dust accumulates quickly, especially in high-traffic areas.
Tools: Use a stiff-bristle push broom for initial sweeping, followed by a microfiber dust mop to capture fine particles. A shop vac with cleanable filters helps remove stubborn dust.
Technique: Work in overlapping paths, edges first, then the center. Keep dust off the air by wetting the mop slightly and moving it slowly.
Limitations of sweeping
Sweeping alone won’t fix every dust issue. Here are signs you need more than just a broom:
Active powdering: If concrete dust is actively shedding from the surface, sweeping won’t help. This indicates a densification or resurfacing treatment is needed.
Structural delamination: Flaking or peeling of the slab’s top layer signals underlying issues like moisture damage or poor curing. Sweeping won’t address these structural problems.
Chronic moisture: Sweeping can’t prevent dust buildup if your garage is constantly damp. Address moisture sources to keep dust at bay.
Tools and materials checklist for cleaning
Before treating your slab, ensure it’s clean. Use this checklist to gather the right tools:
- Stiff-bristle push broom: For initial sweeping; soft bristles won’t dislodge dust.
- Microfiber dust mop: Captures fine particles missed by the broom. Use with a damp-mopping technique.
- Shop vac with cleanable filters: Removes stubborn dust and prevents clogging; replace filters as needed.
- Degreaser or concrete cleaner: For tough stains or grease spots; use sparingly, following manufacturer’s instructions.
- Broom and dustpan: For edges and corners where larger tools can’t reach.
- Safety gear: Gloves, safety glasses, and a dust mask to protect from dust exposure.
- Flashlight or inspection light: To check for hidden cracks or damage before treatment.
- Tape measure: To ensure proper coverage of densifiers or resurfacing materials.
Quick rule: Always inspect your slab before treating. Skipping this step can lead to wasted effort and money.
How Densifiers Work and When They Help
Concrete densifiers are chemical treatments that react with the surface chemistry to form denser pore structure and reduce dusting. They primarily aim to fill capillary pores and increase surface density. The result is a harder, less dusty top layer when applied correctly.
Different chemistries matter for pore filling and coating compatibility. Lithium-based formulations may act differently than silicate blends. Use the right product for the type of finish you want and the coatings you plan to apply later, following the label and manufacturer guidance for prep and cure times.
Types of densifiers and how to choose
Concrete densifiers come in different types, each with its own chemistry and benefits. Here’s a quick rundown:
Silicate-based densifiers, like sodium or potassium silicate, react with calcium hydroxide in concrete to form additional calcium silicate hydrate (CSH). They’re great for filling micro-pores and improving surface hardness.
Lithium silicate densifiers work similarly but offer better compatibility with coatings. They also provide enhanced long-term durability due to their slower reaction rate.
For light dusting from new or aged concrete with hairline porosity, silicate-based densifiers are usually sufficient. If you’re preparing a slab for coatings, lithium silicates might be your best bet.
Proper application technique for densifiers
Applying densifiers correctly is crucial for them to work effectively. Here’s how:
Surface prep: Clean, dry, and pH-balance the slab. A clean surface ensures good penetration.
Application: Apply densifier evenly using a low-pressure sprayer or roller. Follow manufacturer guidelines for dilution rates and coverage.
Dwell time: Let it sit as directed – usually 15-30 minutes. This allows the densifier to react with the concrete.
Visual checkpoints: Look for a slight color change or haze on the surface, indicating reaction completion. Rinse off any excess with clean water after the dwell time.
Realistic outcomes and maintenance after densification
Densifiers can significantly reduce dusting, but they won’t eliminate it completely. Expect noticeable improvement, not perfection.
Surface hardness should increase, making the slab more resistant to damage from foot traffic or vehicles. Densified slabs also tend to hold coatings better.
Maintenance: Regularly sweep and clean your garage floor to remove any remaining dust and debris. If you notice increased dusting over time, consider reapplying densifier or combining it with other treatments like grinding or resurfacing.
When Resurfacing Is the Only Practical Fix
Resurfacing becomes necessary when you see deep pitting, wear through to rough patches, or there are movement cracks that won’t seal. If the slab base is compromised or you want a seamless aesthetic, resurfacing is a practical option. Structural concerns typically drive this choice as well.
Before deciding, assess thickness, base integrity, and moisture issues. Use a moisture check and ensure substrate compatibility with resurfacing products. Plan for curing and ventilation needs and schedule around other garage upgrades if needed.
Structural and Surface Failure Indicators
Before you grab your resurfacer, step back and assess the damage. Resurfacing isn’t a band-aid for every issue.
Deep Pitting: If pits are deeper than 1/8 inch, they’ll show through any resurfacer. Fill them first.
Structural Cracks: Hairline cracks are fine, but wider ones or those with movement indicate underlying issues. Get a pro’s opinion before proceeding.
Widespread Spalling: If large areas of the surface are flaking off, it’s time for resurfacing. Small patches can be repaired, but extensive spalling needs a new surface.
Types of Resurfacing Materials and Suitability
Choosing the right material is key to a successful job. Here’s what you need to know:
- Cement-Based Overlays: Thin, easy to apply, but may crack if not properly prepared.
- Polymer-Modified Mortars: Flexible, durable, but can stain if not sealed. Look for high polymer content.
- Micro-Toppings: Thin, decorative, but don’t hide imperfections well. Use as a final touch after proper prep.
Expected Lifecycle and When to Resurface Instead
Resurfacing solves root problems, but it’s a bigger job than repeated densifier or cleaning cycles. Here’s why:
Long-Term Durability: A well-done resurfacer job can last 10-20 years with proper care. Densifiers and cleanings wear off faster.
However, Resurfacing Isn’t Always Necessary: If the slab is structurally sound but just dusty or has minor surface issues, densifiers or cleanings might be enough. It’s all about assessing the damage right.

Comparing Epoxy Coatings and Concrete Resurfacing Materials
Adhesion on weak or dusty concrete depends on surface prep and priming. A simple pull-off or moisture check can indicate whether epoxy or resurfacing offers a better bond. If the substrate is unstable, resurfacing may be the safer path.
Dust control and sealing vary between options. Epoxy coatings seal surfaces but require proper profile and curing. Cementitious resurfacing materials can encapsulate dust but may behave differently under wear and traffic; follow label guidelines for prep and application.
Material properties and adhesion considerations
The material you choose for your garage slab depends on the condition of your existing concrete. Epoxy coatings and cementitious resurfacing materials each have their strengths, and proper substrate preparation is key to a successful outcome.
- Epoxy Coatings: Ideal for weak or dusty concrete with good structural integrity. Use when the slab is sound but needs better protection. Spec/ratings to look for: High solids content, good adhesion ratings. Practical tip: Ensure proper surface preparation and priming.
- Cementitious Resurfacing Materials: Suitable for severely damaged or crumbling surfaces. Use when the slab needs structural renewal. Spec/ratings to look for: High compressive strength, good bond strength. Practical tip: Avoid using on sound but dusty slabs without proper preparation.
- Substrate Prep for Epoxies: Clean, grind, and vacuum to create a profile. Moisture readings below 4% are crucial. Use a suitable primer.
- Substrate Prep for Resurfacers: Remove loose material, clean, and dampen the surface (if allowed by product specs).
- Red Flags: Cracking or staining within days of application may indicate wrong material choice or poor prep.
Performance, slip resistance, and visual outcomes
Epoxy coatings and cementitious resurfacing materials offer different performance characteristics and aesthetic options for your garage slab.
Epoxies provide excellent abrasion resistance due to their thick wear layer. They can be customized with various sheens, colors, and textures, including anti-slip aggregates. However, they may not fully hide minor imperfections in the substrate.
Cementitious Resurfacers, on the other hand, offer good abrasion resistance and can blur imperfections better than epoxies. They typically have a more natural, matte appearance but can be customized with integral colors or stains. Slip resistance can be enhanced by adding texture to the surface.
Maintenance-wise, both systems require periodic cleaning, but epoxy coatings may need touch-ups due to their thick wear layer, while resurfacers might show minor cracks over time that can be easily patched.
Cost, recoatability, and repairability trade-offs
The choice between epoxy coatings and cementitious resurfacing materials also depends on your budget, maintenance willingness, and expected lifespan.
Epoxies are generally more expensive due to their superior performance and durability. They can be recoated when necessary, extending their lifespan. Repairs are possible but may require sanding and re-priming the area.
Cementitious Resurfacers are typically less costly but have a shorter lifespan compared to epoxies. They can usually be patched easily if minor damage occurs, making them more forgiving in high-traffic areas. However, recoating may not be as straightforward due to their different chemical composition.
Before choosing one system over the other, consider factors like expected traffic, budget, and maintenance willingness. Perform simple tests on small areas first to ensure you’re happy with the outcome before committing to a full application.
Step-by-Step DIY Planning and Preparation
Start with a moisture and structural check of the slab. Look for cracks, delamination, and roughness, and document findings with notes and photos. Decide if a densifier or resurfacing is more appropriate based on condition and use.
Outline the scope for both paths, plan materials and sequencing, and set a realistic timeline. Ensure the area is dry, ventilated, and protected from dust intrusion during curing or drying.
Step-by-Step Process
This section guides you through the practical steps of planning and preparing your garage slab project, from initial checks to final cleanup.
- Preparation and safety: Put on PPE, clear the area, set up dust barriers. Safety first!
- Moisture test: Use a calcium chloride test kit to check for moisture emission in the slab. If it’s wet, wait or call a pro.
- Main work – Densifier: If chosen, apply densifier using a sprayer or mop, following manufacturer’s guidelines. Work in small sections.
- Resurfacing prep: If resurfacing, grind and vacuum the surface to create a profile for better adhesion. Prime with a suitable primer.
- Cure and clean up: Let it cure according to product specs, then remove dust barriers and clean up. Job done!
Assessment checklist and measurement tips
Use this checklist before starting any work to map affected areas and gather data for material estimates.
- Moisture test: Check for moisture emission using a calcium chloride test kit. Moisture can ruin your project!
- Crack inspection: Inspect cracks for width, depth, and severity. Note any hairline or structural cracks.
- Delamination check: Tap the slab with a hammer. A dull thud indicates delamination. If so, resurfacing might be needed.
- Roughness assessment: Feel the surface. Rough slabs need more prep work or resurfacing.
- Existing coatings: Note any existing sealers or coatings that may affect product adhesion.
- Oil spots and stains: Mark oil spots, chemical residues, or stains for extra cleaning during prep.
- Spalls and patch needs: Note any spalls or areas needing patching. These need repair before densification or resurfacing.
- Measurements: Measure the affected area(s) accurately for material estimates.
Quick rule: Don’t skip this step. It’s crucial for planning and estimating materials!
Surface preparation and priming steps
Thorough surface prep ensures product adhesion and a successful project.
Start by removing loose debris, oil, and chemical residues using a degreaser. Then, mechanically profile or etch the surface to create micro-pores for better adhesion. Use a grinder with diamond blades or an acid etcher as needed.
Next, repair cracks and spalls using a suitable concrete patching material. Ensure a consistent surface profile before priming.
Priming: Choose a primer that’s compatible with your chosen densifier or resurfacing product. Apply it evenly, following manufacturer’s guidelines. A good prime job ensures better adhesion!
Timing, staging, and curing considerations
Proper timing and staging ensure your project cures correctly and performs as expected.
Weather: Avoid applying densifiers or resurfacing materials in extreme temperatures (below 50°F/10°C or above 90°F/32°C) or high humidity. Wait for suitable weather conditions.
Temperature control: Maintain consistent temperature during application and curing. Use heaters or fans if necessary, following safety guidelines.
Curing time: Allow the recommended cure time before using the slab again. This ensures the product has fully cured and gained its intended strength and durability. Follow manufacturer’s guidelines for specific products!
Cost Considerations, Longevity, and Maintenance
Compare upfront costs with long-term savings for each option. Include materials, tools, and labor, and consider bundle deals if you’re doing multiple steps. Look for guidance on expected service life from product labels and manufacturer instructions.
Plan maintenance cadence and costs for sweeping, densifying, coatings, or resurfacing. Factor in downtime, humidity effects, and how usage affects durability over time. Use a practical framework to weigh options based on budget and expected lifespan.
Cost factors to evaluate
The cost of treating your dusty garage slab varies based on several factors. First, consider the condition of your existing surface. Worse conditions mean higher prep and material costs.
Square footage plays a big role too. Larger areas need more materials and labor, driving up the price.
Material choice also affects cost. Sweeping and densifying are usually cheaper than coatings or resurfacing. But remember, cheaper upfront doesn’t always mean better in the long run.
Labor costs can be high if you’re hiring pros. DIY can save money but requires time and effort. Check local quotes and product specs to get a clear picture of what you’ll spend.
Expected durability and maintenance needs
Each treatment has its own lifespan and maintenance requirements. Sweeping and densifying can last 2-5 years, depending on traffic and conditions. But they’ll need regular reapplication to keep dust at bay.
Coatings like epoxy can last 5-10 years with proper care. They require periodic cleaning and touch-ups but no major maintenance until it’s time for recoating.
Resurfacing provides the longest service life, often 10-20 years. But it’s also the most labor-intensive to maintain, requiring occasional grinding and resealing.
Moisture issues, temperature swings, and heavy traffic can shorten lifespans regardless of treatment. Regular inspections help catch maintenance needs early.
When to hire a professional vs DIY
DIY is great for simple jobs like sweeping and applying densifiers. But if your slab has structural issues, it’s best to call in the pros.
Complex installations, like full resurfacing or intricate coating patterns, are also better left to professionals. They have the experience and tools to do the job right.
If you want a warranty, hire a pro. Many offer warranties on their work, giving you peace of mind.
But if you’re comfortable with power tools and have the time, DIY can save you money. Just remember, a botched job can cost more to fix than hiring a pro in the first place.
Common Mistakes, Safety, and Environmental Impact
DIY mistakes often involve improper surface prep or selecting incompatible products. These missteps can lead to long-term failures. Check product labels and local rules to avoid common pitfalls.
Safety protocols cover PPE, ventilation, and dust suppression. Consider environmental impact and proper disposal of residues and containers. Keep the workspace organized to reduce slip hazards and accidents during work.
Common pitfalls to avoid
Steer clear of these common DIY mistakes to ensure your garage slab project lasts.
- Inadequate prep: Skimping on surface preparation leads to poor adhesion. Always clean, grind, and profile the concrete.
- Wrong product for substrate: Using the wrong densifier or epoxy can cause long-term failures. Match products to your slab’s condition.
- Improper mixing: Following mixing instructions ensures optimal performance. Don’t rush or skip steps.
- Rushing cure times: Allowing proper curing time lets the product set right. Rushing can weaken the surface.
Each step matters. Take your time, follow instructions, and don’t cut corners.
Safety measures and PPE
Prioritize safety when working with chemicals and dust. Follow these guidelines:
PPE: Wear gloves, goggles, and a respirator when handling cleaners, densifiers, and epoxies.
Ventilation: Ensure your workspace is well-ventilated to prevent solvent buildup. Use fans if needed.
Always follow product Material Safety Data Sheets (MSDS) for specific safety instructions.
Environmental impact and proper disposal
Minimize your project’s environmental footprint with these practices:
Runoff control: Contain chemicals and rinse water to prevent runoff into drains or soil.
Neutralize chemicals: Use neutralizing agents for strong acids or bases in cleaning solutions. Check product labels for recommendations.
Recycle and dispose responsibly: Recycle empty containers when possible. Dispose of leftover materials and contaminated water at a hazardous waste facility. Never pour chemicals down drains.
Conclusion
Keep the work focused on safety and durability. The right move now is to decide and act in small, controlled steps so the slab stays solid, looks clean, and lasts longer.
To move forward, perform a simple check-and-plan: assess how dusty the slab is, decide whether sweeping is enough or a densifier will help, or if resurfacing is required; test a small area to confirm results before committing; gather the right PPE and tools, ensure good ventilation, plan for proper drainage and edge work, verify material compatibility, and set a realistic budget and timeline before you start.
Common mistakes to avoid are rushing into resurfacing without a patch test, using the wrong product for your finish or dust level, and skipping safety steps like ventilation, eye protection, and respirator use. Never apply coatings or densifiers to a damp or unstable surface, and stop if you see cracks, water intrusion, or significant movement. Always test first and follow manufacturer instructions to prevent permanent damage.
If the slab shows structural cracks, widespread movement, or you’re unsure about the coating choice or resurfacing depth, it makes sense to call in a pro rather than push ahead. With careful planning and proper work, you’ll get a safer, cleaner garage floor and real, measurable results that last. You’ve got this—take the first safe step today and stay deliberate through the process.
FAQ
What signs tell me dustiness is coming from the concrete itself and not just loose dirt?
Look for a fine, talc-like dust that reappears after sweeping. If the surface feels chalky or powders off when you rub it, that’s a clue the concrete pores or surface finish are worn. Check the slab’s surface for spalling or tiny fissures that can let fines escape.
How does sweeping actually help a dusty garage slab?
Sweeping removes loose dust so you don’t grind it into the air or into sealers. It also helps you see the true condition of the surface for the next treatment. Keep it simple and frequent so you can decide on the right fix without piling up fines again.
When should I consider using a densifier on a dusty slab?
Consider densifiers only on clean, dry concrete where the goal is to harden the surface and reduce dust. Always follow the product label and manufacturer instructions, and verify that the slab isn’t sealed or painted first. If in doubt, check with the product datasheet or local guidance.
When is resurfacing the only practical fix?
Resurfacing is usually needed when the surface is badly worn, chipped, or delaminating, or when a coating won’t adhere well due to deep porosity. If tools or coatings won’t stick after proper prep, or the dust is from deep pores, resurfacing is the safer path. Always confirm with the product instructions and local requirements before starting.