
Introduction
Drywall taping is the process of sealing joints with tape and joint compound to hide seams. It’s a hands-on step after hanging panels that keeps walls flat and ready for paint. You’ll work in stages, smoothing each layer so it dries without ridges.
Keep the work area clean and inspect joints as you go to stop small problems before they grow. Follow the manufacturer’s instructions for drying times and conditions, and check local rules if you’re unsure. If a joint looks high or cracked, feather the edge and let it dry before applying additional coats.
Key takeaways
- Understand the concept of “stop rules” to pause when problems surface.
- Inspect surface for flatness, thoroughly clean dust, and repair gouges before taping.
- Apply mud in thin coats, feather edges, and avoid bundling too thick layers.
- Protect occupants and workspace with ventilation, masks, and eye protection.
- Use correct tapes and fasteners, and verify screw pops are addressed prior to finishing.
- Stop DIY and call a professional if moisture, cracks, or wide gaps appear.
Table of Contents
- Introduction
- Key takeaways
- Quick Overview and the Concept of “Stop Rules”
- Tools and Materials Checklist
- Surface Assessment and Preparation
- Step-by-Step DIY Taping Workflow with Stop Rules
- Visual Checkpoints and Quality Signs
- Common Mistakes and Corrective Fixes
- Environmental and Material Considerations
- When to Stop DIY and Call a Professional
- Conclusion
- FAQ
Quick Overview and the Concept of “Stop Rules”
Taping drywall is a process with clear milestones. Understand the basics: embedding tape, applying coats, and achieving a smooth finish. The idea of Stop Rules is to pause when something doesn’t look right and verify before moving on.
Success looks like a flat, crack‑free surface with uniform texture and no edge ridges. Common failure modes include loose tape, visible joints, and sanding dust migrating into the compound. Use Stop Rules to decide when to redo a step or call in a pro for a stable finish.
What drywall taping involves
Drywall taping, also known as mudding, is the process of creating smooth, invisible seams between drywall panels. It’s a critical step in preparing your walls for painting or other finishes.
You’ll use three main tools: joint tape (usually paper or mesh), joint compound (mud), and a taping knife. Paper tape requires embedding it into the mud, while mesh tape can be used with or without mud.
The goal is to create a seamless, flat surface. You’ll apply multiple thin coats of mud, allowing each to dry before sanding and applying the next. Patience is key here; rushing will lead to visible seams.
What “Stop Rules” mean for DIYers
“Stop Rules” are clear decision points that help you know when to pause, redo, or stop your drywall taping work. They’re like traffic lights guiding you through the job.
Red light: When to stop and reassess. For example, if you’ve applied too thick a layer of mud, it might crack as it dries. Stop, let it dry, then sand and start again with a thinner coat.
Yellow light: When to slow down or seek advice. If you’re unsure about how much pressure to apply when sanding, ask an expert before you damage the surface.
Green light: When to call in a pro. If you’ve encountered major issues like bowed walls or extensive drywall damage, it’s time to bring in a professional. They have the tools and experience to handle complex problems.
Tools and Materials Checklist
Gather core tools for embedding tape, applying compounds, and smoothing joints. Include a taping knife, a mud pan, a paddle mixer, and a corner tool as needed. Have a utility knife, sanding blocks, and a sampler of sandpaper grits on hand.
Category-wise, stock joint compounds, paper or fiberglass tape, and primer suitable for drywall work. Check product labels and manufacturer instructions for use, drying times, and suitability for your wall type. If unsure, compare options and ask for store guidance or refer to the data sheet before buying.
Must-have tools
Before you start mixing concrete, ensure you have all the necessary tools. This checklist will help you verify what you need and avoid common pitfalls.
- Taping knife: Essential for applying and smoothing concrete. Start with a 4″ or 6″ trowel for small jobs, and a 12″ or 18″ for larger ones. Check the blade’s sharpness to ensure clean cuts.
- Mud pan (hawk): Used to hold and transfer concrete mix. A standard size is 6″ x 14″, but adjust based on your project’s needs. Ensure it’s clean and free of cracks.
- Hawk: This tool helps in spreading and leveling concrete. A 24″ or 30″ hawk is suitable for most jobs. Check its condition to avoid warped surfaces.
- Corner tools (inside/outside): Crucial for working in corners. Start with a 1/4″ or 3/8″ corner tool set. Verify they fit your project’s corner radius.
- Screed: Used to level and smooth concrete surfaces. A 2×4 or 2×6 works well for most DIY projects. Ensure it’s straight and free of bends.
- Float (bull float): Helps in smoothing and consolidating concrete. Start with a 18″ or 24″ float. Check its condition to avoid damaging the surface.
- Edger: Used to finish edges of slabs, preventing them from crumbling. A standard size is 3/4″, but adjust based on your project’s needs. Ensure it’s sharp for clean cuts.
- Sanding tools (if needed): For smoothing and finishing surfaces. Start with a 12″ or 18″ sanding screen. Check its condition to avoid damaging the surface.
Quick rule: Always inspect your tools before starting work. Dull or damaged tools can lead to poor finishes, extra work, and even safety hazards.
Joint compounds and tape options
Before you start taping and compounding your drywall joints, use this checklist to ensure you’ve got the right materials for the job. This is best done when your drywall is up and before you start sanding.
- Premixed vs setting compounds: Check if you need a quick-setting or standard compound. Premixed is ready to use, while setting compounds require mixing. Use premixed for small jobs or when time is critical; setting compounds are better for large areas and offer more working time.
- Compound type: Lightweight or regular: Verify if your walls are lightweight (metal studs) or standard (wood studs). Use lightweight compound for metal studs to avoid sagging, and regular compound for wood studs.
- Tape: Paper, mesh, or fiberglass?: Inspect the joint width. For narrow joints (<1/2″), use paper tape. For wider joints (1/2″ – 3/4″), use mesh tape. For very wide joints (>3/4″) or curved surfaces, use fiberglass tape.
- Tape width: Measure the joint width and select a tape that’s slightly narrower to avoid excess material. Too narrow can cause cracking; too wide wastes material.
- Compound coverage: Estimate your wall area and check if you’ve enough compound. A 16 oz tub covers about 80 sq ft, so adjust quantities as needed.
- Tape adhesive: Ensure you have a compatible tape adhesive for your chosen tape type. Read manufacturer instructions to confirm.
- Compound application tools: Check if you’ve got the right tools: wide taping knife (4″ – 6″) for applying compound, and a narrower knife (2″ – 3″) for embedding tape and final coats.
- Proper storage: Ensure all materials are stored properly to prevent drying out. Keep compounds sealed tightly when not in use, and store tapes away from heat sources.
Quick rule: Always read manufacturer instructions for specific product usage and safety guidelines. This checklist provides general guidance, but local conditions may vary.
Safety gear and prep supplies
Before you start mixing joint compound or making repairs, ensure you have the right safety gear and prep supplies to protect yourself and your home. Use this checklist before each work session.
- Dust mask/respirator: Check for a NIOSH-rated N95 or P100 filter to minimize dust inhalation. Ensure it fits properly by performing a user seal check.
- Eye protection: Wear safety glasses with side shields or goggles to protect your eyes from debris and drywall dust.
- Gloves: Use work gloves to protect your hands from cuts, scrapes, and joint compound. Check for a good grip to handle tools and materials.
- Drop cloths: Lay down canvas or plastic drop cloths to protect floors and fixtures from drywall dust and joint compound spills. Ensure they’re large enough to cover the work area.
- Ventilation: Set up a fan or dust extractor to minimize airborne dust. Position it to blow dust away from your work area, not towards you.
- Tape measure: Verify it’s in good working order and calibrated to ensure accurate measurements for cuts and repairs.
- Utility knife: Check blade sharpness. A dull blade can cause sloppy cuts and increase the risk of injury. Replace if necessary.
- Joint tape: Ensure you have the right type (paper, mesh, or fiber) for your joint compound and project requirements. Check for any damaged rolls before starting work.
Quick rule: Always prioritize safety first. Skipping safety gear can lead to serious health issues and damage to your home. Double-check your supplies each time you start working.
Surface Assessment and Preparation
Start by inspecting the drywall surface for gouges, ridges, and moisture issues. Look for loose boards, nail pops, or delamination behind the surface. Identify underlying causes so you can address them before taping.
Prepare the surface by cleaning dust, repairing small damage, and sanding high spots. Ensure the substrate is dry and stable according to local guidance. If you see signs of structural trouble, plan a pro review before proceeding.
Inspecting for structural or substrate problems
Before you start taping, give your walls a thorough once-over. You’re looking for signs of trouble that could make your hard work short-lived.
Framing movement: Check for cracks around windows and doors. If they’re wide or wonky, there might be framing issues. Get those fixed first.
Water damage: Look for discoloration, warping, or soft spots. Water-damaged drywall needs to be replaced before taping.
Loose drywall: Give the walls a gentle push. If they feel wobbly, screws need to be tightened or replaced.
Prepping seams, screws, and edges
To ensure your tape adheres properly, prep the surfaces first. Here’s how:
Remove any loose paper or debris from seams with a utility knife. Then, use a screwdriver to countersink any protruding screw heads. If screws are missing, drive new ones in.
For edges, use sandpaper to remove any rough spots and create a smooth surface for your tape to stick to.
Finally, clean the area with a damp cloth to remove dust. Let it dry before you apply your tape and compound.
Step-by-Step DIY Taping Workflow with Stop Rules
Embed the tape along joints with a light, even pass to remove air pockets. Apply the first coat thick enough to cover the tape but not so heavy it drags. Let it set until it loses tack before moving to the next stage.
Apply the second coat with a wider feathered edge to blend joints. Check for ridges or hollow spots before the finish coat. If you see any irregularities, stop and re‑embed or re‑coat as needed, then recheck before continuing.
Step-by-Step Process
The following steps outline a practical DIY drywall taping workflow with stop rules to ensure quality results. This sequence starts with preparation, performs the main work, and concludes with cleanup.
- Inspect your workspace for safety: remove obstacles, secure lighting, and wear appropriate gear (gloves, goggles).
- Prepare your tools and materials: have joint compound, tape, trowels, sanding block, and safety supplies at hand.
- Check seams, screws, and edges: ensure they’re clean, dry, and ready for taping. Fill any gaps or voids with compound if necessary.
- Apply the first coat of joint compound using a 6-inch trowel, embedding tape into the wet compound. Smooth the bead with a 12-inch trowel, ensuring no bubbles or voids are present.
- Let it dry: follow manufacturer’s instructions for drying time. Inspect for any missed spots or trapped air before moving on to the next step.
- Apply fill coats: add successive layers of compound, building a taper and feathering edges. Stop when edges are flat and ready for sanding.
- Lightly sand seams: use a fine-grit sandpaper (120 or 150) to smooth ridges or low spots. Stop sanding when seams blend visually and tactilely, avoiding over-sanding.
- Clean up: remove debris, wash tools, and store materials properly for future use.
Embedding tape and first coat
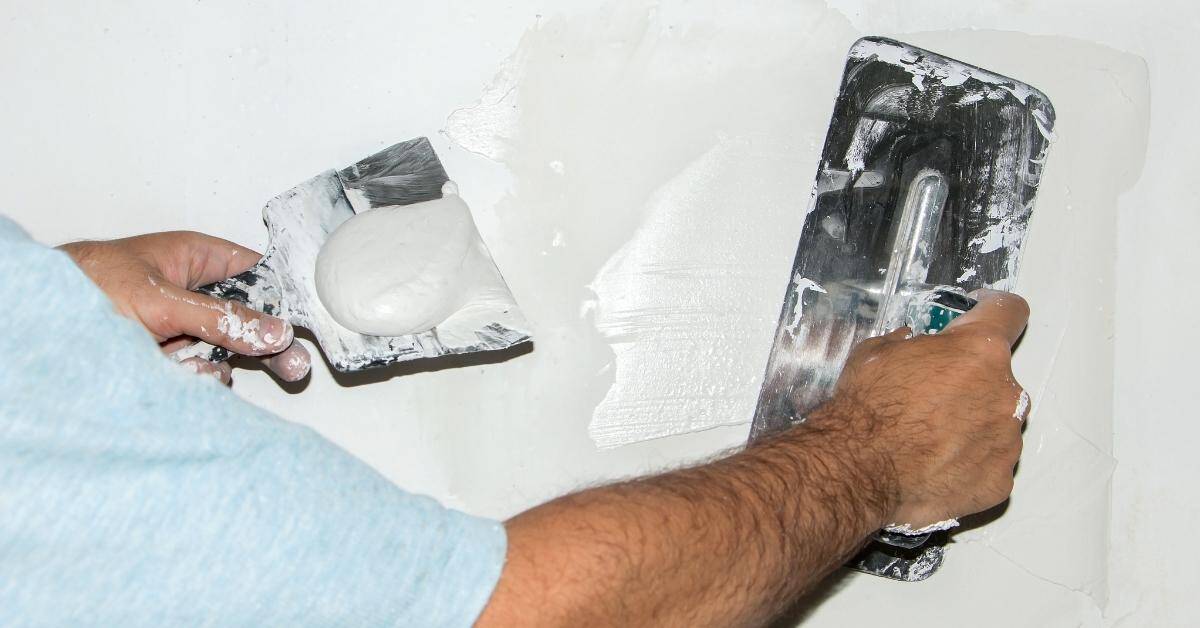
Properly embedding the tape into the joint compound is crucial for a strong bond. Here’s how to do it:
Start by applying a thin layer of compound onto the seam using a 6-inch trowel. Immediately press the tape into the wet compound, ensuring full contact and no wrinkles or bubbles.
Use a 12-inch trowel to smooth the bead, removing excess compound and creating a flat surface. Inspect for any trapped air or voids. If found, stop, poke holes with a needle tool, and refill before it dries.
Let the first coat dry according to the manufacturer’s instructions. Once dry, proceed to applying fill coats.
Applying fill coats and feathering
Adding successive coats builds a taper and feathers edges for a smooth finish. Here’s how:
After the first coat has dried, apply a wider layer of compound using a 10-inch or 12-inch trowel. Feather the edges to create a smooth transition between the seam and the wall.
Let it dry, then inspect for any missed spots or low areas. Apply additional coats as needed, building up the taper and feathering further with each application. Stop adding coats when edges are flat and ready for sanding.
Sanding and final finish
Lightly sanding the seams ensures a smooth, finished look. Here’s how to do it right:
Use a fine-grit sandpaper (120 or 150) attached to a sanding block. Gently sand ridges or low spots on the seam, following the direction of the tape.
Inspect your work visually and by touch. Stop sanding when seams blend smoothly with the surrounding wall both visually and tactilely. Avoid over-sanding, which can create divots or remove too much compound.
Visual Checkpoints and Quality Signs
Look for a uniform surface with no visible tape edges or texture differences. Run a light hand over joints to feel for smoothness and consistency. Confirm that joints blend into the surrounding drywall without shadows.
Check that the surface is flat to the eye and by sight along long runs. If you detect pinholes, cratering, or rough patches, set aside the area for touch‑up. Don’t proceed until the checks pass at this stage.
Seam and edge appearance
Use this checklist after applying each coat to ensure a smooth, professional finish.
- Smooth transitions: Run your hand along seams. Feel for any bumps or ridges.
- No visible tape lines: Check for any visible tape edges. If seen, apply more compound and sand lightly.
- Consistent feathering: Ensure edges blend smoothly into the wall. Inconsistencies may require touch-ups.
- Dry time: Let each coat dry before moving on. Skipping this can cause issues in later stages.
- No cracks or gaps: Check for any hairline cracks or gaps. Fill with compound if found.
- Even surface: Look for any low or high spots. Sand down highs, fill lows with compound.
- No excess compound: Wipe away excess compound to prevent drips and sags.
- No dust: Ensure no drywall dust remains before applying the next coat. Dust can cause pitting.
Quick rule: If it feels or looks wrong, fix it before moving on.
Corners and butt joints
Inspect corners and butt joints after each coat to ensure straightness and even coverage.
- Inside corners: Check for square cuts. Use a corner bead if necessary.
- Outside corners: Ensure they’re sharp and well-defined. Rounded or uneven corners need touch-ups.
- Butt joints: Check for proper alignment. Misaligned joints require realignment.
- Straightness: Use a level to check corners and butt joints. Any deviation needs correction.
- Compound coverage: Ensure compound covers the entire joint or corner. Incomplete coverage can cause issues later on.
- No gaps: Check for any gaps at corners or butt joints. Fill with compound if found.
- No excess compound: Wipe away excess compound to prevent drips and sags, especially at corners.
- Dry time: Let each coat dry before moving on. Skipping this can cause issues in later stages.
Quick rule: Straight, even, and complete coverage is key for a professional finish.
Common Mistakes and Corrective Fixes
Too much compound can squeeze at corners and cause lumps. Remove excess gently and re‑embed tape if needed. Under‑embedded tape will telegraph through the finish coat and require rework.
Over‑sanding creates deep scratches and reduces adhesion in spots. Stop sanding when the surface feels smooth, then wipe away dust and recheck. If edges are still visible, apply a light touch‑up coat and re‑sand carefully.
Overworking compound and rework tips
Too much compound can lead to delamination, where the tape peels off. If you notice this happening:
Stop! Let it dry. Then, gently scrape off excess compound with a taping knife.
If delamination is severe, remove the tape, clean the surface, and start again. Spot-correct minor issues by lightly sanding, then apply a small amount of fresh compound.
Tape bubbles, ridges, and visible seams
Bubbles form when there’s too much compound or trapped air. Ridges appear if tape wasn’t fully embedded.
For bubbles, let them dry. Then, cut out the bubble with a utility knife, clean up the area, and reapply compound.
For ridges, lightly sand to smoothen, then apply a thin layer of fresh compound. For visible seams, feather the edges of your tape and apply more compound.
Environmental and Material Considerations
Temperature and humidity affect cure and adhesion of joint compounds. Verify the project’s conditions against product guidance rather than sticking to fixed times. Use ventilation and consistent conditions when possible.
Different compound types behave differently, so read the label for open time and drying cues. If your area has unique conditions, consult the manufacturer instructions or local rules before starting a batch.
Drying, ventilation, and curing
Proper drying is key to a strong, durable drywall finish. Ventilation speeds up the process. Keep your room well-ventilated during taping and for at least 24 hours afterwards.
Stable conditions are crucial. Fluctuating temperatures or humidity can cause shrinkage or even mold growth on your walls.
Maintain a steady, moderate temperature between 70°F to 85°F (21°C to 29°C) and keep humidity below 60% for best results.
Moisture-prone areas and material choices
In moisture-prone areas like bathrooms or kitchens, using the right materials is vital to prevent issues down the line.
- Greenboard: Use for high-moisture areas. It has a built-in mold inhibitor.
- Mold-resistant tape: Spec look for ‘mold-resistant’ or ‘moisture-resistant’ on the label. Apply in wet areas to prevent mold growth behind the tape.
- Low-VOC compounds: These emit fewer volatile organic compounds, reducing the risk of mold and mildew in humid environments.
- Avoid standard paper-faced drywall in moisture-prone areas. It can swell and lose its bond when exposed to water.
- Seal seams with primer: Before taping, seal all seams and edges with a mold-resistant primer for added protection.
When to Stop DIY and Call a Professional
Stop if you discover structural damage, ongoing large cracks, or concealed systems behind the walls. Recurrent issues beyond surface repair are a signal to pause and seek help. Have pictures, notes, and a list of findings ready for a pro.
When in doubt about the cause of failure or if moisture is involved, contact a professional. Collect your project details and expectations to discuss next steps clearly with the contractor.
Structural, repeated, or hidden issues
If you notice recurring cracks, movement in your walls, or large damaged areas, it’s time to stop and call a professional. These signs could indicate serious structural issues that require expert attention.
Recurring cracks might be due to settling or even hidden damage. Movement can signal foundation problems. Large damaged areas could hide rot or other concealed-system issues.
Don’t risk further damage or safety hazards by continuing to work on these issues yourself. A professional can assess the situation, determine the cause, and provide appropriate solutions.
Utilities, hazardous materials, and mold
When dealing with electrical or plumbing work, asbestos concerns, or significant mold, it’s crucial to stop your DIY project and consult professionals.
- Electrical work: Incorrect wiring can cause fires. Always hire a licensed electrician for any electrical work.
- Plumbing work: Burst pipes or leaks can cause extensive damage. A professional plumber ensures your system is up to code and functions properly.
- Asbestos concerns: Asbestos exposure is hazardous. If you suspect asbestos, stop immediately and hire an abatement specialist.
- Significant mold: Large mold patches can cause health issues and structural damage. A professional mold remediation service can safely remove it and prevent further growth.
- Material choices: Using the wrong materials for your project can lead to cracking, staining, or weak bonds. Always choose appropriate materials for your specific needs.
Conclusion
Sticking to good stop rules and proper technique protects both your walls and your wallet. When you keep safety in hand and finish with solid joints, you get a smooth, durable result that lasts.
Follow this practical check as you wrap up: verify the surface is clean and dry, confirm your mud is the right consistency and has cured in stages, apply joints in sequence with the proper feathering, check every joint under steady lighting, and test a small patch before committing the full project. Move in clear, logical steps, and stop if any step looks risky or shows signs of failure.
Common mistakes to avoid are rushing the cure, skimping on surface prep, and ignoring stop rules that alert you to moisture or cracking. Safety rules are simple: test a tiny area first, wear eye protection and a mask when sanding, and never force a repair when exposure to water or movement is ongoing. If you see persistent cracking, treatment failures, or persistent moisture, it’s time to call a professional rather than push on.
When in doubt about moisture, structural movement, or coating compatibility, step back and seek an expert. You can finish the job with confidence by sticking to tested methods, watching for signs of trouble, and knowing when to bring in the right help. Stay steady, stay safe, and you’ll get a clean, lasting result.
FAQ
How do I know when I should stop DIY and call a professional during drywall taping?
Trust your gut: if the wall has major warping, extensive taping failures, or unpredictable movement, stop. If you’re unsure about joint layout or compound compatibility, check the label and manufacturer instructions. Local rules or a pro can save you from costly rework later.
What should I check before starting a taping job on rough or uneven walls?
Assess for loose backing, high spots, or water damage. If the substrate isn’t sound, fix that first or call for a professional help. Always follow surface prep guidance on product labels and manufacturer instructions.
How should I handle difficult joints or corner beads without professional tools?
Use the basics you have, but don’t force a bad corner. For difficult joints, prioritize proper masking and steady brushing, then read the product instructions for any tool limits. If in doubt, set it aside and verify with the manufacturer or a local pro before proceeding.
What are the signs of a failing repair that mean I should reassess or stop?
Look for cracks reopened after drying, obvious ridges, or sagging tape. If joints keep showing through after a patch, recheck prep and product compatibility. Check the label, datasheet, and local rules before retrying.