

Introduction
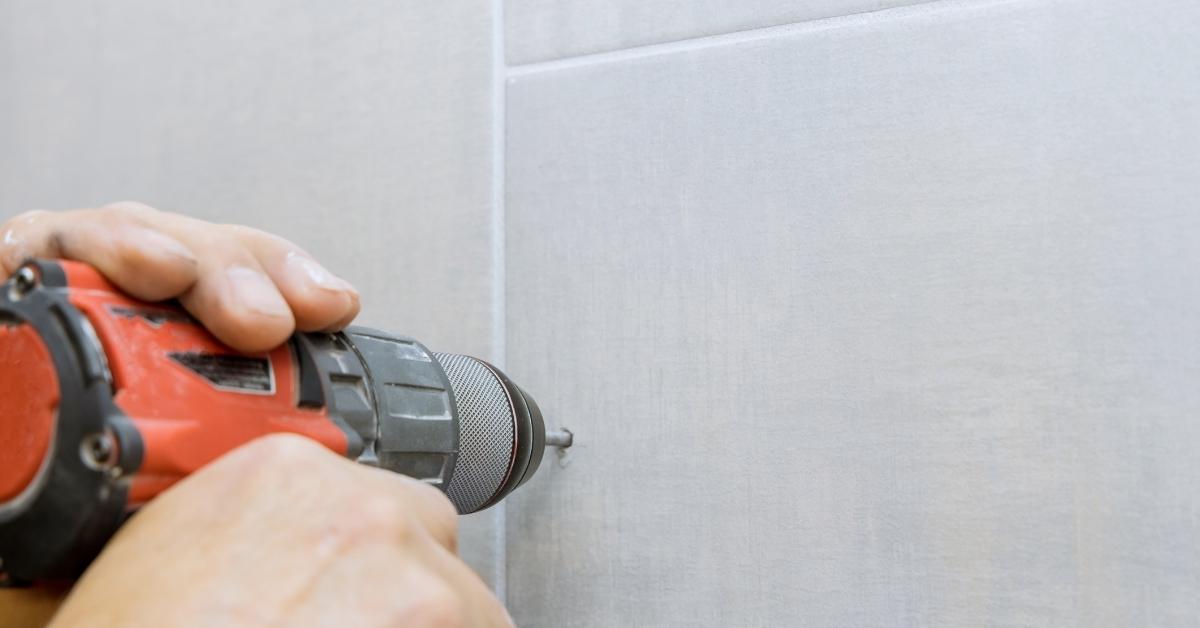
A diamond hole saw with careful technique can cut clean, crack-free holes in tile.
This introduction explains the practical, hands‑on approach you’ll use to drill through ceramic or porcelain tile without damaging the surrounding material.
You’ll want the right tools and steady steps to manage dust and avoid chips.
Check manufacturer instructions for drill speed, bit size ranges, and safety gear, and plan a dry-cut or wet-cut method as advised.
Key takeaways
- Choose the correct diamond hole saw size for your tile thickness.
- Use low speed, steady pressure, and a guide to prevent tile cracking.
- Keep dust down with wet drilling and a rigid vacuum during cuts.
- Mark center points precisely, drill pilot holes, and pause to cool if needed.
- Check tile type and substrate to avoid misselection of bits.
- Inspect and remove glaze chips, then seal edges to reduce chipping risk.
Table of Contents
- Introduction
- Key takeaways
- Can You Drill Through Tile Without Cracking It?
- Understanding Tile Types and How They Affect Drilling
- Essential Tools, Bits, and Equipment (with Cost and Specs)
- Safety Precautions and Protective Gear
- Step-by-Step Drilling Process Using a Diamond Hole Saw
- Drilling Large Holes and Holes Near Edges — Planning and Advanced Tips
- Troubleshooting, Common Problems, and Fixes
- Finishing Touches, Cleanup, and Environmental Considerations
- Conclusion
- FAQ
Can You Drill Through Tile Without Cracking It?
Drilling through tile is possible, but success depends on the tile type, bit choice, technique, and patience. Ceramic and porcelain behave differently, as do glass and natural stone, so expectations should adapt to the material behind the glaze. When in doubt, verify the tile’s type and backing with the label or manufacturer instructions.
Key factors to watch include bit quality, diamond hole saw size, and whether you use a jeweler’s-style or jet/step drill approach. Plan to center the mark, start a pilot hole, keep a steady feed, and use water cooling. If the tile is very thick, glazed, or lacks a stable substrate, consider calling a pro for a clean opening.
What causes tiles to crack when drilling
Drilling through tile can be tricky. Here’s what usually goes wrong:
Thermal stress: Drilling too fast or using the wrong bit can generate heat, causing cracks due to thermal expansion.
Excessive pressure: Pushing down too hard on your drill can fracture the tile. Remember, tiles are brittle, not tough like wood.
Vibration: Too much vibration from a worn-out drill or incorrect bit can cause tiny cracks to spread and grow.
Using the wrong bit or speed is a recipe for disaster. Always check your bit’s suitability and follow the manufacturer’s instructions for speed settings.
When to avoid DIY drilling
Even with the right tools and techniques, there are times when you should leave tile drilling to the professionals. Here’s what to watch out for:
- Antique or thin tiles: These can be brittle and prone to cracking. If in doubt, check the tile’s age and thickness before starting.
- Structural areas: Drilling near structural elements like load-bearing walls or beams can compromise their integrity. Always check if you’re unsure.
- Glass tiles: These are especially fragile. If you must drill, use a glass-specific bit and go slow.
Remember, it’s better to be safe than sorry. Double-check these points before you start drilling to avoid costly mistakes.

Understanding Tile Types and How They Affect Drilling
Different tile types—ceramic, porcelain, natural stone, and glass—have distinct base materials, glazing, and thickness that influence drill bit choice and technique. Harder tiles and thick slabs demand different approaches than softer, thinner varieties. Use the tile’s label or data sheet to confirm its type before choosing a bit.
Hardness, glaze composition, and surface texture change the risk of cracking or chipping. Diamond-coated hole saws are typically favored for through-holes, while carbide bits may suit softer ceramic in some cases. When unsure, test on a scrap piece and follow manufacturer guidance for speed, pressure, and cooling.
Porcelain vs Ceramic vs Natural Stone Specifics
Porcelain, ceramic, and natural stone tiles differ in composition and hardness. Here’s how to drill each:
Ceramic: Use a diamond hole saw or carbide bit. Drill at 500-800 RPM with water cooling. Apply gradual pressure.
Porcelain: Similar to ceramic, but harder. Use a diamond hole saw and drill at 400-600 RPM with plenty of water. Go slow.
Natural Stone (like marble or granite): These are softest. Use a diamond bit or hole saw. Drill at 300-500 RPM, keep it cool with water. Be gentle.
Special Case: Glass and Glazed Tiles
Glass and glazed tiles are fragile. Drill carefully:
Glass: Use a diamond hole saw or bit. Drill at 200-400 RPM, keep it cool with water. Start with a pilot hole.
Glazed Tiles: Glaze can crack. Score the glaze before drilling. Use a diamond bit or hole saw. Drill slow (300-500 RPM) with plenty of water.
Always test on a scrap piece first to avoid costly mistakes.
Essential Tools, Bits, and Equipment (with Cost and Specs)
Identify the core tool groups needed for tile drilling and note safe cost ranges for each, including diamond hole saws (wet or dry), drill types, and guides. Check diameter options, shank size, arbor requirements, and the tool’s maximum RPM to match your project. Always verify compatibility with your tile type and substrate backing before purchasing.
Safety gear and proper setups matter just as much as the bits. Use eye protection, dust control, gloves, and hearing protection as needed. Plan the drilling sequence from pilot hole to final diameter with a guide to minimize wandering, and consider lubrication and dust management during operation.
Diamond Hole Saws: Types and Choosing the Right One
When it comes to diamond hole saws, you’ve got two main types to consider – continuous-rim and segmented. Both have their uses, so let’s dive in.
Continuous-Rim Hole Saws: These are great for drilling through tough materials like concrete, masonry, or ceramic tile. They’re built to last with a solid diamond blade that runs continuously around the rim. They’re your go-to for larger holes (usually 1-1/4″ to 6″) and when you need to drill through thick material.
Segmented Hole Saws: These are more versatile, handling a wider range of materials from wood to metal to concrete. They’ve got diamond segments attached to the rim, which makes them ideal for smaller holes (usually 1/2″ to 3″) and when you need to drill through thinner material.
Now, let’s talk arbors. You’ll need one that fits your drill or driver. Common sizes are 1/4″, 3/8″, and 1/2″. Always check what you’ve got before you buy.
Drill and accessory recommendations
For drilling through concrete, you’ll need a heavy-duty drill. I’d recommend one with at least 1000W to 2000W, giving you the power to tackle most jobs. Speed’s important too – look for something that can handle 500-1500 RPM. Check the manufacturer’s specs to ensure it’s suitable for your needs.
Pilot bits are a must. They keep your drill bit on track and prevent wandering. You’ll need ones designed for concrete, usually marked as such or with an ‘m’ (for masonry). Start with a 1/4″ to 3/8″ pilot bit, depending on your drill’s chuck size.
Drill guides and backing boards are crucial. Guides keep your drill straight, while backing boards support the other side of the hole. You can make your own guide using a piece of wood with a hole drilled in it, or buy one. Backing boards should be at least 1/2″ to 3/4″ thick plywood.
Cooling setups help prevent drill bit overheating and keep them lasting longer. A simple sponge dampened with water works fine for small jobs. For larger ones, consider a small water feed system – they’re not expensive and make a big difference.
Safety Precautions and Protective Gear
Personal protective equipment should cover eyes, lungs, and skin. Use safety glasses or a face shield, gloves, and a respirator or dust mask when dust is present. Footwear should be slip-resistant, and hearing protection is advised for louder drills. Assess the work area for hazards before starting.
Contain dust and slurry with appropriate barriers and containment, and manage water use safely around electrical tools. Keep cords dry and use GFCI outlets where water is present. Secure the tile and workspace to prevent movement or tripping during drilling.
Dust management and wet drilling safety
When drilling holes in tile, dust control is crucial to protect your lungs and eyes. Two common methods are vacuum dust capture and wet cutting.
Vacuum Dust Capture: Use a wet/dry vacuum with a HEPA filter to suck up debris as you drill. Keep the hose close to the drilling area for maximum efficiency. This method is ideal for dry drilling but can be combined with water for added dust control.
Wet Drilling: Using water while drilling helps reduce dust and keeps the tile cool, preventing cracks. Always use a diamond hole saw designed for wet cutting. Ensure your drill has a water inlet and that you’re using a GFCI-protected outlet to prevent electrical shocks. Wear a NIOSH-approved respirator or dust mask to protect against airborne particles.
Personal protective equipment (PPE)
Protecting yourself from potential hazards is paramount when drilling holes in tile. Here’s the essential PPE you’ll need:
- Safety Glasses/Face Shield: Protects your eyes from debris and water splatter. Choose a pair with side shields for added protection.
- Gloves: Wear cut-resistant gloves to protect your hands from sharp edges and shards. For wet drilling, use gloves designed for water resistance.
- Hearing Protection: Use earplugs or earmuffs to protect against the high-pitched noise of power tools. Disposable foam earplugs are inexpensive and effective.
- NIOSH-approved Respirator/Dust Mask: Protect your lungs from airborne particles. A simple dust mask is sufficient for most dry drilling, but consider a respirator with a P100 filter for wet cutting or when using vacuum dust capture.
- Slip-resistant Footwear: Wear sturdy boots or shoes with good grip to prevent slips and falls on wet surfaces.
Step-by-Step Drilling Process Using a Diamond Hole Saw
Define the exact hole size and choose a diamond-tipped bit suited to the tile type. Note whether the tile is glazed or unglazed, as this can affect difficulty and risk. Confirm the substrate behind the tile to avoid blowout and edge damage.
Secure the tile firmly with painter’s tape at the mark and support it with a backing board. Start with a center mark, then use slow initial bites and steady pressure. Maintain continuous cooling with water or a damp sponge and advance gradually for best results.
Step-by-Step Process
Follow these practical steps to drill holes in tile using a diamond hole saw, ensuring you achieve clean, crack-free results.
- Prepare your workspace: Ensure it’s stable and well-lit. Wear safety gear as outlined earlier.
- Mark the drilling location accurately: Use a pencil or marker to draw the exact spot where you want the hole.
- Secure the tile: Apply painter’s tape around the mark, then use a backing board to support the tile and prevent breakout.
- Create a pilot hole: Using a center punch or nail set, create a small indentation at the mark. This helps guide your drill bit.
- Start drilling: Begin at low RPM (around 500-1000), apply steady, light pressure, and gradually increase speed as you advance the bit.
- Maintain lubrication: Keep the hole saw cool by using water or a wet sponge. This helps prevent overheating and cracking.
- Check for level: Periodically check that your drill is vertical to ensure a straight hole.
- Finish carefully: As you near the end, reduce speed and pressure to avoid chipping the exit side of the tile.
- Clean up: After drilling, remove the backing board, clean up any debris, and inspect your work for any cracks or chips.
Marking, securing, and preparing the tile surface
Accurate marking and proper preparation are crucial to prevent cracking. Start by ensuring your tile is securely adhered to its substrate.
Use a pencil or marker to draw the exact location of your hole. Be sure to account for any grout lines if applicable.
Apply painter’s tape around the mark to protect the tile’s surface and provide a stable base for drilling. Then, secure the tile using a backing board. This distributes pressure evenly and prevents breakout on the backside.
Note: If your tile feels loose or wobbles when pressed, do not drill it. Call a professional to check its adhesion first.
Drilling technique: pilot hole, start, and finish
Proper drilling technique is key to preventing cracks. Start by creating a small pilot hole using a center punch or nail set at the marked location.
Begin drilling at low RPM (around 500-1000) to allow the diamond bit to bite into the tile gradually. Apply steady, light-to-moderate pressure, increasing speed as you advance the bit.
As you near the end of the hole, reduce your drill’s speed and pressure to avoid chipping the exit side of the tile. This final step requires patience and careful monitoring.
Cooling, speed, and pressure guidelines
Following these guidelines helps prevent overheating, cracking, and excessive wear on your drill bit.
RPM: Start at low RPM (around 500-1000) and gradually increase as you advance the bit. Aim for a steady, smooth drilling action without excessive vibration or smoke.
Pressure: Apply steady, light-to-moderate pressure. Too much pressure can cause cracking or breakage. Too little may result in slow progress or binding of the drill bit.
Cooling: Keep your hole saw cool by using water or a wet sponge. This helps prevent overheating and maintains optimal drilling performance. Monitor for excessive heat, vibration, or smoke, which could indicate a problem with your technique or equipment.
Drilling Large Holes and Holes Near Edges — Planning and Advanced Tips
When planning large-diameter holes, select the appropriate saw size and anticipate greater heat and stress. Near-edge drilling requires careful measurement and solid backing to prevent edge cracking. Use templates or guides to keep centerlines true as you cut.
Implement staged drilling with pilot and intermediate passes to relieve stress gradually. Keep the bit cool and watch for glazing or edge damage as you approach the final pass. Choose the right combination of diamond hole saw and backing material for the tile type you’re working with.
Techniques for very large holes or irregular cutouts
For extra-large holes, consider using multiple overlapping holes. Mark out your desired diameter with a larger circle, then drill smaller holes around the perimeter. Connect them with a grinder to create your final shape.
Grinding can also help refine irregular cutouts. After drilling pilot holes, use a tile grinding bit or multi-tool fitted with a diamond blade to carefully grind away excess material.
Note: Always wear appropriate PPE when using power tools and grinders. Keep the work area clear of debris and maintain proper ventilation.
For very large holes near edges, consider core cutting. This involves drilling a series of overlapping holes to create a larger opening. It’s more labor-intensive but reduces stress on the tile and minimizes cracking risks.
Reinforcing and protecting edges
When drilling near edges, support the tile to distribute stress evenly. You can use clamps or a backing board to secure it.
Take a slow, steady approach when cutting close to edges. Apply gentle pressure and let the diamond hole saw do the work. Rushing can cause blowouts and cracks.
Consider using: Splines or edge backing for extra support when drilling within 1-2 inches of an edge. These tools help distribute stress and prevent edge blowout.
If you’re cutting a hole that goes right up to the edge, consider using a jig saw with a tile-cutting blade instead. This allows for more control and precision near edges.
Troubleshooting, Common Problems, and Fixes
Before applying fixes, diagnose the issue by looking for slippage, overheating, glazing lift, or cracks around the cut. Note the tile type and whether the surface prep was adequate. Document what you observe to decide on the next step.
Common fixes include re-centering, reducing speed, and applying continuous water cooling. If glazing persists or the bit dulls quickly, pause and reassess alignment or tool choice. For stuck cores or deeper cracks, stop and evaluate whether replacement or professional help is needed.
What to do if the tile cracks during drilling
If you notice a crack while drilling, stop immediately. Further drilling can cause the crack to spread and damage the tile.
Stabilize the tile by placing a piece of wood or a clamp on either side of the crack to prevent it from spreading.
For minor cracks, you might be able to repair the tile using a tile repair kit. But if the crack is extensive or the tile is bowing, it’s best to replace the tile to avoid further damage and maintain the structural integrity of your surface.
Dealing with a stuck core or damaged hole saw
If the core gets stuck, stop drilling immediately to avoid damaging the tile further.
To remove the stuck core, try gently twisting the drill bit back and forth. If that doesn’t work, use a thin rod or an air gun to clear any debris from the hole saw.
Prevention is key: keep the hole saw lubricated with water while drilling to prevent the core from sticking. Also, ensure your drill bit is in good condition and the correct size for the task.
Finishing Touches, Cleanup, and Environmental Considerations
Smooth finished edges with a diamond cup wheel or fine abrasive to reduce snagging. Seal around penetrations with appropriate sealant or caulk to prevent water intrusion and chipping. Clean up edge slurry promptly to minimize staining and dust.
Dispose of tile waste responsibly and consider recycling options for tile offcuts and slurry water where available. Minimize water use by reusing rinse water when feasible and choosing tools and methods with efficient dust control and lower environmental impact.
Edge finishing and sealing for durability
After drilling, tile edges can be sharp and rough. Smooth them out with a diamond grinding cup or sandpaper. Start with coarse grit (60-80) to remove major imperfections, then switch to finer grits (120-220) for a smooth finish.
Deburr sharp zones carefully to prevent injury and chipping. Use a small file or sandpaper to gently round off any sharp edges.
Seal around penetrations with an appropriate sealant or caulk to prevent chipping and water intrusion. For ceramic and porcelain tiles, use a silicone-based sealant. For natural stone, consider using an epoxy-based sealant. Apply in thin beads along the hole’s edge, ensuring it’s well-adhered and smooth.
Note: Always choose sealants suitable for your tile material to ensure durability and longevity.
Conclusion
Drilling clean holes in tile comes down to planning, control, and protecting the tile surface. When you do it right, you get precise openings that won’t crack or chip and you keep the countertop or wall looking professional and durable.
Before you start, confirm the tile type and intended hole size, choose the correct diamond hole saw, inspect your grinder or drill, set up a clean, stable work area, mark the center, cover the area with tape, start with a shallow pilot mark, and drill at a slow, steady pace with light, even pressure while cooling with water or a damp sponge as needed. Keep the bit cool, stop if you see excessive heat or vibration, and verify the hole edges before finishing the surrounding grout or sealant.
Common mistakes to avoid include pushing too hard and letting the bit overheat, starting at a bad angle or without a center mark, and skipping cooling or comprehensive protection for the tile and your eyes. The simple safety rules are to test on a scrap area first, wear eye protection and gloves, and never rush the process near edges or when you’re unsure about the tile type or required hole size. If the tile is unusually brittle, glassy, or the hole needs to be very close to an edge, consider calling a professional instead of forcing through a risky move—a small investment now can save costly cracks later, and with the right approach you can finish confidently and safely.
FAQ
How can I drill a hole in tile without cracking it?
Use a diamond hole saw designed for tile, keep the drill speed low, and apply steady, light pressure. Start with tape over the mark to prevent wandering, and cool with water or light irrigation as you cut. If the tile shows a micro crack, stop and reassess before continuing.
What safety precautions should I take when drilling tile?
Wear eye protection and a dust mask. Work in a well-ventilated area and use a sharp, clean bit to reduce kickback. Keep hands away from the drill and use a steady, controlled grip to prevent slips.
How do I choose the right tools and bits for tile drilling?
Choose a diamond hole saw or a carbide-tiberated bit labeled for tile; confirm the intended tile type on the label or datasheet. Match the hole size to your needs and ensure the drill can run at low speed with a steady torque. Avoid using a hammer drill for ceramic or porcelain tiles unless the manufacturer approves it.
How can I manage dust and handle a cracked tile situation during drilling?
Use a shop vacuum or dust box to capture debris as you drill. If you see a crack forming, stop, evaluate the crack’s path, and switch to a safer approach or repair plan per tile type and manufacturer guidance. Clean the area before continuing and avoid forcing the bit.