
Introduction
The right blade and technique let porcelain cut cleanly without chips. A wet saw setup is the typical path, and choosing the correct blade type matters for porcelain. Always check label guidance and manufacturer instructions for your blade and water flow, and plan your cuts to minimize chipping.
You have options like a manual tile cutter, a wet saw, or an angle grinder with a porcelain blade. Focus on slow, steady cuts, scoring and snapping or controlled backing to prevent chips, and keep the edge wet. Wear safety gear, work on a flat surface, and follow local rules for cutting porcelain, checking your tools’ instructions for any limits.
Key takeaways
- Porcelain is hard; use consistent scoring and full support to minimize edge chipping.
- For clean cuts, prefer a wet saw with a sharp, porcelain-rated blade.
- Manual tile cutter is useful for straight cuts; validate minimal chipping risk.
- Use angle grinder with a continuous-rim diamond blade; wear eye protection.
- Practice dry runs and keep porcelain supported to avoid breakout; never rush.
Table of Contents
- Introduction
- Key takeaways
- Why Porcelain Is Harder to Cut (Basics You Must Know)
- Choosing the Right Tool: Manual Cutters, Wet Saws, and Angle Grinders
- Blade Selection and Maintenance for Clean, Chip-Free Cuts
- Wet Vs. Dry Cutting: When to Use Each Method
- Step-by-Step Cutting Techniques to Prevent Chipping
- Common Mistakes, Troubleshooting, and How to Fix Them
- Safety, Waste Management, and Project Planning for Diyers
- Cost, Rental Options, and When to Hire a Pro
- Conclusion
- FAQ
Why Porcelain Is Harder to Cut (Basics You Must Know)
Porcelain differs from ceramic in composition, density, and glaze presence. It uses a vitrified mix with quartz, feldspar, and kaolin, and it often carries a glassy glaze on the surface. These traits raise the risk of chips and cracks during cutting.
Manufacturing forces porcelain to be denser and less porous, with a relatively thick glaze that changes how heat and friction affect the edge. That combination means more stress at the cut line, especially on edges and during longer straight cuts or tight radii. Knowing these properties helps guide blade choice and cutting approach from the start.
Material properties that matter
Porcelain’s unique material properties make it harder to cut cleanly. Here are the key factors affecting cutting outcomes:
- High Density and Hardness: Porcelain is denser and harder than ceramic, making it more resistant to cutting but also more prone to chipping. Look for diamond blades with high density and hardness ratings.
- Low Porosity: Porcelain has low water absorption, which reduces friction during cutting. This means you’ll need to use a slower feed rate to prevent overheating and microcracking.
- Glaze Thickness: The thick glaze on porcelain increases the risk of chipping when cutting. Use blades designed for glazed tiles and consider edge protection techniques.
- Large-Format Tiles: Larger tiles put more stress on the blade, increasing the risk of breakage or poor cuts. Choose blades rated for large-format tiles and maintain a steady feed rate.
- Vitrified Body: Porcelain’s vitrified body makes it less porous but also more brittle. This increases the risk of cracking during cutting, so take extra care with straight cuts and complex shapes.
How tile thickness and finish change the approach
Porcelain tiles come in various thicknesses and finishes, each requiring a different cutting strategy:
Rectified Tiles: These have sharp, square edges that require careful scoring before cutting. Use a slow feed rate to prevent chipping.
Glazed Tiles: The glaze on porcelain tiles can be thick and tough. Choose blades designed for glazed tiles and maintain a steady water supply to keep the blade cool.
Textured Tiles: Textured tiles require careful cutting to preserve the design. Use a slow feed rate and consider using a blade with a larger diameter to minimize damage to the texture.
Thick (12mm+) Tiles: Thicker tiles put more stress on the blade, increasing the risk of breakage or poor cuts. Choose blades rated for thick tiles and maintain a steady feed rate to prevent overheating.

Choosing the Right Tool: Manual Cutters, Wet Saws, and Angle Grinders
Manual tile cutters excel at precise straight cuts on porcelain when the tile is well-supported and the edge is not overly thick. Wet saws handle larger formats and offer cleaner edges with constant water cooling. Angle grinders with a diamond blade are flexible for curves and complex shapes, but require careful control.
Consider each tool’s strengths and trade-offs: speed and setup time, dust and water management, required skill, and the risk of chipping. Use the right blade and steady feed to minimize edge damage. Have a simple decision routine in mind based on project size, shape, and edge needs.
Manual tile cutter: when it works and limitations
The manual tile cutter is your go-to for thin to medium-thick porcelain tiles with straight cuts. It’s cheap, portable, and easy to use.
Here’s how it works:
Score the tile with a grooved wheel, then snap it along that line using the cutter’s leverage. But remember, it won’t work for thick or highly dense porcelain. The force needed might damage the tool or cause chipping.
Wet saw with diamond blade: recommended use and advantages
A wet saw paired with a porcelain-rated continuous rim or thin-turbo diamond blade gives you the cleanest cuts. The water keeps dust down, prevents heat buildup, and helps maintain blade life.
Use it for:
– Large-format tiles
– Miters and notches
– Thick porcelain
It’s your best bet when you need clean edges and precision.
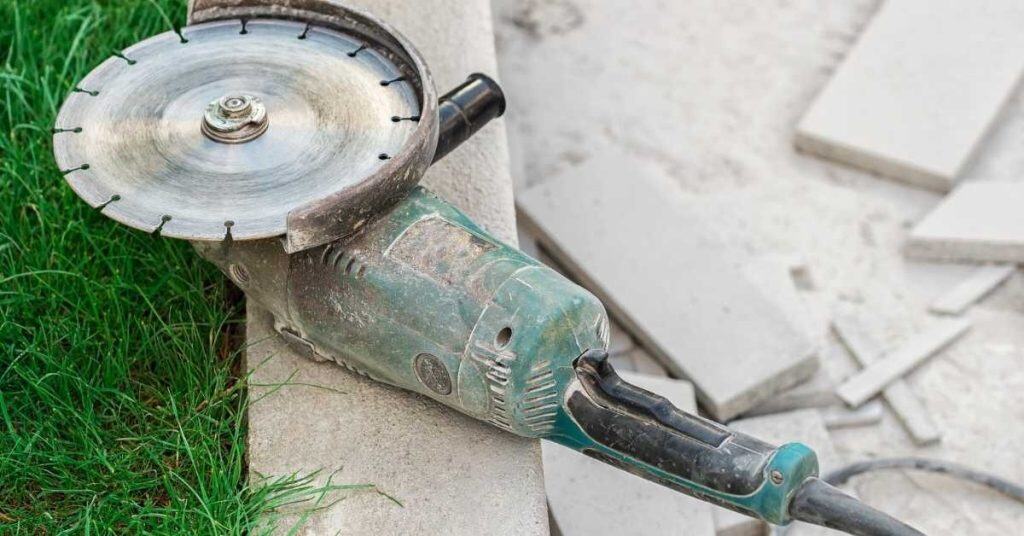
Angle grinder and specialty blades for curves and notches
The angle grinder is versatile, handling curves, L-cuts, and site-fit shaping. Use it with diamond blades designed for dry or damp cutting.
It’s great for:
– Curved edges
– Notches
– Site-specific cuts where precision isn’t crucial
But remember, it creates more dust than a wet saw and may not give the cleanest finish. It’s also riskier due to the exposed blade.
Blade Selection and Maintenance for Clean, Chip-Free Cuts
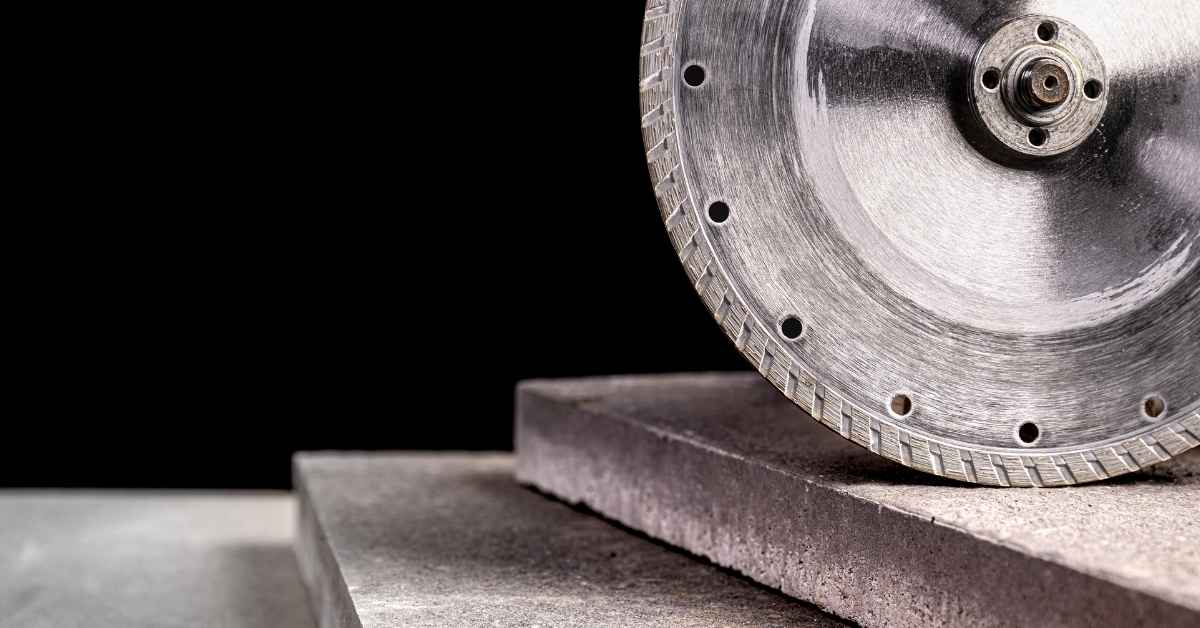
Blade types matter for porcelain: continuous rim blades help with clean edges, thin turbo blades cut more aggressively, and mesh blades are useful in dry-cut scenarios. Match the blade to the job to reduce chipping along the cut line. Always verify the blade is appropriate for porcelain with the label or data sheet.
Bond hardness and tile density influence performance: a harder bond or denser tile calls for the right balance of grit and bond to prevent heat buildup. Keep the blade clean, ensure proper water flow, and check tracking and balance regularly. Dress or replace when performance declines.
Which blade to choose for porcelain
When cutting porcelain, you need a blade designed for the job. Here’s what to look for:
Porcelain-rated blades are your best bet. They’re designed to handle dense materials like porcelain.
For clean edges, go with continuous rim or stone-brick blades. These have a solid outer edge that reduces chipping. For thin tiles, consider thin turbo blades, which are designed for fine cuts on porcelain.
If you’re dry cutting, use mesh blades. They create less dust and reduce the risk of chipping compared to wet cutting with other blade types.
Dressing, cleaning, and replacing blades
Maintaining your blade is crucial for clean cuts. Here’s how:
Dressing glazed blades removes any glaze buildup that can cause chipping. Use a dressing stone to smooth out the blade’s segments.
Check your blade regularly for signs of wear. If it starts skipping or feels hot, it might be time for a replacement.
To prevent glazing and chipping, keep your blade and water flow clean. Regularly remove dust buildup from the blade and ensure there’s enough coolant/water flowing to keep the blade cool and clean.
Wet Vs. Dry Cutting: When to Use Each Method
Wet cutting provides cooling, dust suppression, and longer edge life with cleaner results. A continuous-rim diamond blade works best when water is available and controlled. This method minimizes heat-induced edge chips and keeps the surface smoother.
Dry cutting is handy when water is limited or for small, delicate nibbles. It increases dust and heat, so use proper dust extraction and steady guidance. Plan blade choice, setup, and feed rate to reduce risk when you must cut dry.
Advantages of wet cutting with a saw
Wet cutting porcelain tile offers several benefits. The primary advantage is the cooling effect water provides, preventing blade glazing and overheating that can cause chipping or cracking.
Water also significantly suppresses dust. This not only makes for a cleaner work environment but also reduces the risk of inhaling harmful particles.
Wet cutting produces cleaner, more precise edges. The water helps to wash away debris and keeps the blade cool, resulting in smoother cuts with less chipping at corners.
The combination of a wet saw with a continuous-rim diamond blade further enhances these benefits. The constant water flow through the blade’s core keeps it cool and lubricated, mitigating heat-induced edge chips and extending blade life.
Controlled dry cutting: techniques and limits
Dry cutting can be necessary when water access is limited or for delicate nibbles where water may cause slippage. However, it’s crucial to understand the safety and quality trade-offs.
Multiple shallow passes are key to safe dry cutting. Instead of trying to cut through the tile in one go, make several light passes, allowing the blade to cool between each pass.
Dust extraction is vital when dry cutting. Use a dust mask or respirator and consider using a wet/dry vacuum to suck up airborne particles at the source. This reduces the risk of inhaling dust and keeps your work area cleaner.
Purpose-built turbo blades can help mitigate some of the drawbacks of dry cutting. These blades are designed to cut faster and cooler, reducing the risk of overheating and chipping. However, they’re still no substitute for proper water cooling in most cases.
Step-by-Step Cutting Techniques to Prevent Chipping
Begin with a precise workflow that plans measurements, cutting order, and waste management. Mark carefully and test on scrap where possible to avoid miscuts. A clear plan reduces stress on the tile during the cut.
Secure the tile firmly and choose the proper blade and water setup for wet cutting. Maintain a slow, steady feed and complete passes with minimal loads. Use shallow passes first and finish with a clean full-depth cut to minimize chipping.
Step-by-Step Process
The following is a clear, numbered sequence of practical steps to achieve clean cuts and prevent chipping.
- Preparation: Ensure your workspace is clean, dry, and well-lit. Gather all necessary tools and materials.
- Safety Checks: Inspect tiles for cracks or weaknesses. Wear safety glasses and gloves.
- Main Work: Follow the steps outlined in this guide to measure, mark, clamp, cut, and finish your porcelain tiles.
- Cleanup: Remove clamps, clean the work area, and dispose of any waste responsibly.
- Final Checks: Inspect your cuts for chips or cracks. If necessary, make minor repairs using techniques outlined in this guide.
Prep and marking best practices
Accurate measurement and marking are crucial for clean cuts. Use a caliper or tape measure to get exact dimensions. Mark the finished side of the tile to avoid visible marks.
Score lines using a pencil, ensuring they’re straight and even. Support tiles with clamps or a vise to reduce vibration and edge chipping.
Consider making partial cuts first to minimize waste, then finish with full cuts on the wet saw.
Cutting technique per tool (saw/manual/grinder)
The following are concise cutting techniques for each tool to avoid forcing or overheating the tile.
- Wet Saw: Use a slow, steady feed with consistent pressure. Engage the blade at full speed. Avoid stopping on the tile to prevent chipping.
- Manual Cutter: Apply even pressure while rolling the cutter. Make sure the tile is secure and supported.
- Angle Grinder: Use a slow, steady feed with minimal pressure. Keep the blade perpendicular to the tile’s surface.
Edge finishing and minor chip repair
After cutting, use simple sanding or rubbing stone techniques to remove micro-chips and achieve factory-like edges. Start with a coarse grit (e.g., 80) and progress to finer grits (e.g., 120, 220).
For minor chips, use diamond hand tools to carefully grind away any rough edges. Be gentle to avoid creating new chips.
Always wear appropriate safety gear when sanding or grinding.
Common Mistakes, Troubleshooting, and How to Fix Them
Chips and cracks often come from blade choice, blade condition, feed rate, and inadequate support. Notice signs early, such as rough edges or uneven cuts, and adjust accordingly. A quick check of the blade and setup can prevent repeat issues.
Diagnose with a simple, practical flow: verify blade quality, confirm water delivery, and test guides for straightness. When problems persist, consider changing tools or altering the scoring approach to protect the edge.
Top mistakes (wrong blade, too fast, poor support)
Avoid these common pitfalls to prevent chips and cracks when cutting porcelain.
- Using the wrong blade: Regular blades aren’t designed for porcelain. Use a porcelain-specific diamond blade to avoid chipping.
- Cutting too fast: Rushing through cuts can lead to chips. Slow down your feed rate to ensure clean cuts.
- Poor tile support: Unsupported tiles can crack or chip. Secure the tile firmly before cutting.
- Improper blade condition: A dull or glazed blade won’t cut cleanly. Inspect and dress your blade regularly.
Remember, prevention is key. Always check your blade, support your tile, and maintain a steady feed rate.
Troubleshooting chips and glazed blade symptoms
If you’re seeing chips or cracks, it’s time to troubleshoot. Start by checking your blade.
A glazed or dulled blade won’t cut cleanly. Look for a white, frosty appearance on the blade’s surface. If present, it’s time to dress or replace the blade.
To dress a blade, use a diamond sharpening stone to remove the glaze. Hold the stone against the blade at an angle and move it along the blade’s edge. Do this gently and evenly to avoid damaging the blade.
If dressing doesn’t help, or if you notice chips even after dressing, it’s time to replace your blade. Regular replacement ensures clean cuts and prevents damage to your tiles.
Safety, Waste Management, and Project Planning for Diyers
Wear appropriate eye, face, and respiratory protection, plus gloves and hearing protection as needed. Enforce safe practices on the worksite to reduce risk. A clear plan keeps corners protected and people safe.
Plan the workspace for containment, stable support, and good lighting. Manage water runoff and dust to minimize mess and waste. A practical cutting plan reduces offcuts and helps with orderly cleanup and disposal.
Tool-specific safety and PPE
Protecting yourself is crucial when cutting porcelain. Here’s what you need for each tool:
- Eye Protection: Wear safety glasses or goggles to protect from flying debris.
- Hearing Protection: Use earplugs or earmuffs with wet saws and grinders, especially when cutting large tiles.
- Respiratory Protection: A dust mask is essential for manual cutters. Consider a respirator if you’re sensitive to dust.
- Gloves: Wear work gloves to protect your hands from sharp edges and hot surfaces.
- Wet Saw-specific: Tie back long hair, wear a long-sleeved shirt, and avoid loose clothing that could get caught in the blade.
Waste handling, storage, and disposal of porcelain offcuts
Handling porcelain waste safely is important to prevent injuries. Here’s how:
Collection: Use a sturdy, flat container with a lid for collecting sharp offcuts. Keep it near your work area.
Storage: Store collected waste in a cool, dry place away from children and pets. Keep the container upright to prevent spills.
Disposal/Recycling: Porcelain can be recycled. Check with your local recycling center for guidelines. If not accepted, dispose of it in heavy-duty plastic bags as regular trash. Always wear gloves when handling waste.
Cost, Rental Options, and When to Hire a Pro
Evaluate the practical cost framework by weighing purchase versus rental against project scope. Consider blade life, maintenance, and the value of a ready-to-work setup. Avoid surprises by confirming what the rental includes and what you must supply separately.
Clarify rental terms, accessibility, and included accessories such as guards, containment, and a proper blade for porcelain. Weigh your skill level and time—if precision or curves are critical, hiring a pro can save tile waste and frustration. Use clear criteria to decide when outsourcing is the safer, smarter choice.
Rent vs. Buy Decision Checklist
Use this checklist to decide whether renting or buying a wet saw is the better option for your project.
- Project size: If you’re only cutting a few tiles, renting might be cheaper.
- Frequency of use: If you’ll need to cut tiles often, buying could save money in the long run.
- Tile difficulty: Complex cuts or special blades required? Consider renting or hiring a pro.
- Rental availability: Can you get a saw when you need it?
- Blade cost: Premium porcelain blades can be expensive to buy. Rentals may include them.
- Skill level: Inexperienced? Consider renting or hiring a pro to avoid mistakes.
- Project timeline: Delays due to learning curve or blade changes could impact your schedule.
- Warranty considerations: Some tools come with warranties that cover blade replacements.
Quick rule: If you’re unsure, err on the side of safety and professional help.
When to Hire a Pro: Risk, Complexity, Large-Format Tile
Certain projects demand professional expertise to minimize risk and waste. Here’s when to consider hiring a pro.
Large-format tiles: These are heavy and fragile. Pros have the equipment and skill to handle them safely.
Intricate patterns or complex cuts: Mitered edges, tight angles, or special shapes can be challenging for DIYers. Pros can ensure precision and minimize waste.
Expensive tile or limited time/skill: If your tiles are pricey or you’re short on time, hiring a pro ensures the job gets done right without risking damage or delays.
Conclusion
Porcelain cuts best when you respect the material and the tool, keep the blade clean and sharp, and stay in control to protect both the surface and your hands. Do that, and you’ll avoid costly chips, hours of rework, and unsafe work habits.
Check your setup: choose the right tool, select the correct wet-saw blade, secure the workpiece, mark your cut, use water and a slow steady feed, and test on scrap before the final cut. Keep the blade cool, support the piece, and periodically check for heat buildup as you go—these simple checks will save you from dives, catches, and sudden breakage.
Common mistakes to avoid include rushing the cut, dry cutting when moisture is required, and not securing the tile or misaligning the mark. Safety rules are simple: wear eye protection and gloves, wear hearing protection if needed, keep hands away from the blade path, and never force a cut. Start conservative, test on scrap, and stop if the blade drags or the tile shows signs of chipping.
If the job involves complex angles, large slabs, or uncertain cuts, consider bringing in a pro rather than pushing on. When you know the limits and follow these steps, you’ll finish cleanly, safely, and with durable results you can trust. You’ve got this—plan, test, and cut with confidence.
FAQ
What tools are best for cutting porcelain tile, and when should I use each?
For clean, straight cuts, a wet saw is usually the workhorse. A manual tile cutter works for simple straight cuts on thinner porcelain. An angle grinder with a diamond blade handles ов irregular cuts or small openings, but it requires steady hands and protection.
How can I cut porcelain without chipping the tile?
Score-and-snap methods work best with proper tile cutters, and wet cutting helps reduce chipping. Let the blade do the work without forcing it, support the tile, and use a slow, steady feed through the cut.
What blade choice and setup should I check on a wet saw before cutting?
Use a diamond blade rated for porcelain and ensure the blade is sharp and clean. Check the water flow and keep the tile cool and lubricated as you cut; a dry blade overheats and chips more.
What are common cutting mistakes to avoid, and how can I fix them?
Avoid rushing the cut or applying side pressure. If you see chipping, pause, re-set, and re-check your blade and water flow. Misalignment or unsupported edges often lead to cracks—keep both edges supported and cut slowly.