

Key Takeaways
- The water-cement ratio is critical in concrete mixing, affecting the strength and durability of the concrete, with a lower ratio enhancing strength but reducing workability.
- Accurate measurement tools and equipment like mixing drills and slump cone tests are essential for achieving the desired water-cement ratio and ensuring proper workability.
- Projects prioritizing durability should use a lower water-cement ratio, while those focusing on aesthetics may benefit from a slightly higher ratio for improved workability and finish.
Understanding the Water-Cement Ratio
The water-cement ratio (w/c ratio) is one of the most critical factors in determining the strength, durability, and overall performance of concrete. It refers to the ratio of the weight of water to the weight of cement used in a concrete mix. Even slight changes to this ratio can dramatically affect how the concrete behaves, from workability during placement to strength after curing.
A lower water-cement ratio (e.g., 0.40–0.45) produces stronger, more durable concrete, but it’s also stiffer and harder to work with. In contrast, a higher ratio (e.g., 0.55–0.60) improves workability and flow but can weaken the final product if not properly cured or reinforced.
Understanding this balance is key. For structural applications like footings, driveways, or slabs, you’ll want a lower ratio to ensure long-term durability. For decorative or non-load-bearing features, a slightly higher ratio may be acceptable if ease of application or finish quality is a priority.
Importantly, the water-cement ratio should always be measured by weight, not volume. Estimating by sight or using inconsistent measurement methods often leads to poor results like cracking, dusting, or premature failure.
This article will walk you through a simple, effective method—the bucket test—to help you measure and adjust your mix on the spot. Whether you’re patching a sidewalk or pouring a countertop, mastering the water-cement ratio is your first step to better concrete.

Gathering Your Tools and Supplies
Before diving into the bucket test, it’s essential to gather all the necessary tools and supplies. Having everything on hand will make the process smoother and more efficient. Here’s a comprehensive list of what you’ll need:
Equipment & Devices
- 5-gallon bucket: This will serve as the main mixing and testing container. Ensure it is clean and free from any residues.
- Measuring cups or kitchen scale: For accurate measurement of cement and water. Use a scale for precise measurements, aiming for a water-cement ratio of 0.45 by weight.
- Mixing tool: A sturdy trowel or a mixing paddle attached to a drill can work well. Choose a mixing paddle with a comfortable grip and appropriate length for your bucket size.
- Protective gear: Gloves and eyewear to ensure you handle cement safely. Use nitrile gloves and safety goggles compliant with safety standards.
- Plastic sheeting or tarp: To protect your work area from spills. Ensure the tarp covers an area of at least 6×6 feet.
Key Concepts & When to Use
Each tool has its purpose in the bucket test. The bucket is your mixing vessel. and accurate measurement tools ensure you get the right water-cement ratio. Protective gear is a must to prevent skin irritation or injury from cement particles.
Using a scale rather than estimating volumes can significantly improve your mix quality.
Surface Preparation & Conditions
- Ensure the substrate is clean and dry before starting.
- Maintain ambient temperatures between typically 50°F and typically 80°F for optimal mixing conditions.
- Avoid high humidity or direct sunlight, which can affect the mix consistency.
Safety & Compliance
- Wear appropriate PPE, including gloves and eyewear.
- Consult the Safety Data Sheet (SDS) for the cement product being used.
- Ensure proper ventilation if working indoors to avoid inhalation of dust.
Failure Modes & Fixes
- Cracking: Ensure proper water-cement ratio and avoid rapid drying.
- Blistering: Mix thoroughly to remove air pockets.
- Delamination: Ensure substrate is clean and free of contaminants.
Order of Operations
- Prepare the work area by laying down plastic sheeting or tarp.
- Measure and add the required amount of water to the bucket.
- Gradually add cement while mixing continuously with the mixing tool.
- Mix until a uniform consistency is achieved, ensuring no lumps remain.
- Conduct the bucket test as per the specific instructions for your application.
With the right tools and supplies at your disposal, you’re well-equipped to undertake the bucket test. Preparation is key, and having everything ready will help you focus on getting the perfect mix.
Key Points
- 5-gallon bucket: Main mixing and testing container, should be clean and residue-free.
- Measuring cups or kitchen scale: For accurate measurement of cement and water, aiming for a water-cement ratio of 0.45 by weight.
- Mixing tool: A sturdy trowel or mixing paddle with a comfortable grip and appropriate length for the bucket size.
- Protective gear: Gloves and eyewear to handle cement safely, using nitrile gloves and safety goggles.
- Plastic sheeting or tarp: To protect the work area from spills, covering an area of at least 6×6 feet.
Quick Facts: Snapshot specifics for “Gathering Your Tools and Supplies”.
- Approx. Time: The preparation and gathering of tools and supplies should take approximately 15-30 minutes, depending on the availability and organization of materials.
- Potential Pitfalls: 1. Failing to measure the water-cement ratio accurately can lead to poor mix quality. 2. Not wearing appropriate protective gear can result in skin irritation or injury from cement particles.
- reliable Practice: 1. Use a kitchen scale for precise measurement of materials to ensure the correct water-cement ratio. 2. Prepare the work area with plastic sheeting or tarp to prevent spills and maintain a clean workspace.
Note: Times and steps vary by local codes and manufacturer instructions.
Edge cases: Situations where this section’s guidance may not apply as written.
- Working in temperatures below 50°F or above 80°F.
- High humidity or direct sunlight conditions.
- Lack of proper ventilation in indoor settings.
- Absence of appropriate PPE.
- Using contaminated or unsuitable substrates.
- Incorrect water
Step-by-Step Guide to the Bucket Test
The bucket test is a straightforward and effective method for determining if your concrete mix has the correct water-cement ratio. This test is particularly valuable for DIY enthusiasts and small-scale projects where precision is crucial. and sophisticated equipment is unavailable. By following the steps outlined in this guide, you can ensure your concrete mix achieves the desired consistency and strength for your project.
Equipment & Devices
To perform the bucket test, you’ll need a few essential pieces of equipment:
- 5-Gallon Bucket: This serves as the container for your concrete mix. Ensure it’s clean and free of any residues that could affect the test results.
- Measuring Tools: Use a scale or measuring cups to measure the water and cement accurately. Precision is key, as even slight deviations can impact the mix’s quality.
- Mixing Tool: A trowel or mixing paddle is essential for achieving a uniform mix. Stainless steel tools are preferable to prevent rust, which could contaminate the mix. Typical trowel sizes range from 4 to 6 inches in width.
- Protective Gear: Safety should always be a priority. Wear gloves and eyewear to protect against potential hazards during the mixing process.
Having the right equipment ensures that the bucket test is conducted safely and effectively, providing reliable results for your concrete mix.
Key Concepts & When to Use
The bucket test is primarily used to verify the water-cement ratio in concrete mixes. This ratio is crucial because it influences the concrete’s workability, strength. and durability. A correct ratio ensures that the mix is neither too dry nor too wet, which could lead to issues such as cracking or reduced strength.
Consider this mini-example: If you’re building a small garden pathway, using the bucket test can help you avoid a mix that’s too wet, which might lead to surface erosion or a mix that’s too dry, potentially causing cracks under pressure.
In summary, the bucket test is ideal for smaller projects where precision is needed but access to advanced testing equipment is limited. It helps ensure that the concrete mix will perform well under the intended conditions.
Procedure
- Prepare the Substrate: Ensure the surface where you plan to pour the concrete is clean and slightly damp. This helps the concrete adhere better and prevents premature drying.
- Measure Ingredients: Accurately measure the water and cement. A common starting ratio is 0.5:1 by weight. Precision in measurement will help achieve the desired consistency.
- Mix Thoroughly: Use your mixing tool to combine the ingredients until a uniform consistency is reached. This typically takes about 3 to 5 minutes.
- Fill the Bucket: Pour the mixed concrete into the 5-gallon bucket, tapping the sides to remove any trapped air bubbles.
- Allow to Set: Let the concrete cure for 24 hours in a controlled environment, ideally with temperatures between typically 50-70°F and relative humidity of 40-60%.
- Inspect the Results: After setting, check for signs of cracking or delamination. If issues are present, adjust the water-cement ratio and repeat the test.
Additional Tips
- Start Small: Begin with a small batch to minimize waste and make adjustments easier. This approach allows you to experiment with different ratios without significant material loss.
- Record Results: Keep a detailed log of your measurements and outcomes. This practice helps refine your technique over time and ensures consistency in future projects.
- Experiment with Ratios: Try different water-cement ratios to see how they affect workability and strength. This exploration can lead to discovering the optimal mix for your specific needs.
By adhering to these tips and the outlined procedure, you can confidently assess your concrete mix’s water-cement ratio, making necessary adjustments for a robust and durable outcome.
Note: Times and steps may vary based on local conditions and specific manufacturer instructions.
Edge Cases: Situations where this guidance may not apply as written.
- Extreme weather conditions, such as freezing temperatures or excessive heat, can affect the setting and curing of concrete.
- High humidity or unexpected rain can alter the water content in the mix, leading to inaccurate results.
- Using additives or special types of cement may require different water-cement ratios.
- Large-scale projects may necessitate more precise testing methods.
Mixing Water and Cement: A Simple Approach
Mixing water and cement correctly is the foundation of a strong, durable concrete mix—and it doesn’t have to be complicated. Whether you’re a DIYer or a contractor running small-scale tests, starting with a controlled method ensures consistency and quality. The key is to measure by weight, not volume. For most standard mixes, a water-cement ratio of 0.45 to 0.50 by weight strikes a good balance between strength and workability.
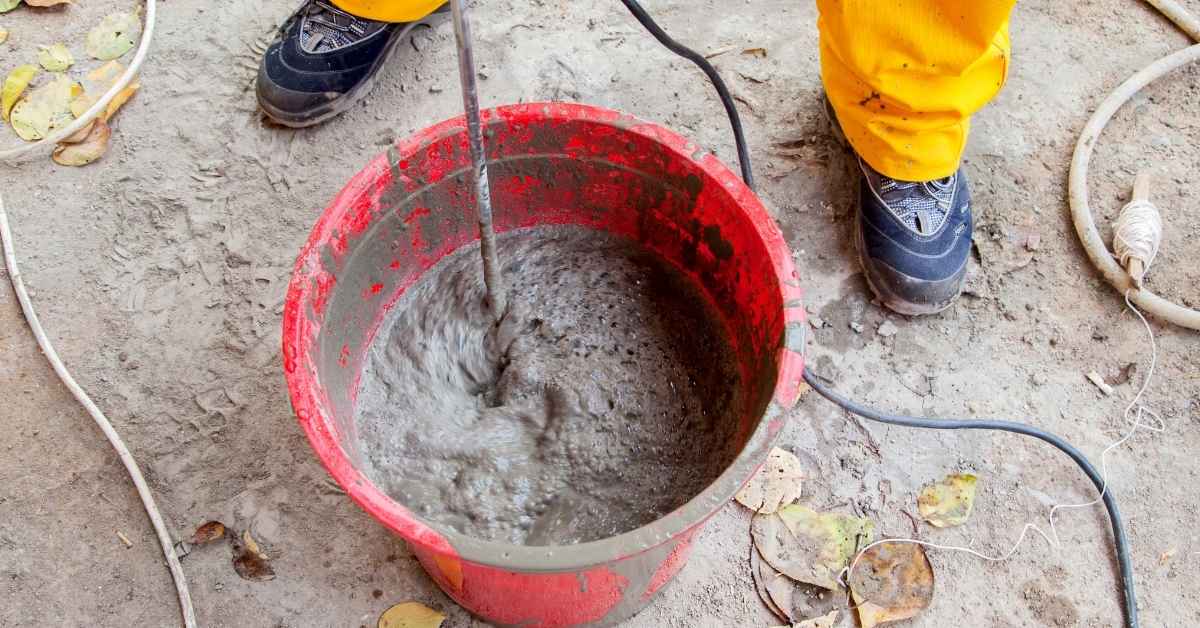
Begin by weighing your cement using a digital scale. For example, if you’re working with 10 pounds of cement, you’ll need 4.5 to 5 pounds of water, depending on the desired consistency. Slowly add water into a clean 5-gallon bucket, then gradually add the cement while continuously mixing. Use a paddle mixer attached to a drill, or a sturdy trowel for smaller batches.
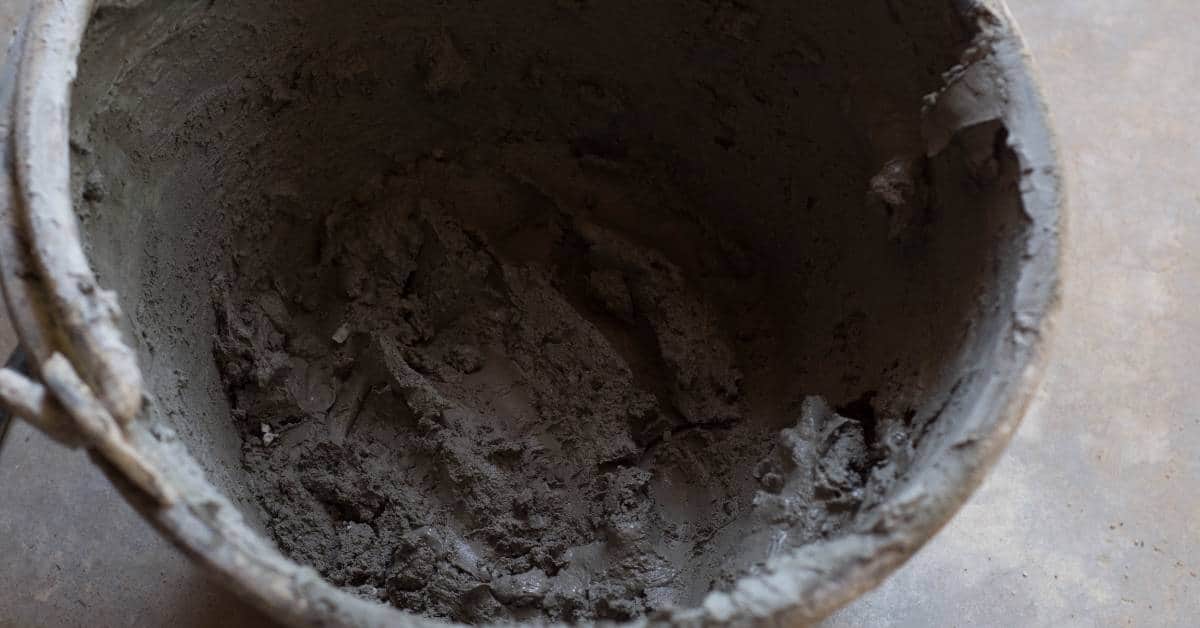
Mix for 3–5 minutes until the paste reaches a smooth, lump-free consistency. If the mix feels too dry or crumbly, add water in small increments—never dump extra in all at once, as this can oversaturate the mixture.
Once mixed, perform a visual check. A well-mixed paste should be workable but not soupy. For testing purposes, conduct the bucket test or a slump test to verify the mix’s workability and consistency.
Proper mixing ensures even hydration and reduces the risk of common failures like cracking, blistering, or poor bonding. Keep records of each mix and adjust as needed for your specific conditions or project type.
How to Interpret Your Test Results
The bucket test is a widely used method for mixing concrete, offering simplicity and effectiveness when done correctly. However, common mistakes can significantly affect the quality and durability of your concrete. By understanding potential pitfalls and how to avoid them, you can ensure a successful mix that meets your project needs.
Equipment & Devices
Using the right equipment is crucial to achieving a consistent concrete mix. Precision in measurement and mixing can make the difference between a long-lasting repair and a premature failure.
- Measuring Tools: Use a reliable measuring cup or scale to ensure precise ratios of water to cement. A typical water-to-cement ratio by weight is between 0.45 and 0.60. This precision helps prevent issues like weak or overly porous concrete.
- Mixing Tools: Choose a mixing tool appropriate for the batch size. For small batches, a drill with a paddle attachment is effective, while larger projects may require a dedicated concrete mixer.
- Ergonomics: Consider using ergonomic tools to reduce physical strain during mixing, especially for larger projects where manual mixing could lead to fatigue.
- Application Tools: A trowel with a blade size of 4-6 inches is ideal for small repairs, providing control and precision during application.
Key Concepts & When to Use
Understanding the key concepts of concrete mixing can help you avoid common mistakes. Proper measurement, mixing, and application are essential for achieving the desired strength and finish.
For instance, when repairing a section of your driveway, ensuring the mix has the correct water-to-cement ratio is crucial. An incorrect ratio could result in a patch that does not blend well or match the existing concrete’s strength. This mismatch can lead to further damage over time.
Additionally, the mixing process itself is important. Over-mixing can introduce excessive air into the concrete, leading to blistering, while under-mixing can result in weak spots due to uneven distribution of materials.
Additional Tips
Here are some additional tips to ensure success:
- Surface Preparation: Before applying the mix, make sure the substrate is clean and free of debris. A clean surface improves adhesion, reducing the risk of delamination.
- Environmental Conditions: Perform the bucket test within a temperature range of typically 50°F to typically 90°F and maintain humidity levels between 40% and 70%. These conditions are optimal for curing and help prevent issues such as cracking.
- Safety Measures: Always wear appropriate personal protective equipment (PPE), such as gloves, goggles, and a dust mask, to protect against potential hazards associated with concrete mixing.
- Working and Setting Time: Typical working time for concrete is 30 to 60 minutes, with initial set times ranging from 1 to 2 hours. Full curing can take 28 days under optimal conditions.
Consider this mini-example: If you’re working in a hot, dry climate, the water in your mix may evaporate too quickly, leading to a dry mix. To counteract this, you might need to add water incrementally and work quickly to apply the mix before it dries out.
By following these guidelines and being aware of potential mistakes, you can ensure a successful bucket test, resulting in a high-quality concrete mix that meets your project’s requirements.
Edge cases: Situations where this section’s guidance may not apply as written.
- Extreme weather conditions outside the specified temperature and humidity ranges.
- Specialized concrete applications requiring specific mix designs not covered by general guidelines.
- Use of additives or admixtures that alter the standard water-to-cement ratio.
- Situations requiring rapid setting or curing times that differ from typical recommendations.
Once you’re familiar with the basics of the bucket test, you can start experimenting with creative adjustments to optimize your concrete mix for specific needs. This approach allows you to tailor the mixture to meet both functional and aesthetic requirements, enhancing the overall quality and appearance of your project.
Equipment & Devices
To effectively implement creative adjustments in your concrete mix, having the right equipment and devices is essential. These tools help you achieve the desired consistency, appearance, and structural integrity:
- Color Additives: These are used to alter the appearance of the concrete. A typical recommendation is to use color additives at 1-2% of the total mix weight. This allows for customization of the concrete’s hue, which is particularly useful in decorative applications.
- Fibers: Incorporating fibers can enhance the strength of the concrete and reduce the likelihood of cracking. The suggested fiber length is between 0.5-1 inch, which helps to evenly distribute stress across the material.
- Trowels: For application, a typical trowel size ranges from 1/4 to 1/2 inch notch, which is crucial for achieving an even surface finish.
Key Concepts & When to Use
Enhancing your testing involves tweaking the mix to explore different attributes like strength, color, or texture. These adjustments are particularly useful for projects where aesthetics are as important as functionality, such as decorative concrete features.
For instance, if you’re creating a concrete planter, you might want a smoother finish or a particular hue. By adjusting the mix components, such as adding specific color additives or using finer aggregates, you can achieve the desired outcome. These adjustments matter because they allow you to create a product that meets both visual and structural demands.
Another example is creating a concrete countertop. Here, the smoothness of the surface and the overall color are critical. By experimenting with different sand types and color pigments, you can achieve a polished look that complements the surrounding interior design.
Additional Tips
When making creative adjustments to your concrete mix, consider the following tips to ensure success:
- Surface Preparation: Ensure the substrate is clean and free of debris. The ideal moisture content should be between 5-7%, and the temperature window for application typically ranges from typically 50-90°F. Maintaining a humidity range of 40-60% is crucial for optimal curing.
- Safety & Compliance: Always wear appropriate personal protective equipment (PPE), such as gloves, goggles, and a dust mask. Consult the Safety Data Sheet (SDS) for each additive used to ensure compliance with safety standards.
- Failure Modes & Fixes: Be aware of potential failure modes such as cracking or blistering. For cracking, consider increasing fiber content or adjusting the water-cement ratio. To avoid blistering, ensure proper curing conditions and avoid excessive water.
By understanding these concepts and applying them judiciously, you can expand the possibilities of your concrete projects beyond the standard mix designs. This approach not only enhances the aesthetic appeal but also ensures that the structural integrity is maintained, providing a well-rounded solution for various applications.
Edge Cases: Situations where this section’s guidance may not apply as written.
- Projects requiring strict adherence to structural engineering specifications where creative adjustments could compromise safety.
- Situations where the concrete is used in load-bearing structures and any deviation from standard mix designs could lead to failure.
- Environments with extreme temperatures or humidity levels outside the specified range, which could affect curing and strength.
- Applications where the use of additives could react negatively with other materials or environmental conditions.
- Projects with regulatory or compliance requirements that mandate specific mix designs or prohibit certain additives.
Conclusion
In summary, understanding the water-cement ratio is crucial for any concrete mixing project. This ratio significantly influences the strength, durability. and workability of concrete. A lower water-cement ratio enhances strength and durability, making it ideal for structural applications, while a higher ratio improves workability, which may be better suited for aesthetic projects.
This balance is essential for achieving desired results in concrete construction. Equipping yourself with the right tools and devices is vital for maintaining an accurate water-cement ratio. Precision measurement tools, such as scales and mixing drills, ensure consistency and accuracy in your mix.
Conducting tests like the slump cone test can quickly assess workability, helping you make necessary adjustments to meet project requirements. Proper preparation and execution are key to achieving a high-quality concrete mix. It’s important to recognize potential challenges, such as environmental factors and safety risks.
High temperatures and humidity can affect the water demand of your mix, while inadequate surface preparation can lead to poor adhesion. Always wear appropriate protective gear to mitigate health hazards associated with cement handling. Being mindful of these factors can prevent common issues like cracking, blistering. and delamination.
Moreover, understanding when to use specific water-cement ratios is essential. Durability-focused projects should aim for lower ratios, while aesthetic-focused projects might require slightly higher ratios for improved finish and appearance. Projects with unique requirements, such as high-performance or lightweight concrete, may necessitate specialized mixes and additives, highlighting the need for flexibility and adaptability in your approach.
Finally, remember that achieving the right water-cement ratio is not only about following guidelines but also about practice and experimentation. Each project may present unique challenges. and adjusting to these is part of mastering concrete mixing. Ensuring compliance with safety standards and consulting relevant codes is also crucial for successful project completion.
As you embark on your concrete mixing projects, prioritize safety, precision. and adaptability. Gather the necessary tools, prepare your work area, and approach each task with a commitment to quality and safety. By doing so, you’ll be well-equipped to create concrete structures that are both durable and aesthetically pleasing.
Quick Facts
- Overall time needed: Completing the bucket test, including preparation and execution, typically takes about 1-2 hours.
- Most common pitfalls: Inaccurate measurement of water-cement ratio, improper mixing leading to air pockets, and neglecting safety precautions such as wearing protective gear.
- Top best practice: Use precise measuring tools like a kitchen scale to ensure an accurate water-cement ratio, and always prepare your workspace with protective sheeting to maintain cleanliness and safety.
FAQ
Question 1What is the water-cement ratio, and why is it important in concrete mixing?
The water-cement ratio is the proportion of water to cement in a concrete mix. It is crucial because it determines the strength and durability of the concrete. A lower ratio results in stronger concrete, while a higher ratio improves workability but can reduce strength and durability.
Question 2What equipment is essential for achieving the desired water-cement ratio?
To achieve the desired water-cement ratio, accurate measurement tools such as a kitchen scale or industrial-grade scale are essential for precise proportions. A mixing drill with a paddle attachment ensures a consistent blend. and a slump cone test can check the workability of the mix.
Question 3When should a lower water-cement ratio be used, and when is a higher ratio preferable?
A lower water-cement ratio is advisable for durability-focused projects like driveways or foundations, as it enhances strength and longevity. A higher ratio is preferable for aesthetic-focused projects, such as decorative countertops, where improved workability and surface finish are desired.
Question 4What additional tips should be considered when managing the water-cement ratio?
Consider environmental conditions, such as temperature and humidity, as they can affect the water demand. Ensure the substrate is clean and dry before pouring. and aim for uniformity in the mix. Always wear appropriate protective gear and be aware of potential issues like cracking, adjusting the ratio or curing process if necessary.