
Introduction
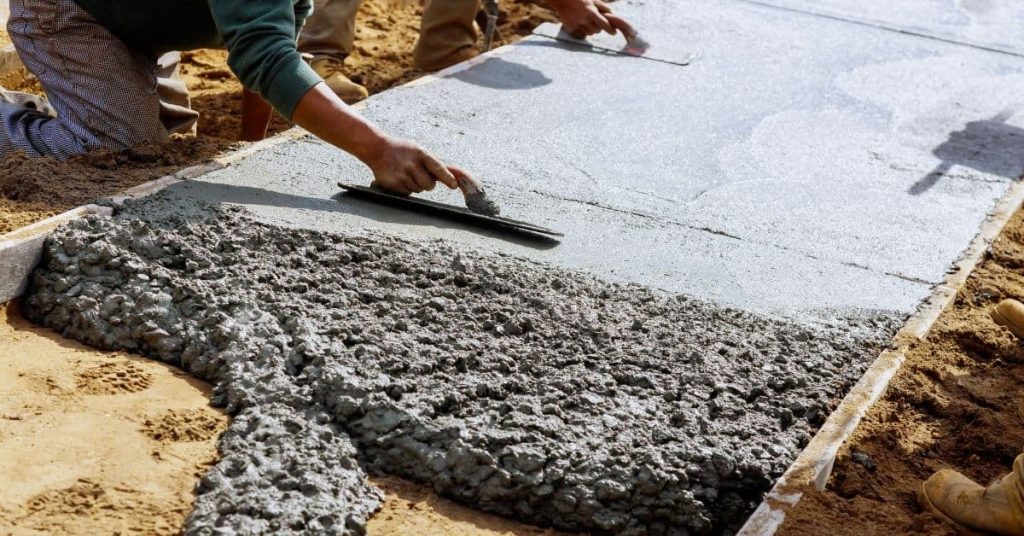
Crazing and hairline map cracks are very fine, web-like cracks that run across the surface of concrete or plaster. They often look like a spiderweb or tiny branching lines and can appear after finishing when the surface dries unevenly. These marks aren’t structural failure, but they do affect the look and texture of a finished surface.
Causes include finishing the surface too much, or when the material dries too quickly or fights against a hard, slick layer. You can spot over-finishing by unusually smooth patches, micro-cracks around edges, or a shiny, non-porous feel that won’t accept moisture. To prevent it, work with the material at the right hold, avoid excessive troweling, and follow the manufacturer’s instructions for curing and finishing, checking local rules as needed.
Key takeaways
- Understand craze mapping: shallow network cracks indicating over-finished concrete surfaces.
- Identify signs: micro-cracks at joints, resin sheen, edges polish unevenly; stop further finishing.
- Prevention: use lighter touch, avoid over-polishing, and test finish on scrap before full coat.
- Conditions: cure room temps, dust control, and joint spacing to prevent micro-shrinking.
- Corrective actions: sanding with progression, fill cracks after curing and reseal with appropriate product.
- Safety: wear eye/respiratory protection when sanding or applying finishes indoors.
Table of Contents
- Introduction
- Key takeaways
- Quick Overview — What Crazing and Hairline Map Cracks Are
- How to Identify Crazing and Hairline Map Cracks (Visual Checkpoints)
- Primary Causes — How over-Finishing Creates These Defects
- Signs Your Finish Is Too Fine or Too Smooth
- Preventative Measures and Best Practices for a Subtle Finish
- Corrective Options When Defects Appear
- Long-Term Effects, Safety Concerns, and Maintenance
- Planning, Case Studies, and Project-Ready Checklist
- Conclusion
- FAQ
Quick Overview — What Crazing and Hairline Map Cracks Are
Crazing and hairline map cracks are subtle, ghost-like imperfections that show up on new or recently finished concrete. Think of crazing as fine spiderweb lines on the surface, while hairline map cracks form a more irregular, interconnected network. Both signals point to surface conditions rather than deep material failure when they appear in DIY projects.
They differ in how they form: crazing tends to come from surface drying and thermo-mechanical stress, while map cracks trace a more complex pattern from finishing and curing histories. Look for where they show up—benches, countertops, or slabs—to gauge severity and risk. Early finishing timing, excessive trowel work, and applying sealer too soon are common root causes that you can address in future projects. Quick checks and simple fixes can keep these defects subtle and non-structural, with targeted curing, controlled drying, and mindful finishing sequences guiding the cure.
Definitions and visual traits
Crazing and hairline map cracks are common surface defects in concrete, but they’re not the same. Let’s set them apart.
Crazing is like fine spiderweb lines. These tiny thermo-mechanical cracks form during curing or drying due to rapid temperature changes or moisture loss. They’re usually shallow and barely visible, but can be felt with your fingers.
Hairline map cracks, on the other hand, are networked, irregular patterns resembling a map. These deeper cracks form when concrete shrinks during drying, often due to improper curing or finishing techniques. They’re usually wider and more visible than crazing.
Typical timing and contexts of appearance
These defects don’t just pop up overnight. Here’s when to expect them:
Crazing often appears during the first few days after pouring, as concrete starts to set and lose moisture. It’s common on countertops, benches, and other small slabs where rapid drying can occur.
Hairline map cracks usually show up later, sometimes not until weeks or months after pouring. They’re common on larger slabs under traffic, like driveways or walkways, due to the weight and movement of people or vehicles.
Why subtlety matters for aesthetics and performance
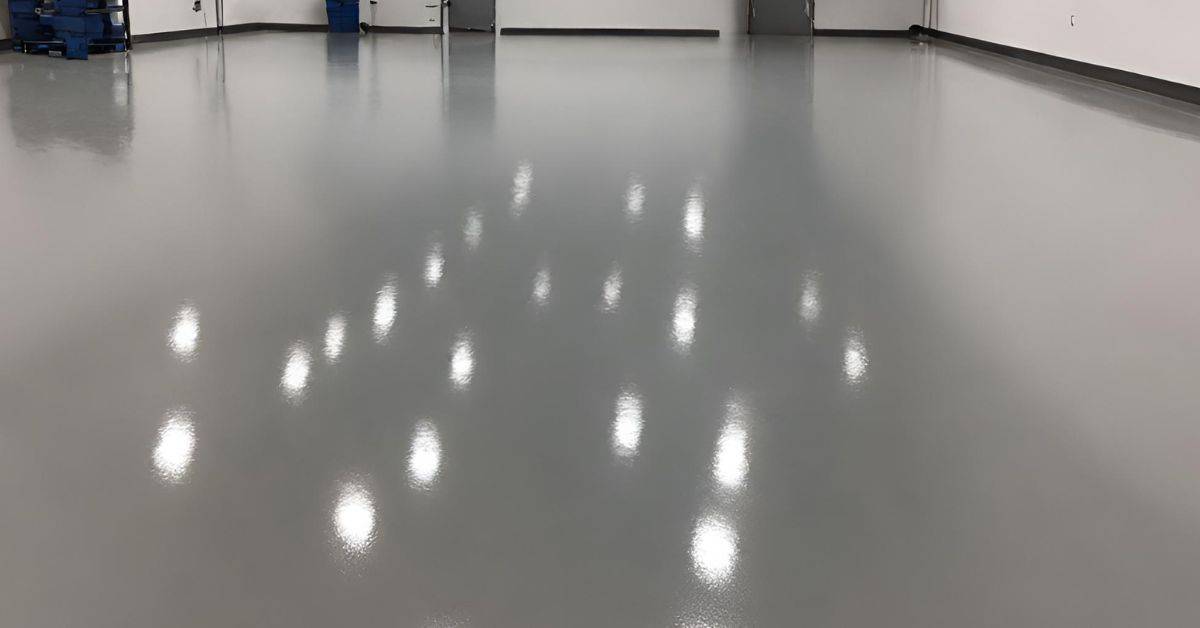
A high-gloss, ultra-smooth finish might seem ideal, but it’s not always best. Here’s why:
Subtle texture hides minor defects better than a smooth surface. It also provides better traction, making surfaces safer underfoot or for vehicles.
Moreover, a subtle finish is more forgiving to minor imperfections in the concrete mix or placement. It won’t amplify every tiny flaw like a mirror-smooth surface would.
How to Identify Crazing and Hairline Map Cracks (Visual Checkpoints)
Crazing versus hairline map cracks: define them clearly to protect aesthetics and longevity. Crazing appears as fine, regular cracks; map cracks present a more irregular, branched layout. The distinction helps you decide whether to monitor or act.
Visual checkpoints include surface uniformity, crack patterns, width, and distribution across busy areas versus decorative surfaces. Use lighting to reveal micro-cracks, such as raking light or oblique sun angles. Note cement color changes, aggregate visibility, and any signs of an overly finished or under-finished surface. Cleaning, magnification, and documenting crack locations on a plan view support future repairs. A simple decision tree can guide whether to re-smooth, seal, or call in a pro when cracks show up beyond purely cosmetic level.
Step-by-Step Process
Use this checklist to identify crazing and hairline map cracks on your finished concrete surfaces.
- Preparation: Ensure the surface is dry, clean, and free from debris. Wear safety glasses and gloves.
- Lighting: Inspect under raking light (low sun angle) to reveal micro-cracks.
- Viewing Angle: Check at different angles – oblique sunlight and cross-lighting can help spot defects.
- Surface Uniformity: Look for any deviations from a smooth, even surface.
- Crack Patterns: Identify branching, radial, or spidering cracks.
- Crack Width: Measure crack width; thin lines indicate crazing, noticeable ones map cracking.
- Distribution: Check high-traffic and decorative areas for concentration of defects.
- Material Indicators: Note cement paste color changes, aggregate visibility, surface sheen, and signs of over- or under-finishing.
- Documentation: Photograph cracks and mark their locations on a plan view for future repairs.
Quick rule: Regular, thorough inspections help catch issues early, preventing bigger problems down the line.
Texture, pattern, and depth clues
Use these visual cues to differentiate between shallow crazing and interconnected map cracking.
- Crazing: Looks like fine, interwoven lines; resembles a cracked eggshell.
- Map Cracking: Deep, interconnected cracks forming a ‘map’ pattern.
- Branching: Cracks that split into smaller ones indicate map cracking.
- Radial Cracks: Spoke-like patterns radiating from a central point suggest deeper issues.
- Spidering: Fine cracks spreading out like a spider’s web hint at crazing.
- Width Variation: Consistent thin lines indicate crazing; varying widths suggest map cracking.
- Depth: Crazing is shallow, while map cracking goes deeper into the concrete.
Quick rule: Understanding these patterns helps target repairs effectively.
Simple on-site tests and tools for inspection
Use these non-destructive methods to reveal hidden defects in your concrete surfaces.
- Lighting Angles: Inspect under different light angles to highlight micro-cracks.
- Magnification: Use a magnifying glass or loupe to examine small cracks closely.
- Water Test: Pour water onto the surface; if it beads up, the concrete is likely over-finished and may have underlying issues.
- Tapping Sound: Tap the surface with a hammer; a dull sound indicates delamination or other defects.
- Moisture Meter: Check for excess moisture, which can cause cracking.
Quick rule: Regular testing helps catch problems early and prevents costly repairs down the line.
Documenting defects with photos and notes
Accurate record-keeping ensures quality control and effective communication with contractors.
- Photograph: Take clear, well-lit photos of cracks from various angles.
- Include Reference Points: Use a ruler or tape measure in shots to show scale.
- Note Locations: Mark crack locations on a plan view for easy reference.
- Date and Time-stamp: Keep records organized with accurate dates and times.
- Describe Defects: Note crack width, pattern, and any other relevant details.
Quick rule: Thorough documentation helps track progress, identify trends, and make informed decisions about repairs.
Primary Causes — How over-Finishing Creates These Defects
Identify and differentiate the four finishing missteps and map them to crack patterns in plain terms. Oversanding, overpolishing, excessive troweling, and timing mistakes each push the surface differently toward crazing or map cracking. Simple cause-effect examples help you spot the likely culprit on a project.
Understanding concrete chemistry and surface mechanics clarifies why these habits matter: fast-drying surfaces, paste pull, trapped moisture, and microcrack initiation all shift surface tensile stress. Finishing timing, joint placement, and the pace of work influence crack development. Look for hollow sounds, shifting sheen, and fine network cracks as practical indicators to adjust technique. Use a quick troubleshooting flowchart and a before/after mindset to prevent future issues, plus safe, scalable fixes for DIYers without specialized gear.
Mechanical causes: oversanding, overpolishing, and burnishing
Overworking the concrete surface with sanding, polishing, or excessive troweling can lead to crazing and map cracks. Here’s why:
Oversanding removes too much surface paste, exposing aggregates and weakening the texture. This leaves microcracks prone to widening under stress.
Overpolishing and burnishing can cause similar issues by removing the fine cement layer that binds the surface together. It also increases the risk of surface tension leading to crazing.
Process and timing errors: finishing too soon or too late
Incorrect timing in the finishing process can result in surface defects. Avoid these common mistakes:
- Finishing too early (before bleed water is gone): This leaves a weak, porous surface prone to crazing and map cracking.
- Finishing too late (after initial set): The concrete becomes hard and unworkable, leading to excessive troweling and increased risk of defects.
- Delaying joint placement: This allows the concrete to dry unevenly, causing shrinkage cracks that can widen into crazing or map cracks.
- Rapid finishing (before bleed water is gone): This forces moisture to the surface too quickly, leading to paste pull and microcrack initiation.
Timing is crucial. Finish when bleed water has disappeared but before the concrete starts setting.
Material and environmental contributors
The right mix design, admixtures, and curing conditions can help prevent over-finishing defects. Consider these factors:
- Mix design: A well-designed mix with the correct water-cement ratio reduces the risk of cracking.
- Water loss (evaporation): Rapid drying due to high temperatures or low humidity can cause surface cracks and crazing. Use appropriate curing strategies.
- Admixtures: Some admixtures can accelerate setting, leading to over-finishing if not monitored carefully.
- Rapid drying shrinkage: Concrete that dries too quickly can shrink and crack. Use appropriate curing and avoid excessive water reduction.
- Inadequate compaction: Poorly compacted concrete has a weak surface layer prone to defects.
Signs Your Finish Is Too Fine or Too Smooth
Early cues of over-finish include an overly even sheen, ghosting, and swirl marks that betray aggressive smoothing. Look for haloing along edges that indicates excessive grinding effort. These signs matter because they correlate with surface stress and potential crack development.
Texture and slip tell more: too slick a finish can hide aggregate texture and invite micro-scratching as the surface dries unevenly. Note patterns like halos around joints or dull patches that contrast with surrounding areas. Carry out simple checks at home, such as a light reflectivity test and a water bead test, to decide whether to stop grinding and switch to sealing or retexturing. Remediation options range from spot textureing to selective dulling, with preventive steps for future projects.
Tactile and Optical Signs During and After Finishing
An overly finished surface feels too smooth, almost slippery. It lacks the subtle texture that a good finish should have.
Look for excessive sheen or ghosting. This means light reflects off the surface too much, indicating it’s been polished too fine. Check high and low spots – if they all look equally glossy, you’ve gone too far.
Polish halos around edges are another sign. They form when grinding is too aggressive, removing more material than intended.
Performance Indicators: Dusting, Reduced Bond, and Slipperiness
A surface that’s too smooth can dust under traffic. This happens because there’s no texture for the sealant to grip onto.
You might also notice reduced bond strength with adhesives. Too-smooth surfaces don’t provide enough ‘tooth’ for adhesives to stick to properly.
Lastly, overly smooth floors can be slippery. This increases the risk of falls, especially in wet conditions.
When to Stop Polishing or Sanding — Decision Triggers
Know when to call it quits. Keep an eye on the surface as you work.
If you start seeing ghosting, swirl marks, or halos around edges, stop grinding immediately. These are signs you’ve gone too far.
Also, watch for changes in the feel of the surface. If it starts feeling overly slick, that’s your cue to switch from sanding/polishing to sealing or retexturing.
Preventative Measures and Best Practices for a Subtle Finish
Start with substrate prep and condition checks: verify moisture, remove laitance, and ensure uniform porosity. These steps reduce differential drying that leads to crazing or map cracking. A solid prep lays the groundwork for a calm finish.
Focus on mix design, timing, and curing: control workability, use appropriate admixtures if needed, and plan curing to minimize shrinkage forces. Outline a finishing sequence that avoids over-troweling while achieving the desired subtle look. Joints, edge control, and quick quality checks help confirm consistency before finalizing the surface and protection plan.
Controlled finishing schedule and technique guidance
Timing is key in concrete finishing. Don’t rush it.
Check your mix design – It should specify when to start finishing after pouring. Typically, that’s when the surface bleed water disappears and the concrete is no longer sticky.
Use a staged approach. Start with a bullfloat or magnesium float for the first pass. This helps level out any minor imperfections. Then, use a finishing broom to create a subtle texture. Avoid aggressive single-pass techniques like power troweling, which can lead to an overly smooth, slippery surface.
Pressure control is crucial. Too much pressure with your tools can cause the concrete to bleed and leave marks. Too little, and you won’t get a good finish. Find that sweet spot by checking base compaction before you start. If it’s not right, stop and fix it.
Tools, abrasives, and material choices (specs explained)
First off, you need to choose the right tools and abrasives for a subtle finish. It’s not about having the most expensive gear, but using what works best for your job.
Tools: You’ll need a concrete trowel set – that’s a straight edge, margin trowel, and a bull float. Check your local hardware store or rental place, they should have these. Make sure the handles are comfortable, you’ll be holding them for hours.
Abrasives: For grinding and polishing, you’ll need diamond abrasives. Start with a coarse grit (like 30/60) to remove any high spots or imperfections, then progress to finer grits (like 80/120/240) for a smooth finish. Always check the manufacturer’s recommendations for safe usage and application.
Material choices: The concrete mix is crucial. You want a low water-cement ratio for strength, and a fine aggregate for a smooth surface. Check your material data sheets to ensure you’re getting the right stuff. And remember, base compaction is key – a solid base means less problems later on.
Curing, moisture management, and sealer selection
After pouring your concrete, the first step in maintaining a subtle finish is proper curing. This helps control shrinkage cracking and keeps your surface looking good.
Keep it wet for at least 7 days, using plastic sheets or sprinklers. Check local rules on watering restrictions. After that, let it dry naturally. Don’t rush this process with heaters or dehumidifiers.
Moisture management is key. Before sealing, check for any signs of moisture with a moisture test. If it’s too high (over 4 lbs per sq ft), wait until it drops.
Now, sealers. You’ve got options: film-forming, penetrating, or a combo. Check the label to see if it’s suitable for your concrete type (e.g., plain, stamped, colored). Apply according to manufacturer instructions, usually 1-2 coats with light sanding in between.
Corrective Options When Defects Appear
Begin with a proper diagnosis to separate craze lines, hairline map cracks, moisture movement, or finish-level concerns. Assess depth, width, pattern, and substrate condition to choose a path forward. Subtle blending or spot repairs can often preserve appearance with minimal disruption.
Prepare the surface and adhesion work carefully: cleaning, profiling, and moisture checks ensure repairs bond well. When needed, escalate to resurfacing with thin overlays or decorative toppings, and consider the long-term outcomes. Weigh pros and cons, cure times, and ongoing care to maintain subtlety and prevent recurrence.
Minor repairs and blending techniques
When defects appear, the first step is to assess their severity. For minor issues like shallow craze lines or hairline map cracks, subtle repairs can keep your concrete looking good as new.
Start by grinding back the affected area with a diamond cup wheel or handheld grinder. This helps remove any loose material and creates a profile for better bonding of the repair material. Be careful not to grind too deep; you don’t want to create more damage.
Next, use a color-matched epoxy or polyurea filler to fill in the cracks. These materials are flexible and can bridge small gaps without cracking themselves. Apply the filler with a putty knife or caulking gun, feathering the edges to blend it into the surrounding concrete.
Once the filler is dry, use a feathered skim coat of self-leveling cementitious material to even out the surface. This helps disguise any remaining imperfections and creates a smooth, seamless look.
Material treatments: densifiers, sealers, and re-polishing
Choosing the right materials is crucial for successful repairs. Here are some options that can stabilize your concrete and improve its appearance without causing further issues:
- Densifiers: These penetrate deep into the concrete to harden and densify it, making it more resistant to cracking and staining. Look for silicate-based densifiers with a minimum of 30% SiO2. Apply according to manufacturer’s instructions, usually in multiple thin coats.
- Sealers: A good quality sealer can protect your concrete from moisture and stains. Opt for a penetrating sealer with a satin or gloss finish, depending on your preference. Avoid film-forming sealers as they can trap moisture and cause further damage.
- Re-polishing: If your concrete has been over-finished, a light re-polish can help restore its original sheen without causing more defects. Use fine-grit diamond pads and work in small sections to avoid creating new issues.
- Moisture vapor inhibitors (MVIs): If your concrete is suffering from moisture-related movement, an MVI can help control the problem. Apply according to manufacturer’s instructions, usually as a primer before applying other materials.
When to resurface or replace and cost considerations
If your concrete has extensive crazing, deep cracks, or severe finish-level concerns, minor repairs may not be enough. In these cases, you might need to consider resurfacing or even replacement. Here’s how to evaluate when it’s time:
First, assess the extent and severity of the damage. If more than 10-15% of your concrete is affected, resurfacing may be the better option. Also, consider the age and overall condition of the concrete. If it’s old or has other significant issues, replacement might be necessary.
When deciding between resurfacing and replacement, consider the cost implications and durability tradeoffs. Resurfacing is generally cheaper but may not last as long as a full replacement. However, if your concrete has a good substrate and the damage is mainly superficial, resurfacing could be a cost-effective solution.
If you decide to resurface, consider using thin overlays or micro-toppings. These can provide a new surface layer that hides defects and provides a fresh look. Make sure to follow manufacturer’s instructions for proper installation and maintenance to ensure long-term performance.
Long-Term Effects, Safety Concerns, and Maintenance
Understand how crazing and map cracks affect durability over time, including moisture ingress and vulnerability to movement. Consider how cracks may propagate toward structural components if left unchecked. This awareness guides monitoring and maintenance planning.
Safety and upkeep go hand in hand: cracks can pose trip or slip hazards, and visible defects alert you to maintenance needs. Develop a routine inspection schedule, choose resurfacing or sealing options wisely, and budget for long-term care. Document crack changes and align with local standards to guide decisions and required interventions.
Durability and maintenance implications
Crazing and map cracks can accelerate wear on your concrete. They let moisture in, which speeds up deterioration.
Cleaning frequency might increase as dirt gets trapped in the cracks. More cleaning means more time and money spent.
These defects can also propagate into structural components over time, leading to bigger issues that’ll cost you dearly down the line.
Safety hazards and mitigation (slip, contaminants)
Crazing and map cracks can make surfaces slippery, especially when wet. This increases the risk of falls.
Contaminants like dirt or oil can get trapped in these cracks, making them harder to clean and potentially hazardous. They could hide underfoot, causing trips.
Regularly inspect your concrete for any changes in texture or color that might indicate a safety hazard. If you’re unsure, don’t hesitate to call a pro.
Lifecycle costs and budgeting for repairs
Maintaining your concrete isn’t a one-time job. It’s an ongoing process that’ll cost you over time.
Preventive measures like sealing can help, but they add to the initial cost. Repairs will also set you back when cracks get worse or propagate.
Budget for regular maintenance and inspections. Set aside funds for potential repairs. It’s better to be prepared than caught off guard by a big bill.
Planning, Case Studies, and Project-Ready Checklist
Planning starts with clearly defined problems and acceptable finishes for the project. Identify whether crazing or hairline map cracks is the issue, then set success criteria and working environment constraints. This clarity informs next steps and decisions.
Include real-world variables like mix characteristics, curing regimes, and surface treatments. Establish a finishing timeline, select appropriate tooling, and plan patches or tests to prevent over-work while achieving a subtle texture. Compile a consolidated project-ready checklist for substrate prep, moisture checks, tool settings, and post-finalization protection.
Project planning: specs to include and contract language
Use this checklist when drafting contracts or project plans to ensure all necessary details are covered.
- Define problem: Clearly state ‘crazing’ or ‘hairline map cracks’ in the scope of work. Specify acceptable finish levels (e.g., LCI 1-3).
- Materials and surface variables: List required concrete mix, aggregate size, sealers/densifiers, curing regime, and edging practices.
- Finishing timeline: Establish milestones for initial pour, early-stage finishing, final polishing, and acceptance testing.
- Tooling and speeds: Specify tool types (e.g., planetary grinders, burnishers) and recommended operating speeds.
- Testing patches: Include provisions for testing small areas before full-scale finishing to ensure desired results.
- Acceptance criteria: Define pass/fail conditions based on finish depth, gloss, and evenness.
- Inspection milestones: Schedule inspections at key stages: after initial pour, early-stage finishing, final polishing, and acceptance testing.
- Contract language: Include provisions for rework or additional costs if over-finishing occurs due to contractor error.
- Moisture management: Specify moisture testing methods (e.g., calcium chloride test) and acceptable results before finishing begins.
Quick rule: Clear, specific contract language helps prevent disputes and ensures a successful project.
Case studies: successful subtle finishes and failure lessons
Learn from these real-world examples to apply practical lessons to your projects.
- Project A – Success: Early testing, proper curing (7 days), low-speed polishing (200-400 RPM) resulted in a subtle LCI 2 finish.
- Project B – Failure: Inadequate curing (3 days), high-speed polishing (800+ RPM) led to over-finishing and excessive gloss.
- Project C – Lesson: Proper moisture management prevented crazing, while timely testing allowed adjustments for a successful LCI 1 finish.
- Project D – Failure: Skipping early-stage finishing led to inconsistent aggregate exposure, making final polishing difficult and time-consuming.
Quick rule: Understand what worked and why in each case to apply those lessons to your projects.
Tools and materials checklist plus visual checkpoints
Use this on-site checklist before, during, and after finishing to ensure a subtle, even texture.
- Concrete mix: Verify aggregate size (e.g., 3/8″ or 1/2″) and slump (4-6 inches) for proper finishability.
- Sealers/densifiers: Check compatibility with chosen concrete mix and desired finish level.
- Tooling: Inspect grinders, burnishers, and other equipment before use; ensure all tools are in good working order.
- Visual checkpoints – Early-stage: Verify consistent aggregate exposure (50-70%) and minimal laitance removal.
- Visual checkpoints – Final polishing: Check for even gloss, consistent finish depth, and no over-polished or under-polished areas.
- Moisture testing: Conduct calcium chloride test; acceptable results: < 4 lbs/1000 sq.ft./24 hrs.
- Curing regime: Verify proper curing duration (5-7 days) and moisture content (85%+).
- Post-finalization: Inspect for any defects, cracks, or other issues before final acceptance and sealing.
Quick rule: Regular visual checks and inspections help catch potential problems early, preventing over-finishing and rework.
Conclusion
Preserving a subtle, durable finish comes down to controlled steps, careful inspection, and sticking to safe methods. Don’t chase perfection with aggressive polishing or over-rapid finishing—steady, deliberate work protects the surface and your safety.
To proceed: inspect a small, inconspicuous area first, sample finishes in the same lighting, verify coats and sanding are appropriate for the material, then follow the documented plan in the order you outlined earlier: identify crazing or hairline map cracks, confirm the finish level, apply corrective options only as needed, and re-check for even tone and sheen before moving to long‑term maintenance. Test often, document results, and only scale up once you’ve achieved the subtle look you want in a controlled spot.
Common mistakes to avoid include over‑finishing or pushing a finish beyond what the substrate tolerates, skipping proper surface preparation, and ignoring safety steps like ventilation and protective gear. Always test in a small area first, work with a restrained hand, and wear eye protection and a mask when sanding or applying finishes. If the defect persists after a careful correction attempt, or if you’re dealing with complex substrates, consider bringing in a professional before you risk irreversible damage.
When the project scale or the finish complexity exceeds your comfort zone, or you notice persistent cracks, compatibility issues, or unfamiliar finishes, stop and call in a pro. Stay patient, follow the plan, and you’ll land a durable, subtle result that lasts. You’ve got this—steady progress beats dramatic risks any day.
FAQ
What exactly are crazing and hairline map cracks, and how do they relate to over-finishing?
Crazing are fine, interconnected cracks that form a web-like pattern on a surface. Hairline map cracks are similar but can look like a tiny map or network. Over-finishing can stress the surface and pull away enough to create these patterns as the material dries and cures.
What signs should I look for to confirm over-finishing in concrete or plaster?
Look for an overly smooth, almost glassy look with tiny cracks that follow a grid or map pattern. The surface may feel slick or overly compact, and repairs tend to show through as faint lines. If finish is hard to achieve grip or texturing, that’s a red flag.
How can I prevent over-finishing during finishing work, and what practical steps to take on site?
Keep finishing coats thin and even; don’t hunt for a perfectly flat sheen in one pass. Work in manageable sections, mist lightly if allowed by the product, and avoid over-working the surface once the material starts to stiffen. Follow product directions and don’t rush cure times or force a second coat too soon.
What repair methods work best for existing over-finished surfaces, and what to expect in terms of results?
Lightly abrade the surface to create a key, then re-apply with a more forgiving, compatible finish. Patch small areas with matching material and blend edges softly. Complete removal and re-coating may be required for severe crazing or if the texture is inconsistent. Always check label and manufacturer guidance for the best repair approach.