
Introduction
Reinforcement mesh helps prevent cracks where stucco meets framing. Different mesh patterns distribute movement across a crack and across corners, so choose one that fits your wall and framing. Always check manufacturer and local guidance for mesh type, installation height, and any soak-in or primer requirements.
For a DIY install, plan your mesh pattern around window/door headers and corners so seams align with framing. Keep it simple and secure, with proper base coat and overlaps as instructed by the mesh you select. If in doubt, read the product label and instructions and confirm with local building rules before proceeding.
Key takeaways
- Understand framing movement drives crack patterns; align mesh to accommodate anticipated shifts.
- Choose reinforcement materials with proper lath type matching stucco system and substrate.
- Use effective mesh patterns and staggered layout to minimize crack propagation.
- Secure mesh with corrosion-resistant fasteners and proper embedment depth per label.
- Plan movement joints to isolate framing stresses and prevent load transfer.
- Surface prep and coating sequence must follow manufacturer instructions on embedment.
- Wear eye protection and gloves; secure scaffolding and protect pedestrians nearby.
Table of Contents
- Introduction
- Key takeaways
- Why Stucco Cracks Appear over Framing Members
- Reinforcement Materials and Lath Types — Pros and Cons
- Effective Mesh Patterns and Layout Strategies That Reduce Cracking
- Fastening and Anchoring Tactics to Maintain Mesh Performance
- Joint Design and Movement Control to Isolate Framing Stresses
- Surface Preparation, Coating Sequence, and Embedment Technique
- Retrofit Solutions and Repair Sequences for Cracks over Framing
- Common Installation Mistakes and How to Avoid Them
- Conclusion
- FAQ
Why Stucco Cracks Appear over Framing Members
Cracking often starts where stucco meets framing because movement travels along the studs and through transitions. The stucco coat is rigid, while framing members flex and settle. That mismatch concentrates stress at the line where the two systems connect.
Conditions like continuous framing lines, sudden changes in thickness, and openings invite stress transfer into the stucco. These areas are where hairline cracks first show up and can widen if movement isn’t relieved. Look for patterns that align with stud spacing and door or window openings when assessing the cracks.
Thermal and Structural Movement
Stucco is a rigid material. It doesn’t stretch or compress much under heat or cold. Framing, on the other hand, expands and contracts with temperature changes.
When you apply stucco over framing, it can’t move freely. This creates tensile stresses – pulling forces – at the stud lines as temperatures fluctuate. These stresses build up and initiate cracks.
Solution: Use expansion joints to allow for some movement in the stucco. This helps relieve stress and prevent cracking.
Substrate Stiffness and Fastener Issues
Rigid framing members don’t flex much. If they’re not secured properly, or if the sheathing is weak, deflection points can form at the fasteners.
When you apply stucco to these deflections, it has to follow their shape. This causes stress concentrations that lead to cracking along the framing lines.
Solution: Ensure your framing is square and true. Use proper nailing patterns for sheathing. And drive fasteners deep enough to prevent deflection.
Moisture, Drying Shrinkage, and Adhesive Failure
When stucco gets wet during application or curing, it absorbs moisture. As it dries, it shrinks. This can cause cracks if the bond between the stucco and substrate is weak.
Improper curing – not keeping the stucco damp long enough after application – also reduces its bond strength, making it more susceptible to cracking.
Solution: Keep your stucco damp for at least three days after application. Use a proper adhesive or scratch coat to improve bonding with the substrate.
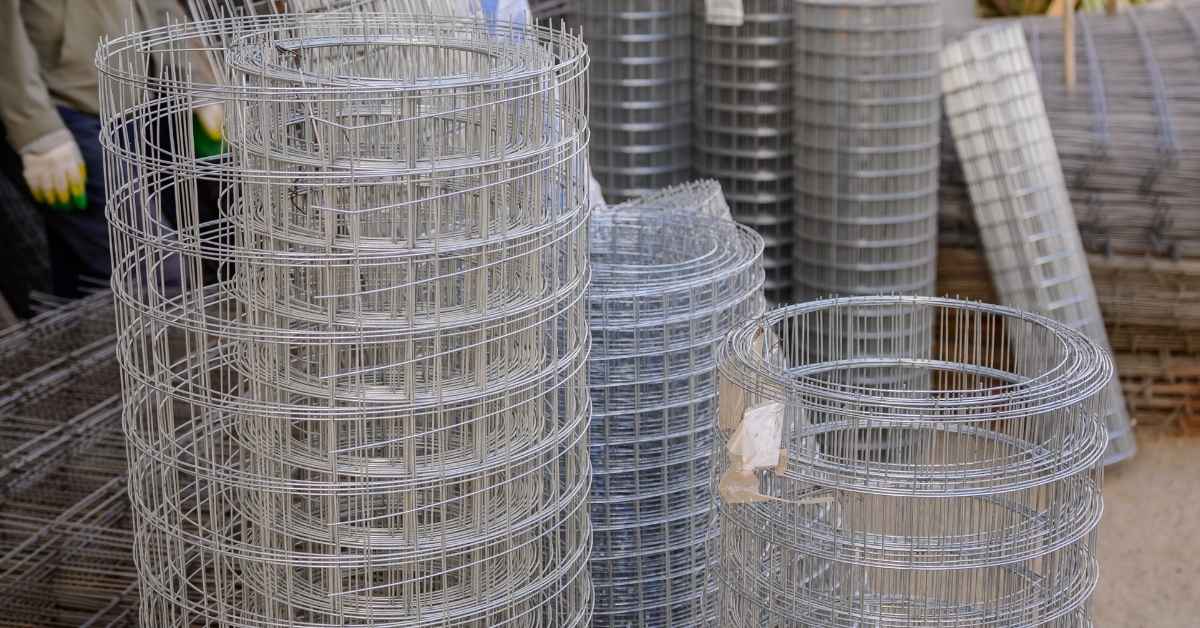
Reinforcement Materials and Lath Types — Pros and Cons
Fiberglass mesh, expanded metal lath, and paper-faced or self-furring lath each behave differently over framing lines. Durability and corrosion resistance vary with material choice and exposure. Compatibility with the stucco system matters for long-term performance.
Check manufacturer data and local rules to confirm how each option performs near framing. Understand how each reinforces movement and transfers loads at studs. Use label instructions or product guides to verify appropriate uses for your climate and substrate.
Fiberglass mesh vs. metal lath
When reinforcing your stucco at framing transitions, you’ve got two main options: fiberglass mesh or metal lath.
Fiberglass mesh is lightweight and easy to handle. It’s flexible too, which helps it bridge gaps and follow curves. But it’s not as strong as metal and can tear if not handled carefully. It also doesn’t provide the same level of corrosion resistance.
Metal lath, on the other hand, is stronger and more rigid. It provides better support for your stucco and resists tearing. However, it’s heavier and less flexible, making it harder to work with around complex framing lines. It also needs protection from corrosion, especially in areas prone to moisture.
Self-furring and paper-faced lath considerations
Self-furring and paper-faced lath both have their uses, but they’re not interchangeable.
Self-furring lath has built-in legs that space it away from the substrate. This is great for embedding in fresh stucco, promoting strong adhesion. But it’s less suitable for existing surfaces where you want to maintain a consistent thickness of stucco.
Paper-faced lath has a layer of paper on one side. This helps with adhesion and prevents the lath from rusting. It’s ideal for new construction or when applying stucco directly over wood. But it’s not suitable for surfaces that need to breathe, like existing masonry.
Tools and materials checklist
Before you start reinforcing your lath, make sure you’ve got everything you need. Here’s a quick checklist:
- Reinforcement material: Fiberglass mesh or metal lath, depending on your needs.
- Fasteners: Nails or screws suitable for your substrate and reinforcement type.
- Mixing tools: A drill with a paddle mixer for preparing your stucco mix.
- Tape measure: To ensure even spacing of your lath.
- Chalk line: For snapping lines to guide your cuts and nail placements.
- Utility knife or tin snips: For cutting your mesh or lath to size.
- Safety gear: Safety glasses, work gloves, and a dust mask for mixing and applying stucco.
- Level: To ensure your lath is properly aligned and your stucco finish will be even.
Quick rule: Always double-check that you’ve got the right tools and materials before starting. Missing something can lead to poor reinforcement, wasted time, or even safety hazards.
Effective Mesh Patterns and Layout Strategies That Reduce Cracking
Continuous wraps help carry movement across framing lines rather than concentrating it at a single seam. Staggered seams reduce the chance of a direct seam over a stud. Reinforcement strips over framing can bridge openings and transitions.
Pattern choice matters because it affects how the mesh resists stress transfer at framing and openings. Avoid aligning seams directly over stud lines. Consider layout options that keep reinforcement continuous through high-stress zones.
Continuous Wrap and Full Embedment Patterns
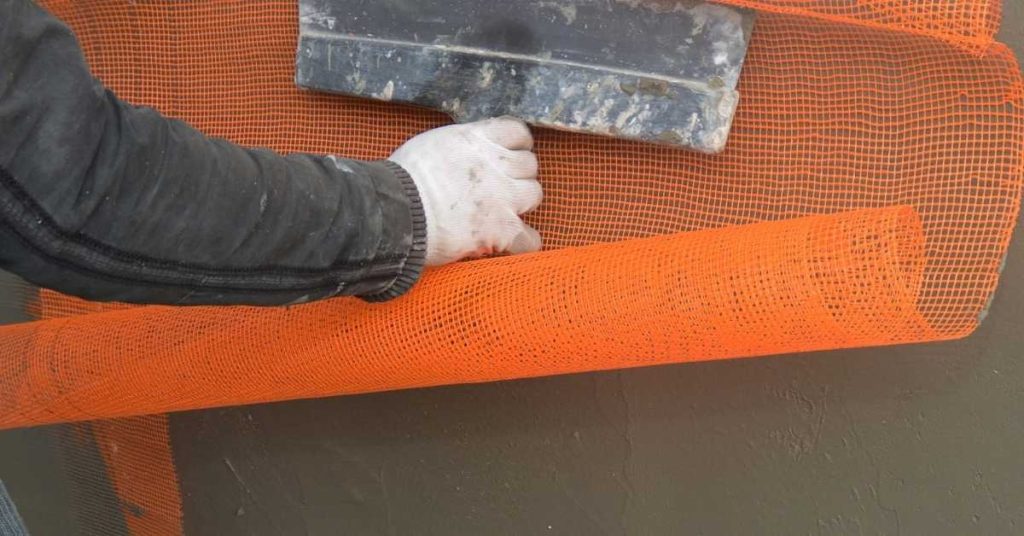
The key to reducing cracks over framing is keeping your mesh continuous across transitions. Here’s how:
Wrap around corners: Make sure the mesh wraps around corners continuously, without any breaks or gaps.
Full embedment: Ensure the mesh is fully embedded in the brown coat (base layer of stucco). This helps transfer loads evenly and prevents cracking at framing lines.
Staggered Seams and Overlap Best Practices
Seam staggering is crucial to avoid weak lines that align with studs. Here’s how:
Stagger seams: Offset the mesh seams by at least 12″ from framing members.
Proper overlap: Overlap the mesh according to product guidelines, usually around 4-6 inches. This ensures continuous reinforcement and prevents cracking.
Targeted Reinforcement at Openings and Corners
Windows, doors, and corners are stress concentration points. Here’s how to reinforce them:
Additional strips: Add extra strips of mesh around these areas for increased reinforcement.
Crisscross patterns: For high-stress areas like corners, use a crisscross pattern to dissipate stresses evenly and prevent cracking.
Fastening and Anchoring Tactics to Maintain Mesh Performance
Choose fasteners that secure the mesh without creating new stress points and that suit your substrate and lath type. Place anchors where they can hold the mesh without piercing through to sheathing in awkward spots. Anchor spacing should be enough to prevent sag or wrinkling during stucco application.
Coordinate fastening with sheathing and wrap to avoid interference with movement. Always follow manufacturer and code guidance for fastening schedules. If in doubt, verify the latest requirements on the product label or instruction sheet.
Fastener selection and placement principles
Choosing the right fasteners and placing them correctly is key to keeping your lath/mesh flat and securely embedded. Overdriving into framing can cause stress points that lead to cracking.
Use appropriate screws: For metal lath, use 1-1/4″ or 1-1/2″ screws with a coarse thread. For fiberglass mesh, use 1-5/8″ or 2″ screws with a fine thread.
Proper spacing: Follow manufacturer’s guidelines for screw spacing. Generally, it’s every 6″ to 8″ along studs and every 4″ to 6″ at joints and openings. This helps distribute stress evenly.
Anchoring through sheathing vs into studs
Both methods have their pros and cons, but the goal is to avoid creating rigid points that interrupt your reinforcing plane.
Through sheathing: This method distributes stress across a larger area. It’s easier on the lath/mesh but can be harder on the sheathing if not done right. Use appropriate screws and follow manufacturer guidelines for spacing.
Into studs: This provides better support for the lath/mesh, especially in high-wind areas. However, it creates more stress points that could lead to cracking if not spaced correctly. Always stagger your fasteners to distribute stress evenly.
Integrating reinforcement with WRB and flashing
Maintaining the continuity of your weather-resistive barrier (WRB) and flashing is crucial to prevent moisture-driven bond failures. Here’s how to do it:
WRB: Before installing lath/mesh, ensure your WRB is intact and lapped correctly at seams. Cut slits in the WRB for fasteners, then embed the lath/mesh into the slit. This keeps the WRB behind the lath/mesh.
Flashing: At openings like windows and doors, flash first, then install your lath/mesh over it. Ensure the flashing extends beyond the face of the wall to direct water out and away from the opening.
Joint Design and Movement Control to Isolate Framing Stresses
Control joints should be positioned to separate framing movement from the finish, especially near large openings. Isolation joints help relieve stresses that would otherwise crack the coating. Plan joint detailing for both retrofit and new construction.
In retrofit projects, identify existing movement paths and place joints to intercept them before they reach the stucco. For new work, design joints with framing layouts in mind and document the intended movement gaps. Always verify with applicable code and manufacturer guidance before cutting or installing joints.
Location and purpose of control/isolation joints
Control and isolation joints are crucial to protect your stucco finish from framing stresses. They’re designed to absorb and redirect movement, preventing it from reaching the stucco.
Place these joints parallel to framing lines. This aligns them with natural stress paths, allowing movement to release along these lines instead of into the stucco.
For new construction, plan joint locations during framing. For retrofits, install control joints where existing cracks or stress points are visible.
Sealant interfaces and backer choices
At joints, use a compressible backer rod to fill the joint cavity. This allows for movement without putting excessive stress on the sealant.
Choose a flexible, paintable sealant. Silicone or polyurethane caulks work well. They can stretch and compress with movement without failing.
Apply sealant over the backer rod, filling the joint cavity completely. This creates a flexible barrier that can accommodate framing movement.
Vertical versus horizontal joint strategy
Joint orientation depends on building geometry and expected movement:
– Horizontal joints are best for wide expanses with minimal height, like long walls or low-pitched roofs. They allow movement along the length of the wall.
– Vertical joints suit tall, narrow structures or areas with significant height-to-width ratio. They accommodate vertical expansion and contraction.
For complex buildings, combine joint orientations. For instance, use horizontal joints at the base, transitioning to vertical as you move upwards.
Surface Preparation, Coating Sequence, and Embedment Technique
Start with a clean, sound substrate and remove loose material before applying coats. Follow the proper scratch and brown coat sequencing for your system. Embed the mesh so it sits flush and locked into the base, not perched on top.
Test adhesion at several spots before finish application to confirm bond continuity over framing lines. Use the recommended embedment depth and pressure as described by the system instructions. If unsure, consult the product label or manufacturer instructions for exact steps.
Substrate cleaning, repairs, and priming
The first step is to ensure your substrate is clean and ready for the mesh. Here’s how:
Repair gaps: Fill any gaps or holes with a suitable patching compound before applying the primer.
Ensure surfaces are clean and dry. Remove all dust, dirt, and debris. Let it dry completely if it’s been recently painted or washed.
Apply primer as required by your system. This improves bond strength and helps prevent peeling.
Embedding mesh in the brown coat correctly
The key to successful embedding is to ensure the mesh is fully covered without wrinkles or air pockets. Here’s how:
Apply a thick, even layer of brown coat over the substrate.
Lay the mesh flat and smooth. Avoid stretching it as this can cause wrinkles.
Press the mesh firmly into the wet coat using a float or trowel. Ensure there are no air pockets or voids underneath. The mesh should be fully embedded, with only its edges visible.
Curing and environmental controls
Proper curing is crucial to prevent shrinkage cracks and ensure a strong bond. Here’s how to control the environment:
Keep temperatures between 50°F and 90°F. Avoid extreme heat or cold during cure.
Maintain moisture levels. Keep the surface damp but not wet using a fine mist spray. Cover it with plastic sheeting if necessary to retain moisture.
Avoid direct sunlight and strong winds during cure. These can cause premature drying and cracking.
Retrofit Solutions and Repair Sequences for Cracks over Framing
Begin with diagnostic steps to determine if cracks stem from reinforcement failure, framing movement, or substrate issues. Document findings to guide the repair plan. Prioritize targeted patching when cracks are localized and movement is minor.
For more extensive issues, follow a step-by-step repair that may include re-lathing and re-embedding the mesh. Retrofit work often requires matching or upgrading to a compatible system. Always check manufacturer guidance and local rules before starting repairs.
Assessing severity and deciding repair scope
First, examine the cracks closely. Narrow, hairline cracks are usually cosmetic and can be patched. But if they’re wide or propagating, it’s a sign of underlying issues.
Check for framing movement by grabbing the wall gently. If it feels solid, partial reinforcement might do the trick. But if it moves, you’ll need to address the framing first.
Inspect the substrate. If it’s damaged or crumbling, full system replacement may be necessary. Remember, cosmetic repairs on failing substrates are just temporary fixes.
Patch, re-mesh, and full re-lath sequences
For minor cracks: Clean the area, apply a patching compound, let it dry, then embed new mesh in the brown coat. Follow our earlier guide on embedding mesh correctly.
For partial reinforcement: Remove damaged mesh, clean the surface, reapply base and brown coats, then embed new mesh. Make sure to integrate it with WRB and flashing as explained before.
For full system replacement: Remove all old stucco, inspect and repair framing if needed, install new lath or sheathing, apply base and brown coats, then embed new mesh. Ensure you’re using the right joint strategy to isolate framing stresses.
When to consult a structural or stucco specialist
If cracks are ongoing or worsening, it’s time to call in the pros. They can assess if there’s ongoing movement or hidden damage.
Water stains or dampness around cracks indicate water damage. This needs professional evaluation to prevent further issues like mold growth or structural decay.
Cracks that are wide (over 1/4 inch) or propagating also warrant a pro’s opinion. They can determine if the issue is with the stucco system, framing, or something more serious.
Common Installation Mistakes and How to Avoid Them
Common errors include misplacing mesh, inadequate overlap, driving fasteners through the mesh, and neglecting WRB considerations. Each mistake can create new paths for movement to crack the surface. Focus on aligning mesh over framing without creating stress risers.
Adopt precise habits and QA checks to prevent framing-related cracks, such as verifying overlaps, securing edges, and following wrap guidance. Use the product instructions and code requirements as your baseline for every job. If anything is unclear, verify with the manufacturer or local building authority.
Misplaced seams and aligned overlaps
When installing stucco reinforcement mesh, it’s crucial to avoid aligning the seam with studs. Why? Because when framing moves – and it will – the seam can crack.
Here’s how to plan your layout:
1. Start at a corner or where two walls meet. This way, you’ll have a solid starting point.
2. Stagger mesh seams like bricks in a wall. If one piece is 4 feet wide, offset the next by 2 feet. This spreads stress evenly and prevents cracking at seams.
Overdriving fasteners and creating stress concentrators
Driving fasteners too deep into the mesh can create weak points. When stucco moves, these points concentrate stress and can cause cracks.
Here’s how to avoid this:
1. Use the right size and type of fasteners. Follow manufacturer recommendations for your specific mesh and substrate.
2. Don’t overdrive them. Fasteners should be snug but not so tight they dent or deform the wire. A slight indentation is okay, but no more than that.
Ignoring manufacturer instructions and testing
Each mesh product has its own installation guidelines. Ignore them at your peril – it could lead to poor adhesion, weak embedment, or even failure of the entire system.
Here’s what you should do:
1. Read and follow the datasheet. It’ll tell you everything from how many fasteners to use per square foot to the best embedding technique.
2. Perform simple adhesion and embedment checks before finishing. Scrape a small area with a trowel or putty knife to ensure the mesh is securely embedded in the brown coat. If it’s not, re-embed and let it cure properly before proceeding.
Conclusion
Doing the reinforcement right keeps the stucco over framing durable, protects the facade, and stops costly damage from spreading. Focus on solid material choices, correct mesh patterns, and clean, methodical installation so you get a long-lasting finish that looks good.
Check the framing and crack pattern, confirm a proper mesh and lath layout, verify fasteners and embedment, and follow a correct surface prep, coating sequence, and repair sequence on a small test area before covering the whole wall. Then proceed in the real project with the same method: test, cover, monitor, and adjust as needed.
Common mistakes to avoid: skipping movement joints or using the wrong mesh size, rushing fastening or embedding, and skipping surface prep or mis-timing coatings. Always work in daylight, wear eye and skin protection, and test a small area first to verify adhesion and coverage before committing to the full surface.
If you’re unsure about the framing, fastener choices, or movement control, call a qualified pro instead of pushing on alone. Stay deliberate, stay safe, and you’ll get a repair that holds up and stays looking sharp.
FAQ
Which reinforcement mesh pattern works best over framing members near openings and corners?
Use a pattern that keeps joints off framing edges and avoids continuous runs across a single stud line. Lay out mesh to wrap around corners and butt joints with proper overlap as per manufacturer instructions. Don’t run one long strip across multiple openings without stepping it to reduce stress transfer.
What should I check on the reinforcement mesh when buying or installing?
Read the label or datasheet for mesh type, corrosion resistance, and embedment guidance. Make sure the mesh is compatible with the plaster or stucco system you’re using and that it’s suitable for exterior use. Follow the installer’s notes and local rules when placing and fastening.
How can I spot a bad mesh pattern before it causes cracks?
Look for mesh that’s torn, bent out of shape, or not fully embedded in the base coat. Check that fasteners hold the lath and mesh firmly without gaps or sagging. If you see loose edges or misaligned joints, fix them before applying another coat.
What sequence should I follow to retrofit a crack over framing with mesh?
Clean the crack and the surrounding area, then extend the reinforcing so it crosses the crack zone. Embed the mesh into a fresh base coat with proper tension, and cover with the next coat to trap and distribute movement. Always follow the manufacturer instructions for cure times and embedment depth.