
Introduction
Concrete trowel blade burnishing is the act of using a trowel blade on a fresh slab to seal the surface and tighten the paste, which can harden the floor but may leave dark swirl marks if done too aggressively. In practice, it can give a slick finish and extra density when conditions are right, but it can also highlight imperfections if you overwork the surface. Check the blade type, the slab condition, and your finish goal before you start.
Timing matters: begin burnishing when the surface has the right set and can hold a gloss without marring easily. Blade choice matters too; understand the difference between blades intended for float work and those meant to finish to avoid chasing swirls. When operating a power trowel, keep a steady pace, avoid concentrating burnish in one spot, and tweak blade pitch gradually if you start seeing dark swirls.
Key takeaways
- Burnishing blades compress surface cap after set; aids strength but risks dark swirls.
- Start burnishing within the critical window per manufacturer guidance and pad feel.
- Choose blade types by task; float blades for leveling, finish blades for sheen.
- Follow power trowel steps precisely: set blade pitch, steady passes, avoid overworking.
- Watch for dark swirls, dull grain, or uneven sheen; halt to diagnose.
- Safety first: wear eye/face protection, check blades, and maintain ventilation.
Table of Contents
- Introduction
- Key takeaways
- What Is Burnishing with Trowel Blades and Why It Matters
- Timing — When to Start Burnishing (Critical Window)
- Types of Trowel Blades and How They Affect Strength and Appearance
- Step-by-Step Burnishing Technique for a Strong, Uniform Floor
- Visual Checkpoints, Signs of Overworking, and Diagnosing Dark Swirls
- Techniques to Achieve Maximum Strength and High Shine Without Defects
- Safety, Common Mistakes, and Maintenance
- Tools, Materials, Costs, Buying Options, and Guarantees
- Conclusion
- FAQ
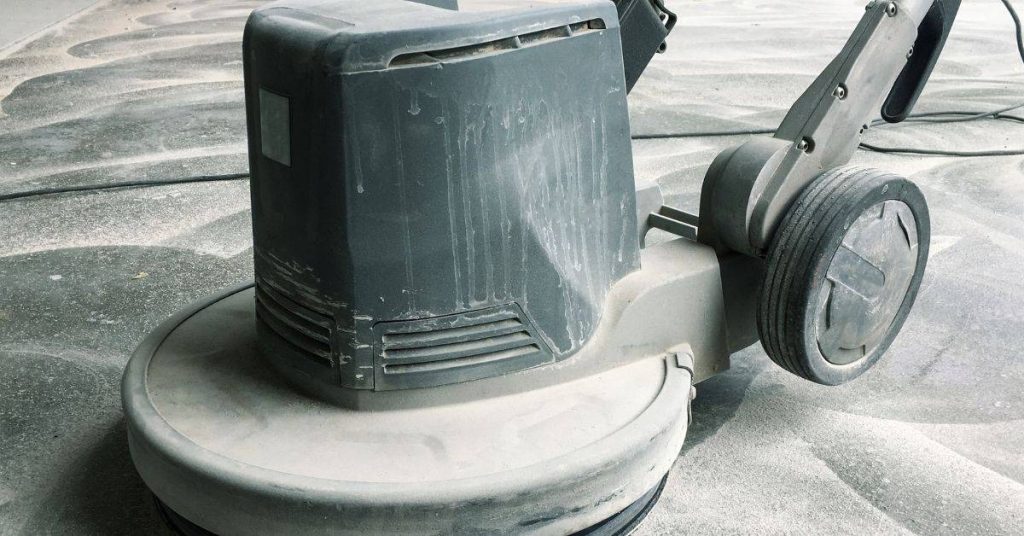
What Is Burnishing with Trowel Blades and Why It Matters
Burnishing with trowel blades is the finishing step that uses friction to compress the cement paste and densify the top surface, producing a harder, more wear-resistant finish with a glossy look. It differs from floating or traditional troweling, which focuses more on leveling and bonding the surface; burnishing tightens the microstructure for durability while tradeoffs show up in appearance and potential for dark swirls. The goal is a dense, smooth wear layer rather than a perfectly flat, glossy look, so timing and control matter to avoid uneven results.
In practice, you’ll want to follow practical guidelines on blade type, speed, pressure, and how many passes you make, and always test on a small area first. Burnishing can strengthen a floor when the concrete is at the right stage of curing, moisture is controlled, and the dense wear layer can be thick enough without risking surface crazing or trapped bleed water; too early or too aggressive work invites dark marks, uneven paste, or exposed aggregates. Be mindful of risk factors like overburnish, poor substrate prep, or uneven paste, and have a plan to switch to a different finishing method if aesthetics or control become the priority over strength.
Burnishing vs other finishing stages
Concrete finishing involves several stages, each with its own goal. Burnishing comes last, after screeding, floating, and initial troweling.
Screeding levels the concrete. Floating smooths and evens out the surface. Initial troweling gives a final sheen before burnishing.
Burnishing densifies the top layer, improving wear resistance. It’s not about appearance like initial troweling, but strength and durability.
How blade contact changes surface microstructure
The way you use the trowel blade affects your floor’s surface. Pressure, pitch (angle), and pass count matter.
Pressure: More pressure means more compaction. But be careful – too much can expose aggregates or cause swirls.
Pitch: A steeper angle (sharper pitch) gives a denser, harder surface. Flatter angles are gentler but less effective.
Pass count: More passes mean more compaction. But again, too many can cause problems like swirls or aggregate exposure.
Timing — When to Start Burnishing (Critical Window)
The critical window for burnishing is all about when the concrete has progressed from wet to set enough to resist surface damage but not so far that moisture and laitance are locked in. Premature burnishing traps moisture and fine particles, leading to a weak, dust-prone surface, while late burnishing can leave drag marks, swirls, and a dull sheen. Watch for shifts in color from wet gray to a lighter, uniform appearance, the surface beginning to feel firmer under light pressure, and a gloss or flow that steadies rather than continues to change, with ambient temperature and humidity nudging the ideal start time.
This matters because timing directly impacts long-term density, abrasion resistance, and finish quality. Use consistent start criteria, document conditions, and be ready to adjust if the environment shifts, since a small change in heat or humidity can move the window. Do quick checks such as a light footprint test and a gentle scrape resistance check, and if conditions change, perform a rapid recheck protocol before proceeding to burnish (remember to verify with product labels and manufacturer guidance for any specific equipment or surface requirements).
Visual and Tactile Cues to Begin
The first step in knowing when to start burnishing is recognizing the visual and tactile changes happening on your concrete slab. Here’s what to look for:
Visual Cues: Keep an eye out for these signs:
- Color change: As concrete sets, it transitions from a wet gray to a lighter, more uniform color.
- Surface sheen: You’ll see a consistent gloss or flow appearance across the slab.
Tactile Cues: Use your gloves or trowel to press gently on the surface. It should feel firm, not tacky or soft.
Planning and Scheduling the Finishing Window
The ideal burnishing time is influenced by several factors. Plan your crew sequencing and equipment setup accordingly:
Temperature and Humidity: Warmer temperatures speed up setting, while cooler conditions slow it down. High humidity can also extend the working time.
Mix Design and Placement Speed: Faster-setting mixes and quicker placement times narrow your finishing window. Adjust your planning to accommodate these factors.
Here’s a simple way to plan:
- Check weather forecasts for temperature and humidity.
- Review the mix design and expected placement speed.
- Calculate the estimated set time based on these factors.
- Schedule your crew and equipment accordingly, allowing for flexibility in case conditions change.
Types of Trowel Blades and How They Affect Strength and Appearance
Blade materials and profiles dramatically change how the concrete densifies, shines, and wears. Finish blades, float blades, and burnishing blades each play a different role in the hard-tinish window and influence density, trowel marks, and the risk of dark swirls. Choose based on your floor type and concrete mix, and be ready to switch as you progress.
For DIY work, start with a blade profile that matches your goal—finish for final texture, float for initial levelling, burnishing for sheen—while checking compatibility with your trowel size and motor. Follow label guidance for RPM, pass order, and pad/grit changes, and watch for density and swirl signs so you can adjust quickly. If in doubt, check the manufacturer instructions and local rules for your equipment and concrete mix.
Blade material and wear characteristics
The material of your trowel blade significantly impacts its durability and the quality of your concrete finish.
- Carbon Steel: Inexpensive, holds a sharp edge. Avoid on decorative floors due to staining risk.
- Stainless Steel: More durable, resists corrosion. Ideal for high-traffic areas and overlays.
- Aluminized Steel: Lightweight, good for large slabs. Not suitable for heavy-duty use or decorative finishes.
- Ceramic/Composite: Long-lasting, non-staining. Expensive but worth it for high-end projects.
- Tungsten Carbide: Extremely durable, great for grinding and polishing. Not recommended for initial finishing passes.
Blade profile and pitch: what each profile does
The profile of your trowel blade determines how it contacts the concrete, affecting shine and risk of marking.
Flat blades have a wide contact area, smoothing the surface and reducing swirls. They’re great for final passes but can leave trowel marks if used too early.
Cupped blades focus pressure on the center, helping to level and compact concrete. Use these first to avoid leaving footprints or trowel marks.
Adjustable pitch blades let you control aggressiveness. A higher pitch is more aggressive, good for initial passes; a lower pitch is gentler, ideal for final finishing.
Step-by-Step Burnishing Technique for a Strong, Uniform Floor
BeginBurnish: Start with a clean, prepped surface and a properly calibrated burnisher blade. Use conservative passes with careful overlap, and reduce pitch or RPM as you sense heat, glare, or swirl coming on; check the label or datasheet for any guidance on limits.
Why this matters: small, steady steps prevent defects and give you a uniform sheen, making DIY results look like a pro job. You’ll save time by catching early issues, pausing when needed, and following a predictable sequence from first pass to the final touch while staying mindful of safety and ventilation.
Step-by-Step Process
This sequence will guide you through the burnishing technique to achieve a strong, uniform floor finish.
-
Prepare your equipment: Gather your diamond tooling (100-200 grit), burnisher, vacuum, and safety gear. Check all tools are in good working order.
Why: Proper equipment ensures a smooth finish. Check: Visual inspection of tools. -
Ensure the surface is ready: Inspect the concrete for any defects, cracks, or contaminants. Clean and repair as needed.
Why: A clean, sound surface ensures a strong bond with the sealer later on. Check: Visual inspection of the surface. -
Grind the concrete: Using your diamond tooling, grind the surface to expose fresh aggregate and create a profile for the sealer.
Why: This step opens up the pores in the concrete to accept the sealer. Check: Surface should feel rough and look dull. -
Vacuum the surface: Remove all dust and debris from the grinding process.
Why: A clean surface ensures good adhesion of the sealer. Check: No visible dust or residue on the surface. -
Apply the sealer: Using a low nap roller, apply the sealer in even coats, following the manufacturer’s instructions for coverage and drying times.
Why: The sealer protects the concrete and enhances its appearance. Check: Even coat application with no missed spots or puddles. -
Burnish the surface: Using your burnisher, apply even pressure to compact the sealer into the pores of the concrete.
Why: Burnishing creates a hard, durable finish. Check: Surface should feel smooth and look glossy. -
Let it cure: Allow the floor to cure for the recommended time (usually 24-72 hours) before walking on or applying additional coats.
Why: Proper curing ensures a strong, long-lasting finish. Check: No tackiness or stickiness on the surface. -
Final inspection: Check for any missed spots, defects, or areas that need touch-up.
Why: A thorough inspection ensures a high-quality finish. Check: Visual inspection of the entire surface.
Pro tip: Always follow manufacturer’s instructions for specific products and tools to ensure the best results.
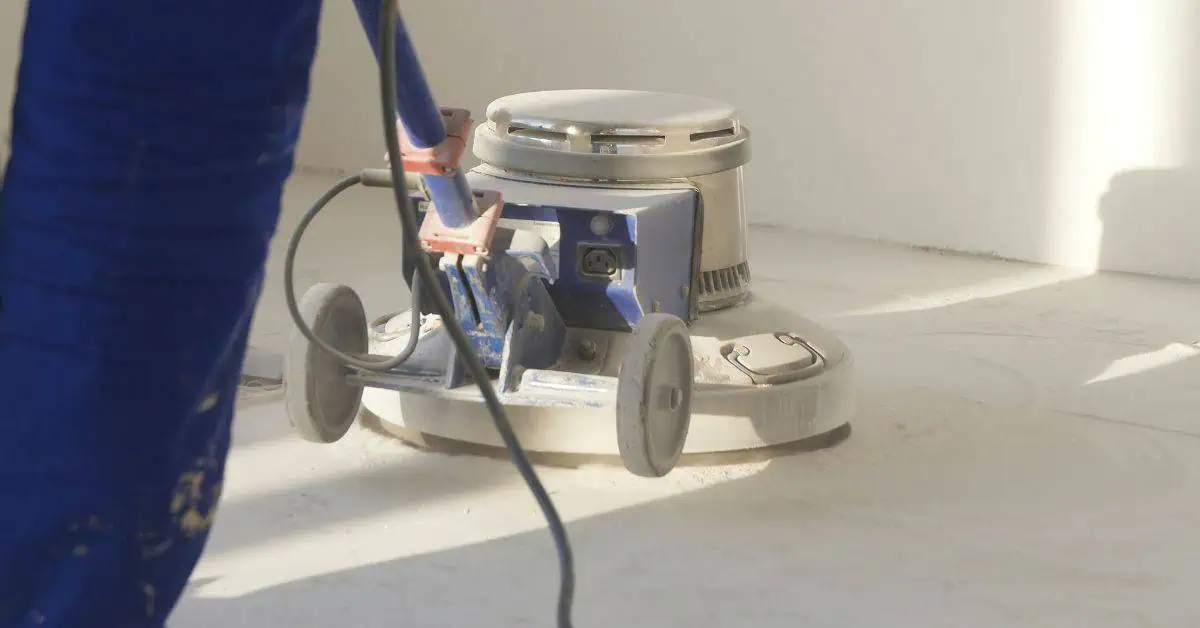
Setup and machine checks before starting
Before you fire up that burnisher, take a moment to ensure everything’s in tip-top shape. You don’t want any surprises halfway through the job.
Check your blade: Make sure it’s clean, sharp, and free of nicks. A dull blade won’t give you that smooth, glossy finish you’re after. If it’s not up to snuff, get it sharpened or replaced.
Inspect your machine: Give your burnisher a once-over. Check the RPMs – they should be within the manufacturer’s recommended range, usually around 1500-2000 RPM for concrete floors. Make sure the power settings are dialed in too. You don’t want to underpower or overpower it.
Now, let’s talk layout. You want consistent passes across the slab, right? So, plan your route. Start from one corner and work your way out. That way, you won’t miss any spots or overlap too much. And remember, keep those passes parallel – it’ll help you maintain that uniform look.
Pass strategy and overlapping patterns
Now that you’ve set up your machine and checked everything’s in order, let’s talk about how to make those passes for a strong, uniform floor.
Start with float passes, these are your base layers. You want to lay down a solid foundation here. Check your machine’s manual or the product label to see what speed and pressure work best for floating. Remember, you’re not trying to burnish yet, just lay down that concrete nice and flat.
Next up, finish passes. You’ve got your base compaction done, now it’s time to smooth things out. Again, check your machine’s settings. You want a smooth, even surface here. Don’t rush this, take your time and make sure each pass is overlapping the last by about 30-50%. This helps ensure you’re not leaving any lines or missed spots.
Finally, it’s time for the burnish passes. You’ve laid down a solid base and smoothed it out. Now, let’s give that floor some shine. Start slow, check your machine’s settings again, and make sure you’re not overworking the surface. Overlapping here is crucial too, aim for about 50-70% overlap to ensure you’re burnishing every inch evenly.
Final pass and acceptance criteria
The final burnish pass is where you’ll see your hard work pay off. Here’s what to look for:
Uniform sheen: The floor should have a consistent, glossy finish from one end to the other. If there are dull spots, you may need to go over them again.
Absence of loose paste: After burnishing, there shouldn’t be any visible paste or residue on the surface. If there is, it means you haven’t compacted the concrete properly during the initial passes.
Stop when you’ve achieved a uniform sheen across the entire floor and there’s no loose paste. Don’t overdo it; too many passes can lead to excessive heat and damage the concrete.
Visual Checkpoints, Signs of Overworking, and Diagnosing Dark Swirls
This section helps you read a cement finish by focusing on visual checkpoints: shine level, swirl direction, pattern sharpness, and how uniformly those swirls appear across slabs, so you can photograph and annotate any areas that deviate from the intended look. It also identifies signs of overworking—over-troweled sheen, edge burning, feathering, surface darkening, and increased dust or hairline cracks—that signal the concrete has fatigued under the machine and the pigment has been driven into uneven patterns. Finally, it trains you to separate dark swirls from acceptable color variation by considering moisture, blade condition, pigment behavior, and the finishing sequence you followed, instead of guessing.
A simple on-site diagnostic process is laid out: isolate variables with a controlled test area, document environmental conditions, inspect blade cleanliness, and track trowel settings to build a quick, repeatable checklist you can refer to while working. Remediation and prevention follow—re-burnish with a clean blade, adjust speed or pressure as needed, allow proper curing, reseal if required, and use consistent workflow and moisture control so dark swirls don’t recur, while recognizing some color shifts are normal under light.
Common causes of dark swirls
Before you start troubleshooting, understand these common causes to prevent further issues.
- Excessive localized pressure: Too much force on one spot can cause dark swirls. Check your trowel pressure and ensure it’s consistent across the slab.
- Wetting during troweling: Adding water to concrete while troweling can lead to dark spots. Avoid wetting unless absolutely necessary and follow proper hydration techniques.
- Contaminated blades or additives: Dirt, debris, or improper additives on the blade can create swirls. Inspect your blades before each use and ensure you’re using the right additives.
- Insufficient curing: Concrete that cures too quickly or not enough can develop dark swirls. Monitor your concrete’s moisture levels during curing.
- Blade wear: Worn blades can cause inconsistent results. Inspect your blades regularly and replace them when necessary.
- Excessive trowel speed: Troweling too fast can lead to overworking the concrete surface, causing dark swirls. Maintain a consistent, moderate speed.
- Inadequate blade maintenance: Not cleaning blades properly between uses can leave residue that causes swirls. Clean blades thoroughly after each use.
- Moisture migration: Moisture moving through the slab during curing can create dark patches. Ensure proper moisture control and ventilation during curing.
Quick rule: Addressing these common causes early can prevent most dark swirl issues.
On-site troubleshooting and corrective actions
If you’ve already got dark swirls, follow this checklist to troubleshoot and fix the issue.
- Inspect blade cleanliness: Check your blades for dirt or debris. Clean them if necessary before re-troweling.
- Check trowel settings: Ensure your trowel speed, pressure, and angle are correct. Adjust as needed.
- Re-wet and re-trowel: If the swirls are fresh, lightly rewetting and re-troweling can sometimes fix the issue. Be careful not to overwork the surface.
- Mechanical polishing: For deeper or more persistent swirls, consider using a mechanical polisher to smooth out the surface.
- Surface treatments: Apply a suitable surface treatment to even out the color and hide minor swirls. This isn’t a permanent fix but can buy time for proper repairs.
- Repair vs. rework: If the swirls are extensive, consider if repair or reworking the entire slab is more feasible. Sometimes, it’s best to start over.
- Document conditions: Keep records of environmental conditions, blade cleanliness, trowel settings, and any corrective actions taken. This helps refine your process for next time.
Quick rule: Early intervention is key to minimizing the impact of dark swirls on your floor’s finish.
Techniques to Achieve Maximum Strength and High Shine Without Defects
The goal is to balance maximum surface strength with a high-shine finish while avoiding burn-through, dark swirls, and aggregate pull-out. Use a procedural sequence with initial trowel passes, intermediate burnishing, and a final high-speed finish, applying gradual pitch increases and conservative pressure at each stage. Burnishing favors early strength gains, while mechanical polishing can yield a brighter, defect-free surface depending on slab age and mix.
This matters to you, DIY homeowner, because following the right sequence and settings prevents common defects like roller chatter, dust embedded, and swirl marks, and keeps touch-ups minimal. It also helps you know when to stop and verify cure state and moisture before moving to finishing. If unsure, check the product label or datasheet for guidance on tools and timings, and follow local rules and manufacturer instructions.
When to use burnishing vs mechanical polishing
Both burnishing and mechanical polishing can give you a high shine on your concrete floor, but they’re not one-size-fits-all. Here’s when to choose one over the other.
Burnishing: This is like giving your concrete a good, hard buffing. It’s best for new, well-cured slabs with no major defects. It brings out the shine and seals the surface at the same time. But, it won’t hide imperfections. So, check base compaction before you start.
Mechanical Polishing: This is more like giving your concrete a deep clean and shine. It’s great for older slabs with minor scratches or stains. It grinds down the surface to remove imperfections, then polishes it up. But, it can be more expensive and time-consuming than burnishing.
Here’s how to decide: If your slab is new, smooth, and you want a quick, affordable shine – go for burnishing. If your slab has some wear and tear, or you’re after a deeper clean – opt for mechanical polishing. Always check local rules and manufacturer instructions before starting any work.
Advanced tips for experienced finishers
You’ve got the basics down. Now let’s take your concrete finishing to the next level.
Progressive blade changes: Don’t wait until blades are dull. Swap them out every 2-4 hours or when you see a drop in performance. Check your blade manufacturer’s guidelines for specifics.
Maintain even RPM/pressure: Keep your finisher’s speed steady at around 100-150 RPM and pressure consistent, about 30-40 psi. Too fast or too much pressure can cause defects. Too slow or light can lead to weak spots.
Coordinate with curing practices: Timing is everything. Let the concrete bleed and set slightly before starting to finish. Then, after finishing, cover it immediately to retain moisture for proper curing. Check local rules and product labels for ideal humidity and temperature ranges during curing.
Safety, Common Mistakes, and Maintenance
Safety starts with the right PPE and proper power trowel operation. Wear ventilation, hearing protection, eye/face protection, a dust mask, and sturdy footwear. Do a quick safety check before starting: guards in place, blade guard in good shape, fuel and oil at appropriate levels, and the emergency shutoff working.
Common operator mistakes that cause swirls or weakened surfaces include improper blade pressure, uneven technique, over-troweling, and the wrong machine speed or timing. Routine maintenance—watching blade wear, correct rotation direction, cleaning, lubrication, and timely replacement—helps prevent those issues and keeps the slab more uniform. Checks after the job and a simple maintenance cadence help you catch problems early and avoid flash marks or stains on new concrete.
Safety precautions and PPE
Working with power trowels requires proper safety measures. Always wear appropriate personal protective equipment (PPE). This includes:
Ear protection: Trowels can be loud, so use earplugs or earmuffs to protect your hearing.
Eye/face protection: Wear safety glasses with side shields to protect your eyes from debris and splashes. A face shield may also be necessary for added protection.
Dust mask: Concrete dust can be harmful, so wear a dust mask or respirator to protect your lungs.
Appropriate footwear: Wear sturdy boots with good grip and ankle support to prevent slips and falls.
Routine maintenance to prevent finish defects
Maintaining your trowel blades is crucial for a smooth, defect-free concrete surface. Regular cleaning, lubrication, and inspection can help prevent swirls or weakened surfaces.
Cleanliness: Keep blades clean by removing any buildup of concrete or debris after each use. This prevents rust and ensures even blade contact with the surface.
Lubrication: Regularly lubricate blade bolts to prevent seizing, which can cause blade wobble and lead to finish defects.
Inspection frequency: Inspect blades before each use. Check for wear, cracks, or rust. Replace blades as needed according to the manufacturer’s recommended intervals.
Top mistakes and how to avoid them
Even with experience, mistakes can happen. Here are some common errors and tips on how to avoid them:
- Starting too early: Waiting for the right time is crucial. Starting too early can lead to a weak surface. Wait until the bleed water has disappeared and the slab is firm but not hard.
- Overworking the slab: Over-troweling can cause excessive wear on blades and lead to finish defects like swirls or a weakened surface. Keep an eye on your machine’s speed and the number of passes.
- Using worn blades: Worn blades can leave marks and create an uneven finish. Inspect blades regularly and replace them when needed.
- Incorrect machine speed or float timing: Too fast, too slow, or incorrect float timing can lead to finish defects. Follow the manufacturer’s guidelines for optimal speed and float timing.
By being aware of these common mistakes and taking preventive measures, you can avoid them and achieve a strong, uniform floor.
Tools, Materials, Costs, Buying Options, and Guarantees
Here’s the practical checklist you’ll actually use: note blade types—steel for economy and carbide for longer wear—plus trowel machine compatibility so you don’t buy the wrong shaft or drive system, and don’t skimp on protective gear like gloves, eye protection, and hearing protection. Include consumables you’ll routinely need, such as burnish compounds and cleaners, and a beater or pad when prepping the surface so you’re not chasing materials mid-project. Keep this list lean but complete, and verify each item against your machine’s label or manual before you shop.
Costs matter, but so do how you buy: compare blade life, maintenance needs, and the rough duration you expect from rental versus ownership without chasing exact price tags, and check whether refurbishment or used units come with a warranty. Buying options depend on brand reputation, machine compatibility, and seller policies; online stores, local shops, and rental houses each have trade-offs for selection, support, and pickup or lead times. Expect shipping or pickup to influence total cost, and read the fine print on packaging, lead times, and regional availability, plus the seller’s warranty and return policy to protect your investment should something go wrong.
Tools and materials checklist
Before you start, ensure you have all the necessary tools and consumables to achieve a successful concrete trowel blade burnish. Here’s your comprehensive checklist.
- Blade types: Steel or carbide? Both work, but steel is cheaper and easier to maintain while carbide lasts longer and provides a better finish. Check compatibility with your trowel machine.
- Trowel machine: Power trowel or walk-behind float? Depends on the job size. Ensure it’s in good working order before starting.
- Protective gear: Safety glasses, gloves, and ear protection. Don’t skip; safety first!
- Burnish compounds: Use a high-quality compound to enhance shine and protect the floor. Follow manufacturer’s instructions for application.
- Cleaners: Have concrete cleaners ready to remove any residue or stains before burnishing.
- Finisher’s tools: Edger, groover, and other finishers’ tools to prep the surface properly.
- Measuring tape: To ensure you’re following correct pass strategies and patterns.
- Level: Check for any low spots or high areas that need attention before burnishing.
Quick rule: Always check your tools and consumables before starting. Missing something can lead to poor results or delays.
Cost considerations and procurement tips
Blade and machine costs vary, so consider these factors when planning your budget:
Blade types: Steel blades are cheaper but wear out faster. Carbide blades cost more but last longer.
Rent or buy? Renting is cheaper upfront but may not be the best option for large projects due to potential rental costs and machine availability. Buying might be a better long-term investment, especially for frequent users.
Lifespan: Consider the expected lifespan of blades and machines when comparing costs. A higher upfront cost could mean lower long-term expenses if it lasts longer.
Where to buy, shipping, warranties, and satisfaction guarantees
When purchasing, consider these factors to ensure you’re getting a good deal:
Vendor reputation: Check reviews and ask for references. A reputable seller ensures quality products and reliable service.
Shipping and handling: Consider lead times, regional availability, and shipping costs. Nationwide shipping might take longer but offers convenience. Local pickup can be faster but may require travel.
Warranty and return policies: Look for a solid warranty that covers manufacturing defects. A good return policy lets you send back items if they’re not as described or don’t work as expected. Always ask about these before purchasing.
Conclusion
The core idea is simple: burnishing with the right blade at the right time makes a floor both stronger and smoother, but missteps can leave dark swirls or weak spots. Stay disciplined about safety and test areas first so you don’t lock in mistakes.
Start with a practical checklist: choose the blade type that suits your floor, confirm you’re within the critical window, follow a clean step‑by‑step burnish from edge to center, inspect for uniform density and shine as you go, and stop if you see signs of overworking or new dark patterns. Do a small test area before you commit to the whole floor and wear proper PPE throughout the process.
Common mistakes to avoid are simple: start too late or too early, use a dull or mismatched blade, rush into edge work without finishing the field, or skip the post‑burnish inspection. Keep safety tight—protect sleeves, eyes, and lungs; keep the blade clean and properly mounted; and never push duplicate passes where you can’t see the surface clearly.
If you notice persistent dark swirls, cracking, or you’re outside the recommended window and can’t correct the surface, it’s time to call a professional instead of forcing it. Stay deliberate, stay safe, and you’ll finish with a floor that’s strong, smooth, and ready for coating or use—a real job that you can be proud of.
FAQ
When is the right time to start troweling with a power trowel, and what should I look for before turning it on?
Start troweling only after the surface has stiffened enough to hold a shallow impression without marring. Check the concrete for a dull surface with slight resistance and a firm feel. If in doubt, follow the manufacturer’s guidance and local site rules for timing.
What’s the difference between float blades and finish blades, and when should I use each?
Float blades are for initial leveling and removing bumps. Finish blades are for the final smooth, hard surface. Use float blades early, then switch to finish blades as the slab begins to set to improve density and reduce marks.
What are the essential steps to operate a power trowel safely and effectively, including blade pitch?
Set up the machine on a clean, dry surface with guards in place. Start with a low blade pitch and increase as the mix hardens, keeping the machine moving to avoid burning. Always follow the blade pitch guidance on the label or manual and wear proper safety gear.
What common mistakes cause dark swirls or other defects, and how do I fix them?
Overworking the surface or running a too-high blade pitch can create dark patches. If swirls appear, ease back the pitch and slow down, then recheck the surface pattern with light passes. Check the blade condition and the concrete temp, and consult the manufacturer instructions for corrective steps.