
Introduction
Concrete temperature monitoring means tracking how hot or cold the mix stays during curing to guide when to finish and moisture cure. Affordable sensors can be embedded or attached to the surface to give real-time readings. Proper curing depends on temperature behavior, and monitoring helps catch excessive heat or slow cooling before it harms strength.
Manual checking is tough and unreliable in the field, which is why wireless or simple wired sensors are popular. Choose sensors with clear labeling, verify they suit your curing time, and check the manufacturer’s instructions and local rules for installation. If in doubt, document your readings and compare to basic guidance to judge when to keep concrete damp or cover it.
Key takeaways
- Concrete curing means maintaining adequate moisture and temperature for strength gain.
- Manual temperature checks are error-prone; sensors reduce guesswork and tracking gaps.
- Wireless maturity sensors save time and provide real-time strength indicators without wiring.
- Embedded, surface, and wireless options offer flexible placement for varying pours.
- What Is Concrete Maturity? A method for real-time compressive strength guidance.
- Check your concrete temperature and test it with fully embedded sensors.
- Warning: keep sensors away from extreme heat, moisture, and physical damage.
Table of Contents
- Introduction
- Key takeaways
- What Is Concrete Curing and Why Temperature Matters
- Challenges in Concrete Curing (Including Cold Weather)
- Concrete Maturity: Measuring Strength in Real Time
- How Temperature Sensors Work: Embedded, Surface, and Wireless Options
- Cheap Sensor Options: Comparison, Trade-Offs, and Practical Choices
- Selecting and Installing Affordable Temperature Monitoring Tools
- Real-Time Data Collection, Analysis, and How It Saves Time & Money
- Case Studies and Applications (Including Data Centers)
- Conclusion
- FAQ
What Is Concrete Curing and Why Temperature Matters
Curing is what happens after you pour the concrete. It’s the process that lets hydration chemistry do its job and gain strength over time. Drying is different; curing is about keeping the right moisture and heat so the mix hydrates properly rather than simply drying out.
A practical DIY-friendly window guides you toward proper curing: keep the concrete warm enough for steady strength gain, but not so hot that moisture blasts away. If it’s too cold, strength development slows and microcracks can form. If it’s too hot, rapid evaporation invites cracks and surface defects. Use simple methods like keeping the surface moist, covering with plastic or damp burlap, misting as needed, or applying curing compounds, depending on project needs.
What is concrete curing?
Concrete curing is the process of maintaining appropriate temperature and moisture conditions for newly placed concrete to gain strength over time. This happens through a chemical reaction called hydration, where cement particles bind with water to form strong bonds.
Think of it like baking a cake. You need heat (temperature) and time (curing period) for the ingredients to come together properly. In concrete’s case, controlled conditions allow the hydration process to complete, resulting in a strong, durable final product.
Pro tip: Unlike drying, curing doesn’t involve losing moisture. Instead, it’s about keeping moisture in and maintaining the right temperature for optimal strength gain.
Why temperature control matters for final strength and durability
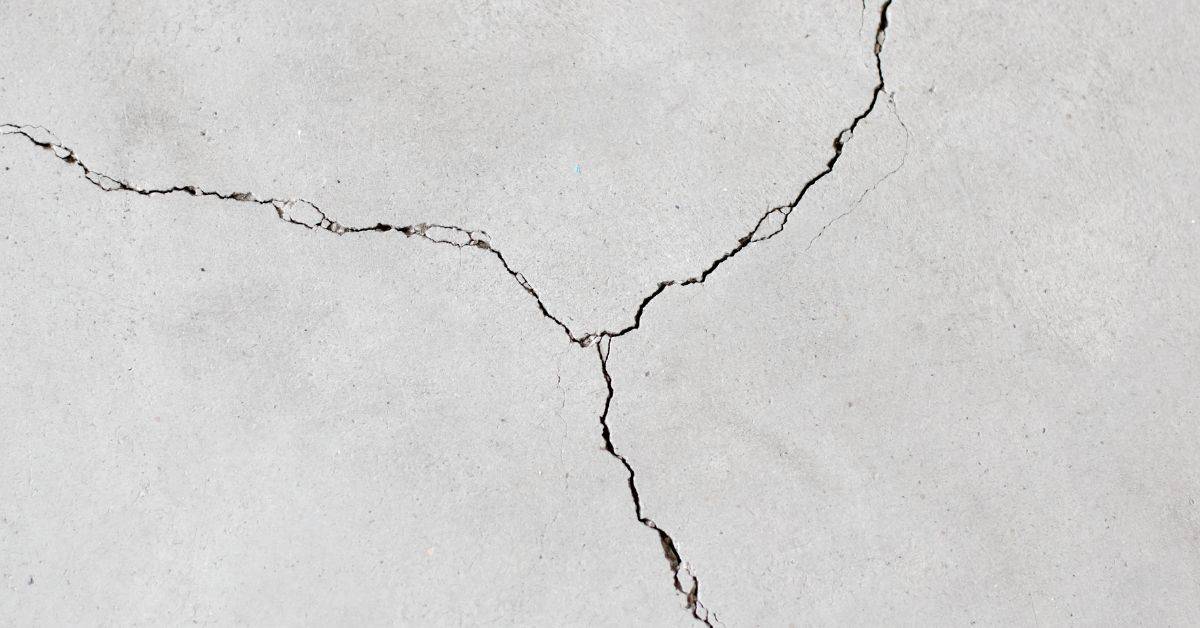
Temperature plays a crucial role in concrete’s hydration rate. Too cold, and the reaction slows down, leading to delayed strength gain and potential microcracks. Too hot, and moisture evaporates too quickly, increasing the risk of cracking.
Thermal gradients – differences in temperature across the concrete – can also cause issues. They create stresses that may lead to cracks or other defects, compromising long-term durability.
Always check project specs and local standards for specific temperature limits. Generally, aim for a practical curing temperature range of 50-90°F (10-32°C) for optimal strength development and durability.
Challenges in Concrete Curing (Including Cold Weather)
Curing hinges on uniform temperature and moisture, so shifts in weather matter a lot. Cold spells slow early strength gain and can lead to delayed set, while heat speeds evaporation and raises cracking risk. Keep this discussion practical and focused on what you can control on a small crew project.
On-site realities like weather swings, uneven surface temperatures, wind, and shading from forms or structures complicate curing. These factors affect moisture loss and how quickly the concrete dries. Practical measures include insulation blankets, windbreaks, shade during peak sun, misting or curing compounds, sealed forms, and scheduling pours to forecast conditions. A low-cost monitoring approach with simple sensors helps you spot trouble early and adjust as needed.
Cold-weather impacts and guidance to check
Low temperatures slow down concrete hydration, the process that builds strength. Below freezing, it can even stop or cause damage.
ACI 306, local codes, and your material supplier’s recommendations will tell you the minimum temps for pouring and curing. Check them before you start.
In cold weather, consider using heated forms, insulated blankets, or accelerators to keep temperatures up. But remember, every degree drop can halve strength gain in early stages.
Thermal gradients, moisture loss, and formwork effects
Concrete cures best when it’s uniformly warm. But temperature differences through a slab create thermal gradients, causing weak spots and cracks.
Cold forms or tools can also chill the concrete surface, creating weak planes. This leads to inconsistent strength development and increased cracking risk.
Wind-driven evaporation speeds up moisture loss from surfaces. This dries out the concrete too fast, leading to surface dusting and reduced durability.
To combat this, use windbreaks, shade, or misting systems. Keep forms sealed tight to retain moisture. And remember, proper curing compounds can help maintain a consistent temperature and moisture profile.
Concrete Maturity: Measuring Strength in Real Time
Maturity is a way to estimate in-place strength from how temperature changes over time. This real-time insight helps with decisions like when to remove forms or open to traffic without waiting for all cylinders to cure.
The practical workflow centers on data: collect temperature readings from sensors, compute a maturity value with a chosen model, and map that to an early-age strength target. Calibration curves tied to your mix and curing regime improve accuracy. Understand that ambient conditions and hydration rate can shift readings, so stay aware of potenial data quirks and.communicate results clearly to the crew.
What is concrete maturity?
Concrete maturity is a way to estimate the in-place compressive strength of your freshly poured concrete. It’s like giving it a ‘maturity score’ based on how much heat it’s generated over time.
Think of it as a real-time report card for your concrete’s strength, helping you make decisions without waiting for lab tests or breaking apart samples.
Use maturity when: You need quick, non-destructive insights into your concrete’s strength. It’s great for deciding when to remove forms, open roads, or test early strengths.
How temperature data translates to strength estimates
Here’s how we turn temperature readings into strength estimates: First, we collect temp data over time. Then, we use a model like Nurse-Sager to calculate something called ‘maturity index’.
The maturity index is like a summary of your concrete’s heat history. It tells us how much ‘aging’ or ‘curing’ has happened.
Next, we compare this index with project-specific calibration curves to estimate the actual compressive strength. These curves are like conversion charts, showing us where our maturity index sits on the strength scale.
Check which calibration method: Different projects might use different calibration methods. Make sure you’re using the right one for your job.
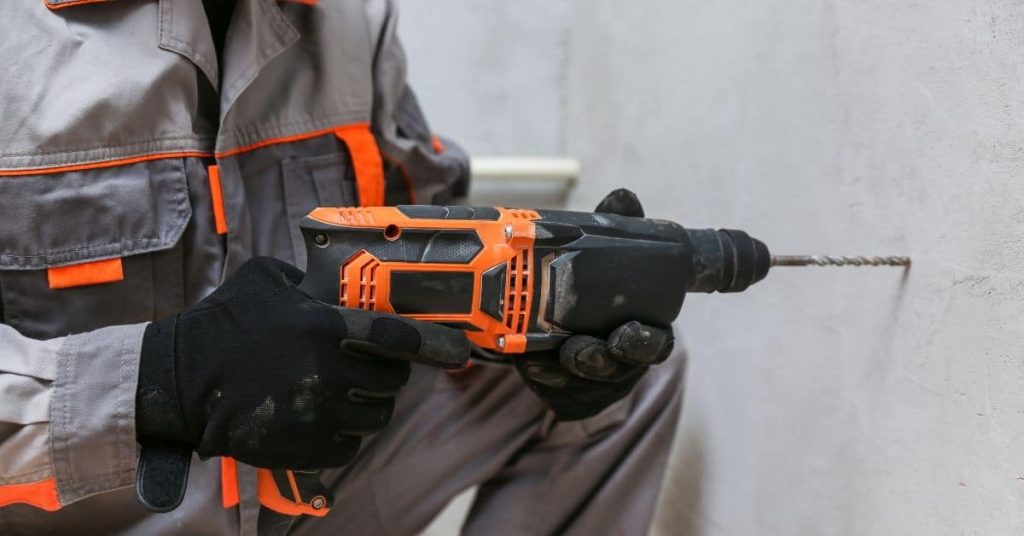
How Temperature Sensors Work: Embedded, Surface, and Wireless Options
Three main sensor categories cover most pours: embedded, surface, and wireless. Each type has its own usual accuracy, response time, and data cadence. Start with what fits your formwork and access needs.
Embedded sensors live in the concrete and read as the pour cures; surface probes sit on forms or nearby and are easier to install in existing slabs. Wireless sensors offer convenient data reporting but require reliable power and good transmission paths. Consider installation ease, durability in fresh concrete, and how you’ll read and act on readings when choosing.
Fully Embedded Sensors vs Surface Probes
When it comes to measuring concrete temperature, you’ve got two main options: fully embedded sensors and surface probes. Both have their uses, but they’re not interchangeable.
Embedded sensors are placed right in the mix during pouring. They give you the most accurate reading of what’s happening inside your concrete. This is crucial for understanding how temperature changes affect strength gain. But they’re also more expensive and labor-intensive to install.
On the other hand, surface probes are attached to forms or placed near critical zones. They’re cheaper and easier to install, but they only measure surface temperature. This might not be representative of what’s happening inside your concrete, especially in large pours or cold weather.
So, which should you choose? For small projects or when accuracy is crucial, go embedded. For larger jobs or where budget is a concern, surface probes can work, but keep their limitations in mind.
Wireless, BLE, LoRa, and Wired Sensor Basics
You’ve got options when it comes to how your sensors communicate. Here’s a quick rundown:
Wired sensors are simple and reliable. They’re connected by cable to a data logger or readout device. But they’re also limited in range, making them less suitable for large pours or remote locations.
Wireless sensors use radio signals to transmit data. BLE (Bluetooth Low Energy) is great for short-range, real-time readings. It’s perfect for monitoring small projects or when you’re on-site. But it has limited range and can be affected by interference.
LoRa, on the other hand, is long-range. It’s ideal for large pours or when you need to monitor from afar. But it doesn’t provide real-time data like BLE. Choose based on your project size, access needs, and desired data cadence.
Cheap Sensor Options: Comparison, Trade-Offs, and Practical Choices
Cheap options fall into three categories: thermistors or thermocouples with loggers, entry-level wireless sensors, and DIY embed solutions. Each has its own trade-offs for accuracy, durability, and ease of use on a jobsite. Match the option to your project scale and tolerance for maintenance.
Expect simple thermistors to need calibration and drift checks over time, while wireless units save hands-on reading time but may require battery management. DIY embeds can save money but demand careful placement and protection. Use practical scenarios to decide which path to follow and how long you expect to rely on these sensors before upgrading.
Low-cost thermistors and thermocouples with data loggers
Thermistors and thermocouples are simple, affordable sensors for monitoring concrete temperature. They’re great for DIY jobs due to their ease of use.
Pros: Cheap, easy to install, accurate enough for most small projects.
Cons: Wiring can be a hassle on larger sites. Data retrieval requires physically accessing the logger. They don’t log data continuously; intervals are set by the logger’s sampling rate.
Budget wireless sensors and DIY embeddable options
Entry-level wireless sensors and DIY embed solutions offer more convenience but come with trade-offs. They’re perfect for larger projects where wired loggers aren’t feasible.
Pros: Wireless data transmission, no wiring needed, can be embedded directly into concrete.
Cons: Less robust than professional-grade sensors, may require calibration over time. Warranty support might be limited with DIY options. Battery life and wireless signal strength can vary.
Selecting and Installing Affordable Temperature Monitoring Tools
Core selection comes down to accuracy, measurement interval, battery life, embedment method, and calibration needs. Higher accuracy and faster readings cost more, but provide more precise curing control. For DIY projects, balance cost with how much data you actually need to guide decisions.
Choose embedment method and form factor by considering whether you want direct embedment in concrete or a protective housing. Calibration requirements and drift tolerance over days and weeks should be checked against the manufacturer’s guidance. Plan for data access and budget by weighing wired versus wireless options, then map this to your project duration and data needs.
Practical checklist: specs and tools to verify before buying
Before you make a purchase, use this checklist to ensure the temperature monitoring tools meet your project’s needs.
- Accuracy: Look for sensors with ±0.5°C or better accuracy. This ensures reliable data during early strength gain.
- Measurement interval: For early curing, aim for 1–5 minute intervals. Long-term trends can be monitored every 15–30 minutes.
- Battery life: Ensure the battery lasts the entire project duration to avoid data gaps.
- Data logging capacity: Check if the sensor has enough memory for your required measurement interval and project length.
- Embedment method: Verify the sensor can be embedded directly in concrete or requires a protective housing.
- Probe length: Ensure the probe is long enough to reach the desired depth but not so long that it’s difficult to handle.
- Grout compatibility: Check if the sensor is compatible with your chosen grout.
- Calibration needs: Inquire about field calibration requirements and factory calibration reports.
- Data access: Consider if you need wired or wireless options, cloud dashboards, or local storage.
- Poor embedment depth: If the sensor is too shallow, it won’t accurately represent the concrete’s temperature. Ensure it’s embedded deep enough.
- Loose contacts: Tighten all connections before embedding to prevent data loss due to poor contact.
- Exposed wiring: Protect wires from damage during pouring and curing to maintain data integrity.
- Bad placement relative to reinforcement: Avoid placing sensors near reinforcing bars as they can affect temperature readings. Maintain a consistent distance.
Quick rule: Always ask vendors for calibration records and support options to ensure reliable performance.
Common installation mistakes and how to avoid them
To ensure accurate readings, avoid these common installation mistakes.
Regularly check your installations, and address any issues promptly to avoid data gaps or inaccurate readings.
Real-Time Data Collection, Analysis, and How It Saves Time & Money
Real-time temperature monitoring keeps the crew ahead of problems. A clear sensor network layout and readable dashboards help you spot when readings are diverging from expected trends. Readings feed decisions quickly without waiting for routine checks.
Understanding maturity translates readings into predicted strength and helps you time formwork removal and protection strategies. The practical payoff is reduced schedule risk, fewer unnecessary tests, and smoother commissioning. Use affordable sensors, simple dashboards, and agreed-upon thresholds to keep the project moving on schedule.
Operational benefits: faster decisions and reduced rework
Real-time temperature monitoring lets you make quick decisions to protect your pours. You’ll get alerts when temps dip too low or rise too high. Catch issues early, add heat if needed, and avoid delays.
Example: Say it’s 40°F outside. Without real-time data, you might wait till morning to add heat. But with instant alerts, you can act right away, saving time and labor.
Monitoring trends helps too. See how temps are changing over hours or days. If curing slows down, you can adjust your plan before it’s too late.
Simple analysis workflows: maturity curves, alerts, and reporting
Your data platform should show you time-temperature plots. See how temps change over days or weeks. This helps you understand your pour’s curing process.
Maturity-to-strength curves predict when your concrete will reach its design strength. No more guessing, no more unnecessary cylinder tests.
Alerts: Set temperature thresholds to get notified if temps go out of range. This helps you protect your pour and avoid costly rework.
Export data as needed for records or to share with your team. Most platforms let you export CSV or PDF files with just a click.
Case Studies and Applications (Including Data Centers)
These examples show how low-cost sensors translate into real-world gains. One cold-weather pour demonstrates early warning and better control of thermal bands, while a data-center project shows how stable curing supports tight tolerances and faster commissioning. The focus is on actionable improvements rather than abstract theory.
Cold-weather case: sensors tracked temperature loss and curing duration, enabling proactive adjustments to blankets and timing to avoid premature finishing. High-value project: embedding affordable sensors verified uniform curing under strict tolerances, supporting risk management and energy goals through predictable strength development. Use these templates to guide your next pour and keep the data simple to interpret.
Cold-weather pour example: preventing delays and false lab results
In winter, concrete sets slower due to cold temperatures. Field-cured cylinders can give false negatives, leading to premature finishing. In-place sensors avoid this.
On a recent job in Minnesota, we used cheap temperature and maturity sensors. They monitored pours, alerting us when temps dropped below setpoint bands. This prevented premature finishing and reduced thermal cracking risk.
Result: We avoided delays, saved labor costs, and improved concrete quality.
Designed to move data center projects faster — high-stakes application
Data centers need tight schedules and critical floor flatness. Continuous monitoring ensures consistent curing, supporting milestone tracking.
In a Texas data center project, we embedded affordable sensors. They verified consistent curing under tight tolerances, supporting risk management and commissioning timelines.
Result: Real-time data helped us achieve stable concrete strength development, meeting energy-efficiency goals on time.
Get Real-Time Data with SmartRock® and similar solutions
Commercial wireless maturity systems like SmartRock provide turnkey data. They’re easy to use but come at a cost.
For DIY homeowners, affordable alternatives exist. Wireless sensors with long battery life (up to 2 years) and frequent data logging can be used. Place them strategically in pours for best results.
Consider paying for vendor platforms if you need advanced analytics or remote monitoring. Otherwise, DIY setups can work well.
Conclusion
Keeping concrete within the right temperature range matters for strength, durability, and appearance. With affordable sensors and a simple plan, you can catch problems early and cure safely without wasting time or money.
Start by checking the site conditions, select a sensor setup that fits your cure plan (embedded, surface, or wireless), install and test it in a small area, and then collect real-time data long enough to see the trend. Make a daily check of readings, compare them to safe curing bands for your mix, and keep a log so you know when to adjust the heat, moisture, or protective cover. Stay practical: verify power, verify data, and don’t push past safe limits.
Common mistakes to avoid are rushing installation, ignoring cold-weather risk, and assuming all sensors read the same across a slab. Use proper placement and calibration, protect wiring and probes from damage, and never run curing factors beyond what your mix and ambient conditions can tolerate. If you don’t see a clear temperature trend or you’re dealing with large sections or critical loads like data center pads, pause and reassess—safety and durability first.
If the project scales up or you’re unsure about the curing plan, call in a professional for the final verification or to tailor a sensor network to the job. With disciplined monitoring and practical steps, you’ll save time, avoid costly mistakes, and finish with a solid, well-cured concrete slab. Stay steady, stay safe, and let the data guide your next steps.
FAQ
What is concrete curing, and why does temperature matter?
Concrete curing is the chemical process where cement reacts with water to gain strength. Temperature affects the rate of that reaction, which in turn impacts final strength and durability. Proper curing temperatures help prevent cracks and weak spots.
What are the challenges of monitoring temperature manually on a job?
Manual checks rely on you remembering to take readings at the right times. Data gaps can hide hot or cold spots that affect curing. If you’re not consistently measuring, you’re flying blind and risking uneven strength.
What advantages do wireless sensors bring to curing?
Wireless sensors give you real-time data without running wires all over the site. They cut down manual checks and let you spot temperature trends quickly. They’re easier to scale as the slab or pours grow.
Do you have real-world examples where tech helped curing?
Folks who used simple, affordable sensors caught premature cooling or overheating and adjusted curing practices in time. This saved potential delays and helped avoid defects that show up later in strength testing. Look for real-world results on the product label or manufacturer notes to understand what to expect.