
Introduction
High pH in concrete can break down coatings and weaken their grip.
That alkaline environment reacts with many sealers and paints, especially when new concrete is unfinished. Always check the coating’s label and follow manufacturer instructions, and consider what local rules say about surface prep.
To prepare, scrub and rinse the surface and let it dry, then test a small area for compatibility.
Watch environmental conditions like temperature and moisture, since humidity can affect how pH acts and how coatings cure.
If you’re unsure, consult the product label or a local pro before committing, and plan to neutralize or seal the surface as needed.
Key takeaways
- Test concrete pH early to choose coatings compatible with high-alkaline surfaces.
- Perform thorough surface preparation: remove laitance, clean, and ensure dry substrate.
- Saponification risk: avoid epoxy or polyurethane mismatches on highly alkaline concrete.
- Control environmental conditions during application to prevent rapid moisture movement.
- Implement moisture vapor drive mitigation before coating to reduce failure potential.
- Follow manufacturer instructions for surface prep and cure times; verify labels.
- Always wear PPE and ventilation; high-alkaline residues can irritate skin.
Table of Contents
- Introduction
- Key takeaways
- What Concrete Surface Ph Is and Why It Matters for Coatings
- How High Ph Physically and Chemically Causes Coating Failure
- Moisture, Vapor Drive and How They Compound High-Ph Problems
- Testing Protocols and Visual Checkpoints Before Coating
- Surface Preparation and Remediation Strategies for High-Ph Concrete
- Mixing, Application Best Practices and Environmental Controls
- Tools, Safety, and Material Specs Checklist
- Planning, Costs, Common Mistakes and Alternative Solutions
- Conclusion
- FAQ
What Concrete Surface Ph Is and Why It Matters for Coatings
Surface pH is a measure of how acidic or alkaline the outermost portion of concrete is. It matters because coatings interact with the surface, not just the bulk material behind it. An alkaline environment at the surface can affect adhesion and long-term performance.
Fresh and curing concrete continually brings alkaline compounds to the surface as it dries and cures, and this evolves over time. The science behind the surface chemistry explains why certain coatings struggle to bond or endure in high-alkali conditions. Use available product labels and manufacturer instructions to confirm how a coating should perform on alkaline substrates.
pH basics and the chemistry of cementitious surfaces
Concrete’s pH is like a scale from 0 (acid) to 14 (alkaline), with 7 being neutral. Fresh concrete is highly alkaline, around 12-13.
Cement, the key ingredient in concrete, reacts with water and produces calcium hydroxide (Ca(OH)2). This makes concrete alkaline even after it dries out. Alkalinity persists because Ca(OH)2 is not water-soluble.
Alkaline surfaces can affect coatings, so understanding this chemistry helps you choose the right ones for your project.
How surface alkalinity interacts with common coating chemistries
High pH can break some coatings. Epoxy and polyurethane, popular for concrete, can be sensitive.
Epoxies cure by cross-linking. High pH can prevent this, weakening the bond. Polyurethanes can degrade due to alkaline hydrolysis – a chemical reaction with water that breaks down the polymer chains.
Acrylic paints and silane sealers are more alkali-resistant. But always check compatibility before applying any coating. High pH can also cause efflorescence – white, powdery deposits that ruin coatings’ appearance and longevity.
How High Ph Physically and Chemically Causes Coating Failure
This section maps two main failure pathways: chemical reactions at the concrete–coating interface driven by alkaline pore solutions, and the weakening of the binder network under sustained high pH and moisture cycles. Each pathway ties concrete chemistry to coating chemistry and explains potential delamination and surface changes. Observed failures often reflect those underlying reactions.
High pH can accelerate hydrolysis of resin components, promote bond scission in cross-links, and cause ion exchange at the surface. These processes reduce both cohesion within the coating and adhesion to the substrate. Expect visible signs like peeling, blistering, chalking, and loss of gloss, especially where moisture and porosity move through the concrete.
Saponification and resin degradation
High pH on concrete surfaces can cause certain resins in coatings to break down. This process, called saponification, happens when the alkaline environment reacts with the resin. It’s like making soap – that’s where the term comes from.
Imagine this: your coating’s resin is like a long chain of molecules. High pH cuts these chains into smaller pieces, turning them into soap-like materials. These ‘soap’ molecules block adhesion points, preventing your coating from sticking properly to the concrete.
Result? You might see softening or peeling of your coating over time. It’s like trying to stick a wet piece of paper to a wall – it just won’t stay put.
Alkaline salts, efflorescence and weak boundary layers
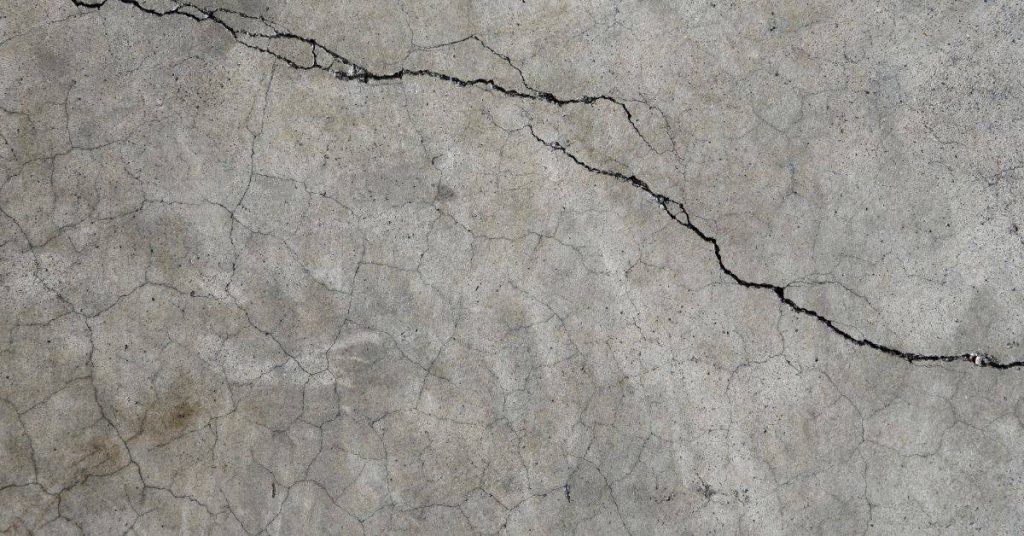
High pH on concrete surfaces can dissolve certain salts and hydroxides, sending them on a journey to the surface. Once there, they crystallize or form a powdery film – this is what we call efflorescence.
Think of it like this: imagine you have a salt shaker. If you sprinkle too much salt onto a plate (our concrete surface), some will stick, but most will just sit on top and won’t mix in with your food (the coating). This creates a weak boundary layer – a non-stick surface that doesn’t bond well with the coating.
Consequence? Your coating might not adhere properly to the concrete. You could see delamination or peeling, as if you’d tried to paint a wall without proper preparation – the paint just flakes off.
Moisture, Vapor Drive and How They Compound High-Ph Problems
Moisture moves from within the slab through vapor drive, capillary action, or hydrostatic pressure, carrying alkalinity and salts to the surface. That transport raises surface pH and interacts with coatings to promote film failure at the bond line. Keep an eye on signs like surface dampness and efflorescence as indicators of the problem.
Applying coatings under high-alkali, moisture-rich conditions changes the timeline of cure and prep needs. Prep challenges increase as vapor-driven moisture accelerates film separation and can undermine adhesion over time. Mitigation requires addressing both moisture and alkalinity before coating and choosing compatible products.
Common moisture-related failure modes to watch for
When concrete’s surface is exposed to moisture, it can cause a range of problems that might not be immediately obvious. These issues often stem from vapor drive or hydrostatic pressure pushing alkalinity and contaminants towards the surface.
Keep an eye out for these common signs:
- Blisters: Small bubbles or pockets form under the coating, indicating trapped moisture.
- Pinholes: Tiny holes appear in the coating, often due to escaping vapor during drying.
- Whitening: A white, powdery substance (efflorescence) appears on the surface, signaling high alkalinity and salt movement.
- Poor intercoat adhesion: Coats lift or peel easily, suggesting moisture has weakened the bond.
When moisture and pH testing are both needed
Measuring surface pH alone won’t give you the full picture of your concrete’s health. Moisture can drive alkalinity to the surface, causing problems even if pH levels seem normal.
To create an effective remediation plan, use a combination of tests:
- Moisture vapor emission rate (MVER) test: Measures how much moisture is moving through the slab.
- Relative humidity (RH) or equivalent moisture factor (EMF) probes: Assess moisture content within the concrete.
- Surface pH check: Directly measures alkalinity at the surface.
Remember: High MVER and RH/EMF readings combined with high pH indicate a serious risk of coating failure due to vapor drive and high alkalinity.
Testing Protocols and Visual Checkpoints Before Coating
Define when to test based on new work, re-coating, or suspicious surfaces, and note what flags a potential failure. Use a simple pH check, salt indicators, and moisture assessments to guide next steps. Document the results clearly for future reference.
Recommended checks include surface pH methods, chloride or salt screening, and moisture tests. Look for dusting, carbonation, or surface defects that suggest remediation is needed. Use the findings to decide if cleaning, neutralizing, or delaying coating is appropriate.
pH testing methods and what they reveal
Before applying any coating, test your concrete’s surface pH to ensure it won’t harm the finish. Here’s a quick checklist:
- Quick pH indicator test: Use litmus paper or a pH pen for a rough estimate (5-10 seconds).
- Precise pH meter: For accurate results, use a pH meter. Calibrate it first.
- Sample spots: Test at least 3 spots per 100 sq ft to account for variations.
- Document results: Record each spot’s reading and location.
- High pH warning: If readings are above 9.5, coating may fail.
- Lab test if needed: For inconclusive results, send samples to a lab for analysis.
Quick rule: Always test before coating. High pH can ruin your finish.
Visual and tactile checkpoints for surface contamination
Before testing pH, visually inspect your concrete for signs of contamination. Here’s a simple checklist:
- Powdering: Gently rub the surface with a damp cloth. If it feels powdery, there may be alkali transport.
- Efflorescence: Look for white, chalky deposits. These could be alkaline salts.
- Staining: Check for discoloration or stains that might indicate contamination.
- Slippery residues: Feel the surface. If it’s slippery, there may be alkali transport to the top.
- Carbonation/dusting: Lightly tap the surface. If it crumbles or dusts, it might need cleaning or repair.
Quick rule: Always inspect visually before testing pH. Contamination can skew results.

Surface Preparation and Remediation Strategies for High-Ph Concrete
Define the problem clearly: high-alkali concrete requires remediation rather than masking. Establish criteria for when to proceed with mechanical or chemical remediation. Document the substrate condition with notes and photos.
Assess surface condition at multiple depths to identify laitance, efflorescence, and porosity. Mechanical options include grinding or profiling to create a sound, receptive surface, while chemical options address alkali residues. Combine methods when appropriate and verify adhesion afterward.
Mechanical methods: shotblasting, grinding, and profile control
High-alkali concrete surfaces need aggressive mechanical removal to eliminate weak surface layers. This creates a proper substrate profile for adhesion.
Shot blasting is a common method. It uses steel shots propelled at high speeds to remove contaminants and create a rough, clean surface.
Grinding, especially diamond grinding, can also be used. It’s more controlled but may not remove all weak layers if not done properly.
However, be cautious with aggressive mechanical removal on surfaces with embedded alkalis or where substrate damage is a risk.
Chemical remediation: neutralizers, cleaners, and poultices
Neutralizing agents and decontaminants can help in some cases. They work by reducing the pH of the concrete surface.
Neutralizers like ammonium nitrate or citric acid can be applied to lower the pH. But they won’t physically remove weak layers, so mechanical prep might still be needed.
Poultices, made from materials like clay or lime, can absorb alkalis and reduce pH over time. They’re useful for small areas but not practical for large surfaces.
Remember, chemical remediation alone is often insufficient. Always follow up with pH testing to confirm effectiveness.
Mixing, Application Best Practices and Environmental Controls
Select coatings and primers known to tolerate alkaline substrates and test adhesion on small areas first. Be aware of compatibility issues and perform simple pilot checks before full application. Plan ahead for required product compatibility tests.
Follow strict mixing protocols, maintain proper temperatures, and avoid air entrapment to preserve work time. Track open times and recoat windows, and verify the surface is clean, dry, and properly prepared. Control environmental conditions to minimize premature chemical changes during cure.
Material compatibility and choosing alkali-resistant products
Choosing the right materials is crucial for successful coating on high-alkaline slabs. Incompatible coatings can lead to cracking, staining, or weak bonds.
- Resin Systems: Look for epoxy or polyurethane systems rated for high alkalinity. Avoid acrylic resins which can degrade in high pH environments.
- Topcoats: Opt for 100% solids epoxy or polyurethane topcoats. Solvent-based coatings may not adhere well and could stain.
- Primers: Use primers specifically designed for high-alkali substrates. These will improve adhesion and protect the coating from alkali attack.
- Moisture-sensitive formulations: Avoid these as they can lead to blistering or delamination in the presence of moisture driven by high pH.
- Testing: Always test adhesion on-site using small patches. This helps ensure compatibility and prevents costly mistakes.
Environmental control and timing for successful installs
Controlling environmental conditions during application and curing is vital to prevent pH-driven chemical reactions that can ruin your coating job.
Temperature: Maintain a consistent temperature between 60°F (15°C) and 80°F (27°C). Too hot or too cold can affect cure rates and adhesion.
Humidity: Keep humidity levels below 70%. High humidity can lead to condensation, which can interfere with curing and cause delamination.
Dew Point Management: Monitor and control dew point to prevent condensation. Dew point should be at least 10°F (5°C) lower than the surface temperature.
Use a hygrometer and thermometer to monitor conditions in real-time. If conditions aren’t right, wait until they are before proceeding with your install.
Tools, Safety, and Material Specs Checklist
Prepare essential testing kits, grinders or shotblasters, PPE, neutralizers, and primers so you can verify substrate conditions on site. Ensure calibration and accuracy of testing devices before work starts. Keep safety procedures visible and followed.
Include surface prep gear, dust containment, and waste handling equipment. Select primers and coatings compatible with high-alkaline concrete and confirm shelf-life and substrate conditions. Document the sequence from testing to priming and coating with a sign-off checklist.
Personal protective equipment and handling alkaline materials
Before you start any work on high pH concrete, gear up right to protect yourself from harmful dusts and chemicals.
- Respirator: Use a half-face or full-face respirator with P100 filters to protect against alkaline dust. Fit-test before use.
- Eye/face protection: Wear safety glasses with side shields or a face shield to prevent chemical splashes.
- Gloves: Use chemical-resistant gloves to protect your hands from harsh chemicals and neutralizers.
- Long sleeves and disposable suit: Wear long sleeves and a disposable suit to minimize skin exposure.
- Decontamination station: Set up a decon station with soap, water, and towels for washing hands and face before breaks or leaving the work area.
- Change PPE between tasks: Change gloves and wash hands thoroughly when switching from handling chemicals to grinding or other tasks.
- Avoid eating/drinking in work area: Keep food and drinks away from the work area to prevent contamination.
- Proper disposal of used PPE: Seal used PPE in a plastic bag and dispose of it according to local regulations.
Quick rule: Always prioritize your safety first. If you’re unsure about any aspect of PPE, consult the manufacturer’s guidelines or seek professional advice.
Material specs and documentation to verify before work
Before purchasing materials and starting your project, ensure you have all necessary information to make informed decisions.
- Technical data sheets: Review product TDS for compatibility with high pH concrete, application instructions, and safety guidelines.
- Surface prep standards: Check manufacturer’s surface preparation requirements to ensure your methods meet their criteria.
- Warranty requirements: Verify that chosen primers, coatings, and application methods align with the warranty conditions.
- pH testing results: Have recent pH test results (within 30 days) to confirm high pH levels and ensure proper neutralization.
- Moisture test results: Review moisture test results to address any related issues before coating application.
- Substrate conditions: Assess the concrete surface for cracks, delamination, or other defects that may affect adhesion.
- Shelf-life and storage conditions: Check expiration dates and ensure products have been stored correctly to maintain their effectiveness.
- Compatibility checks: Conduct small-scale compatibility tests with chosen primers and coatings on a representative concrete sample.
Quick rule: Always double-check manufacturer guidelines and test results before starting any work. It’s better to be safe than sorry!
Planning, Costs, Common Mistakes and Alternative Solutions
Plan decisions based on measured pH, porosity, and coating compatibility. Define triggers for remediation versus switching to an alternative system. Clarify expectations up front with the client.
Outline a realistic timeline from assessment to cure, including contingencies for weather or substrate issues. Compare upfront remediation costs with long-term risk of failure and explore viable alternatives if remediation isn’t feasible. Include a practical decision checklist to guide the project team.
Typical planning steps and timeline considerations
Planning your concrete surface project involves a clear decision sequence to manage alkali issues effectively. Here’s how it typically goes:
Test: Start by testing the pH, moisture content, and substrate condition. This helps you understand what you’re dealing with.
Evaluate: Based on test results, decide if remediation is needed. High pH (above 8.5), excessive porosity, or incompatible coatings often require action.
Choose prep method: If remediation is required, choose the appropriate method – grinding, poultice, or chemical neutralizers. Each has its own timeline considerations.
Remediate and retest: Carry out the chosen remediation process, then retest to ensure pH levels are within acceptable ranges (below 8.5). This step can extend project timelines, so plan accordingly.
When to repair, replace, or use specialized barrier/repair systems
If your coated floor is plagued by recurring alkali problems, consider these alternative strategies:
Sacrificial membranes: These can be applied over existing coatings to protect them from further alkali attack. They act as a barrier and can be replaced when worn out.
Replace the topping: If the damage is extensive, it might be worth replacing the entire topping layer. This ensures a fresh start but comes at a higher cost.
Specialty high-alkali primers: These are designed to tolerate high pH levels and can be used as a base for new coatings. Always consult manufacturers to ensure these options align with warranties.
Conclusion
High pH on concrete can ruin coatings and cause long‑lasting problems if you don’t act safely and methodically. The right prep, testing, and environmental controls protect your investment, keep surfaces stable, and give you a durable, good-looking finish.
First, check the surface in a sensible order and move from quick visual checks to reliable tests: confirm surface moisture and vapor drive, verify cleaning and etching are complete, test the pH in several spots, and verify the coating window with a small trial area before full application. Do the prep in a clean, dry space, mix and apply only within the coating’s specified ranges, and control temperature and humidity during work and curing. If you spot high pH or moisture flags, remediate before proceeding and document what you did.
Common mistakes to avoid are skipping or rushing moisture checks, not neutralizing or profiling high‑pH zones, and ignoring safety gear or ventilation. Always wear eye protection and gloves, work in a well‑ventilated area, and keep the work zone contained to prevent spills and dust. Remember: small tests first, then larger areas, and never coat over suspect patches or unfamiliar residues.
If the signs are stubborn or the surface is porous, cracked, or untreated, consider bringing in a pro rather than forcing a DIY fix. A professional can verify pH, moisture, and coating compatibility and handle advanced prep or remediation safely. Stay disciplined, follow the checks, and you’ll finish with a durable, safe, and lasting result.
FAQ
What happens when concrete coatings meet high pH in the slab?
High pH can break down coating adhesion over time. It can also cause coatings to cure unevenly and fail sooner than you expect. Check the coating label and manufacturer instructions for pH tolerance guidance.
What is saponification and how can it affect coatings on concrete?
Saponification is a chemical reaction where soap-like compounds form from fats or oils and alkalinity in concrete. It can create a slick, release-prone surface that makes coatings fail to bond. Avoid products not rated for alkaline substrates and follow proper surface prep steps.
What are the best surface prep steps to improve coating adhesion on high-pH concrete?
Clean and profile the surface to remove greasy residues, release agents, and laitance. Use mechanical methods or compatible chemical cleaners as directed by the product label, then rinse and dry thoroughly. If in doubt, test a small area and verify adhesion before full coating.
How do environmental conditions affect applying coatings over high-pH concrete?
Humidity, temperature swings, and moisture vapor can worsen adhesion issues on alkaline slabs. Work only under conditions recommended by the coating manufacturer and avoid applying in cold or damp settings. If unsure, ask for local guidance or read the product instructions.