
Introduction
A concrete slab subbase is the compacted layer beneath the slab that supports and shapes the final surface. For a quick, hands-on approach, this article focuses on using a hand tamper and a hose to evaluate compaction on-site. Keep in mind that results depend on soil type, moisture, and thickness, so verify with local guidance before finalizing any plan.
Use a hand tamper to evenly compact in small, consistent passes, checking for firm resistance and level without overworking the edge areas. A hose can help settle and re-wet the subbase, but avoid overwatering, as too much moisture can skew compaction readings. If you need exact thickness or compaction standards, refer to manufacturer instructions or local building rules and adjust your technique accordingly.
Key Takeaways
- Ensure subbase is well compacted evenly before pouring concrete to prevent settlement.
- Use the hand tamper with deliberate, overlapping passes to avoid air voids and uneven density.
- Water-assisted compaction requires controlled moisture; avoid over-watering, erosion, and slipping hazards.
- Verify correct subbase thickness per project plans and local code guidance before tamping.
- Inspect surface with level and straightedge after compaction; address low spots promptly.
- For DIY, weigh cost/time tradeoffs: hand tamper method is slower but lower upfront risk.
Table of Contents
- Introduction
- Key Takeaways
- Why Proper Subbase Compaction Matters for Concrete Slabs
- Choosing the Right Subbase Material
- Tools and Materials Checklist for the Hand Tamper + Hose Method
- Step-by-Step Fast Compaction Process with a Hand Tamper and Hose
- Hand Tamper Techniques: Efficiency, Ergonomics, and Best Practices
- Water-Assisted Compaction — the Hose Reality Check
- Testing, Inspection, and Visual Checkpoints for Diyers
- Safety, Time, and Cost Considerations — DIY Hand Tamper Vs Mechanical Compaction
- Conclusion
- FAQ
Why Proper Subbase Compaction Matters for Concrete Slabs
Proper subbase compaction is essential to minimize settlement, hairline cracks, edge pops, and frost-related movement in concrete slabs. A simple on-site check helps DIYers spot warning signs early: if the base feels spongy or leaves footprints, more compaction is needed.
Experienced installers rely on a plate test or proof rolling to assess readiness, and a failed check means re-compact and re-test until the base is solid. Rushing through compaction is a common mistake; ensure each lift of base material is properly compacted before moving to the next, so the slab edge and interior behave as intended.
Structural Performance and Crack Prevention
Proper subbase compaction significantly enhances the structural integrity of concrete slabs. A well-compacted base minimizes settlement, hairline cracks, and edge pops.
Inspect your subbase for any soft spots or loose materials before pouring concrete to ensure longevity and prevent costly repairs down the line.
Verify that the subbase material meets local standards for strength and stability. If it’s unstable or weak, consider replacing or reinforcing with suitable materials.
Drainage, Frost Heave, and Long-Term Moisture Control
Effective drainage and moisture management are crucial for preventing frost heave, edge pops, and other moisture-related problems that can compromise your concrete slab.
Check for any standing water or signs of previous water damage on the site. Ensure the subbase has a proper slope for water runoff and verify the material’s permeability meets project requirements.
If your site has poor drainage or a high water table, consider additional measures such as installing a moisture barrier or improving grading to prevent long-term moisture issues that could lead to slab failure.
Choosing the Right Subbase Material
Choosing the right subbase material means balancing bearing capacity, drainage, frost considerations, and how the material compacts, with availability and total cost in line with project plans and local rules. Align this choice with structural notes and any regional requirements noted for subbase thickness and compaction standards.
A simple on-site check of texture and consistency helps confirm material quality before placement. An experienced installer reviews project plans, local codes, and material datasheets to ensure alignment with requirements; if bearing capacity or drainage needs aren’t met, re-evaluate the material choice. If the wrong material is delivered, promptly request a replacement to protect the slab’s integrity and performance.
Material Types and Pros/Cons (Crushed Stone, Gravel, Sand, Engineered Fill)
The subbase material you choose significantly impacts your project’s durability and appearance. Selecting the right one ensures a stable foundation for your construction.
- Crushed Stone: Used for deep bedding layers due to its strength and stability. Look for ASTM D6938 standards. Choose it when you need a strong, well-draining base. Avoid in thin layers as it can shift.
- Gravel: Ideal for drainage and leveling. Check particle size (e.g., #57 or #2) to ensure proper compaction. Use it where water management is crucial but avoid in areas with heavy traffic due to its tendency to shift.
- Sand: Suitable for thin bedding layers and mixing concrete. Look for ASTM C33 standards. Choose it when you need a smooth, level surface. Avoid in areas prone to frost heave or where drainage is poor.
- Engineered Fill: A geotechnical material designed for specific soil conditions. Check manufacturer’s recommendations for compatibility with your site’s conditions. Use it when you need tailored performance but expect higher costs.
The wrong material can lead to cracking, settlement, or poor drainage. Renting or borrowing equipment may be cheaper than buying, but consider the time and effort involved. Always prioritize safety and durability over initial cost.
Pro tip: When buying, check product labels for ASTM standards and compatibility with your project’s needs. Store materials in a dry place to prevent contamination or degradation. Mix only what you need to avoid waste.
Subbase Material Selection and Properties
Choosing the right subbase material significantly impacts your project’s longevity and appearance. Understanding key properties of common materials helps ensure an informed decision.
- Crushed Stone (1/2″ to 1″): Suitable for heavy traffic areas like driveways or parking lots. Opt for dense-graded aggregate with a high crush count for better compaction and stability. Avoid using under patios due to its coarse nature, which may lead to an uneven surface.
- Gravel (1/4″ to 3/8″): Ideal for walkways, paths, and light traffic areas. Choose well-graded material with good fines content for better compaction and stability. Be aware that using it under heavy loads may result in settlement over time.
- Sand (0/4 to 1/8″): Best used as a base layer for pavers or concrete slabs. Select clean, well-graded sand with good fines content for better compaction and stability. Avoid using alone as subbase due to poor drainage properties that can cause frost heave and settling.
- Engineered Fill (0/37.5mm to 40mm): Controlled-density fill designed for heavy loads and improved drainage. Look for material with high compaction rate and good permeability. More expensive but offers superior performance.
- Permeable Paving Base: Open-graded aggregate allowing water infiltration while supporting heavy loads. Choose material with high void space (around 35%) for optimal drainage. Ideal for permeable paver systems to reduce runoff.
Tip: When purchasing subbase materials, always check product labels or manufacturer’s specifications. Consider renting or borrowing equipment like a plate compactor for optimal results.
Sourcing, Testing, and Documentation for Inspections
Use this checklist upon delivery of subbase materials to ensure you’re working with the right products. This will help prevent costly rework and maintain the integrity of your project.
- Check Delivery Ticket: Verify that the delivery ticket matches your order in terms of material type, quantity, and size gradation.
- Inspect Material Appearance: Quickly examine a few handfuls of the delivered material for size, color, and consistency with what you ordered. If it looks different, investigate further.
- Request Gradation Data: Ask your supplier for gradation data or a certificate confirming the material’s particle size distribution.
- Perform Sieve Analysis (if needed): If the material appears different from expected, test it on-site using a simple sieve analysis to confirm its gradation. This helps ensure the material meets required permeability and strength standards.
- Check Material Moisture Content: Ensure the material is within acceptable moisture content ranges (typically 5-10%) for compaction. Excessive moisture can lead to poor compaction and reduced strength.
- Verify Material Compliance with Local Codes: Check that the chosen subbase material complies with local building codes and standards for your specific project.
- Document Inspection Findings: Keep records of all inspection findings, including photos, test results, and supplier communications. This documentation may be required during code inspections or if disputes arise.
- Halt Work if Wrong Material is Delivered: If it’s discovered that the wrong material has been delivered, immediately halt work, inform the supplier, and request a replacement before proceeding. Using incorrect subbase materials can lead to inadequate support, poor drainage, and ultimately, slab failure.
Quick rule: Always verify deliveries, test materials if necessary, and maintain thorough documentation to ensure your project’s longevity and compliance with local codes.
Tools and Materials Checklist for the Hand Tamper + Hose Method
This checklist covers the core tools, safety gear, and setup items needed for the hand tamper and hose method. It emphasizes compatibility with slab size and subbase depth and keeps arrangements simple and ready for use.
Understanding the sequence of watering and tamping cycles helps avoid under- or over-wetting and yields consistent density. Feel the tamper for the steady, low-pitched hum to confirm contact, and verify with simple tests before moving on. If the aggregate seems too dry or loose, add water and let it soak briefly; if over-wetted, rework and allow it to dry slightly.
Selecting a Hand Tamper: Key Considerations
Before commencing subbase compaction, ensure you have the right hand tamper. Here are key aspects to consider when selecting an appropriate tamper.
- Tamper weight: Evaluate the tamper’s weight. Heavier tampers (typically over 80 lbs) are suitable for deeper subbases (exceeding 12 inches).
- Plate size: Assess the plate size. Smaller plates (under 16 sq. in.) provide precise compaction for smaller slabs.
- Handle length: Ensure the handle length matches your subbase depth and allows comfortable operation.
- Handle grip: Inspect the handle grip to ensure it’s secure and won’t slip during use.
- Tamper condition: Check for any damage or wear on the tamper before use. Replace worn-out parts as needed, following manufacturer instructions.
Safety Tip: Always inspect your hand tamper before starting work to ensure it’s in good condition and suitable for your specific job.
Hose Setup, Water Sources, and Delivery Options
Proper hose setup is crucial for efficient watering during subbase compaction. Prepare your hose and water source with the following steps:
- Hose length: Ensure the hose is long enough to reach all corners of the subbase area without straining or kinking.
- Water pressure: Check the water pressure at the source. Consistent flow rate (around 40-60 PSI) is optimal for compaction.
- Nozzle type: Choose an adjustable nozzle to control water distribution and prevent over-wetting.
- Water source distance: If the water source is distant, consider using a long-reach hose (over 100 ft) or a portable water tank.
- Delivery points: Plan multiple delivery points for large subbase areas to avoid downtime due to hose length limitations.
Safety Tip: Always test your hose and water source before starting work to ensure they can support efficient compaction.
Supplemental Tools and Safety Gear
In addition to your hand tamper and hose, having the right supplemental tools and safety gear ensures efficient subbase preparation and operator safety.
- Rakes: Use sturdy, wide-tooth rakes for coarse or deep subbase materials. Inspect rakes for broken tines before use.
- Screeds: Screeds help level and compact the subbase surface. Check screeds for damage before use.
- Compaction testers: These tools ensure proper density. Calibrate testers according to manufacturer instructions and check accuracy regularly.
- Personal Protective Equipment (PPE): Ensure all operators have the required PPE, such as durable gloves, eye protection, hearing protection, dust masks, and sturdy boots.
Quick rule: Always inspect your supplemental tools and safety gear before starting work to ensure they’re in good condition and meet job-site requirements.
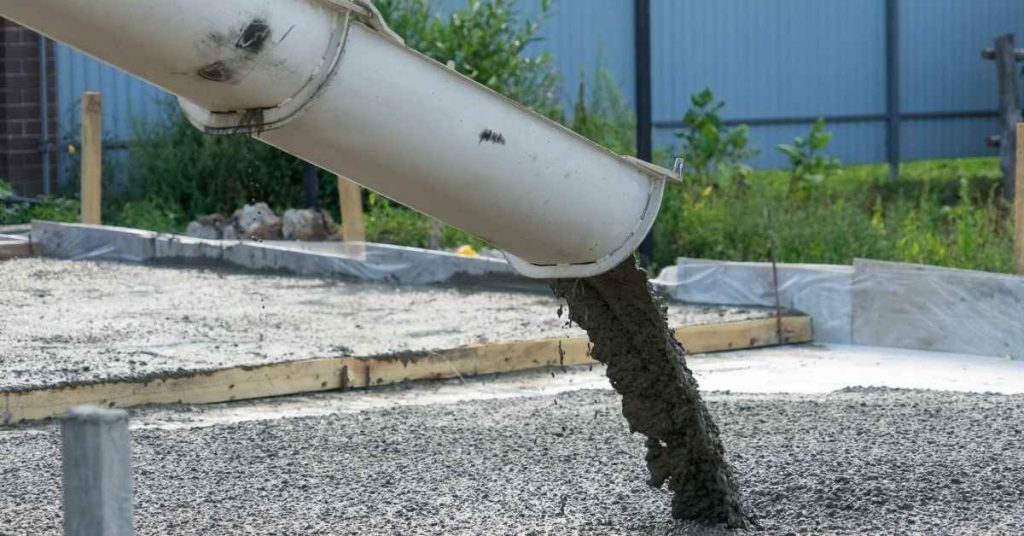
Step-by-Step Fast Compaction Process with a Hand Tamper and Hose
This step-by-step process guides DIYers from site prep and form setup through final inspection, emphasizing checkpoints over exact pass counts. Focus areas include keeping the work area clean, managing moisture, and achieving a uniform base, followed by precise hand tamping technique and controlled hose adjustments. After each lift, check surface firmness, edge stability, and slope, address voids, and halt if signs of shear, rutting, or over-compaction appear.
Why it matters: proper moisture, consistent base material, and steady tamping produce a stable slab ready for the next step. Interim checks and quick tests—like a foot-press test, straightedge check, and edge alignment—help you catch issues early, so you can rewet, dry, or re-tamp as needed. Keeping forms undisturbed and avoiding washouts protects alignment and level, ensuring a clean finish and reliable cure once you move to pouring or reinforcing.
Step-by-Step Process
The following steps outline the fast compaction process using a hand tamper and hose for your concrete slab subbase. This sequence ensures efficient and effective compaction, preparing the base for concrete placement.
- Prepare site: Inspect conditions, weather, and form setup. Ensure forms are secure and aligned, with adequate drainage.
- Review tools and materials: Check hand tamper suitability, hose pressure control, and safety gear.
- Moisten base material: If dry or inconsistently moist, rewet using the hose to achieve consistent moisture content.
- Compact initial lift: Begin tamping from one corner, working in a systematic pattern. Use a controlled rhythm to ensure even compaction.
- Perform interim checks: After each compacted lift, use foot-press test, straightedge check, and edge alignment methods to assess surface firmness, edge stability, and slope for drainage.
- Address voids or uneven spots: If identified during interim checks, add more material and re-compact, or remove excess from high spots.
- Adjust moisture content: If over-wetting occurs, allow base to dry slightly. If under-compaction is suspected, perform additional passes with the hand tamper.
- Final inspection: Check for smoothness, level tolerance, clean edges, and curing considerations before pouring or reinforcing.
Initial Site Preparation: Grading and Edge Containment
Begin by preparing a stable and level surface for subbase compaction. Inspect the site to remove any debris or obstructions that could hinder the process.
Ensure forms are securely in place and properly aligned. Verify adequate drainage is present to prevent water accumulation.
If forms shift during compaction, immediately secure them properly before resuming work. This step ensures a stable foundation for your concrete slab.
Layering, Lift Depth, and Compaction Sequence
Achieve optimal subbase density through proper layering and compaction technique. Inspect base material consistency and moisture content before starting.
Verify that material gradation and permeability meet project specifications. Ensure your hand tamper is suitable for the material being compacted.
If material appears too wet or dry, adjust moisture content by adding water or allowing material to dry before proceeding. If over-compaction occurs, remove excess material and re-compact in thinner lifts.
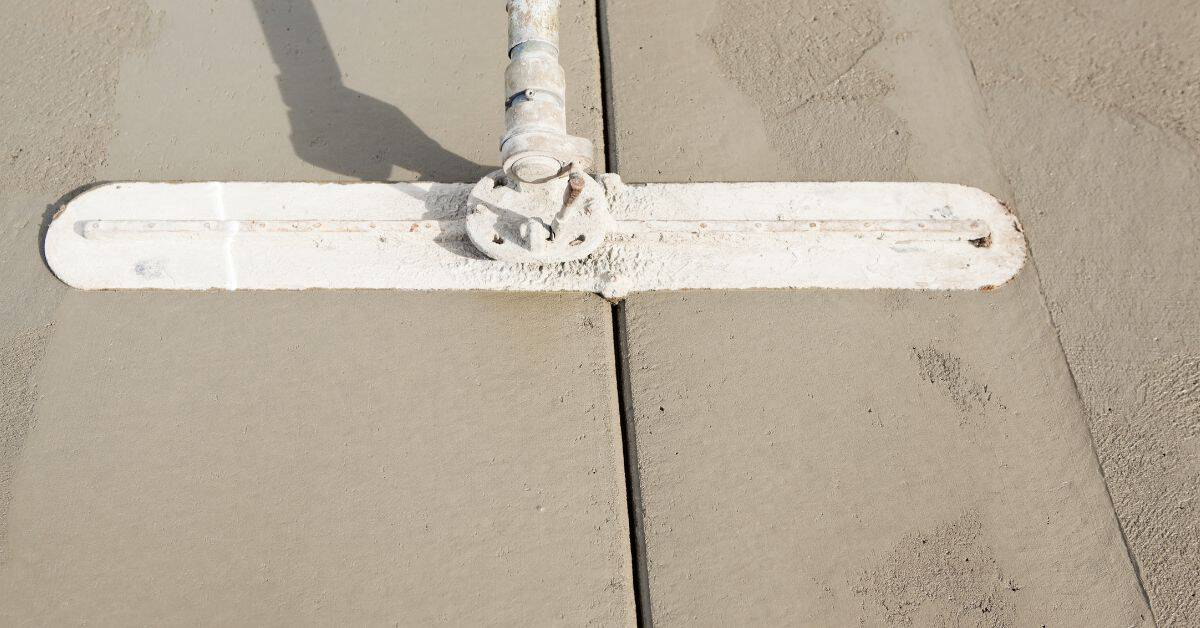
Controlled Wetting, Tamping Rhythm, and Finishing Touches
Compact your subbase to achieve a smooth, level, and well-compacted surface ready for concrete placement. After each compacted lift, perform interim checks using the foot-press test, straightedge check, and edge alignment methods.
Maintain controlled hose pressure to prevent washouts. Inspect your hand tamper to ensure it’s in good working condition.
If you observe signs of shear or rutting on the surface, stop work and reassess your tamping technique or material consistency. After final inspection, if the surface is not smooth and level, perform additional passes with the hand tamper or address any remaining voids or high spots.
Hand Tamper Techniques: Efficiency, Ergonomics, and Best Practices
Hand tamper technique focuses on grip, stance, and controlled blows to maximize compaction while reducing fatigue. Use a consistent pass sequence with proper overlap and a comfortable rhythm. When damp or submerged subbase, adapt with a hose and adjust impact to maintain effective density.
Good technique helps maintain density progression without overwork and lowers injury risk. Check grip, stance, and tool control after each pass, and rotate hand positions or take micro-rests to sustain performance. This matters for DIY projects because steady technique reduces rework and keeps work safer and more predictable.
Proper Stance, Striking Technique, and Fatigue Management
Adopt a stable, balanced stance with your feet shoulder-width apart. Keep your back straight and knees slightly bent to minimize strain.
Hold the hand tamper with both hands, maintaining a neutral wrist position. Your forearms should be aligned with the tamper’s handle for maximum control and efficiency.
Rotate hand positions regularly to prevent fatigue. If you feel excessive strain or discomfort, take a short break and stretch. Avoid over-tamping; maintain consistent strike force.
Coverage Patterns, Overlap, and When to Rework Areas
Start at one corner of the subbase area. Make passes in a grid pattern, ensuring each pass overlaps the previous one by about half its width for consistent compaction.
Inspect the subbase after initial passes for any low spots or inconsistencies. Use a compaction tester if available to check density.
Rework areas with insufficient compaction, focusing on proper technique and moisture control. Avoid under-tamping; ensure each lift is adequately compacted before moving on.
Water-Assisted Compaction — the Hose Reality Check
Water-assisted compaction can help rearrange particles, but only when moisture is controlled. Soaking the subbase tends to create weak spots and reduce density if it becomes too wet. The common myth that soaking always improves density should be avoided; aim for a uniform, slight dampness rather than a wet condition.
Feel the material: it should be slightly damp, not muddy, and an experienced installer checks moisture before and after water-assisted compaction. If the material feels dry or crumbly, lightly mist with water and wait a few minutes before compacting. If the material is excessively wet or forms mud, allow it to dry slightly and reduce water usage next time to maintain consistent moisture and avoid weak zones.
How Moisture Aids Compaction and Common Misconceptions
Moisture plays a crucial role in the compaction process of concrete slab subbases. It helps to lubricate particles, allowing them to slide past each other and rearrange into a denser configuration.
However, it’s essential to understand that too much or too little moisture can negatively impact the compaction process. Before starting, perform a simple field test to assess the current moisture level of your subbase material.
Verify the optimum moisture content for compaction on the material’s label or datasheet. If the moisture content is too low, gradually add water and mix thoroughly until the desired level is achieved. Conversely, if it’s too high, allow the material to dry naturally or use mechanical means to reduce moisture content before proceeding.
Common misconceptions include believing that soaking the subbase will always improve density. Over-wetting can create weak spots and lead to compaction issues, so it’s crucial to maintain a balanced moisture level.
Signs of over-Wetting and How to Recover Problem Areas
Recognizing signs of over-wetting is essential for addressing potential weak spots and maintaining the integrity of your subbase. During compaction, feel for soft spots or areas where the material feels excessively wet or muddy underfoot.
Inspect the subbase material regularly during compaction, looking for any visible or tactile indicators of over-wetting. If soft spots or puddling are present, halt compaction in the affected area and allow it to dry naturally. Once dried, remove any weak material and recompact with the correct moisture content.
If no signs of over-wetting are found, proceed with compaction as planned, ensuring that water is added gradually and evenly to maintain uniform moisture content. If problem areas cannot be dried and recompacted effectively, consult a geotechnical engineer for further guidance on remediation options.
Testing, Inspection, and Visual Checkpoints for Diyers
The key point is to perform a thorough visual inspection and documentation of the subbase before pouring concrete, using photos of representative areas, noting problem zones, and recording final measurements such as thickness, level, and any slight unevenness. A simple checklist helps you capture conditions that can affect the slab’s long-term performance. Prioritize documenting areas that show soft spots, ridges, or uneven compaction, and keep a concise record for reference on site and during review with others.
This matters because skipping careful testing can leave an uneven subbase that undermines slab longevity and creates future cracks. A careful walk across the surface should confirm solid, stable footing, and any soft spots or inconsistent fill should trigger rework before proceeding. If the subbase feels spongy or gives way, recompact the area; if concrete has already been poured on an inadequately compacted subbase, you may need to jackhammer and replace the section to restore a stable base.
Simple Field Checks and DIY Indicators of Adequate Compaction
Before pouring concrete, use this checklist to assess the compaction quality of your subbase.
- Visual inspection: Look for any visible voids or segregation. If present, rework those areas.
- Auditory test: Strike the surface with a hammer. A dull thud indicates likely adequate compaction, but consider additional checks.
- Manual test (footstep): Step on the surface in multiple locations. If it feels solid and doesn’t give way, compaction is likely good.
- Moisture content: Ensure the subbase is moist but not overly wet to facilitate compaction.
- Thickness check: Measure the thickness of the compacted layer. It should meet your project’s requirements.
- Leveling check: Use a level or laser level to ensure the surface is flat and within acceptable tolerances.
- Edge check: Inspect edges to ensure they are well-compacted and properly contained.
- Final measurement: Record final measurements for thickness, level, and any slight unevenness before pouring concrete.
Quick rule: If visual inspection shows no visible voids or segregation, auditory test reveals a dull thud, and manual tests confirm solidity, proceed with concrete pouring. Otherwise, rework problem areas.
When to Hire a Pro or Require Formal Compaction Testing
In some cases, it’s crucial to involve professionals or conduct formal testing for project quality and compliance with regulations.
- Project complexity: If your project involves critical structures (e.g., foundations, retaining walls) or high loads, consider hiring a professional engineer for compaction testing.
- Local regulations: Check local building codes. Formal testing may be mandated for certain project sizes or types.
- Industry standards: Consult ASTM D698 and ACI 301 for guidance on when to require formal testing based on project scope and materials.
- Risks involved: If your project poses significant risks (e.g., environmental concerns, public safety), consider hiring a professional or conducting formal testing.
- Certified laboratory services: Arrange for certified laboratory testing if required by local regulations or to ensure project quality and compliance.
- Address issues promptly: If any issues are identified, address them promptly to avoid delays and additional costs.
Quick rule: For complex projects, critical structures, high loads, or when local regulations mandate, consider hiring a professional engineer or arranging for certified laboratory testing services.
Safety, Time, and Cost Considerations — DIY Hand Tamper Vs Mechanical Compaction
Safety, time, and cost drive the choice between a hand tamper and a mechanical compactor. Expect hand tamping to pose vibration, noise, and risk of foot or ankle injury, so PPE and pause points for re-sequencing are key. Consider how many passes are reasonable by hand and compare that to rental or purchase costs and potential rework from inadequate compaction.
This matters because it shapes crew effort and project pace, especially on larger slabs or tight sites. Practical checks include soil moisture feel, slab size, and accessibility, plus a simple method to estimate labor hours and materials. If the slab is small and accessible, hand tamping may suffice; for larger areas or restricted access, mechanical compaction can save time and reduce fatigue, with a need to adjust moisture and rework if compaction is insufficient.
Safety Protocols, Site Ergonomics, and Heat/Hydration Planning
Working with hand tampers requires careful consideration of safety measures to prevent injuries and maintain productivity.
Wear appropriate PPE: Gloves protect hands from debris and vibration, safety glasses shield eyes from potential hazards, and steel-toed boots safeguard feet from falling objects or compression injuries.
Assess site conditions for trip hazards. Ensure adequate hydration and rest periods, especially in hot weather. If working in extreme heat or humidity, increase hydration and rest breaks to prevent heat exhaustion.
Time, Labor, and Budget Trade-Offs; Rental and Contractor Decision Guide
When planning your concrete slab subbase compaction, evaluate time, labor, and cost implications of using a hand tamper versus renting or hiring a contractor for mechanical compaction.
DIY Hand Tamper Time: Hand tampers require multiple passes (typically 3-5) to achieve adequate compaction. Consider accessibility constraints and potential rework costs due to inadequate compaction.
Estimate total labor hours based on slab size, soil moisture, and subbase depth. Research rental rates for mechanical compactors and obtain quotes from local contractors. If the slab size exceeds 1000 sq ft or accessibility is limited, consider renting or hiring a contractor to expedite the process.
Conclusion
Achieving a solid subbase with a hand tamper and a hose matters for safety, durability, and a clean concrete finish. When done correctly, the slab sits evenly, drains properly, and avoids cracks that come from a weak or uneven foundation.
To make it practical, verify the subbase material and moisture level, then compact in controlled passes with the hand tamper and use the hose to manage moisture as needed. Check for uniform density and absence of soft spots as you go, fix low areas before moving on, and protect edges and corners from over-tamping. Keep the process steady, take short breaks to maintain control, and document any changes in soil behavior so you can adjust on the next section.
Common mistakes to avoid include over-tamping the same spot, which can pump out fines and create rutting; treating the hose as a substitute for proper tamping rather than a moisture aid; and neglecting edge and corner compaction, which leads to uneven edges after form removal. Always wear eye and hand protection, avoid sudden drops or jerks with the tamper, and keep the work area free of trip hazards. If the site shows unstable soil, persistent low spots, or runoff concerns, pause and reassess with a professional opinion before proceeding.
If the project area is large, has poor drainage, or you’re unsure about subbase stability, consider bringing in a pro instead of pushing ahead. When in doubt, prioritize safety and testing small sections first, then scale up. With careful checks and steady technique, you can achieve a reliable subbase and a smoother, longer-lasting slab.
FAQ
What Are Reliable Compaction Techniques for a Concrete Slab Subbase Using a Hand Tamper?
Apply steady, even passes to compact the subbase in small sections. Focus on achieving consistent density across the area without overworking any spot. Refer to manufacturer instructions for the hand tamper you use and follow local guidelines for acceptable compaction practices.
How Do I Choose the Right Hand Tamper and Why Does Tool Type Matter?
Choose a tamper with a solid head and a comfortable handle grip. The size and weight should fit the area you’re working in and your stride, reducing fatigue and improving control. Check product labels and instructions to ensure it suits subbase materials and intended thickness.
What Role Does Water Play in the Compaction Process, and How Should I Use It?
Water can help the surface subbase settle, but use it sparingly to avoid softening the layer. Light misting or dampening small areas can help the tamper grip the surface. Always verify with the subbase material guidance and local practices before applying water.
What Should I Know About Subbase Thickness and Preparing the Ground Before Tamping?
Prepare the ground by removing loose material and debris, then level the area to a stable starting point. Do not rely on guesswork for thickness; check project specifications or local guidance to confirm the recommended subbase depth. If in doubt, material labels and manufacturer instructions can provide safe starting ranges.