

Introduction
Concrete planters without efflorescence come from a careful mix, proper drainage, and breathable waterproofing that lets moisture escape. This is a hands‑on guide, built from real-world steps you can follow in a DIY project. Always check product labels and local rules if a spec or method seems unclear.
We touch on practical techniques for concrete block sealer application and breathable waterproofing options, with a focus on staying moisture‑permeable where needed. Look at breathable barrier approaches like Polyguard’s Blue Barrier Liquid Wrap and consider elastomeric layers such as UV40, but compare labels and manufacturer instructions before starting. If a step or product claim isn’t crystal, verify it against the label and local requirements, and adjust to your climate and planter design.
Key takeaways
- Choose a breathable concrete mix to minimize efflorescence in planters.
- Install proper drainage and avoid leaving water trapped near salts.
- Apply breathable waterproofing options like Blue Barrier Liquid Wrap; follow manufacturer safety.
- Do surface prep, crack repair, and plan permanent sealing after cure.
- Inspect for signs of efflorescence; adjust mix and sealant choices accordingly.
- Invite comments with Leave a Reply; Cancel reply option to guide discussion.
Table of Contents
- Introduction
- Key takeaways
- Why Efflorescence Happens in Planters
- Mix Design Principles for Low-Efflorescence, Breathable Concrete
- Drainage Design and Installation for Planters
- Breathable Waterproofing Options for Planters
- Surface Preparation, Crack Repair, and When to Seal
- Application Best Practices and Common Mistakes to Avoid
- Testing, Costs, and Product Selection Strategy
- Maintenance, Troubleshooting Persistent Efflorescence, and Community Feedback
- Conclusion
- FAQ
Why Efflorescence Happens in Planters
Efflorescence is driven by moisture moving soluble salts to the planter surface. Water wicks salts from soil and fertilizers up through capillary action and evaporates, leaving crusty deposits as it dries. Look for patterns tied to how quickly the container dries and how often it is watered.
Small, poorly drained planters concentrate salts and create local pockets that push crystals onto walls and rims. Ambient humidity, temperature, sun exposure, and irrigation cycles affect how fast evaporation happens. Salts enter the system from potting mixes, soils, compost, and typical feeds, and they can be natural minerals or added nutrients.
Primary Causes and Moisture Paths
Efflorescence in planters is all about moisture moving soluble salts around. Here’s how it happens.
Water sources: Rain, irrigation, groundwater, even capillary rise from the soil can move water through your planter. This water picks up soluble salts along the way.
Salt sources: Cement and aggregates in your concrete mix contribute some salts. But mostly, it’s from soil amendments like potting mixes, compost, and fertilizers. Even garden soils have naturally occurring minerals that can cause efflorescence.
Visual Checkpoints and Diagnosis
Before you start troubleshooting, check your planters regularly to catch efflorescence early. Here’s a quick checklist:
- Surface crusts: Look for white or grayish deposits on the surface. Efflorescence often starts here.
- Edges and rims: Check where water tends to collect and evaporate. This is where salts can crystallize.
- Interior walls: Inspect inside your planter for signs of efflorescence. It might be hidden but still causing issues.
- Salt stains vs. mold/mineral deposits: Efflorescence looks like a white, powdery crust. Unlike salt stains, it’s not easily wiped off. Mold and mineral deposits have different appearances and textures.
- Touch test: Gently rub the affected area with a damp cloth. If it wipes away easily, it might be just a salt stain. Efflorescence is harder to remove.
- Moisture check: Feel around the planter for any dampness. Excess moisture can indicate poor drainage or waterproofing issues.
- Fertilizer use: If you’ve been heavy-handed with fertilizers, that could be contributing to efflorescence. Check your application rates.
- Planter design: Small, poorly drained containers can concentrate salts and create local ‘salt pockets’.
Quick rule: Don’t ignore signs of efflorescence. It might seem harmless, but it can damage your planter over time.
Mix Design Principles for Low-Efflorescence, Breathable Concrete
The goal is to minimize soluble salt migration while keeping vapor permeability intact. Focus on target water-to-cement balance, use of SCMs, smart aggregate choices, and a curing approach that supports open pore structure. Check manufacturer guidance for compatibility with breathable components.
Workable ranges can be discussed with product labels and data sheets, but verify with actual data from the supplier. Consider fly ash, slag, silica fume, or metakaolin and how they pair with breathable membranes. Choose aggregates and grading that support air and water movement without creating easy salt paths. Plan curing to reduce microcracking and avoid moisture traps early on. Review tests and notes from the product maker to guide your mix decisions.
Water-to-Cement Ratio and Admixtures
The water-to-cement ratio is like the recipe’s secret ingredient. Too much water makes concrete weak and porous, like a leaky sieve. But too little makes it hard to work with, like trying to mix cement with dry sand.
For breathable concrete, aim for a water-to-cement ratio between 0.45 to 0.6. This keeps the concrete strong and lets water vapor escape, preventing efflorescence. Check your local codes or manufacturer’s guidelines for exact ranges.
Now, here’s where things get interesting – admixtures. These are like concrete’s secret helpers. Water reducers or plasticizers make concrete more workable with less water. This means you can use less water and still have a mix that’s easy to pour and finish.
But be careful, too much of these can cause problems. Follow the manufacturer’s instructions and start with the recommended dosage. You can always add more if needed, but you can’t take it out once it’s in the mix. And remember, every job is different, so check your base compaction and adjust as necessary.
Supplementary Cementitious Materials and Aggregates
The right mix of cement, aggregates, and admixtures can make your concrete durable, breathable, and low-efflorescence. Here’s what you need to know about supplementary cementitious materials and aggregates.
- Fly Ash (Class F): A byproduct from coal-fired power plants, fly ash replaces up to 20% of cement in your mix. It reduces free lime, making concrete less prone to efflorescence. Look for ASTM C618 Class F on the bag. It’s cheaper than cement but can cause longer setting times.
- Slag (Ground Granulated Blast-furnace Slag): Produced by steel mills, slag replaces up to 50% of cement. It also reduces free lime and improves concrete’s sulfate resistance. Check for ASTM C989 compliance. It’s usually more expensive than fly ash but offers better performance.
- Pozzolans: Natural or artificial materials containing silica, pozzolans replace up to 25% of cement. They reduce free lime and improve concrete’s resistance to sulfates and chlorides. Look for ASTM C618 compliance. They can be more expensive but offer excellent durability.
- Clean Aggregates: Use clean, well-graded aggregates with low salt content (less than 0.5% by weight). Check the aggregate’s grading curve and ask for a certificate of analysis. Dirty or poorly graded aggregates can cause weak concrete and staining.
- Lightweight Aggregates: For reduced dead load, consider lightweight aggregates like expanded shale or slag. They replace normal-weight aggregates at a 1:1 ratio. Check their specific gravity (around 0.8-1.2) to ensure proper mix design. They’re usually more expensive but offer better thermal insulation.
Pro tip: When buying, store supplementary cementitious materials and aggregates in dry, covered areas away from direct sunlight and moisture. Always follow manufacturer’s instructions for mixing and handling. Never mix different types of supplementary cementitious materials without proper testing.
Curing and Pre-treatment to Minimize Free Salts
Proper curing is crucial for low-efflorescence, breathable concrete. It locks in hydration, reduces bleeding, and prevents surface cracking.
Start curing immediately after finishing: Cover the slab with plastic or wet burlap to maintain moisture. Keep it damp but not wet for at least 7 days.
Pre-soaking aggregates can help reduce free salts. But be careful, contaminated water sources can cause problems. Always check your water source and pre-soak if necessary. If you’re unsure, use clean, potable water.
Drainage Design and Installation for Planters
Set drainage goals based on planter size and plant needs, aiming for rapid internal drainage and no standing water. Design the internal path so water exits without bypassing the intended drainage layer. Plan for easy maintenance later.
Plan drain holes with thoughtful quantity, size, and placement to prevent clogging. Use a drainage layer and a separator fabric to keep soil from clogging the aggregate while allowing water to move. Tie overflow to landscape or a drainage pot with a clear path to grade and away from structures.
Internal Drain Layers and Materials
The materials you choose for your planter’s internal drainage layer greatly impact airflow, water movement, and overall performance. Here are some options:
- Gravel: Inexpensive, promotes good drainage. Look for clean, angular gravel (1/2″ to 3/4″). Avoid round pebbles as they shift easily.
- Coarse Aggregate: Provides better stability than gravel. Use 3/8″ to 1/2″ washed, clean aggregate. Ensure it’s compatible with your concrete mix for a strong bond.
- Modular Drainage Mats: Plastic mats with built-in drainage channels. Easy to install, but can be pricey. Make sure they’re compatible with your planter size and shape.
- Lightweight Drainage Media: Materials like expanded shale or clay aggregate offer good drainage while reducing weight. Specify Type 1 or Type 2 media for optimal performance.
- Avoid: Fine sand, pea gravel, or other small particles. They can clog pores, restrict water flow, and cause staining.
Designing Effective Outlet and Overflow Systems
Proper sizing and placement of drain holes, ledgers, and overflow routes prevent ponding and backflow. Here’s how:
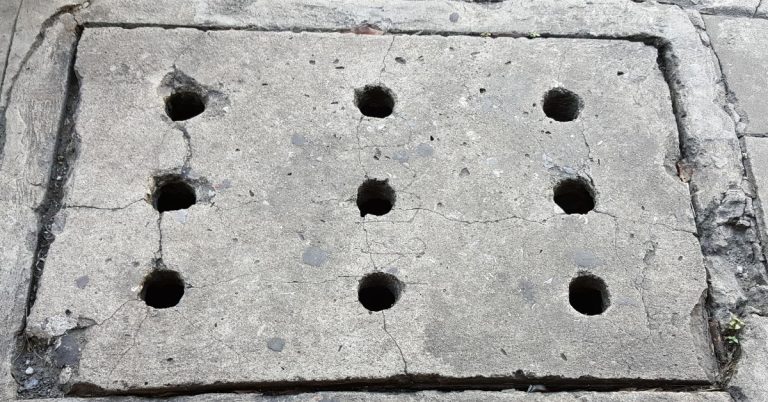
Drain Holes: Size (1″ to 2″) and space (6″ to 12″ apart) them based on planter size. Place at lowest points for effective drainage.
Ledgers: Use ledger strips to support drain holes, preventing cracking. Ensure they’re securely anchored and aligned with the planter’s slope.
Overflow Routes: Design a clear path from internal drains to external outlets. Tie into landscape or dedicated drainage pots. Ensure water flows away from structures and towards grade.
Planning Steps for Integration with Landscape or Pot Systems
Routing planter drainage into landscape beds, French drains, or containers requires careful planning. Here are the steps:
Landscape Beds: Dig a trench from the planter to the bed’s lowest point. Line with geo-textile and fill with gravel. Ensure water flows freely but soil doesn’t wash away.
French Drains: Install perforated pipe in a gravel-filled trench, wrapping it in geo-textile. Connect to the planter’s outlet, ensuring no backflow occurs.
Containers: Use a large pot with drainage holes and a tray underneath. Connect your planter’s outlet to the tray, preventing soil loss and root intrusion into your planter.
Breathable Waterproofing Options for Planters
Breathable waterproofing means a vapor-permeable barrier that protects concrete while letting moisture escape. This is not the same as non-breathable sealers. It’s crucial for long-term durability in above-ground planters.
Compare classes like silanes/siloxanes, breathable liquid membranes, cementitious breathable sealers, and breathable paints for permeability, UV resistance, and finish impact. Ensure the system is compatible as a full package with primers and top coats. Prepare the surface, observe curing and moisture thresholds, and plan re-coats to maintain performance.
Permeable vs. Impermeable Treatments — Pros and Cons
Understanding the difference between permeable and impermeable treatments is crucial for preventing efflorescence in your concrete planters.
Pros of Breathable (Permeable) Treatments
- Allow moisture vapor to escape, reducing efflorescence risk.
- Promote better concrete health by allowing it to breathe.
- Generally more durable and flexible than impermeable coatings.
- Better suited for above-ground planters with varying temperature cycles.
Cons of Non-Breathable (Impermeable) Treatments
- Trap moisture within the concrete, increasing efflorescence risk.
- Can lead to concrete deterioration over time due to trapped moisture.
- Less durable and prone to cracking or peeling under temperature changes.
- May not be suitable for above-ground planters with exposure to sun and freeze-thaw cycles.
Impermeable treatments may be useful in some below-grade applications, but for above-ground concrete planters, breathable treatments are the way to go.
Application Techniques for Common Breathable Products
Applying breathable waterproofing products requires careful preparation and the right technique. Here’s how:
Surface Preparation: Clean the concrete surface thoroughly, ensuring no dirt, grease, or other contaminants remain. Allow the concrete to cure properly before application.
Application Methods:
- Brush: Use a high-quality brush for small areas or detailed work. Apply the product in even strokes, following the manufacturer’s recommendations.
- Roller: For larger areas, use a nap roller suitable for the product’s viscosity. Apply the product in even coats, maintaining a wet edge.
- Spray: Some products can be sprayed on using an airless sprayer. Follow the manufacturer’s guidelines for tip size and pressure.
Always follow the manufacturer’s recommendations for drying times between coats and re-coating intervals to ensure optimal performance.
Choosing Tested Product Systems
When selecting breathable waterproofing products, it’s crucial to choose a system that has been tested and proven to work together. Using incompatible products can lead to poor performance or even failure.
Manufacturer-Specified Systems: Stick with products from the same manufacturer or those specifically designed to work together as a system (primer, barrier, topcoat/paint). These have been tested for compatibility and will perform better than mixing different brands.
Consider potential interactions with common planter substrates and soils. Some products may not be suitable for use with certain materials or could require additional preparation steps.
Always follow the manufacturer’s guidelines for surface preparation, application, and maintenance to ensure your breathable waterproofing system performs as expected over time.
Surface Preparation, Crack Repair, and When to Seal
Begin by removing efflorescence, dust, grease, and loose material. Scrub with a stiff brush, rinse, and dry thoroughly. Confirm the substrate is dry enough to accept treatment before sealing or patching.
Identify all cracks and fill with compatible repair mortars or crack fillers. For larger voids, use backer materials and appropriate sealants to create a smooth, level surface. Ensure repairs are cured before any coating or membrane is applied.
Safe Efflorescence Removal Methods
Efflorescence is a white, powdery deposit on concrete surfaces. Removing it safely ensures your planters’ longevity and prevents damage to the substrate.
Mechanical cleaning: Use a stiff wire brush or a pressure washer with a wide-angle nozzle to scrub away efflorescence. Be gentle to avoid damaging the surface.
Low-acid rinses: For stubborn efflorescence, use a low-acid cleaner specifically designed for concrete. Follow the manufacturer’s instructions and retest after each application until efflorescence is gone. Avoid using high-acid cleaners as they can damage concrete.
Poultice approach: For heavy efflorescence, apply a poultice – a thick paste of cleaning agent and absorbent material like diatomaceous earth or clay. Let it sit for 24-48 hours, then scrub off gently. Retest after each application.
Crack Repair and Filling Voids
Repairing cracks and filling voids is crucial to prevent water intrusion, efflorescence, and structural issues in your planters.
Small cracks (less than 1/8 inch): Use a flexible caulk or polymer-modified mortar. These products can accommodate minor movement and won’t crack again easily.
Medium cracks (up to 1/4 inch): For wider cracks, use hydraulic cement or a polymer-modified mortar with added aggregate. Ensure the repair is level and smooth.
Large voids and cracks (over 1/4 inch): Use a backer material like fiber reinforcement or foam board, then apply an appropriate sealant or mortar that bonds well to the substrate. Ensure repairs are completely cured before sealing.
Tools and Materials Checklist
When to use: Before starting any prep or sealing work on your planters, ensure you have all the necessary tools and materials. This checklist helps you stay organized and efficient.
- Wire brush: For scrubbing efflorescence and cleaning surfaces. A stiff-bristled wire brush is ideal for concrete.
- Sprayer/roller: For applying sealers and coatings evenly. Choose a sprayer with adjustable nozzle sizes or a high-quality roller cover.
- Trowels: For mixing mortars, applying repair materials, and smoothing surfaces.
- PPE (Personal Protective Equipment): Include safety glasses, gloves, dust mask, and protective clothing to ensure your safety during the process.
- Moisture meter: To test substrate dryness before sealing. This helps prevent efflorescence recurrence and ensures proper adhesion of sealers.
- Appropriate repair mortars/caulks: Select products based on crack width and movement, as outlined in the ‘Crack Repair and Filling Voids’ section.
- Breathable sealer/waterproofing system: Choose a product that works with your planned finish and any drainage features, as discussed earlier in the article.
- Appropriate cleaners/poultices: For removing efflorescence safely. Always follow manufacturer’s instructions for best results.
- Tape measure and level: To ensure accurate measurements and even application of materials during repairs and sealing.
Quick rule: Always double-check your tools and materials before starting work to avoid delays or mistakes.
Application Best Practices and Common Mistakes to Avoid
Understand substrate readiness and environmental limits for water- and solvent-based breathable coatings. Check surface moisture and temperature to prevent pinholes and poor adhesion. Verify the concrete is ready before applying primer or sealer.
Outline the correct sequence: clean and dust-free, treat efflorescence, then apply breathable base layers before any top coats. Use the recommended tool and film thickness, and check for evenness before curing. Learn common mistakes and how to avoid them by consulting product techs when in doubt.
Common Mistakes with Water-Based Coatings
Here are some common pitfalls to avoid when applying water-based breathable coatings.
- Applying over efflorescence: Efflorescence can cause poor adhesion. Remove it before coating.
- Poor weather conditions: Apply only in temps 50-90°F (10-32°C) and humidity below 85%.
- Over-thinning: Thinning too much reduces protection. Follow manufacturer’s guidelines.
- Insufficient drying: Allow at least 4 hours between coats to ensure proper curing.
These mistakes can lead to failure. Take your time and follow the guidelines.
Techniques for Spray, Roll, and Brush Application
For even coverage, use a sprayer with a wide fan pattern. Keep the nozzle moving to avoid over-application.
When rolling, use a nap roller suitable for your product’s film thickness. Apply in ‘W’ or ‘M’ patterns to avoid streaks.
Brushing is best for edges and details. Use a good quality brush and apply in even strokes.
Always maintain the manufacturer-specified film thickness to ensure proper protection.
Safety Precautions and PPE
Respirator: Use a respirator when working with sealants or solvents to avoid inhalation.
Gloves: Wear gloves to protect your hands from chemicals. Change them if they become contaminated.
Ventilation: Ensure good ventilation in the work area to prevent solvent buildup.
Safe disposal: Follow local regulations for disposing of unused product and waste materials.
Testing, Costs, and Product Selection Strategy
Understand permeability and the perm rating as you evaluate planter materials and systems. Look for ratings that allow moisture egress without harming structure or plants. Check how salts and freeze-thaw cycles may interact with chosen products.
Develop a framework that weighs permeability, lifecycle expectations, and environmental compatibility. Include in-situ moisture checks to verify dryness before coating and a simple cost-benefit view that considers long-term maintenance. Use a scoring approach to compare products for performance and budget.
How to Test Moisture and Permeability
Before applying breathable waterproofing, test your planters for moisture. Surface-only tests can be misleading due to capillary action drawing water upwards.
In-situ testing: Drill small holes (1/4″ diameter) at varying depths and insert a moisture meter probe. Readings should be consistent and below 20% for proper dryness.
Alternatively, use a Wet-Dry Bulb Psychrometer. It measures relative humidity inside the planter. readings below 75% indicate acceptable dryness.
Cost Comparison and Lifecycle Considerations
Upfront costs aren’t everything. Long-term maintenance matters too. Here’s how to compare:
Product price: Breathable options may cost more upfront, but they prevent efflorescence and reduce long-term remediation.
Maintenance frequency: Less permeable treatments may need reapplication every 3-5 years. Breathable systems can last 10+ years with proper curing.
Consider potential water damage risks too. Better upfront investment can save you from costly repairs down the line.
Warranties, Compatibility, and Manufacturer Support
Check these before buying:
Compatibility: Ensure the product works with your drainage strategy. Some may not play nice with gravel or other materials.
System warranties: Look for 5-10 year warranties, covering both material and labor.
Manufacturer support: Does the manufacturer provide installation guidance? Tested pairings? Good customer service can save you headaches later on.
Maintenance, Troubleshooting Persistent Efflorescence, and Community Feedback
Create a maintenance calendar that includes drainage checks, periodic reapplication of breathable treatments, and remediation for recurring efflorescence. Plan seasonal checks around rain, heat, and plant cycles. Keep notes on what you observe and fix promptly.
If salts persist, run diagnostic checks: monitor moisture, trace salt sources, and assess substrate temperature and coating condition. Actionable steps include cleaning salts, reapplying breathable treatment, and addressing moisture paths or cracks. Invite readers to share experiences to build a practical, working set of tips.
Routine Inspection and Maintenance Checklist
Use this checklist to keep your concrete planters in top shape. Regular checks ensure proper drainage, coating integrity, and prevent efflorescence.
- Check weep holes: Ensure they’re clear of debris every spring and fall. Clogged holes trap water, leading to efflorescence.
- Inspect drainage slope: Confirm planters slope away from structures every season. Flat or reversed slopes cause water pooling and salt buildup.
- Check gravel layers: Refresh or add new layers in spring and fall. Compaction or loss reduces filtration, allowing salts to rise.
- Monitor coating condition: Inspect breathable treatments annually. Cracking or peeling indicates reapplication is needed to prevent efflorescence.
- Test soil salt levels: Use a moisture meter in spring and fall. High readings suggest excessive salts, requiring remediation.
- Check plant health: Monitor plants for signs of distress every season. Salts from plant food or decaying matter can cause efflorescence.
- Inspect cracks and voids: Repair any new openings every spring. Moisture enters through cracks, leading to efflorescence.
- Monitor substrate temperature: Check in winter. Freeze-thaw cycles can damage planters, causing efflorescence.
Quick rule: Regular checks prevent small issues from becoming big problems. Don’t skip inspections!
Troubleshooting Persistent Efflorescence
If efflorescence returns despite your best efforts, follow this prioritized approach to diagnose and fix the issue.
Start with drainage: Inspect and clear weep holes, confirm slope, and check gravel layers. Poor drainage is often the root cause of recurring efflorescence.
Next, trace salt sources: Check soil and watering practices. High salts in soil or frequent irrigation can lead to persistent efflorescence. Use a moisture meter to test soil salt levels.
Assess coating condition: If drainage and salt sources are addressed, inspect breathable treatments. A failed coating may allow vapor to become trapped, leading to efflorescence.
Leave a Reply / Cancel reply
Got questions about maintaining your concrete planters? Want to share your experiences or tips with fellow DIY homeowners? Leave a comment below!
Your insights help refine recommendations and provide community-sourced solutions. Let’s build a helpful resource together.
Remember: Keep comments respectful, on-topic, and relevant to the article. Your feedback is valued and appreciated.
Conclusion
Concrete planters can stay durable and keep their clean look when you lock in a practical mix design, proper drainage, and breathable waterproofing—the combination protects against efflorescence and costly fixes.
First, confirm your mix aligns with low-efflorescence goals, do a small test batch, verify drainage holes and media depth, install breathable waterproofing in the right places, prepare and repair any surface or crack issues, decide when to seal based on drying and weather, run a quick leak and water-test, and set a maintenance plan that fits how you use the planters. Safety first, test first, and control drainage are the guiding rules you should live by as you move from plan to installation to ongoing care.
Common mistakes to avoid are skipping drainage or over-sealing damp concrete, applying waterproofing or sealants to surfaces that aren’t dry enough, ignoring testing, and rushing repairs without matching the product to the task. Keep the work area clean, wear eye protection and gloves, follow product instructions, and never mix products beyond the recommended ranges. These practical rules keep you safe and prevent permanent damage.
If the project shows persistent efflorescence after careful testing and installation, or you’re dealing with large or complex planters, it makes sense to bring in a pro. Otherwise, stay methodical, document what you do, and keep up with maintenance—steady, controlled steps now will pay off with durable, good-looking planters. You’ve got this—steady pace, solid materials, and a plan you can trust.
FAQ
How do I seal concrete blocks without trapping moisture or causing efflorescence?
Use a breathable sealer that blocks water while letting vapor escape. Read the label to confirm breathability and suitability for planters. Apply per manufacturer instructions and test a small area first.
What are breathable waterproofing options for concrete blocks in planters?
Look for products labeled breathable or vapor-permeable. Options include liquids or coatings designed to stay flexible and allow moisture to pass. Check the manufacturer guidance for application method and cure time.
Can I use elastomeric coatings like UV40 on block planters, and how should I apply them?
Elastomeric layers can bridge small cracks and add protection, but ensure the product is compatible with blocks and drainage. Follow the label for surface prep, priming if required, and multiple thin coats rather than one thick coat. Inspect for complete coverage and edge detailing.
How do I repair cracks and fill voids in block planters before waterproofing?
Clean/crack out loose material, then choose a repair method recommended by the product you’re using. Use compatible filler or mortar designed for breathable systems. After curing, test for moisture movement and proceed with the chosen sealer or barrier.