
Introduction
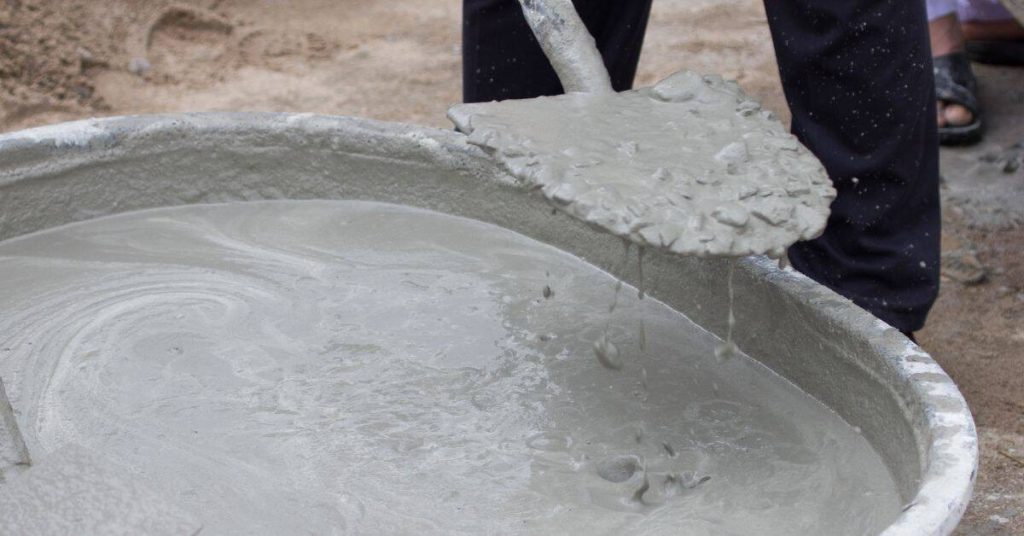
Pigment streaks in concrete happen when mixing order and water balance create color bands. This article explains how to mix pigments with cement and manage water so the color stays even. Keep in mind proper timing and consistency as you work.
Start by blending pigment powder with a small portion of dry mix before adding water, then mix with the rest to keep the color uniform. Monitor water content carefully as you add liquid or water-based pigment, and mix until the batch looks uniform; if the color looks spotty, pause and verify the pigment dispersal. Add pigments in a consistent sequence and avoid sudden changes that can cause streaks; finally, cure the concrete with steady, protected conditions to reduce banding.
Key takeaways
- Pre-measure pigments with dry mix; blend thoroughly before adding liquids.
- Monitor water additions carefully; use graduated tools to avoid oversaturation.
- Add pigments in the approved order; mix after each addition.
- Maintain consistent moisture during curing to prevent color variation.
- Place in uniform lifts; use consistent trowel timing to avoid banding.
- Wear PPE; follow label instructions and local regulations for pigments.
Table of Contents
- Introduction
- Key takeaways
- What Causes Pigment Streaks and Banding in Colored Concrete
- Pigment Types, Quality and Material Specs
- Correct Mixing Order and Protocol to Ensure Even Pigment Dispersion
- Water Control and Controlling Water-to-Cement Effects on Color
- Placement and Finishing Techniques to Minimize Streaking
- Curing, Sealing and Maintenance for Long-Term Color Stability
- Troubleshooting, Common Mistakes and Corrective Techniques
- Safety, Environmental and Cost Considerations
- Conclusion
- FAQ
What Causes Pigment Streaks and Banding in Colored Concrete
Pigment streaks and banding describe visible color variations on concrete surfaces. They show up as feathered lines, patches, or stripes that break the uniform look you expect. This applies to both fresh plastic concrete and hardened slabs.
Root causes include uneven pigment dispersion, changes in water content, bleed or evaporation differences, and how the concrete was placed and finished. By understanding these factors, you can spot early signs and head off noticeable color shifts. Practical checkpoints help you act before the surface sets.
Common failure modes
Banding and streaks in colored concrete often follow predictable patterns. Spotting these on-site can help you pinpoint the cause and fix it before it’s too late.
Truck-to-truck differences: Inconsistent pigment loading between trucks can lead to visible bands where they meet. Washout at joints: If water bleeds out more at joints, it can carry pigment with it, leaving lighter streaks. Finishing techniques: Overworking or underworking the surface can cause uneven pigment distribution.
Keep an eye on these common failure modes during placement and finishing to minimize banding and streaks in your colored concrete.
Visual checkpoints and inspection checklist
Use this checklist during placement and after finishing to catch inconsistent color early, before curing begins.
- Check for consistent slump: Uneven consistency can lead to varying water-to-pigment ratios and streaks. What goes wrong if skipped: Inconsistent slump causes banding due to different pigment dispersion.
- Inspect joint areas: Ensure no washout or excessive bleeding occurs at joints. How to confirm: Check for even color and no light streaks around joints.
- Examine edges: Edges can dry faster, leading to banding if not managed properly. What goes wrong if skipped: Banding along edges detracts from the overall appearance.
- Check for proper pre-wetting of pigment: Dry pigment clumps and causes streaks. How to confirm: Ensure pigment is fully saturated before adding it to the mix.
- Inspect trowel finish: Uneven troweling can cause banding. What goes wrong if skipped: Inconsistent troweling leads to visible bands on the surface.
- Check broom finish: Overworking or underworking the surface with a broom causes streaks. How to confirm: Ensure even texture and no light or dark patches.
- Examine color match: Inconsistent pigment loading between loads can cause bands. What goes wrong if skipped: Mismatched loads result in visible bands where they meet.
- Check for proper timing of pore wetting or sealers: Applying too early or late can cause banding. How to confirm: Follow manufacturer’s guidelines for application times.
Quick rule: Regular, thorough inspections during placement and finishing are key to catching inconsistent color early and minimizing banding and streaks in your colored concrete.
Pigment Types, Quality and Material Specs
Different pigment types bring different strengths to concrete color. Powdered iron oxides, liquid pigments, and specialty pigments each have their best-use scenarios. Knowing where each excels helps you choose for your project.
Particle size, purity, and color system influence uniformity and potential banding, especially in large pours. Check manufacturer data sheets and batch certificates for guidance on usage, compatibility, and expected color behavior. Use test mixes and documented results to verify consistency before full-scale pours.
How to choose pigments and avoid cheap substitutes
Avoid these common mistakes when selecting concrete pigments:
- UV instability: Check for UV resistance. Pigments that fade in sunlight won’t last.
- Organic vs inorganic: Inorganic pigments are more durable and colorfast. Organic ones can bleed or fade.
- Dispersion properties: Ensure pigments disperse easily in water to avoid clumps and nonuniform color.
- Supplier reputation: Verify the supplier’s track record to reduce risk of low-quality products.
Always ask suppliers about these factors before buying.
Material specs and standards to request
Requesting the right material specs ensures a successful pour:
- Certificates of Analysis: Ask for COA to verify pigment purity, particle size, and color.
- Recommended dosing: Get dosing rates relative to cement content from the manufacturer.
- Admixture compatibility: Check if pigments work well with your chosen admixtures to avoid issues like cracking or staining.
- SCM compatibility: Ensure pigments are compatible with supplementary cementitious materials (SCMs) for strong bond and color consistency.
- Color system: Specify the color system (RGBA, CIE) you’re using to match your desired shade.
- Water demand: Know the water demand of pigments to maintain proper mix design and slump.
Missing these specs can lead to weak bond, inconsistent color, or other issues.
Correct Mixing Order and Protocol to Ensure Even Pigment Dispersion
Follow a clear sequence: start with accurate water, then add binders and admixtures, introduce pigments, and finally components like aggregates. The order and amount of water affect how evenly pigment disperses and how the mix will flow. This step reduces clumping and uneven color.
Always consult pigment and admixture manufacturer guidance for mixing order and any required wait times. Use the right tools, scrape the sides, and allow brief rests if specified to promote uniform dispersion. Document the batching steps to reproduce results later.
Step-by-step mixing sequence (field and plant)
The correct mixing order ensures even pigment dispersion, prevents clumping, and maintains workability.
- Add water first: Gradually add clean water to the mixer. This helps distribute other materials evenly.
- Mix binders/admixtures next: Combine cement, fly ash, or other binders with any initial admixtures (e.g., accelerators, retarders). Mix well for 1-2 minutes to ensure even distribution.
- Add pigments third: Slowly introduce pigments while the mixer is running. This helps prevent clumping and promotes even dispersion.
- Scrape sides if needed: If using a tilt-mixer, scrape the sides to ensure all materials are incorporated before adding aggregates.
- Add aggregates fourth: Gradually introduce coarse and fine aggregates. Mix for 2-3 minutes to ensure even distribution.
- Add final admixtures last: If using any remaining admixtures (e.g., air-entraining agents, high-range water reducers), add them now and mix well for another minute or two.
Tools and techniques for good dispersion
The right tools and practices help achieve uniform pigment distribution with minimal clumping.
- Use a high-quality mixer: Invest in or rent a reliable concrete mixer with a powerful motor and durable paddles. A drum capacity of at least 1/3 more than your batch size helps ensure even mixing.
- Discharge/recirculation practices: Use the discharge/recirculation feature on your mixer to ensure all materials are well incorporated, especially when using pigments with different specific gravities.
- Wetting agents or high-range dispersants: Consult pigment and admixture suppliers for recommendations. These can help improve dispersion and reduce clumping, but they may require additional mixing time.
- Paddle selection: Choose paddles designed for your mixer’s drum size and shape. This helps ensure efficient mixing and minimal dead zones.
- Timing and rest periods: Follow manufacturer guidelines for mixing duration, rest periods, and any required wait times before discharge to optimize pigment dispersion.
Water Control and Controlling Water-to-Cement Effects on Color
Water added at batch, during transport, or at finishing can shift color perception. Moisture differences change how pigment appears on the surface and within the body of the slab. Expect light or dark shifts from added moisture.
The goal is consistent water content, not chasing a single ratio. Surface moisture can diverge from internal moisture, especially with stamped or troweled finishes. Plan for moisture control in your workflow and check color stability with small test patches before pouring large areas.
On-site practices to prevent accidental water addition
Accidental water addition on site can throw off your color consistency. Here’s how to avoid it:
No extra water without approval. Make this a rule. Any water added should be approved by the foreman or project manager.
Use the same slump measurement method every time. This helps maintain consistency and prevents anyone from ‘guessing’ how much water to add.
Instead of adding water, use admixtures for workability. They’re designed to improve concrete properties without affecting the water-cement ratio.
Admixtures and slump control options
Adding water isn’t the only way to control slump. Here are some alternatives:
Use water-reducing admixtures. These help maintain workability without adding extra water, keeping your color consistent.
Consider using a retarding agent. This slows down the setting time, giving you more time to finish and level your concrete before it hardens.
Powdered slump control products can also be added at the batch plant. They help maintain workability without adding water. Coordinate with your ready-mix supplier to get the right one for your needs.
Placement and Finishing Techniques to Minimize Streaking
Place concrete in a logical sequence to avoid pigment-rich or pigment-starved zones. Coordinate lifts and ensure timing between passes stays consistent. This reduces visible transitions that look like banding.
Consolidation and proper finishing technique matter. Avoid excessive vibration that can push pigment around. Use the right strike-off methods and manage joints to keep color uniform across transitions.
Best practices for large pours and truck sequencing
When working with large areas, it’s crucial to maintain consistent color throughout. Here are some best practices:
Stagger your pours. Don’t wait until the last truck arrives before starting. Spread out your pours so that each new batch is placed while the previous one is still workable.
Keep an eye on truck-to-truck transitions. Make sure there’s no gap between trucks. If there is, blend the edges with a shovel or rake to ensure a smooth transition.
Communicate with your drivers. Let them know when you’re ready for the next load. This helps keep the pours consistent and prevents any one area from drying out before the next batch arrives.
Surface water management during finishing
Properly managing surface water during the finishing process is key to preventing lighter streaks. Here’s how:
First, control bleed water. Too much bleed water can rise to the surface and lighten the color. Use a tamper or vibrator to help consolidate the concrete and reduce bleeding.
Avoid overworking the surface. Overworking can bring up more cement and cause lighter streaks. Keep your trowel passes even and consistent, but don’t overdo it.
Be careful with wet edging. If you’re using a wet edger, make sure to feather the edges properly to avoid pulling up too much water. Let the surface dry slightly before edging to help prevent this.
Curing, Sealing and Maintenance for Long-Term Color Stability
Curing technique affects pigment stability and surface appearance. Plastic sheeting, moist curing, or curing compounds each influence color uniformity and efflorescence resistance. Choose a method that fits your climate and job size.
Sealant choice also alters color perception over time. Penetrating sealers versus surface coats interact differently with pigments. Plan maintenance and resealing intervals to preserve the color you started with and minimize dulling or darkening from wear.
Curing methods that preserve uniform color
Proper curing is crucial to maintain the even appearance of your colored concrete. Here are some methods to consider:
Covering: Keep the concrete covered with plastic sheeting or wet burlap for the first 72 hours. This retains moisture and prevents rapid drying, which can lead to color variations.
Moist Curing: Sprinkle water on the surface regularly during the initial curing phase. This helps maintain a consistent moisture level and promotes even drying.
Curing Compounds: Apply a commercial curing compound according to the manufacturer’s instructions. These products help retain moisture and protect against color shifts.
Sealer selection and re-sealing schedule
A good sealer can enhance your colored concrete’s appearance and longevity. Here’s how to choose one and maintain it:
Penetrative Sealers vs. Surface/Top-Coat Sealers: Penetrative sealers soak into the concrete, protecting from within while allowing moisture to escape. Top-coat sealers sit on top of the surface, providing a protective layer but can peel or flake off over time.
Check compatibility with pigments: Ensure the sealer is compatible with your cementitious pigments to avoid color loss or darkening. Always follow the manufacturer’s guidelines.
Re-sealing Schedule: Re-apply sealers every 2-5 years, depending on traffic and weather conditions. Regular cleaning and re-sealing will maintain your concrete’s uniform sheen and color.
Troubleshooting, Common Mistakes and Corrective Techniques
Identify root causes of banding by looking at pigment segregation, water distribution, mixing order, and curing conditions. These are the typical culprits behind stripes. Pinpointing the issue guides the fix.
Options include grinding and resealing, applying colorants topically, or overlays. Each has limits, so assess feasibility based on the affected area and budget. Document causes to prevent recurrence and test color after repairs.
Quick site remedies vs permanent repairs
When banding shows up, it’s tempting to grab the quickest fix. But remember, temporary fixes might not last or solve the root issue.
Temporary fixes: Grinding and resealing can hide bands but won’t fix underlying issues. Topical colorants can even out color but may fade over time.
Permanent repairs: Overlays are a structural fix, covering old concrete with new. They’re best for large areas or severe banding. Always choose the right tool for the job – quick fixes might be cheaper upfront, but permanent repairs save you money in the long run.
Post-install diagnostics
Before you fix banding, find out why it happened. Review records to understand what went wrong and how to prevent it next time.
Mix tickets: Check water-to-cement ratios. Too much water can cause segregation and banding.
Pigment batch: Ensure pigment was evenly distributed. If not, you might have a bad batch or improper mixing.
Placement logs: Look for any issues during placement that could’ve caused banding – like stopping and starting pours in the wrong places.
Safety, Environmental and Cost Considerations
Use appropriate PPE for pigment dust and liquid handling. Eye protection, gloves, and spill containment help prevent exposure. Follow site safety procedures for your concrete work.
Environmental and cost factors matter; consider pigment choices, potential VOCs, and waste management. Safer, durable pigments can reduce rework and long-term costs by maintaining color consistency.
Jobsite Safety for Pigment Handling
Safety’s our top priority. When handling pigments, protect yourself:
Dust Control: Use a respirator or mask rated for pigment dust. A P100 filter should do the job.
Eye Protection: Wear safety glasses with side shields to keep dust out.
Gloves and Spill Containment: Use gloves when handling liquids. Keep a spill kit nearby for quick cleanup.
Cost and Sustainability Trade-Offs
Choosing pigments involves balancing cost and environmental impact:
Higher-quality, durable pigments raise upfront costs. But they reduce rework, saving you money in the long run.
Ask suppliers about recycled or lower-impact pigment options. They might cost more initially but could save you cash and protect the environment over time.
Remember: Cheapest isn’t always best. Investing in quality pigments now can prevent expensive mistakes later.
Conclusion
Paragraphs: The goal here is to keep the color even and the surface safe, so you control the mixing order and water carefully from day one and you stop problems before they start. When you do that, you protect durability, appearance, and your time and money.
Check your plan and execution in plain terms: verify pigment types match your concrete, confirm material specs, set the mixing order and water targets before you start, measure water carefully to avoid over-wetting, mix until you have uniform dispersion, test a small patch to confirm color stability, apply finishing in the right window, and seal after a proper cure while keeping notes for future pours. If it passes a small patch test and a controlled trial run, you’re on solid ground to scale up with confidence.
Common mistakes to avoid are skipping a test patch, changing the water-to-cement ratio mid-project, rushing the mixing sequence, applying finishing too early or too late, and neglecting curing or sealing. Always follow a safety routine: wear PPE, keep the work area ventilated, and avoid adding water or pigment last minute. If you see streaking or banding, stop and re-check the plan before proceeding.
If the project is large, or you’re chasing a precise, repeatable outcome across multiple pours, consider bringing in a pro rather than pushing through solo. When in doubt, prioritize testing, safety, and patience, and you’ll end up with a durable, uniform color you can be proud of.
FAQ
What are the proper steps for correctly blending pigments with the cement mix?
Add pigments after you have a dry mix with cement, sand, and aggregate. Mix thoroughly at low to moderate speed until the color looks even, then check a small batch for consistency. If you see streaks, stop and re-blend in small increments rather than overmixing one area.
What methods help manage water content accurately when adding pigment?
Keep track of how much water you add to the mix and don’t rely on feel alone. Use test priors or a standard moisture reference for your batch and adjust to avoid pooling or overly dry spots. If the color starts to look uneven, pause and recheck the water-to-cement balance before continuing.
In what order should pigments be added for consistent color?
Follow a consistent sequence each time you mix and document it on-site. Add the base pigment first, then secondary tones if used, and mix thoroughly before introducing remaining batch materials. Stop if you see perceptible color bands forming and reblend before continuing.
What are best practices during curing to avoid streaks?
Keep the surface protected from rapid moisture loss and temperature swings. Use proper curing methods recommended for your project and avoid drying too fast. If you see color changes during curing, review the curing method and adjust for the next batch.