
Introduction
Concrete form blowouts occur when the wet concrete pressure pushes on the forms and they fail or bow. It happens when the form panels bow or kick out under load. If you see gaps or misalignment after a test lift, pause and inspect braces and joints.
Use bracing patterns that keep panels square and transfer load straight to supports. Ensure alignment and placement are checked as you set forms, and recheck before pouring. Always follow the form manufacturer’s instructions and local rules, and verify requirements on the product label when in doubt.
Key takeaways
- Understand concrete form blowouts happen when wet pressure surpasses bracing capacity causing failure.
- Verify bracing patterns align with wall height and pour direction to prevent bowing.
- Pre-pour planning includes risk assessment, inspecting formwork, and securing anchors.
- Use proper DIY bracing hardware and follow manufacturer labels and local code guidance.
- Visual checkpoints: straight edges, plumb walls, evenly spaced braces, no loose components.
- During pour, monitor pressure, halt if form flexing or leaking occurs.
Table of Contents
- Introduction
- Key takeaways
- What Is a Concrete Form Blowout and Why DIY Forms Fail
- Pre-Pour Planning and Risk Assessment
- Bracing Patterns That Resist Wet Pressure
- Materials, Hardware, and Specs Explained for DIY Bracing
- Step-by-Step DIY Bracing Layouts for Common Wall Types
- Visual Checkpoints and Inspection Checklist Before Pouring
- Preventing and Managing Blowouts During the Pour
- Cost, Safety, and Lessons from Failures
- Conclusion
- FAQ
What Is a Concrete Form Blowout and Why DIY Forms Fail
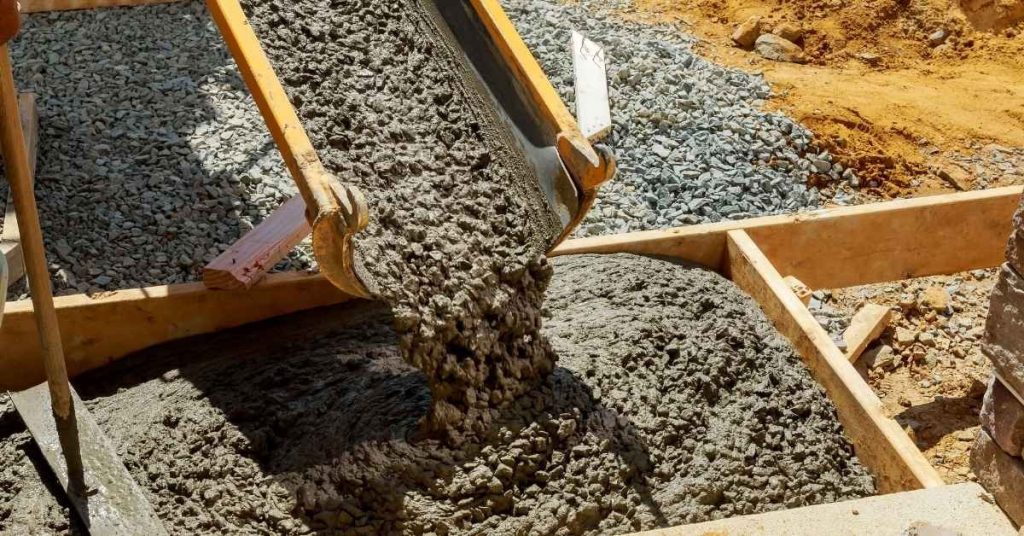
A concrete form blowout is a sudden failure of the formwork or its supports under the weight and pressure of fresh concrete. It is not the same as minor veneer cracking or joint leakage. The hydrostatic pressure from wet concrete is the main driving force behind these failures.
From there, the load transfers through the form panels, braces, and ties. If the bracing is insufficient or misaligned, the peak pressure can push panels out of plumb or cause joints to fail. Common DIY vulnerabilities include weak bracing density, poor panel alignment, reused or damaged forms, faulty fasteners, and inadequate ventilation or release agents.
Definition and mechanics of a blowout
A concrete form blowout is when wet concrete exerts enough pressure to deform, bulge, or even rupture the formwork. This isn’t minor cracking or joint leakage – it’s a serious failure.
The primary driver is hydrostatic pressure from the wet concrete. Imagine a tall column of water: that’s a lot of weight pushing outwards. Now, multiply that by the height and volume of your pour.
Concrete also exerts lateral loads as it settles. This force tries to push the forms sideways. If the bracing can’t handle this, you’ll see bulging or even rupture.
The formwork deforms under these forces, leading to blowouts. It’s like a balloon filling with water – eventually, it bursts if not reinforced properly.
Common causes specific to DIY forms
DIY forms are more vulnerable due to several reasons. Inadequate bracing patterns top the list – not enough supports mean your forms can’t handle the pressure.
Improper connections, like loose or missing ties and fasteners, let the forms shift under load. This causes misalignment and weakens the structure further.
Excessive pour rate is another culprit. If you’re pouring too quickly, the concrete has no time to settle gently; it pushes outwards instead.
Compromised or modified form components also contribute. Reused forms might be damaged, while homemade ones may not be up to spec. Always check your materials before pouring.
Pre-Pour Planning and Risk Assessment
Identify blowout risk factors before the first bag of concrete arrives. Check form material condition, bracing adequacy, timber or wrap integrity, release agents, and concrete mix properties. Look for signs that parts may fail under load.
Establish a clear pre-pour checklist with defined roles and a sign-off for form readiness. Coordinate with suppliers and contractors to confirm form dimensions and bracing specs. Include manufacturer guidelines and when to involve a structural engineer for critical loads or unusual geometries.
Assessing load paths and pour sequencing
Before you start pouring, understand how concrete loads transfer to your bracing. This is key to planning your pour strategy and setting up your bracing layout.
Concrete exerts pressure on forms as it’s poured. If not properly braced, this pressure can cause blowouts. So, plan your pour sequence from the bottom up. Start with the lowest sections and work your way up.
Use sturdy, well-spaced bracing to support these loads. Remember, concrete is heavy – a cubic yard weighs over 4000 pounds. Your bracing needs to be strong enough to handle that.
Site conditions, soil, and temporary loads
Before you build your forms, inspect the site for any potential stability issues. Drainage, soil support, and nearby loads can all affect form stability.
Check for adequate drainage. Standing water can undermine your forms and cause blowouts. If necessary, install temporary drainage systems to keep water away from your forms.
Inspect the soil beneath your forms. Unstable soil can lead to form movement and blowouts. Consider using a geotechnical engineer if you’re unsure about soil conditions.
Also, consider any temporary loads nearby – like heavy equipment or vehicles. These can put extra pressure on your forms and cause instability.
Permits, manufacturer specs, and engineer checks
Always check local building codes before starting any concrete work. Make sure you have the necessary permits and that your forms comply with code requirements.
Follow manufacturer specifications for all materials used in your forms – from lumber to release agents. Using substandard materials can lead to blowouts.
For complex pours or if you’re unsure about anything, don’t hesitate to consult a structural engineer. They can provide professional sign-off and peace of mind. It’s better to be safe than sorry when it comes to concrete work.
Bracing Patterns That Resist Wet Pressure
The goal of bracing is to translate lateral wet concrete pressure into stable support and keep the form from deflecting. Good bracing helps prevent blowouts and keeps the pour on track. Patterns should tie the form together along load paths.
DIY friendly patterns include panel to panel cross bracing, continuous edge bracing, and X or inverted triangular bracing in high load zones. Use sturdy lumber or engineered members and corrosion resistant fasteners. Ensure braces are plumb, square, and level before pouring.
Continuous wales and distributed studs pattern
The purpose of continuous wales is to spread the lateral pressure from wet concrete evenly across your formwork. This reduces localized failure risk, preventing blowouts.
Wales are horizontal members that run along the top and bottom edges of your forms. They should be made from sturdy lumber like 2x4s or engineered materials.
Distributed studs, on the other hand, are vertical members spaced evenly between wales. They help transfer pressure to the ground, further stabilizing your forms.
Key: Keep stud spacing short for higher wet-concrete pressures to ensure load paths meet requirements.
Diagonal bracing and shear restraints
Diagonal members, like those in an X-brace pattern, prevent racking by transferring out-of-plane loads to the ground. They’re particularly useful in high-wet-load zones.
Shear ties, usually made of rebar or metal strips, connect opposing form faces. They resist suction and sliding forces that can cause blowouts.
To set up diagonal bracing, start by ensuring your forms are plumb, square, and level. Then, install braces at a 45-degree angle to the horizontal, connecting top and bottom wales.
Tip: Use corrosion-resistant fasteners for longevity.
Deadmen, tie-backs, and anchoring patterns
Tall or single-sided forms need extra stability. Deadmen and tie-back anchors provide this by resisting overturning and lateral thrust.
A deadman is a horizontal member embedded in the ground behind your form. It’s anchored to your form using a tie-back, which can be a simple rope, cable, or metal rod.
To set up a deadman-tie-back system, first embed the deadman in the ground at a 45-degree angle. Then, attach the tie-back to your form and tension it appropriately.
Warning: Never overload tie-backs. If you’re unsure about loads or soil conditions, consult a professional engineer.
Materials, Hardware, and Specs Explained for DIY Bracing
Compare bracing materials by accessibility, strength, and durability. Reuse potential and moisture resistance matter for longer projects. Wood, steel, aluminum, and engineered panels each behave differently under load.
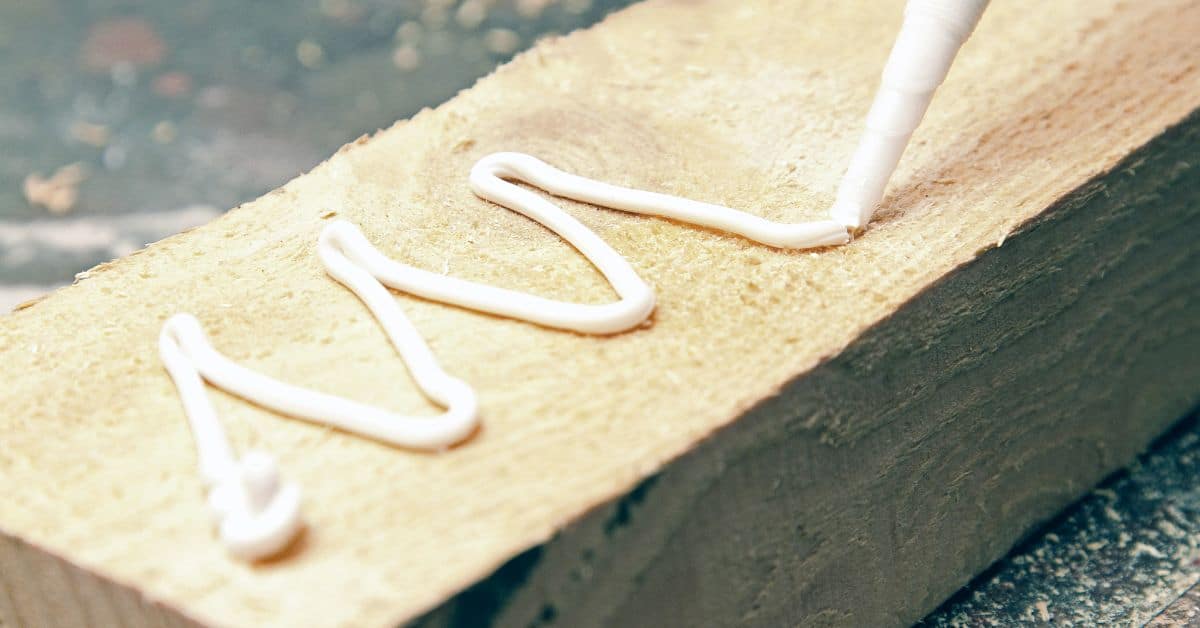
Review hardware categories such as brackets, screws, lag bolts, turnbuckles, and anchors. Pay attention to installation methods and corrosion resistance. Learn how to read load ratings and tolerances from manufacturer documentation and verify compatibility with your form system.
Lumber, engineered wood, and metal options
Choosing the right materials for your concrete form bracing is crucial. Here’s a quick rundown of common options:
Lumber: Cheap and accessible, but prone to warping, splitting, and rot. Use #2 grade or better, 2x4s for studs, 2x6s or wider for wales.
Engineered Wood: Stiffer, stronger, and more dimensionally stable than solid lumber. Great for long spans, but pricier. Look for PSL (Parallel Strand Lumber) or LVL (Laminated Veneer Lumber).
Metal: Steel or aluminum. Strong, durable, and reusable. Aluminum is lighter but weaker; steel is heavier but stronger. Avoid galvanized steel in contact with concrete to prevent staining.
Fasteners, ties, and adjustable systems
Secure your forms with the right hardware:
Screws/Lag Bolts: Use for attaching wales to studs. Galvanized or stainless steel resists corrosion. Size depends on lumber thickness.
Turnbuckles & Tie-Downs: Adjustable, great for leveling and tensioning forms. Stainless steel or galvanized for corrosion resistance. Check load capacity.
Straps & Anchors: For tying forms to existing structures. Use heavy-duty nylon or steel with appropriate anchors. Ensure they can handle the required load.
Reading material specs and safety factors
Understand manufacturer data to pick right materials:
- Load Ratings: Check if it can handle your form’s load. Include a 20% safety margin.
- Span: Ensure it’s suitable for the distance between supports.
- Working Load Limits: Don’t exceed this under any circumstances.
- Factor of Safety: Higher is better. Aim for at least 1.5.
- Installation Tolerances: Follow these to avoid weak points.
Ignore specs, and you might face cracking, staining, or even form failure. Always double-check with an engineer for critical loads.
Step-by-Step DIY Bracing Layouts for Common Wall Types
Define layouts for three common wall types: single sided pours, double sided forms, and corners. Each type has its own pattern to handle hydrostatic pressure. Visualize the layout before you start and adjust as needed.
Identify critical force concentrations and place bracing accordingly. Use studs, props, and screws to counter pressure near openings, corners, and transitions. Prepare a concise list of tools, fasteners, and brace spacing for the pour.
Step-by-Step Layout Process
Follow these practical steps to create DIY bracing layouts for common wall types, ensuring safety and efficiency.
- Preparation: Check forms are level, plumb, and aligned. Ensure all tools and materials are on-site.
- Safety first: Identify potential hazards and mitigate risks before starting work.
- Main brace layout: Start at the bottom, lay out your bracing pattern according to the wall type (single-sided, double-sided, or corner).
- Secure braces: Use recommended fasteners, spacing evenly as per your plan. Tighten securely but avoid overtightening that could deform forms.
- Inspect and adjust: Regularly check plumbness, level, and alignment during height increases or pours. Make adjustments as needed.
- Final checks: Once the pour is complete, inspect your work for any signs of deformation or weakness before removing forms.
Single-sided wall bracing approach
The key to successful single-sided pours lies in reinforcing the backing and anchoring properly. Here’s how:
Reinforced backing: Use sturdy, well-spaced studs or props against the existing structure or earth. Ensure they’re long enough to distribute pressure evenly.
Anchor points: Secure braces at regular intervals using appropriate fasteners. Consider using deadmen or tie-backs for extra support where needed.
Remember, single-sided pours require careful planning and execution to prevent blowouts. Don’t hesitate to call a pro if you’re unsure about any aspect of the process.
Double-sided form assemblies
Balancing bracing on both faces of your forms is crucial for controlling hydrostatic pressure. Here’s how to achieve this:
Ties and wales: Use ties to connect the two sides of your forms, distributing pressure evenly. Install wales horizontally at regular intervals to provide additional support.
Ensure your ties are taut but not overtightened, as this can cause form deformation. Regularly check both sides for level, plumbness, and alignment during the pour.
Double-sided forms require careful planning and execution. If you’re unsure about any aspect of the process, consult a professional before proceeding.
Corners, intersections, and openings
Special reinforcement is needed at corners, wall junctions, and openings where stress concentrates. Here’s how to reinforce these areas:
Corners: Use diagonal bracing or shear restraints to resist pressure buildup at corners. Ensure braces are securely fastened on both sides.
Openings: Reinforce around windows and doors with extra studs or props. Consider using bulkheads for added support where needed.
Remember, these high-clarity zones require extra attention to prevent blowouts. Always check your work regularly during the pour, and don’t hesitate to call a pro if you’re unsure about any aspect of the process.
Visual Checkpoints and Inspection Checklist Before Pouring
Before pour day, verify alignment and plumbness of all forms. Use a laser or stringline to confirm edges and corners are true. Check that all form connections and bracing are secure.
Inspect for damage such as cracks or displaced panels. Confirm anchor bolts and embedded items are correctly positioned. Document checks with photos and note any corrective actions required before pouring.
Alignment, plumb, and level verification
Before pouring concrete, ensure your forms are straight and well-supported. Here’s a quick checklist to confirm.
- Check wall form edges: Use a laser or stringline to verify they’re true to line.
- Confirm corners: Ensure all corners are square using a triangle or corner square.
- Verify centerlines: Check that footing and wall forms align along their centerlines.
- Plumb the walls: Use a level to ensure walls are vertical. Any deviation can cause blowouts.
- Check footings: Ensure they’re level and aligned with wall forms.
- Inspect form base: Make sure it’s stable and won’t shift under pressure.
- Verify bracing: Check diagonal braces for proper tension. Sagging or loose braces need adjustment.
- Check wales: Ensure they’re tight and evenly spaced to distribute pressure.
Quick rule: If forms aren’t straight, level, or properly braced, concrete pressure can cause blowouts.
Damage, cuts, and modified components
Inspect your forms for damage before pouring. Here’s what to look for:
- Cracks in panels: Even small cracks can weaken forms and cause blowouts.
- Dents or deformations: These can create weak spots where concrete can leak through.
- Overloaded blocks/panels: Check for signs of excessive stress, like bulging or warping.
- Modified components: Ensure any altered pieces are reinforced as per manufacturer guidelines.
- Loose or missing stakes: These can allow forms to shift under pressure.
- Worn-out clamps: Replace any that show signs of wear to prevent failure.
Quick rule: Replace or reinforce damaged components to prevent blowouts and maintain form integrity.
Fastener and tie integrity check
Inspect all fasteners and ties before pouring. Here’s a quick checklist:
- Check tie spacing: Ensure they’re evenly spaced to distribute pressure effectively.
- Tighten ties: Make sure all ties are secure and not loose or missing.
- Inspect for wear: Look for signs of bending, corrosion, or other damage on fasteners.
- Verify anchor bolts: Ensure they’re properly seated and won’t shift under pressure.
- Check waler clamps: Make sure they’re tight and evenly distributed along the form.
Quick rule: Loose or damaged fasteners can cause forms to shift, leading to blowouts and poor concrete finish.
Preventing and Managing Blowouts During the Pour
Do pre-pour checks of alignment, plumbness, and bracing. Have extra supports ready for anticipated hydrostatic pressure. Review the pour schedule and pump capability before starting.
During the pour, use staged or controlled flow and proper consolidation techniques. Monitor for movement, sounds, or changes in flow and assign a dedicated observer. Maintain clear safety zones and emergency procedures ready if a blowout occurs.
Monitoring pour rate and concrete placement
The key to preventing blowouts is controlling the pour rate. Here’s how:
Communicate with your crew: Keep everyone on the same page about where you are in the pour schedule. Use a clear communication system, like whistles or radios.
Control the concrete flow: Use a pump that matches your pour rate. Don’t let it run too fast or too slow. Adjust as needed to maintain a steady flow.
Use vibrators wisely: Vibrators help consolidate the concrete, but they can also put sudden pressure on forms if not used properly. Keep an eye on them and adjust their use based on how the pour is going.
Real-time inspections and temporary shoring adjustments
During the pour, regularly inspect your forms to catch any issues early. Here’s a quick checklist:
- Bulging: Check for any swelling or bulging of the forms. If you see this, it could mean the forms are under too much pressure.
- Leak paths: Look for any signs of concrete seeping through cracks or joints in the forms. This is a sure sign that something’s not right.
- Deflection: Check if the forms are moving or shifting. This could indicate that your bracing isn’t strong enough.
- Tie integrity: Make sure all ties and fasteners are still secure. If any have come loose, tighten them immediately.
- Brace alignment: Check if the braces are still properly aligned. If they’ve shifted, realign them as needed.
- Water protection: Ensure that your waterproofing measures are still in place and working.
- Vibration: Keep an eye on any vibrators being used. Make sure they’re not causing sudden pressure spikes.
- Crew safety: Always keep an eye out for any signs of stress on the forms that could pose a risk to your crew.
Quick rule: If you find any issues, don’t hesitate to stop the pour and make adjustments. It’s better to be safe than sorry.
Emergency response and containment
If a blowout starts, act fast to protect your crew and minimize damage:
Stop the pour: Immediately stop the pump and evacuate nearby personnel. The last thing you want is for someone to get hurt.
Isolate the area: Block off the affected area to prevent anyone from getting too close to the danger zone.
Assess form damage: Once it’s safe, assess the damage to your forms. If they’re severely compromised, you may need to shore them up temporarily to prevent a total collapse.
Salvage concrete: If possible, try to salvage any concrete that hasn’t set yet. This can save you time and money in the long run.
Cost, Safety, and Lessons from Failures
Consider the financial impact of blowouts, including material waste and form damage. Plan for potential rework and project delays, and weigh the value of preventive investments. Use a cautious approach to budgeting for formwork safety.
Recognize safety and liability consequences and aim to reduce risk with better planning. Learn from near misses by documenting incidents and fixes. Use post-project reviews to improve future DIY builds and update your checklists.
Cost implications and minimizing rework
A concrete blowout can be expensive. Here’s what you’re looking at:
Direct costs: Waste material, damaged forms, extra labor for cleanup and repair.
Indirect costs: Delays mean rentals aren’t returned on time, workers might sit idle, and you could face storage fees for leftover materials.
To minimize rework:
Plan ahead: Check forms before pouring. If damage is found, fix it immediately.
Monitor pour rate: Too fast can cause blowouts. Too slow risks setting before placement is complete.
Common DIY mistakes and how to avoid them
Blowouts often happen due to preventable errors. Here are some common ones:
- Undersized bracing: Inadequate support can’t handle wet pressure. Size bracing properly.
- Rushing pours: Concrete needs time to set. Rushing causes weak spots and blowouts. Plan your pour schedule carefully.
- Ignoring damaged forms: Cuts, cracks, or modified components weaken forms. Inspect and repair before pouring.
- Poor alignment: Forms out of plumb or level can’t hold concrete. Check alignment at every step.
Learn from these mistakes to prevent blowouts in future projects.
Conclusion
Stay disciplined about safety and quality. A solid brace pattern protects people, keeps walls true, and avoids costly fixes after the hard work is done.
Before you pour, lock in a plan: verify risk, confirm bracing per the patterns you laid out, set up every support and tie, check that the forms are square and clean, test the system with a light load, and have a clear plan to stop and rework if the concrete starts to push beyond what the braces can hold; follow that order and stay ready to halt the pour if anything looks off.
Avoid common traps: skipping pre-pour checks, underbracing for the wet pressure, using the wrong hardware or misaligned braces, and pouring with loose or damaged forms; always follow the documented patterns, use proper hardware, and apply the safety rule to stop and correct rather than proceed when anything feels off.
If the wall size or conditions exceed your setup, or you see signs of excessive movement during setup or early pour, call a professional and get a quick review; otherwise, stay clean, work methodically, and finish with a result that stands up to weather and time.
FAQ
What exactly causes a concrete form blowout and why should I care as a DIY homeowner?
A blowout happens when the form walls fail under wet concrete pressure. You’ll see bulges, cracks, or sudden movement in the form. It can ruin the pour and waste material, so understanding it protects your project and your time.
What are the most common causes of blowouts in DIY setups?
Poor bracing or misplaced supports, uneven form alignment, and weak or damaged forms lead to failure. Inadequate anticipation of wet pressure, or skipping checks, is another frequent culprit. Always inspect forms for tight joints and straight plumb lines before pour day.
Which bracing patterns tend to resist wet pressure best for DIY forms?
Bracing should run in multiple directions to hold the form square and flat. Use strong chords or diagonals that keep walls from bowing inward as the concrete pours. Check that braces are solidly anchored and not leaning or loose before you pour.
How important is alignment and proper placement of braces and supports?
Alignment keeps the form true and helps the concrete settle evenly. Misalignment allows gaps, which can become weak spots or blowouts. Verify that braces contact solid surfaces and stay in place during the pour.