
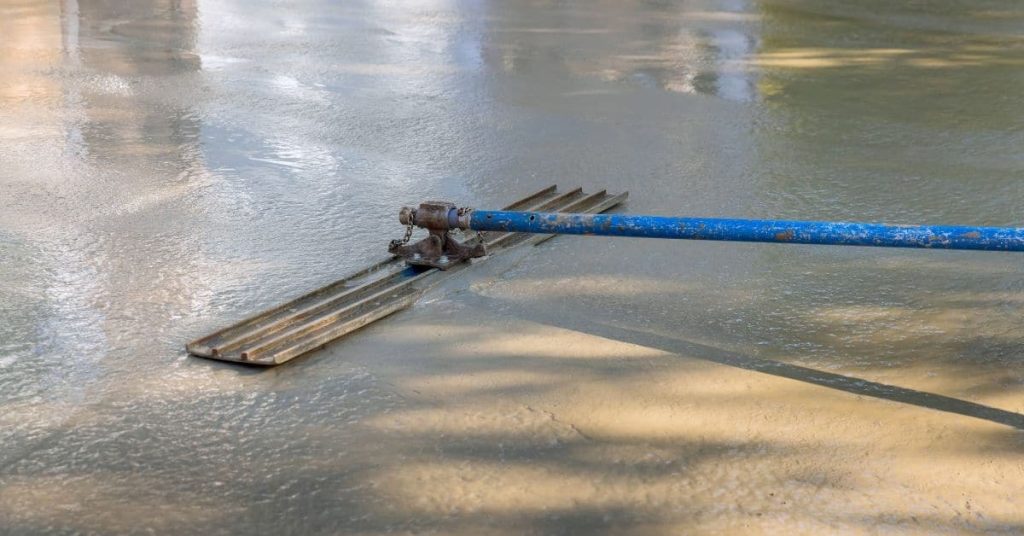
Introduction
Concrete finishing in direct sun means you need shade, moisture control, and smart timing to get a smooth, durable surface.
Shade helps slow rapid moisture loss, fogging or misting adds surface cooling, and timing keeps finishing steps aligned with the concrete’s surface condition. Plan ahead to avoid streaks, itching, or surface damage from heat and wind. Monitor the mix and the sun so you know when to proceed with troweling or edging.
Curing is the process that keeps concrete from drying out too fast.
Explore simple curing options like keeping the surface damp, covering with breathable material, or fogging as needed, and always follow product labels and local rules. Check when to start curing and how long to keep it going with the manufacturer instructions or local guidelines.
Key takeaways
- Shield finishing area from direct sun to control flash drying and texture.
- Differentiate drying and curing: curing requires moisture retention for strength development.
- Schedule finishing during cooler periods; verify temperature and shade availability before starting.
- Use shade solutions and fogging cautiously to avoid overspray onto forms.
- Follow curing methods that maintain moisture, such as appropriate coverings or methods.
- Inspect substrate, wind, and sun angle repeatedly to adjust timing and workflow.
- Wear eye and skin protection when fogging or misting near fresh concrete.
Table of Contents
- Introduction
- Key takeaways
- Quick Overview: Why Direct Sun Matters for Finishing
- Drying Versus Curing: Definitions and Practical Implications
- Timeframes and Temperature Guidance (What to Expect and Check)
- Environmental Factors: Sun Angle, Wind, Humidity, and Substrate
- Shade Solutions for Finishing in Direct Sun
- Fogging and Misting: Methods, Benefits, and Precautions
- Timing and Crew Workflow to Minimize Sun Exposure Issues
- Tools, Materials, Cost Implications, and Common Mistakes
- Conclusion
- FAQ
Quick Overview: Why Direct Sun Matters for Finishing
Direct sun speeds up evaporation from the surface, which dries out the near-surface layer quickly. That faster drying can increase plastic shrinkage and threaten the finish with hairline cracks or an uneven sheen. Recognizing these risks helps you choose shade, fogging, and timing to keep the surface workable.
Practical control starts with shade, then adds moisture management and thoughtful finishing times. Temporary canopies, fabric screens, or nearby structures can quickly block high sun. Fogging or misting schedules and starting the finishing steps at the right moment help maintain workability and prevent dusting or moisture traps beneath an early finish.
Key failure modes to watch for
Finishing concrete in direct sun can lead to several problems if not done right. Here are the key issues you should look out for:
Crazing: Fine cracks on the surface, often resembling a spider web.
Dusting: A powdery layer forms on the surface due to rapid drying and loss of moisture.
Weak surface crusts: The top layer dries too quickly, forming a weak crust that can flake off easily.
Goals of finishing and curing in hot conditions
The main goal when finishing concrete in hot weather is to retain as much moisture as possible within the slab. This helps to ensure proper hydration and strength development.
Moderating the surface temperature is also crucial. If the surface gets too hot, it can cause rapid evaporation and plastic shrinkage, leading to finish problems and early cracking.
The ideal scenario is to maintain a consistent temperature and moisture content throughout the slab until it reaches its design strength. This usually takes around 7 days, but it can vary depending on the concrete mix and environmental conditions.
Drying Versus Curing: Definitions and Practical Implications
Drying means the evaporation of surface and near-surface water. Curing is the chemical hydration process that develops strength and durability in the concrete. Keeping these ideas distinct helps you plan moisture management during sun exposure.
In bright sun, rapid drying can pull away bleed water and fuel plastic shrinkage, leading to surface crazing or dusting if not managed. Proper curing preserves moisture for hydration and reduces the risk of early surface issues, affecting when you finish, seal, or stamp the slab.
How premature drying affects surface integrity
Premature drying happens when water evaporates faster than the concrete can hydrate. This is especially common in direct sun.
Lost hydration: Concrete needs water to complete its chemical reaction, called hydration. If water evaporates too quickly, not enough hydration occurs, leading to weak spots.
Weak surface paste: The top layer of concrete dries out and hardens before the rest of the slab. This creates a weak surface that’s prone to cracking, scaling, or delamination when finished.
How to verify curing is proceeding properly
Proper curing ensures your concrete gains strength and durability. Here’s how to check:
Visual checks: Look for a consistent, uniform appearance across the slab. No major cracks or discoloration should be visible.
Tactile checks: Gently press on the surface with your thumb. As curing progresses, it should feel harder and less ‘plastic’.
Always consult mix datasheets or lab guidance for formal tests like maturity meters or compression tests.
Timeframes and Temperature Guidance (What to Expect and Check)
Initial set times can shift with heat and shade; higher temperatures tend to speed the onset of early set while cooler, shaded conditions slow it down. Full cure timelines still rely on the mix, thickness, and ambient conditions. Always cross-check with the specific mix instructions and local standards for exact limits.
You should monitor surface temperature and air temperature during sun exposure. Use a thermometer and note the time of day to plan when to start troweling or final finishing. Shade, fogging, and misting plans should align with the observed conditions to control evaporation.
Early period priorities (first hours to days)
The first few hours and days after pouring are critical for your concrete’s surface. This is when evaporation control is most important.
Start initial curing measures right away. Keep the concrete shaded from direct sun, especially during peak heat hours. Use a thermometer to monitor the surface temperature – keep it between 50°F (10°C) and 70°F (21°C).
Do not let the surface dry out or crack. If temperatures exceed 90°F (32°C), consider delaying finishing until cooler hours.
Longer-term curing considerations (first week+)
Even after the initial set, your concrete needs continuous moisture retention. This helps it gain strength over time.
Check your mix design and supplier data for recommended curing durations – typically 7 to 28 days. Keep the surface shaded and moist during this period. Use fogging or misting equipment if available.
Monitor the concrete’s moisture content regularly. If it dries out too quickly, consider extending the curing period or switching to moist curing methods like ponding or covering with plastic sheeting.
Environmental Factors: Sun Angle, Wind, Humidity, and Substrate
Sun angle and intensity, wind speed, humidity, and subgrade temperature each push evaporation higher. These factors increase plastic shrinkage risk and can lead to uneven drying if not addressed. Understanding them helps you pick when to shade or mist and how long to cure.
Before placement, assess sun path, forecast heat and wind, and measure substrate surface temperature. A simple plan for shade and moisture control can prevent sudden drying. Real-time checks guide decisions to proceed, delay, or add protection.
Visual and simple measurements to assess risk
Before you pour, walk your site. Check for these:
Wind exposure: Feel it. Strong winds dry out concrete faster.
Direct sun duration: Note how long the sun beats down on your slab each day. Longer means quicker drying.
Felt surface temperature: If you’ve got a thermometer, use it. Or ask around about typical temps for this time of year. Warm subgrades speed up evaporation.
How substrate and color affect finishing outcomes
Dark forms, warm subgrades, and colored finishes can make your job tougher:
Dark forms: They absorb more heat, making the surface hotter. This speeds up drying.
Warm subgrades: If your base is warm, it’ll heat up your slab faster, driving evaporation.
Colored finishes: Some colors can increase surface temps. Check with your supplier to see if this applies to yours.
Shade Solutions for Finishing in Direct Sun
Temporary canopies, fabric tarps, mobile umbrellas, and existing structures each have cases where they shine. Choose based on sun angle, duration, and site layout to keep surfaces workable. Position crews so shade remains consistent during critical finishing steps.
Shade affects surface temperature, evaporation rate, workability, and curing timing. It also influences how you approach trowel windows and jointing. Consider safety, wind, and accessibility when selecting shading methods for different job sites.
Fast-deploy shade techniques for pour day
For quick setup, consider pop-up canopies and shade cloth tied to frames. These are easy to deploy on pour day.
Key: Ensure the shade covers the entire working area. You don’t want any hot spots where concrete might overheat.
Also, make sure the shade doesn’t impede finishing work. Keep walkways clear and provide enough space for your crew to move around.
Permanent or semi-permanent shade considerations
For scheduled pours, plan around existing structures that can provide shade. This could be buildings, trees, or even equipment leftovers.
Tip: If you’re doing repeated projects in the same area, consider installing semi-permanent shading. This could be a simple frame with shade cloth or even a temporary structure like a tent.
Remember, permanent or semi-permanent shades need to be secure and stable. They should withstand wind and weather conditions without posing safety hazards.
Fogging and Misting: Methods, Benefits, and Precautions
Fogging or misting lowers surface temperature and slows evaporation, supporting curing without shocking the surface. It helps maintain moisture for hydration while reducing the risk of thermal stress. Use the right approach for your site and climate.
Equipment options range from handheld misting to inline fogging systems. Place nozzles where airflow won’t direct water onto forms or edges. Test on a small area first and watch for over-wetting and bleed water during curing.
Best practices for fogging without damaging the finish
Fogging is a powerful tool, but misuse can harm your concrete’s finish. Here are some best practices:
Frequency: Fog every 15-20 minutes during peak sun hours (usually mid-morning to late afternoon). Too much at once can cause surface washout.
Nozzle placement: Keep the nozzle about 18-36 inches from the surface. Hold it steady and move slowly for even coverage. Avoid direct high-pressure spraying on fresh paste as it can damage the finish.
Timing: Start fogging once the concrete has set (usually after 2-4 hours) and stop when the bleed water appears or near final set to prevent over-wetting.
Safety and electrical considerations
Safety is paramount when fogging. Here are some key points to keep in mind:
Slip hazards: Wet surfaces can be slippery. Ensure workers wear appropriate footwear and use caution when walking on wet concrete.
Electrical hazards: Water and electricity don’t mix. Always use a GFCI-protected power source for your fogging equipment. Keep tools and cords away from water and ensure they’re in good condition to prevent shorts or trips.
Worker protocols: Establish clear protocols for using electrical equipment around wet surfaces. Train all workers on these protocols and enforce them strictly.
Timing and Crew Workflow to Minimize Sun Exposure Issues
Plan pours and critical finishing steps for the cooler parts of the day when possible. A staged finishing sequence helps crews move efficiently without