

Table of Contents
- Table of Contents
- Introduction
- Understanding Concrete Finishing Techniques
- The Importance of Timing in Concrete Finishing
- When to Float: Key Indicators
- When to Trowel: Key Indicators
- Tools and Equipment for Floating and Troweling
- Common Mistakes and How to Avoid Them
- Expert Tips for Perfect Concrete Finishing
- Conclusion
- FAQ
Introduction
Understanding the nuances of concrete finishing can significantly impact the durability and appearance of your project. This article delves into the critical timing of when to float versus when to trowel, guided by the sheen of the concrete surface, to help you achieve optimal results.
Understanding Concrete Finishing Techniques
Concrete finishing is a crucial step in construction that ensures a smooth, durable surface for various applications. This section explores fundamental techniques such as floating and troweling, which are essential for achieving the desired texture and strength in concrete surfaces.
What is Troweling?
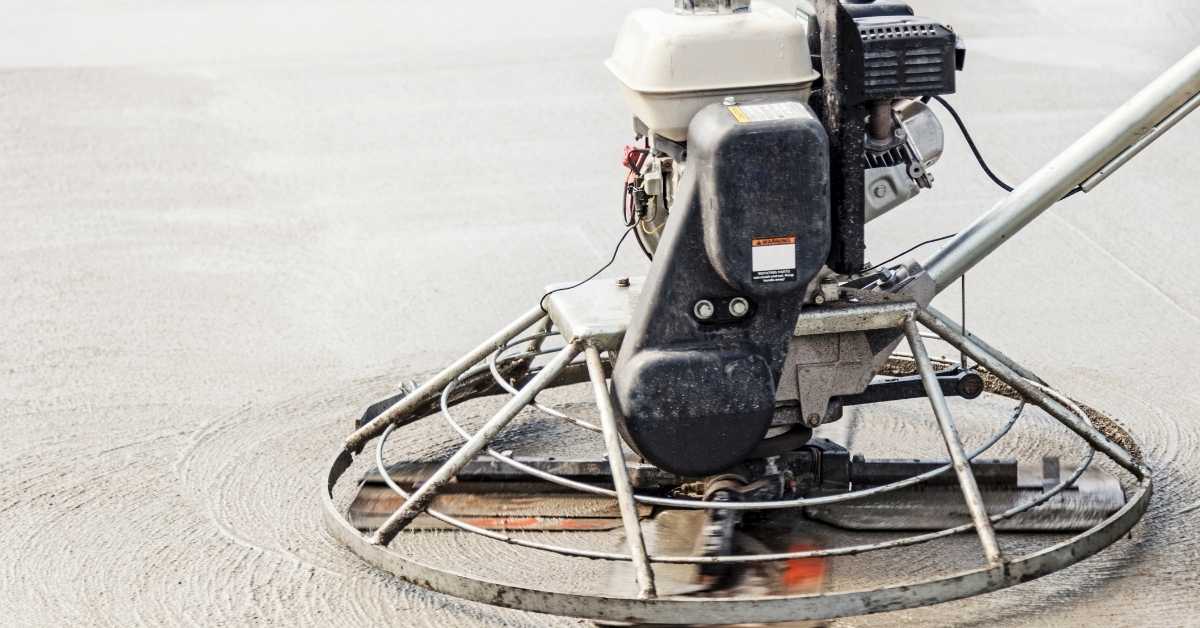
Troweling is a crucial step in the concrete finishing process that involves smoothing and compacting the surface to achieve a dense, polished finish. This technique is typically performed after the concrete has been floated and has set enough to support the weight of the trowel. Using a trowel, either manually or with a power trowel, workers glide over the surface to create a sleek, durable layer.
Unlike floating, which is done earlier in the process to level and consolidate the concrete, troweling is focused on enhancing the surface texture and strength. While floating helps to eliminate imperfections and bring paste to the surface, troweling provides the final touch, ensuring a hard, wear-resistant finish. Understanding when to transition from floating to troweling is essential for achieving optimal results.
For those aiming for a high-quality finish, it is important to monitor the concrete’s hardness throughout the process. Starting the troweling too early can damage the surface, while waiting too long might make it difficult to achieve the desired smoothness. By mastering the timing and technique of troweling, professionals can ensure a superior concrete finish that stands the test of time.
The Importance of Timing in Concrete Finishing
Understanding the importance of timing in concrete finishing is essential for achieving a durable and smooth surface. Deciding when to transition between floating and troweling can significantly impact the quality and longevity of the concrete work.
When to Float: Key Indicators
Understanding the right time to use a float during concrete finishing is crucial for achieving a smooth and durable surface. This section outlines the key indicators that signal when it’s appropriate to begin floating, ensuring optimal results for your concrete projects.
Surface Appearance
Understanding the initial surface appearance of a concrete slab is crucial in determining the right time to float. As the concrete begins to set, the surface will transition from a glossy sheen to a more matte finish. This change indicates that the bleed water has evaporated sufficiently, making it the ideal moment to start floating.
Another key indicator is the loss of surface sheen. When the surface no longer glistens in the sunlight and takes on a duller look, it’s a sign that the concrete has reached the right consistency for floating. This stage ensures that the concrete is firm enough to support the weight of the float without causing damage.
It’s also important to observe for any slight darkening of the surface. This subtle change can signal that the concrete is ready for the next step. By closely monitoring these visual cues, you can ensure a smooth and even finish, preventing issues like cracking or uneven surfaces later on.
Moisture Levels
Assessing moisture levels is crucial when determining the right time to float. The soil should be neither too wet nor too dry, as both conditions can lead to suboptimal results. To evaluate moisture, grab a handful of soil and squeeze it. If it forms a loose ball that crumbles easily, the moisture level is likely appropriate for floating.
Another method is to check base compaction. Walk across the area to be floated; if your footprints are shallow and the soil feels firm underfoot, the moisture level is likely suitable. Excessively wet soil will cause deep footprints, indicating that you should wait for drier conditions.
Regularly monitoring weather conditions can also help in planning the timing for floating. After a rainfall, allow the soil to dry out sufficiently before proceeding. This ensures that the soil structure is maintained, preventing issues like compaction or erosion during the floating process.
When to Trowel: Key Indicators
Understanding the right time to transition from floating to troweling is crucial for achieving a smooth, professional finish. This section highlights key indicators that signal when it’s time to make the switch for optimal results.
Achieving Desired Sheen
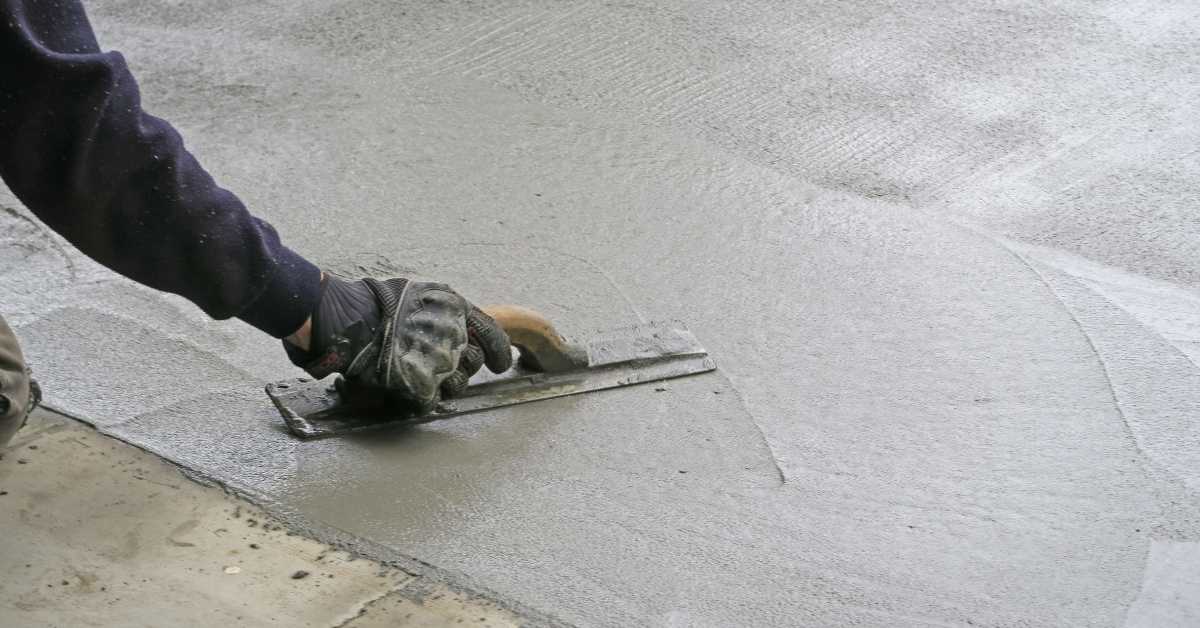
To achieve the desired sheen when troweling, timing is crucial. Begin by observing the concrete’s surface; it should be firm enough to support your weight without leaving deep imprints. This is when the concrete is ready for the first pass. The initial troweling helps to smooth out imperfections and lay the groundwork for a polished finish.
As the concrete continues to set, monitor its sheen. The goal is to achieve a balance between moisture and firmness. If the surface appears too wet, wait a little longer before troweling again. Conversely, if it is too dry, you may have missed the optimal window. The second and subsequent passes should be timed as the sheen begins to appear, allowing you to enhance the finish with each pass.
Remember, the key is to work with the concrete’s natural setting process. By carefully timing your troweling efforts, you can ensure a consistent and desired sheen across the entire surface. This attention to timing will result in a professional-looking finish that enhances the overall appearance of your project.
Surface Hardness
Determining the right time to begin troweling involves assessing the surface hardness of the concrete. This can be done by performing a simple thumb test. Gently press your thumb into the surface of the concrete; if it leaves only a slight impression, the concrete is ready for troweling. If the surface still feels too soft and leaves a deep mark, it’s best to wait a little longer.
Another method to test surface hardness is by using a screwdriver or similar tool. Lightly scratch the concrete surface. If the tool leaves a clear mark, the concrete is still too soft for troweling. However, if the surface resists scratching and feels firm, it’s an indicator that the concrete has reached the ideal hardness for troweling.
It’s crucial to monitor the concrete regularly, as environmental conditions such as temperature and humidity can affect the curing process. By paying attention to these factors and testing the surface hardness, you can ensure that you begin troweling at the optimal time, leading to a smooth and durable finish.
Tools and Equipment for Floating and Troweling
Discover the essential tools and equipment that are crucial for achieving a smooth and professional finish in floating and troweling processes. From floats to power trowels, understanding the right tools can significantly enhance the quality and efficiency of your work.
Hand Tools
Hand tools are essential for achieving a smooth and level finish when floating and troweling concrete surfaces. These tools allow for precision and control, ensuring that the final result is both aesthetically pleasing and structurally sound.
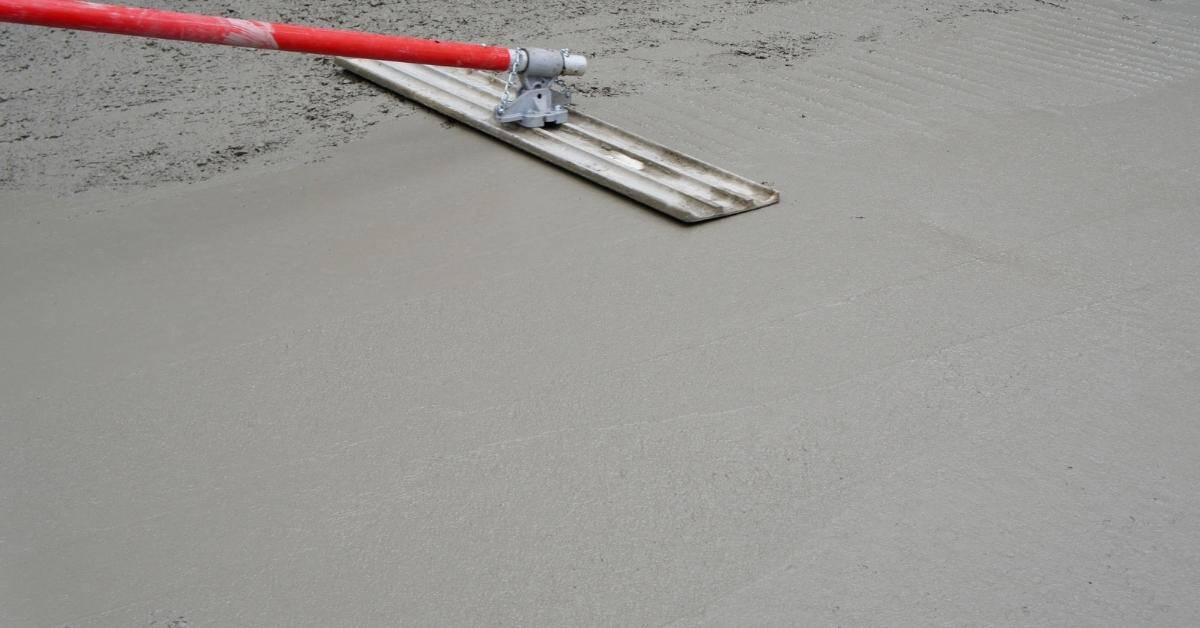
- Float Used to level and smooth the surface of wet concrete, removing imperfections and preparing it for troweling. Opt for a magnesium float for a lightweight and durable option.
- Trowel Essential for finishing concrete, it provides a smooth and polished surface. A steel trowel is ideal for achieving a professional finish.
- Edger Helps create clean edges along the perimeter of the concrete slab, preventing chipping and improving durability. Use a rounded edger for a more refined look.
- Groover Creates control joints in concrete to prevent cracking. Ensure to press firmly to achieve a consistent depth.
- Concrete Rake Used to spread and level concrete before floating. A rake with a long handle can help reach distant areas without stepping on the wet surface.
- Brush Adds texture to the surface for slip resistance. Use a soft-bristled brush for a subtle finish.
By using the right hand tools, you can ensure that your concrete project is completed with precision and quality. Each tool plays a specific role in the process, contributing to a durable and visually appealing finish.
Power Tools
Power tools are essential for achieving a smooth and professional finish in concrete work. They save time and effort, ensuring consistency and quality in the finishing process. These tools are indispensable for both large-scale projects and smaller DIY tasks.
- Power Trowel – Used for smoothing and finishing large concrete surfaces quickly. For DIY enthusiasts, start with a walk-behind model for better control.
- Concrete Vibrator – Helps remove air bubbles and ensures the concrete is compact, which increases its strength. A handheld model is ideal for smaller projects.
- Concrete Saw – Essential for cutting control joints to prevent cracking. Opt for a lightweight saw for easier handling during DIY projects.
- Angle Grinder – Useful for grinding down high spots and smoothing edges. Choose a model with adjustable speed settings for more versatility.
- Power Screed – Assists in leveling the concrete surface efficiently. For DIY use, consider a lightweight, battery-operated version for ease of use.
Incorporating the right power tools into your concrete finishing process can significantly enhance the quality and efficiency of your work. Whether you’re a professional or a DIY enthusiast, these tools provide the precision and power needed to achieve excellent results.
Common Mistakes and How to Avoid Them
Understanding common mistakes in timing and technique is crucial for improving your skills and achieving better results. In this section, we will explore these frequent errors and offer practical tips to help you avoid them.
Over-Troweling
Over-troweling is a common mistake that can lead to significant issues in your concrete projects. When the surface is troweled too much, it can cause the concrete to become too smooth, which may result in a weak surface prone to cracking and scaling. It’s essential to recognize the signs of over-troweling early to prevent these problems.
One of the primary risks of over-troweling is that it can trap water beneath the surface, leading to a phenomenon known as surface delamination. This occurs when the top layer of concrete separates from the underlying layers, creating an uneven and unsightly finish. To avoid this, ensure that you check base compaction and wait for the bleed water to evaporate before starting the troweling process.
To prevent over-troweling, it’s crucial to pay attention to the timing of your work. Begin troweling only when the concrete can support the weight of a finisher without leaving deep marks. Additionally, using the right tools and techniques will help maintain the integrity of the surface. By following these guidelines, you can achieve a durable and visually appealing concrete finish.
Premature Floating
Premature floating can lead to a range of issues that affect the quality and durability of your project. When you float too early, the concrete surface may appear smooth initially, but it can result in a weak top layer that is prone to cracking and dusting. This happens because the concrete has not yet reached the proper level of firmness, and working it too soon can disrupt the settling process.
To avoid this mistake, it’s crucial to check base compaction and moisture levels before starting the floating process. Ensure that the concrete has lost its sheen and can support the weight of a finishing tool without leaving deep impressions. By waiting until the concrete is ready, you can achieve a strong, durable finish that will stand the test of time.
Expert Tips for Perfect Concrete Finishing
Achieving a flawless concrete finish requires precision and skill, especially when it comes to the timing of floating and troweling. In this section, discover expert tips and best practices that will help you master these crucial steps for a perfect concrete surface.
Monitoring Environmental Conditions
When it comes to concrete finishing, keeping an eye on the environmental conditions is crucial. Temperature, humidity, and wind can all affect the drying and curing process. It’s important to regularly monitor these factors to ensure a quality finish. For instance, if the temperature is too high, it can cause the concrete to dry too quickly, leading to cracks. Conversely, if it’s too cold, the curing process can slow down significantly.
Humidity levels also play a significant role in concrete finishing. High humidity can delay the drying process, while low humidity might speed it up too much. To achieve the best results, aim to work when the humidity is moderate. Additionally, adjust your techniques based on the current conditions. For example, using windbreaks can help minimize the impact of strong winds, which can cause uneven drying.
Finally, always have a plan to adapt your strategy as conditions change throughout the day. This might involve altering the mix design or adjusting the timing of your finishing operations. By staying vigilant and responsive to environmental changes, you can ensure a smooth, durable finish on your concrete projects.
Practice and Patience
Achieving the perfect concrete finish is as much an art as it is a science. The key to mastering this craft lies in consistent practice and patience. Each project presents unique challenges, and the more you work with concrete, the better you’ll understand how it behaves under different conditions.
It’s important to remember that concrete finishing is not a race. Taking your time to ensure each step is done correctly will lead to a more professional result. Rushing through the process can lead to mistakes that are difficult to fix later on. By exercising patience, you allow yourself the opportunity to learn from each project and improve your skills over time.
As you gain experience, you’ll develop a keen eye for detail and a deeper understanding of the materials you’re working with. This knowledge will empower you to make informed decisions, such as when to start troweling or how to adjust your technique based on weather conditions. With dedication to practice and patience, you’ll be well on your way to achieving that perfect concrete finish every time.
Conclusion
Mastering the art of concrete finishing requires a keen understanding of when to float and when to trowel, as well as the ability to read the sheen and texture of the concrete surface. By paying close attention to the indicators discussed, such as the appearance of the sheen and the firmness of the concrete, you can ensure that each step is executed at the optimal time.
This not only enhances the durability and aesthetic appeal of the finished surface but also prevents common pitfalls that can compromise the integrity of your work. Utilizing the right tools and techniques, as well as learning from expert tips, can significantly improve your results and elevate your concrete finishing skills.
Ultimately, the key to perfect concrete finishing lies in timing and precision. By avoiding common mistakes and following the guidelines outlined in this article, you can achieve a flawless finish that stands the test of time.
Whether you are a seasoned professional or a DIY enthusiast, understanding the nuances of floating and troweling will empower you to tackle any concrete project with confidence and expertise. Remember, the sheen of the concrete is your guide, and with practice, you will develop the intuition needed to make the right decisions at every stage of the finishing process.
FAQ
What is the purpose of floating concrete?
Floating concrete helps to level and smooth the surface after it has been poured. It also compacts the concrete, pushing down aggregate and bringing the cream to the surface, which is essential for a smooth finish.
When should I start troweling the concrete?
Troweling should begin once the concrete has set enough to support a person’s weight without leaving deep impressions. The surface should have a sheen, indicating that the concrete is starting to set but is still workable.
How can I tell if the concrete is ready to float?
The concrete is ready to float when the bleed water has evaporated and the surface has lost its initial sheen. At this point, the concrete should be firm enough to support the weight of a float without sinking.
What tools are commonly used for floating and troweling?
For floating, a bull float or hand float is typically used to smooth the surface. Troweling is usually done with a hand trowel or a power trowel for larger areas, which helps achieve a polished finish.
Can I skip the floating step and go straight to troweling?
Skipping the floating step is not recommended as it helps to level the surface and prepare it for troweling. Floating ensures that the concrete is compacted and that any imperfections are addressed before the final finish is applied.