
Introduction
Concrete curing blankets are coverings that hold heat and moisture near the slab so the concrete gains strength and resists surface cracking. They come in different thicknesses and materials, so check the product label or manufacturer instructions to match blanket thickness to your climate and pour size. For DIYers, think of them as a controlled blanket that keeps the slab damp and warm during the first critical days.
Start curing as soon as surface bleeding stops and the slab can take light protection without damage, and follow the blanket maker’s timing guidance rather than guessing. Keep the surface moist under the blanket for the manufacturer-recommended period and inspect daily for displacement, ponding, or scouring from wind; if you’re unsure about watering frequency or timing, consult product instructions or local practice.
Key takeaways
- Curing means controlling moisture and temperature to develop concrete strength properly.
- Start curing after the bleed-water stops and the surface can accept blankets.
- Use blankets to maintain consistent moisture and protect from rapid temperature swings.
- Check blanket thickness and type per product label and local rules before use.
- Schedule curing so minimum time aligns with project thickness and weather conditions.
- Avoid surface damage by never removing blankets too early or in drying wind.
- Follow safety guidelines when handling damp blankets to prevent slips and mold.
Table of Contents
- Introduction
- Key takeaways
- What Curing Concrete Means and Why It Matters
- How Curing Blankets Work: Materials and Blanket Types
- Choosing the Right Blanket Thickness and Type for Your Job
- Timing: When to Start Curing and How Long to Keep Blankets on
- Best Practices to Avoid Surface Damage (Scaling, Spalling, Plastic Shrinkage)
- Moisture and Temperature Control Techniques with Blankets
- Safety, Handling, and Installation Tips for Curing Blankets
- Cost, Planning, and When to Choose Blankets Versus Alternatives
- Conclusion
- FAQ
What Curing Concrete Means and Why It Matters
Curing is the combined chemical hydration and physical control of moisture and temperature that lets concrete develop strength, density, and its microstructure. Proper curing keeps cement hydration going and helps the paste consolidate into a durable matrix rather than drying out at the surface.
When curing is done correctly you get better early strength gain, lower permeability, improved abrasion resistance, and greater freeze-thaw durability—factors that directly reduce dusting, scaling, and surface cracking. Check mix notes, product data sheets, and local guidance to confirm timelines and use blankets to maintain consistent moisture and temperature during the critical early period.
How strength and hydration progress during curing
Curing is like concrete’s growth period. It starts with hydration, where water reacts with cement to form crystals that bind the mix together.
Moisture retention speeds up this process, helping concrete gain strength faster. Warmer temperatures also accelerate hydration, but too much heat can cause rapid drying and weaken the concrete.
Mix design plays a role too. Richer mixes (more cement) hydrate quicker, while leaner ones take longer. Ambient conditions like humidity and air temperature affect curing time as well.
Proper curing ensures consistent hydration throughout the concrete’s depth, developing strength evenly and preventing weak spots.
Consequences of inadequate curing
Skipping or rushing curing can leave your concrete weak and vulnerable. Here’s what happens:
Reduced strength: Inadequate curing slows down hydration, leading to lower ultimate strength and increased risk of damage from heavy loads.
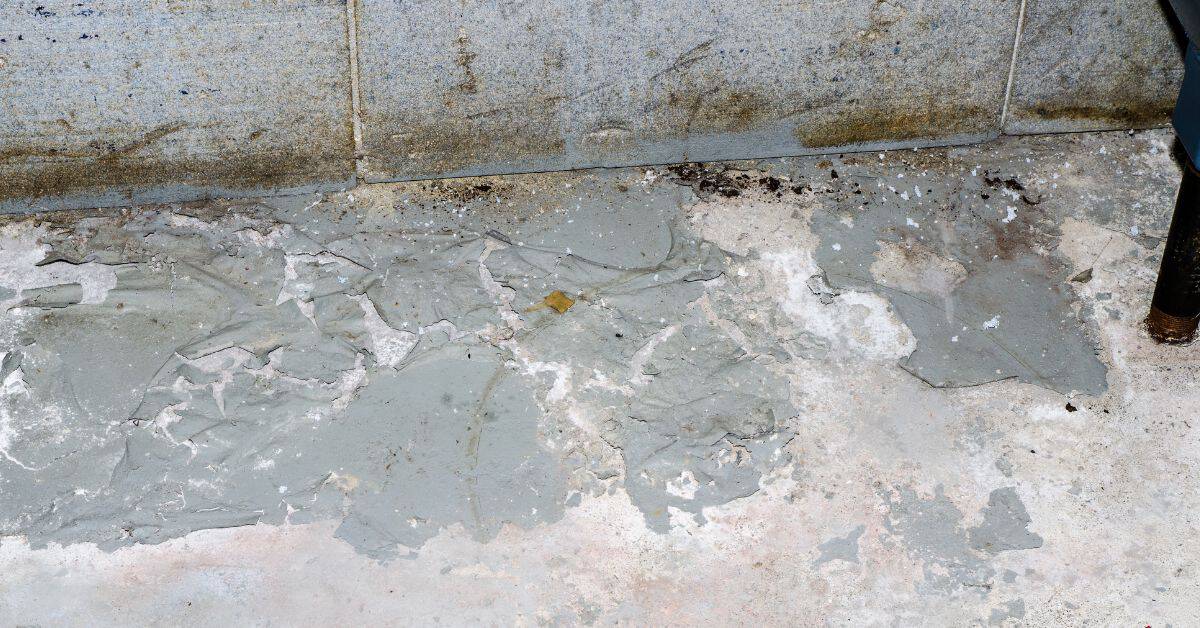
Scaling and spalling: Rapid moisture loss causes the surface layer to dry out quickly, leading to scaling (flaking off) and spalling (chipping). This exposes fresh concrete to more damage and reduces service life.
Increased cracking: Premature drying creates thermal stress as temperatures change. This can cause cracks to form, especially in thick slabs or during extreme weather conditions.
Shorter service life: All these issues add up, making the concrete’s lifespan shorter than it should be. Proper curing is an investment that pays off over time.
How Curing Blankets Work: Materials and Blanket Types
Curing blankets perform three main jobs: retain heat, conserve moisture, and shield the slab from wind and rain so evaporation and thermal swings are reduced. Different materials emphasize one or more of those functions—insulating blankets trap heat, vapor-retarding blankets limit moisture loss, and electrically heated blankets add active warmth.
Material choice affects use: heavier insulation holds temperature longer, low-perm layers block evaporation, and electric units need safe power, grounding, and monitoring. Always read the manufacturer instructions or product data sheet for installation, temperature ranges, and layering options before selecting a blanket type for cold, hot, or high-evaporation conditions.
Insulating and Insulated-Vapor-Barrier Blankets
Curing blankets come in various materials, but they all aim to retain heat and moisture. The most common types are insulating blankets and those with an integrated vapor barrier.
Insulating blankets, usually made of fiberglass or foam, trap air to insulate the concrete. They’re great for cold weather as they keep the slab warm while curing.
Insulated-vapor-barrier blankets combine insulation with a waterproof layer. This combo helps reduce evaporation and keeps the concrete moist during hot, dry conditions or when using high-evaporation mixes.
Heated (Electric) Blankets and Hybrid Systems
For extreme cold weather curing, heated blankets provide active heat. They’re typically electric, with built-in heating elements or cables.
These blankets are usually combined with insulating blankets to create a hybrid system. The heated blanket maintains the concrete’s temperature while the insulator retains that heat, reducing energy consumption and providing better control over the curing process.
Always ensure proper grounding for safety when using electric blankets. Follow manufacturer guidelines for safe handling around wet concrete.
Choosing the Right Blanket Thickness and Type for Your Job
Selecting blanket thickness starts with the job conditions: ambient temperature swings, slab thickness, exposure (indoors/outdoors, wind, sun), and how long the slab must cure before traffic. Heavier-duty blankets can compensate for colder soils or extended cure periods, but verify performance specs and lift/weight limits on the product label or data sheet.
Match blanket class to the slab: light-duty for small residential pours, robust insulation for industrial or long cures, and plan staging or layering where needed to manage heat loss. When in doubt choose the more protective option, document the rationale in your plan, and confirm the supplier or engineer approves the selection for site-specific conditions.
Matching blanket selection to slab thickness and exposure
Slab thickness and expected stress play a big role in choosing the right curing blanket. Thicker slabs need more thermal protection, so opt for heavier-duty blankets.
Exposure matters too. Outdoor slabs or those exposed to sun take on heat during the day but cool at night. They need blankets that can handle wider temperature swings. Indoors or shaded areas have less exposure; lighter blankets might do.
Freeze-thaw cycles and traffic also stress slabs. Heavier blankets offer better durability for these conditions.
Durability, wear-resistance, and lifecycle considerations
Curing blankets take a beating on site. They need to be tough. Abrasion resistance keeps them from wearing out too fast. Check the manufacturer’s specs for this.
Puncture resistance is crucial too, especially with heavy equipment around. A blanket that tears easily isn’t worth your time or money.
Reusability saves you cash. If you’ve got multiple pours planned, consider blankets that can be used again and again. Check warranties too; they’re a good indicator of durability.
Timing: When to Start Curing and How Long to Keep Blankets on
Begin curing as soon as the surface can tolerate contact without marring—usually immediately after finishing and after bleed water has dissipated enough to avoid smearing. Use touch tests and observe finishing cues, but always cross-check the mix design and any local or ACI recommendations for the project.
The critical early strength period is the time when moisture and temperature control matter most; exact durations vary by cement type, admixtures, and climate so verify recommended cure times with the supplier or standards. Monitor surface moisture and temperature with simple tools and log start/stop times; extend coverage if conditions or readings indicate slower strength gain or excessive evaporation.
Immediate start: surface set vs. bleeding phase
Start curing as soon as the concrete’s surface can handle it without damage. This is typically right after finishing, when bleed water has mostly disappeared from the surface.
Premature placement of blankets can trap moisture and cause issues like crazing or dusting. Wait until:
- The surface no longer feels ‘spongey’ underfoot.
- Bleed water has stopped rising to the top.
- The finish is complete, with no visible ridges or marks.
Recommended duration and extended curing for cold or slow mixes
Curing should last at least 7 days, but this can vary. Check your mix design and ACI standards for specifics.
For cold weather, high-strength mixes, or when full design strength is needed, extend curing:
- Up to 14 days in cold temperatures (below 50°F/10°C).
- Longer for high-strength mixes or when full design strength is required.
Always refer to ACI standards and your blanket supplier’s recommendations for exact durations.
Best Practices to Avoid Surface Damage (Scaling, Spalling, Plastic Shrinkage)
Place blankets at the right moment—after bleed water has left the surface but before rapid evaporation begins—to lock in moisture without trapping excessive heat. Avoid overworking or reworking the surface after initial bleed to prevent weakening the paste layer that leads to scaling and dusting.
Secure overlaps and seams, control edges to stop wind-driven drying, and avoid gaps where plastic shrinkage cracks can start; verify sealing methods and overlap recommendations on the product instructions. Watch environmental factors like wind and low humidity, use additives or membranes as appropriate, and address early signs of spalling or shrinkage with preventive adjustments rather than relying on repairs later.
Controlling evaporation and wind-driven drying
Rapid moisture loss is your concrete’s enemy. Here’s how to keep it at bay:
Tuck seams tightly when applying blankets. This stops gaps from forming, which can let moisture escape.
Use edge seals around the perimeter of your slab. This prevents evaporation from the edges, where concrete is most vulnerable.
On windy days or in hot conditions, consider setting up temporary windbreaks. They can be as simple as sheets of plywood propped against sawhorses. Monitor your site regularly to catch any drying before it causes damage.
Protecting against scaling, spalling, and freeze-thaw damage
Maintaining proper moisture and temperature levels is key to preventing surface deterioration:
Follow your mix design. It should include air-entrainment for better resistance to freezing and thawing.
Apply blankets as soon as possible after the initial set. This keeps moisture in, preventing scaling and spalling.
In cold regions, keep blankets on longer than usual. This helps protect against freeze-thaw damage. Monitor temperatures closely and adjust your curing plan as needed.
Moisture and Temperature Control Techniques with Blankets
The goal of moisture and temperature control is to keep concrete hydration progressing evenly; blankets provide thermal retention and moisture conservation as part of that toolkit. Compare blankets with wet curing and curing membranes to decide which method fits the job—blankets are often preferred for cold nights, high evaporation risk, or when thermal control is needed without constant wetting.
Measure both concrete temperature and surface moisture regularly and watch for dew point or condensation issues that can indicate excessive moisture buildup. Choose blanket permeability and thickness to match conditions, ensure full coverage and sealed overlaps, and follow the manufacturer instructions for re-covering, re-wetting, or when to safely remove blankets.
Combining water-based methods with blankets
You’ve learned about using blankets alone and water-based methods separately. Now let’s talk about combining them for better results.
Why combine? Blankets control heat loss, while water-based methods manage moisture. Together, they can prevent excessive drying or freezing, keeping your concrete strong and durable.
Here are two common hybrid approaches:
- Damp burlap under blankets: Lay down damp burlap on the newly poured slab, then cover with blankets. The burlap provides a barrier for moisture release while the blankets retain heat.
- Fogging then sealing: First, apply a light mist of water (fog) to the surface using a fogger. Then, immediately cover with blankets. This method helps maintain a consistent temperature and prevents rapid drying.
Remember, every job’s different. Always check base compaction, follow manufacturer instructions, and consider local weather conditions before deciding which method to use or combine.
Monitoring: visual checkpoints and instruments to use
Use this checklist daily during curing to ensure uniform temperature and retained moisture. Catch issues early to avoid costly rework.
- Check blanket coverage: Ensure blankets cover the entire slab, edges included. Missing spots can lead to uneven curing and cracking.
- Inspect seams: Check for gaps or overlaps at blanket seams. Tighten as needed to prevent heat loss and moisture escape.
- Monitor temperature with thermocouples: Place sensors at slab’s top, middle, and bottom. Aim for a consistent 70-85°F (21-29°C) across the slab. Check manufacturer instructions for specific requirements.
- Use IR thermometer for quick spot checks: Confirm uniform temperature distribution. Hot or cold spots may indicate air pockets, poor insulation, or heat loss.
- Measure moisture with a meter: Insert probes at various depths and locations to ensure consistent moisture content (typically 4-6% by weight). Check product labels for specific targets.
- Check for condensation: Look for water droplets under the blanket. Excessive condensation may indicate too high a temperature or insufficient ventilation.
- Inspect edges and joints: Ensure blankets are securely attached at slab edges and joints to prevent heat loss and moisture escape.
- Verify humidity levels: Use a hygrometer to check relative humidity under the blanket (aim for 85-95%). High humidity helps retain moisture in the slab.
Quick rule: If it’s too hot, too cold, or too dry under the blanket, your concrete may not cure properly. Regular monitoring helps keep conditions just right.
Safety, Handling, and Installation Tips for Curing Blankets
Handle blankets with good team lifts, proper PPE, and staged placement to avoid back injury and material damage—use dollies or mechanical aids for heavy rolls and wear gloves to protect hands. Move blankets onto the slab from the edge inward and avoid dragging across rough concrete to prevent tears and contamination of the surface.
Secure edges against wind with ballast or anchors and plan for safe electrical connections when using heated blankets—follow manufacturer wiring instructions, use GFCI protection, and keep cords off the walking surface. After installation do a quick safety and coverage check, document any issues, and keep a plan for emergency shutdown or removal in case of weather or safety concerns.
Securing blankets and managing wind/uplift
Properly securing concrete curing blankets is crucial to prevent uplift, maintain contact with the slab, and avoid damage. Here’s how:
Edge treatment: Use ballast, stakes, or temporary anchors along the edges. Avoid damaging joints by using soft materials like foam or rubber for edge protection.
Fastening methods: For larger blankets, use blanket clips or ties to secure them to each other and prevent wind from lifting them. Ensure they’re tight but not so much that they damage the slab.
Electrical safety and inspection for heated systems
Before using electrical blankets, perform a safety check to prevent overheating, fire, or electrical hazards. Use this checklist:
- Test cords and controllers: Ensure all connections are tight and no wires are frayed. Check that the controller is functioning correctly.
- Ground-fault protection (GFCI): Use a GFCI outlet or circuit to protect against electrical shocks if moisture is present.
- Dry connections: Keep electrical components away from moisture and ensure all connections are dry before plugging in.
- Follow manufacturer’s electrical rating: Do not exceed the blanket’s rated power. Use a circuit that can handle the load.
- Local code requirements: Ensure your setup complies with local electrical codes and regulations.
- Regular monitoring: Check blankets regularly to ensure they’re not overheating or showing signs of wear.
- Shut-off procedure: Establish a clear shut-off procedure in case of emergencies or when leaving the site unattended.
Quick rule: Always prioritize safety. If you’re unsure about any aspect, consult an electrician or the manufacturer’s instructions.
Cost, Planning, and When to Choose Blankets Versus Alternatives
Weigh the upfront cost of blankets, labor, and any energy for heated units against long-term savings from reduced repairs, faster turnover, and more consistent strength. Compare that total cost of ownership to alternatives like curing compounds, water curing, or membranes and factor in site logistics, weather risk, and labor availability when deciding.
Integrate blankets into the schedule: include lead time for procurement, staging on site, and coordination with pours and formwork, and record chosen methods in the project plan. If you need specific price or performance numbers, check supplier quotes and product data sheets and include contingency for weather delays and extra labor when budgeting.
Cost-benefit factors and lifecycle considerations
Curing blankets aren’t just about upfront cost. They save you in the long run too.
Reusability: Blankets can be reused on multiple pours, reducing waste and saving money over time.
Repair avoidance: Consistent strength and reduced cracking mean fewer repairs down the line, saving labor and material costs.
Consider project timeline. Blankets speed up curing, allowing for faster turnover. This can be crucial in tight schedules or when you’re paying rent on a space while it’s under construction.
Alternatives and hybrid strategies: when not to use blankets
Blankets aren’t always the best choice. Here are some situations where alternatives might be better.
Large horizontal areas: For big slabs or flat surfaces, water curing or membranes can be more cost-effective. They’re easier to apply and maintain on large, continuous surfaces.
Environmental constraints: In areas with strict environmental regulations, water-based methods might be preferable due to reduced energy consumption and waste.
Hybrid strategies combine methods for best results. For example, you can use blankets overnight to protect against cold or wind, then switch to water curing during the day when temperatures are warmer.
Conclusion
Curing concrete with blankets is not glamorous, but it protects strength, appearance, and durability. Do it right and you avoid costly repairs and disappointing surfaces.
Check the plan in one clear pass: confirm you have the right blanket for the job, verify the surface is prepared and clean, start curing after the concrete has set sufficiently, keep the blankets in place long enough to maintain appropriate moisture and temperature, and monitor the area for gaps or loose wraps that could let heat or moisture escape. Do each step in order and document any deviations so you can adjust on the next pour.
Common mistakes bite hard here: using the wrong thickness or type for the mix, removing blankets too early or leaving gaps that dry out edges, and failing to maintain a consistent moisture supply or temperature. Safety rules to follow are simple: secure blankets so they don’t shift, inspect regularly for tears or water pooling, handle materials with care to avoid trips and slips, and never work around curing concrete if you’re unsure about the settings or weather.
If the project is large, complex, or you’re seeing signs of trouble like fast surface drying or cracking, it makes sense to call a professional. A quick consult can save layers of rework and protect your investment. Stay deliberate, stay safe, and you’ll finish with a solid, durable surface you can be proud of.
FAQ
What is concrete curing and why does it matter?
Curing is the process that lets concrete gain strength by keeping it moist and at a proper temperature as it hydrates. Proper curing helps prevent cracks, surface dusting, and weak spots. Skipping or rushing curing can lead to poor performance and surface issues.
When should curing start and how long should it stay on the job?
Start curing as soon as the concrete is set enough to handle without damage, then keep it protected for the duration recommended by the product label or manufacturer. Don’t cut curing short; follow local rules and directions for your mix and climate. If in doubt, err on longer protection and recheck the surface condition daily.
How often should you water or mist during curing?
Keep the surface consistently moist according to the curing method you choose and the product instructions. Water as directed, but don’t flood or wash away the surface. In hot or windy weather, you may need more frequent moistening within safe guidelines.
What are expansion joints and contraction joints, and why do they matter for curing?
Contraction joints create planned cracks to control where cracking happens. Expansion joints allow movement between slabs and structures. Proper joints reduce random cracking and help curing performance by giving the concrete space to move as it cures.