
Introduction
A sealer spot repair on a concrete countertop is fixing a damaged area without recoating the whole surface. It starts with identifying the kind of damage—stains, dull or rough spots—and cleaning the area thoroughly before any repair. Then you’ll choose a compatible sealant and follow the product directions for spot treatment, avoiding the rest of the countertop.
For the repair, pick a sealer that can be used over existing finish and is labeled for spot or countertop use, and read the label for cure time and prep. Apply in thin, even coats as directed, and wipe away any excess before it skins over; compare results to the surrounding finish and repeat only if needed. If in doubt, check manufacturer instructions and local rules, or test on a small inconspicuous area first.
Key takeaways
- Assess whether spot repairs will match the surrounding finish and avoid mismatch.
- Clean and degrease the patch area before sealing to ensure adhesion.
- Choose compatible sealers for repairs, referencing manufacturer guidance and local codes.
- Apply thin targeted coats, feathering edges to blend with the surrounding countertop.
- Allow proper drying and curing as per label, then inspect for uneven spots.
- Safety reminder: wear gloves, ventilate area, and avoid ingesting or inhaling fumes.
Table of Contents
- Introduction
- Key takeaways
- When to Choose a Spot Repair Vs. Full Recoating
- Tools and Materials Checklist
- Preparing the Surface for a Spot Repair
- Step-by-Step: Applying a Targeted Sealer Patch
- Drying, Curing, and Evaluating Repair Effectiveness
- Common Mistakes, Troubleshooting, and Fixes
- Durability and Lifecycle: Patched Areas Vs. Full Recoats
- Safety, Vocs, and Ensuring Food-Safety After Repair
- Conclusion
- FAQ
When to Choose a Spot Repair Vs. Full Recoating
Start by assessing how extensive the damage is and how it looks under typical lighting. Check if the existing sealer adheres well and whether the surface shows wear or color mismatch around the area. Consider the risk of blotching or edge issues if you patch instead of recoating.
Weigh the potential performance impact if the area remains uncoated, such as water intrusion or staining. Use a simple decision flow: if the damage is localized, the sealant is compatible, and there is no delamination, spot repair may be viable. For high traffic or porous primers, a full recoating might be the safer path.
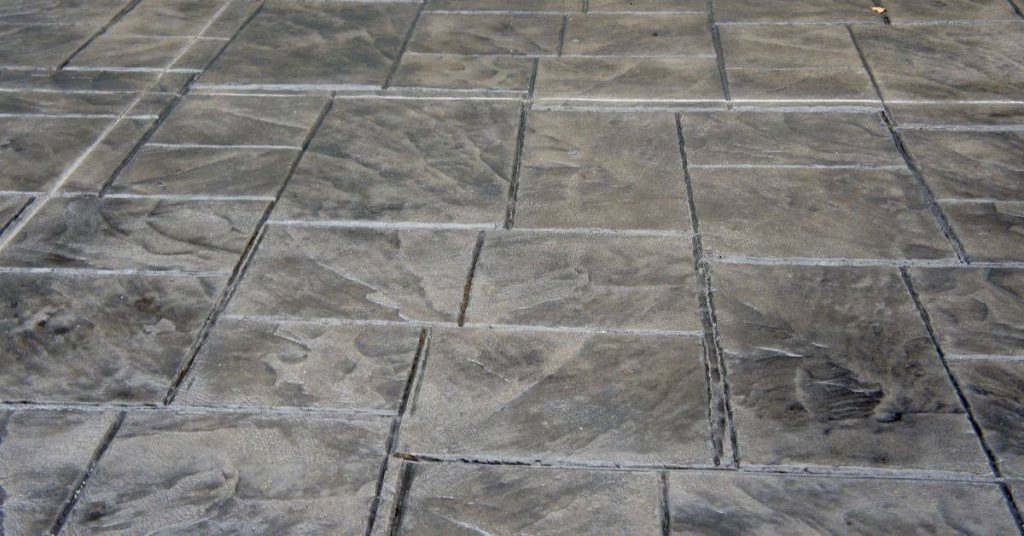
Signs and damage types suitable for spot repairs
Spot repairs are ideal when the damage is localized and isolated. Here’s what to look for:
Localized Delamination: Small areas where the sealer has lifted or separated from the concrete surface.
Scratches: Superficial marks that haven’t affected the underlying sealant or concrete.
Isolated Wear: Light wear in one area, not affecting the entire countertop’s performance.
When full recoating is necessary
Full recoating or refinishing is required when the damage is extensive and affects the overall performance of your concrete countertops. Here are signs to look out for:
Widespread Adhesion Failure: Large areas where the sealer has lifted, delaminated, or lost adhesion.
Extensive Discoloration: Widespread stains, blotches, or color changes that can’t be matched with a spot repair.
Substrate Damage: Cracks, chips, or other damage to the concrete itself, not just the sealer.
Tools and Materials Checklist
Outline why a focused toolkit is needed for a spot repair and how it helps avoid a full countertop makeover. Confirm compatibility with the existing sealer and surface to prevent future issues. Keep this list handy to stay on plan and avoid last minute trips to the store.
Essential tools include hand tools and applicators, plus optional aids for stubborn residues. PPE should cover safety glasses, chemical-resistant gloves, a respirator or good dust mask, and a well-ventilated area. Stock cleaners, degreasers, solvents, masking supplies, patching compounds, colorants, compatible sealers, sandpaper, and rags so you can prep, patch, and seal without cross contamination.
Recommended sealers and compatibility notes (including food-safety)
Before you start, ensure the sealer you choose is compatible with your existing countertop finish to avoid future issues.
- Check sealer type: Penetrating, topical, or film-forming? Each has different maintenance needs.
- Match sheen level: Ensure the new sealer’s gloss or matte finish matches your existing one for a seamless look.
- Verify manufacturer data: Check if the sealer is food-safe and has low VOC emissions once cured.
- Avoid oil-based sealers: These can yellow over time, especially in direct sunlight.
- Consider durability: Choose a sealer that can withstand your kitchen’s specific demands (e.g., heat, water exposure).
- Check drying/curing times: Ensure the sealer dries and cures quickly to minimize downtime.
- Avoid incompatible materials: Don’t use wax-based sealers on concrete; they won’t bond properly.
- Test first: Perform a small, inconspicuous test patch before committing to the entire area.
Quick rule: Always prioritize compatibility and safety when choosing a sealer for your concrete countertop spot repair.
Tools, abrasives, and consumables
Gather the right tools to prep and patch your concrete countertop spot repair efficiently.
- Abrasive pads: Use non-scratch pads for light sanding; avoid harsh materials that could damage the surface.
- Sandpaper grits: Have 400–800 grit sandpaper on hand for fine-tuning and smoothing.
- Masking tape: Use painter’s tape to protect surrounding areas from overspray or drips.
- Applicators: Have putty knives, scrapers, brushes, and microfiber cloths ready for application and touch-ups.
- Cleaners: Use a degreaser or mild soap to clean the area before sealing; avoid harsh chemicals that could damage the surface.
- Spray bottle: For easy application of cleaners, sealers, and water during sanding.
- Optional: heat gun: For stubborn residues or to help dry the area quickly (use with caution).
- Plastic sheeting: Protect your work surface from spills and drips.
Quick rule: Choose tools that are gentle on concrete yet effective at their task to avoid damaging the surface.
Preparing the Surface for a Spot Repair
Define the goal of the patch as blending finish, texture, and sheen locally without altering the whole counter. Note compatible sealer types and the need for color-matched patching material. Clarify what constitutes a successful visual transition in your space.
Clean the surface to remove dust and oils, and verify it dries fully before patching. Identify stain types and plan targeted treatments, testing a small area first. Prepare edges to create a crisp boundary and plan for a seamless blend with texture and aggregate exposure.
Cleaning and removing stains (oil, acid etch, organic)
Start by identifying the stain type. Oil-based stains require a degreaser like TSP or a specialized concrete cleaner. Acid etching needs a mild etchant, while organic stains may need a poultice.
Test any cleaner on a small hidden area first to ensure it doesn’t alter the color. Apply the chosen cleaner, let it soak, then scrub and rinse thoroughly. For tough stains, repeat or use a professional stain remover.
Ensure the surface is fully dry before proceeding with patching. Use a moisture meter if unsure.
Surface profiling, feathering, and edge blending
Use 120-grit sandpaper or a concrete abrasive pad to lightly abrade the sealer around the stain. This creates a keyed surface for better adhesion of the patch material.
Feather the edges of the repair area using progressively finer grits (e.g., 80, 120, 220). This ensures a smooth transition between the patched area and the existing finish. Visually check your progress to ensure even feathering.
For glossy surfaces, lightly scuff them with fine-grit sandpaper or an abrasive pad to help blend the patch material’s sheen. Be careful not to over-sand and expose the concrete beneath.
Step-by-Step: Applying a Targeted Sealer Patch
Clarify that this patch targets a small area and won’t recoat the entire surface. Note any limitations like color variance or sheen match so expectations are set. Keep the scope tight and document the patching plan.
Mask and prep the surface carefully, outline required cleaning and etching if needed, and select compatible primers and sealers. Choose patching material that matches the existing system and plan for feathered edges to blend with the surrounding finish. Follow a disciplined sequence to achieve a flush, smooth patch.
Step-by-Step Process
Follow these practical steps to apply a targeted sealer patch, ensuring a neat and durable repair.
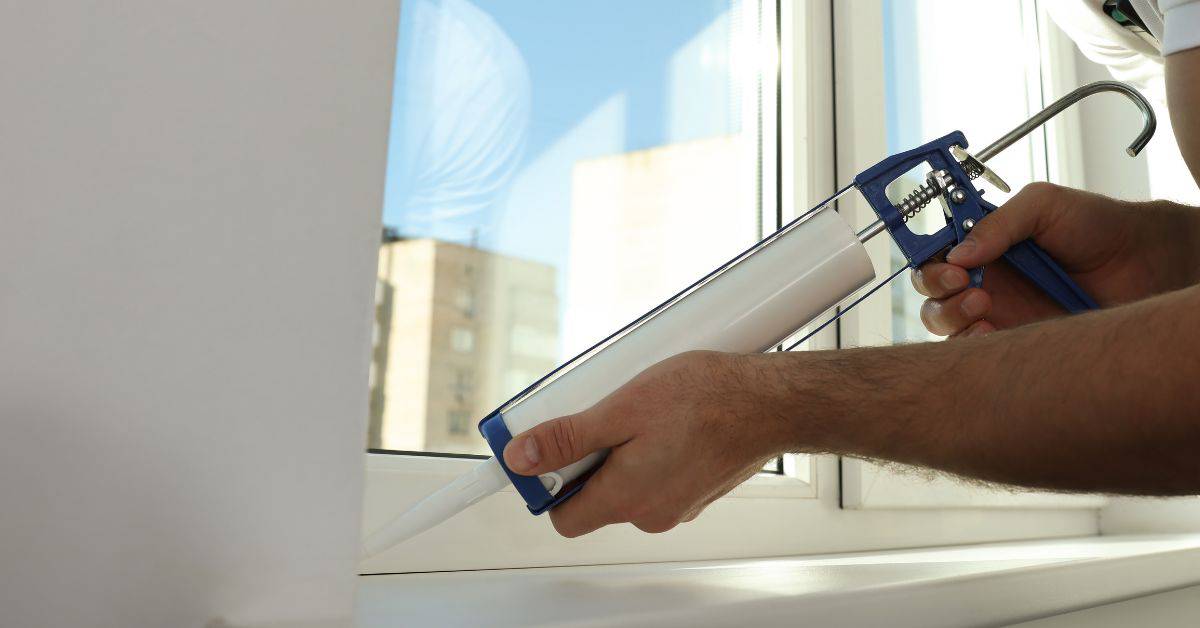
- Prep the area: Clean, remove dust, and mild etch if needed. Mask off surrounding areas using painter’s tape and paper.
- Prime the patch: Apply a compatible primer to the damaged area, allowing it to dry according to manufacturer’s instructions.
- Mix and apply patch material: Use a thin-set or epoxy/concrete repair mix, ensuring compatibility with your existing sealer. Apply in small sections, feathering edges to blend with surrounding countertop.
- Control depth and avoid air pockets: Work quickly but carefully, using a trowel or squeegee to control depth and remove any air pockets.
- Smooth and finish: Use a damp sponge or cloth to smooth out any imperfections and achieve a flush, even finish. Allow the patch to tack-off before proceeding with final sealing.
Masking, containment, and working in small sections
Proper masking ensures a clean repair and prevents overspray or lap marks. Use painter’s tape to create a tight seal around the repair area.
Apply masking paper, pressing down firmly to ensure good adhesion. Work from one side of the countertop to the other, keeping your work area contained.
Control brush/roller pressure: Apply sealer with even, steady strokes, maintaining consistent pressure to avoid uneven application or lap marks.
Work in small sections, allowing each section to dry before moving on to the next. This helps maintain a neat, professional-looking repair and prevents overworking the material.
Application techniques for different sealer types
Different sealers require specific application methods to achieve optimal results. Familiarize yourself with these techniques before starting your repair.
Topical sealers: Apply using a natural bristle brush or roller, working in small sections and maintaining a ‘wet edge’ to avoid lap marks. Ensure even coverage and feather edges for a smooth finish.
Penetrating sealers: Use a lint-free cloth or applicator pad to wipe on the sealer, ensuring full saturation of the surface. Work in small sections, allowing the sealer to penetrate before moving on to the next area.
Match sheen and texture: When applying a patch, strive to match the sheen and texture of the surrounding countertop. Use compatible sealers and application techniques to achieve a seamless repair.
Drying, Curing, and Evaluating Repair Effectiveness
Explain the difference between surface dry and full cure and how environmental factors influence each stage. Consider when the countertop can be safely put back into use after patching. Use a clear plan to monitor progress during cure.
Describe how to evaluate bond quality and blending, including tactile feel and visual checks under different light. Outline steps to verify readiness for use and plan follow-up tests to ensure even finish without blotching. Include troubleshooting steps for common issues and follow-up actions.
Typical cure expectations and what to check on labels
Before you start, understand your sealer’s typical cure times. This helps plan your repair and prevent issues.
- Check manufacturer’s data: Look for ‘tack-free time’ (when it’s safe to touch) and full cure time (when it’s ready for use).
- Consider environmental factors: Warmer temps and lower humidity speed up curing. Check product labels for ideal conditions.
- Avoid hard timelines: Curing is affected by many factors. Don’t rely solely on product data; monitor your repair closely.
- Check re-sealing/re-topcoating times: Some sealers need a specific cure time before applying additional coats or sealants.
Quick rule: Always check the label and monitor curing progress to ensure safe handling and best results.
Visual and performance checkpoints after curing
After your patch has cured, perform these checks to confirm it’s ready for regular use.
- Sheen match: Compare the patched area with the rest of the countertop. If they don’t match, you may need to re-topcoat or adjust application technique.
- Edge adhesion: Gently probe the edges with a fingernail or plastic tool. No crumbling or lifting means good adhesion.
- Scratch resistance: Lightly scratch the patch with a non-abrasive object (like a nail). It should resist scratching like the rest of the countertop.
- Water repellency: Place a few drops of water on the patch. If they bead up and roll off, your sealer is working well.
Quick rule: Thoroughly check your repair’s appearance and performance before resuming normal use to avoid damage or disappointment.
Common Mistakes, Troubleshooting, and Fixes
Identify typical errors such as lap lines, color mismatch, and poor adhesion, and note likely causes. Anticipate where these issues are more likely to appear during a spot repair. Use this as a diagnostic guide to prevent repeat problems.
Provide practical corrective actions for each issue and clear prevention tips for future work. Include a quick workflow that covers assessment, prep, patch, seal, cure, and documentation to keep repairs on track and predictable.
Fixes for adhesion failures and lap lines
Adhesion problems and visible lap lines can happen when the sealer doesn’t bond properly or if there are gaps in your prep work. Here’s how to fix them:
For adhesion issues: First, re-clean the area with a degreaser to ensure no contaminants remain. Then, use a bonding agent to help the new sealer stick. Apply thinner coats than before to avoid over-application.
For lap lines: Lightly abrade the affected area using 220-grit sandpaper to remove any loose material and create a fresh surface for the sealer to bond with. Clean off dust, then reapply the same or compatible sealer, feathering it out to blend with the surrounding area.
Addressing color or sheen mismatch
A mismatch in color or sheen can occur if you’re using incompatible products or if there’s a change in the countertop mix. Here are some fixes:
Minor mismatches: You might be able to blend it with feathered coats of sealer, gradually increasing the intensity until it matches the surrounding area.
Significant mismatches: If blending isn’t possible, consider using a tintable topcoat to match the color. However, this might change the sheen as well. In some cases, full-area recoating may be necessary to ensure a consistent look.
Durability and Lifecycle: Patched Areas Vs. Full Recoats
Compare how long patches tend to hold up versus a full recoating and what factors drive replacement timing. Look at wear patterns and potential failure modes in high traffic spots. Use these cues to decide between patching and recoating.
Discuss maintenance implications and how sealing needs change with patch work. Consider aesthetic aspects like color and texture matching and how they influence long-term upkeep. Use a practical framework to guide the choice based on expected use and maintenance capability.
Cost implications and value considerations
Patching is cheaper upfront. You only buy sealer for the affected area, not the whole countertop.
Labor: Patching takes less time than recoating. But remember, if you mess up, you’ll spend more time fixing mistakes.
Full recoats cost more initially but might save long-term. Sealer wears out evenly across the surface. So, a full recoat extends the life of your countertops. It’s like getting new tires for your car – it costs more, but you get better performance and longevity.
Long-term performance and when to re-evaluate
Patches hold up well at first. But over time, they can wear differently than the rest of your countertop.
Inspect annually: Check for signs of wear, staining, or peeling around the patch. High-traffic spots and edges are most prone to issues.
Every 3-5 years, consider a full recoat. Even if patches look good, the rest of your countertop is aging too. A full recoat ensures uniform protection and extends the life of your countertops.
Safety, Vocs, and Ensuring Food-Safety After Repair
List required PPE and ventilation practices, and explain safe handling and disposal of solvents and sealers per the SDS. Emphasize minimizing exposure during and after the repair. Keep the work area orderly to reduce risks.
Highlight how to verify product suitability for food-contact surfaces and establish cure times before continued use. Provide interim precautions and simple post-repair checks to confirm no odor or tackiness remains. Include documentation steps for future reference and safety audits.
Personal protective equipment and ventilation best practices
Safety first, buddy. Here’s what you need to protect yourself and your lungs while working with sealers.
- Respirator: Use a respirator with organic vapor cartridges for solvent-based products or a particulate filter for water-based ones. It’ll keep those nasty fumes out of your lungs.
- Gloves: Nitrile gloves are your friend here. They’re resistant to solvents and won’t leave you with sore hands.
- Eye Protection: Splash goggles will shield your eyes from any splashes or spills. Safety glasses alone won’t cut it.
- Ventilation: Work in a well-ventilated area, like near an open window or door. If you’re working indoors, consider renting a portable ventilation system for around $50-$100 a day.
- Disposal: Follow the SDS guidelines for disposal of solvents and sealers. Don’t pour them down the drain; they’ll ruin your pipes and pollute the environment.
Confirming cured surface is food-safe
Alright, let’s make sure that countertop is safe for food prep after you’ve sealed it. Here’s how:
First, check the manufacturer’s product data sheet or website to confirm their sealer is approved for use on surfaces that come into contact with food.
Next, perform a simple wipe test once the sealer has fully cured. Use a clean cloth dampened with warm water and mild dish soap. Wipe the repaired area gently. If there’s no residue or tackiness left behind, you’re good to go.
Lastly, wait for the full cure time as specified by the manufacturer before using the countertop for food prep. This could take anywhere from 24 hours to a few days. Be patient; it’s worth it to ensure your family’s safety.
Conclusion
Spot repairs matter for safety, durability, and keeping the countertop looking like you want. When done right, you seal a small area without triggering a full recoat, but you must respect proper prep, patching steps, drying, and curing.
Proceed with a simple, practical check: inspect the area to decide if a patch is truly appropriate, gather the exact tools and patch product, clean and dry the surface, apply the targeted sealer patch in a thin, even layer, let it dry and cure per the product directions, test the patch for adhesion and containment, and finally evaluate the result for food-safety and durability before using the surface normally. Do this in order, and prioritize safety and ventilation, especially with VOCs.
Common mistakes to avoid are skipping a test area and moving forward blind, failing to clean and dry the surface thoroughly, applying patch material to a damp or dirty substrate, using the wrong product for a spot repair, and neglecting proper curing times or ventilation. Always test a small area first, work with clean, dry surfaces, and respect product-specific cure and exposure times to prevent bond failures or odors. If the repair touches food-contact surfaces, ensure the method chosen supports food-safety standards and never shortcut curing or sealing steps.
If the area is large, the substrate is questionable, or you’re unsure about the material compatibility with food-contact use, call a professional. A specialist can confirm whether spot repair is truly suitable or if a full recoat is the safer long-term choice. Stay disciplined, stay safe, and you’ll keep the countertop looking and performing well for years to come.
FAQ
How can I identify what type of damage I’m repairing on a sealer spot (stain, rough area, peeling, or lifting)?
Look at color changes for stains, or feel for rough spots with your hand. If the sealer is peeling or lifting from the concrete, that’s a sign the coating or substrate failed and needs more than a simple patch. Check the surface closely and note if moisture appears behind the sealer or if the damage is confined to a small area.
What sealer types work best for spot repairs on a concrete countertop?
Choose a sealer labeled for patch repairs and compatible with your current coating. Options include water-based and solvent-based sealers, but always check the product label or datasheet for spot repair guidance. If in doubt, follow manufacturer instructions and local rules for food-safe surfaces.
How should I clean and prep the area before applying a new sealant patch?
Remove loose material and wipe away dust, grease, and residues with a compatible cleaner. Rinse or wipe dry as directed by the product label and let the surface dry thoroughly. Avoid leaving soap film or cleaners behind that can prevent adhesion.
What tools and materials will I need for a targeted sealer spot repair, and what’s the basic workflow?
Have a clean cloth, non-abrasive scrub pad, a suitable cleaner, the repair sealer or patch product, a small applicator or brush, and a compatible topcoat if required. The workflow is to clean, etch or roughen if the product requires it, apply the patch or sealer precisely to the damaged area, and then allow it to dry per the label. Always verify drying/curing times on the product instructions before use.