
Introduction
Clay plaster sealer tests help you predict how much darkening a sealer will cause before you coat the whole wall.
They’re simple spot tests that you can do on small patches to see how the finish will look. Look for changes in color as the sealer dries and note how long it takes.
Use the results to decide whether to adjust the mix, the sealer type, or the timing of your coat. Check the product label and manufacturer guidance for application tips and any long-term effects. If you’re unsure, test multiple brands on scrap pieces or a hidden area and compare.
Key takeaways
- Test on a small patch first, document results before full-wall sealing.
- Label each patch with location, product used, and environmental conditions.
- Darkening varies by plaster finish; compare treated versus untreated areas.
- Follow manufacturer instructions for sealer application and cure times.
- Wear appropriate safety gear and ensure good ventilation during testing.
- Document measurements with a simple sight and note any unexpected blotching.
Table of Contents
- Introduction
- Key takeaways
- Why Testing Matters Before Sealing Clay Plaster
- How and Why Clay Plasters Darken with Sealers
- Sealer Types and What to Expect
- Test Patch Protocol — Step-by-Step
- Measuring and Documenting Darkening
- Interpreting Test Results and Choosing a Sealer
- Common Pitfalls and Troubleshooting
- Tools and Materials Checklist
- Conclusion
- FAQ
Why Testing Matters Before Sealing Clay Plaster
Darkening after sealing is common and often irreversible if the wrong product is used. The look can shift from light and uniform to patchy or too dark, affecting the whole room. A small test patch helps you see the final outcome before you commit to the entire wall.
Testing on representative substrate gives you real data about color, sheen, and finish. It also helps you catch compatibility issues with your current plaster mix and the sealer you plan to use. Always verify product guidance on the label or data sheet before moving forward.
Aesthetic and material impacts
The sealer you choose can dramatically alter the look and feel of your clay plaster. It’s crucial to understand these changes before committing to a whole wall.
- Tone change: Sealers can darken or lighten the plaster, changing its overall tone. Some sealers can make the plaster appear greyer or more yellowish.
- Texture perception: Sealers can enhance or mute the texture of the clay plaster. A matte sealer might soften the look, while a glossy one could emphasize it.
- Highlighting inconsistencies: If your mix wasn’t consistent or application was uneven, sealers can highlight these issues. They may cause certain areas to appear darker or more textured than others.
- Cracking: Using the wrong sealer can cause cracking as it dries and shrinks differently from the plaster. This is more likely with sealers that aren’t breathable.
- Staining: Some sealers can stain the plaster, especially if they’re not compatible with clay or if they contain pigments. Always check the sealer’s compatibility before use.
When to perform a test
Testing is crucial at certain stages and situations to avoid costly mistakes:
New mixes: If you’re trying out a new plaster mix, always test the sealer first. The pH or other properties of the new mix might react differently with the sealer.
Unfamiliar sealers: When using a sealer for the first time, it’s wise to test it on a small area. Even if you’ve used the brand before, different formulations can react differently.
Reclaimed plaster or changes in finish: If you’re working with reclaimed plaster or changing the finish of your existing plaster, always perform a test. The age or previous treatment of the plaster might affect how it reacts with the sealer.
How and Why Clay Plasters Darken with Sealers
Sealants change appearance by locking in moisture, altering binder interaction, or forming a surface film that changes light reflectance. Clay plasters respond differently to each of these mechanisms. Moisture migration can be the biggest driver of perceived darkening through surface swelling or color shift.
Different sealers interact with the clay binder and the lime content in unique ways, so the resulting look can vary from slight depth to noticeable change in tone. Always check the manufacturer instructions to understand how your specific sealer will behave with clay plaster.
Physical and chemical causes
Clay plasters darken due to several reasons. First, moisture shift can cause the clay particles to swell and compress, leading to a darker appearance.
Oil or solvent-based sealers can also uptake into the plaster, leaving behind dark residues as they evaporate. This is more common with natural oils like linseed or walnut.
Binder migration occurs when the sealer’s binders penetrate deep into the plaster, pulling darker particles to the surface. This is typical with latex-based sealers.
Pigment concentration can also play a role. If your clay plaster has dark pigments, sealers may intensify their color, making the wall appear darker.
Surface film versus penetrating treatments
Film-forming sealers create a layer on top of the plaster. This can darken the appearance by reflecting light differently or absorbing it, similar to how a stain darkens wood.
Penetrating treatments, on the other hand, soak into the plaster and react with its components. They typically cause less noticeable darkening because they don’t create a surface film. However, they can still lead to darkening due to the physical and chemical causes we discussed earlier.
Film-forming sealers often result in more dramatic color changes, so it’s crucial to test them before applying to the entire wall. Penetrating treatments usually offer a more subtle effect but may still require testing for predictability.
Sealer Types and What to Expect
Common sealer families include resin-based surface coatings, waterborne sealers, and waxy or matte options. Each family tends to impart a distinct level of depth, gloss, and protective behavior. Your choice will influence how the plaster color reads when light hits the wall.
In practical terms, some sealers may enhance the natural texture or emphasize variation in the plaster, while others produce a more uniform finish with additional protection. Use the product label or data sheet to confirm the expected appearance for clay surfaces.
Natural versus Synthetic Options
When choosing a sealer, you’ve got two main categories: natural and synthetic. Each has its pros and cons.
Natural Sealers: These are eco-friendly, non-toxic, and often easier on the wallet. They usually provide a matte finish and allow the plaster’s breathability. However, they might not last as long as synthetics and may require more frequent reapplication.
Synthetic Sealers: These offer better durability and longer lifespan. They can provide a wider range of finishes, from satin to high gloss. However, they’re often more expensive, can emit VOCs (volatile organic compounds), and might not be as breathable as natural options.
Manufacturer Labels and Specs to Check
Before you buy, read the label and spec sheet carefully. Here’s what to look for:
Recommended Substrates: Make sure the sealer is designed for use on clay plaster. Some sealers work best on specific types of plaster or surfaces.
Cure Guidance: Check how long the plaster needs to cure before sealing. Applying too early can trap moisture and cause issues.
Application Notes: Read up on application methods, ideal temperatures, and humidity levels for best results. Don’t hesitate to contact the supplier if you’re unsure about anything. They’re there to help.
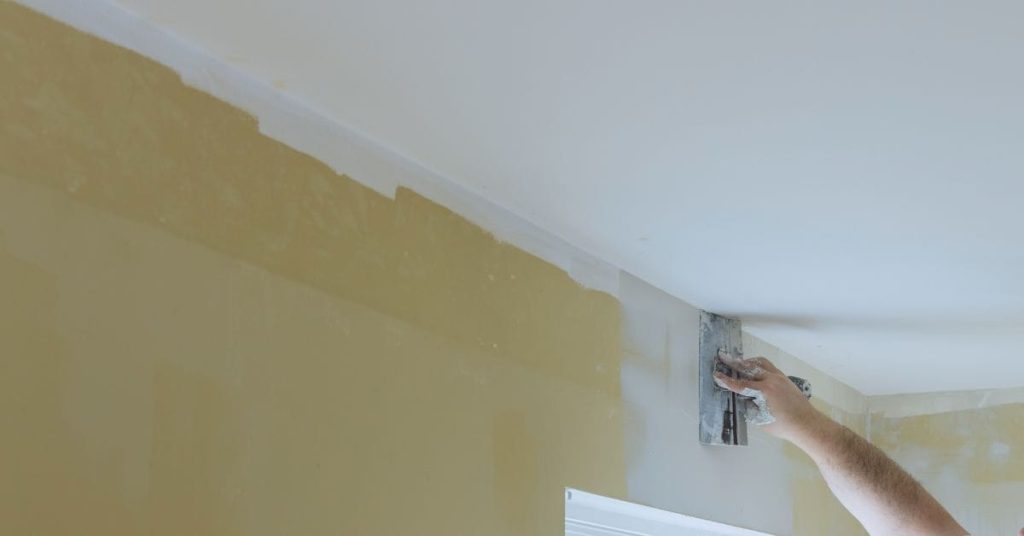
Test Patch Protocol — Step-by-Step
Choose a representative area that matches the average substrate in your project. Prepare a few small patches on the same clay mix and finish you plan to seal. Label each patch clearly for tracking.
Apply the sealer to patches using your planned technique, then keep them in consistent conditions. Schedule observations at multiple intervals and record any changes in color or sheen. Follow the product instructions for curing and safety notes when testing.
Step-by-Step Process
The following steps guide you through creating a test patch for your clay plaster, ensuring a reliable prediction of how it will react with the sealer.
- Preparation: Gather materials – clay plaster mix, sealers to test, brushes or rollers, safety gear (gloves, goggles).
- Safety first: Ensure good ventilation and protect yourself from dust and chemicals.
- Select a representative area: Choose a small, inconspicuous spot on your wall that’s typical of the whole surface.
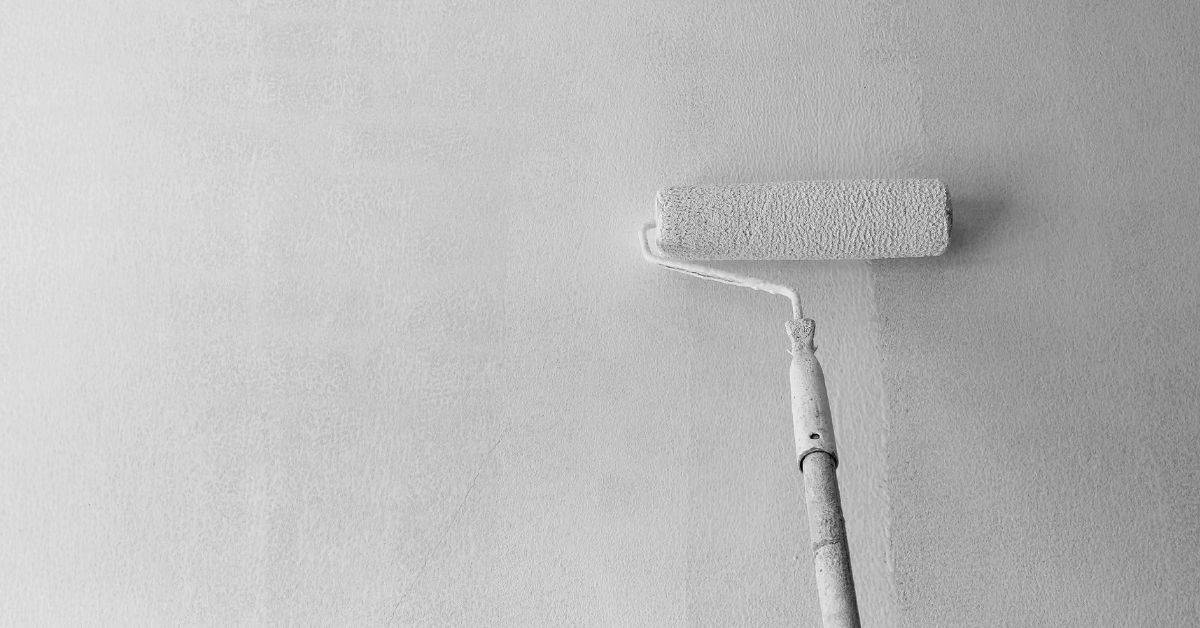
- Apply test patches: Using a brush or roller, apply sealers to the selected area in distinct, labeled sections. Let them cure according to manufacturer’s guidelines.
- Inspect and document: Observe changes immediately after application, then again at short-term (24-72 hours) and long-term (1 week) intervals. Note any darkening or other effects.
Preparing representative samples
To ensure your test patches accurately predict the sealer’s effect on your entire wall, follow these guidelines to create representative samples.
Use the same clay plaster mix as your walls. If you’re unsure, take a small sample from an inconspicuous area and have it tested for composition.
Match substrate and texture: Apply the test patches on a surface with similar texture and substrate to your walls. If possible, use a small, hidden area of your actual wall.
Replicate application technique: Use the same tools (brushes, rollers) and methods as you would when applying sealer to the entire wall. This ensures the test patch’s reaction is as accurate as possible.
Application and curing observation timeline
Observing your test patches at different stages helps you understand how the sealer will interact with your clay plaster over time.
Immediate effects: Check for any initial darkening or other changes right after application. This can help you decide if the sealer is a suitable option.
Short-term changes: Inspect the patches 24-72 hours after application. Some sealers may take this long to start showing their full effect, including darkening.
Long-term appearance: After one week, re-evaluate your test patches. This gives you a better idea of how the sealer will look in the long run and helps you make an informed decision about which sealer to use on your entire wall.
Measuring and Documenting Darkening
Use consistent visual checks under the same lighting and from the same distance each time you inspect patches. Create a simple log noting date, lighting, and perceived darkness compared to a control sample. Photograph patches with neutral lighting when possible.
If you have access to a color or gloss measuring instrument, use it to supplement your observations. When using any instrument, verify its calibration and consult the device label or manufacturer instructions for proper use on plaster surfaces.
Visual checkpoints and photography tips
Use these visual checks and photography tips to spot subtle changes in your clay plaster test patches.
- Consistent lighting: Use the same light source for all checks. Natural light is best, but keep it consistent.
- Neutral reference card: Include a neutral gray card in each shot to help compare photos under different lighting conditions.
- Repeatable camera framing: Frame your shots consistently – use the same distance, angle, and focus point for all checks.
- Before/after shots: Take initial ‘before’ shots before applying any sealers. Then, take ‘after’ shots at regular intervals to track changes.
- Check edges: Darkening often starts around the edges of test patches. Inspect these areas closely.
- Compare to untouched area: Have a section of untreated plaster for comparison. It helps put darkening into perspective.
- Avoid reflections: Be mindful of reflections from windows or lights that can skew results.
- Document changes: Note down any visible changes, no matter how slight.
Quick rule: Regular visual checks and well-documented photos are your first line of defense against unexpected darkening.
Using instruments and keeping a log
While visual checks are crucial, instruments like colorimeters or spectrophotometers can provide objective measurements. Use them when subtle changes need confirmation.
When to use: If you’re struggling to see changes with the naked eye, or if your project requires precise data (like for quality control reports).
These instruments measure color based on numerical values (like L*a*b*). They can help track changes over time and compare different sealers.
Keeping a log: Maintain a simple, organized record of your measurements. Include details like sealer type, application date, lighting conditions, and any observations. Take photos alongside your readings for visual reference.
Interpreting Test Results and Choosing a Sealer
Set clear acceptability criteria for darkening before you seal the whole wall. Compare patch results to your reference swatch and consider lighting in the room. Decide if the level of darkening aligns with your project goals.
Balance performance and appearance by weighing durability, finish, and maintenance against the observed look. Use manufacturer instructions to confirm performance claims and ensure the chosen sealer suits clay plaster.
Decision Criteria Checklist
Use this checklist before choosing a sealer to ensure you’re making an informed decision.
- Acceptable color change: How much darkening can you live with? (Less than 10%? More than 20%?)
- Durability needs: Is this a high-traffic area that needs extra protection?
- Exposure conditions: How much sun, rain, or moisture will the wall face?
- Maintenance expectations: How often are you willing to reapply the sealer?
- Cost: What’s your budget for this project?
- Application difficulty: Are you comfortable applying multiple coats?
- Drying time: Can you afford downtime while waiting for each coat to dry?
- Manufacturer reputation: Have they proven reliable with similar products?
Quick rule: The best sealer balances your needs and expectations, so don’t rush this decision.
Mitigation Strategies If Darkening Is Unacceptable
If test results show too much darkening, consider these options before applying the sealer to your entire wall.
Try a different product: Some sealers cause less darkening than others. Consider switching to a different brand or type.
Dilute or reduce coats: Using less sealer can minimize darkening, but it might also reduce protection. Be sure to test first.
Pre-tint the wall: Applying a light-colored paint before sealing can help counteract darkening. Again, test first to ensure no adverse reactions.
Opt for sacrificial topcoats: Apply a thin layer of sealer, let it dry, then retest. If darkening is still unacceptable, you can remove this layer without affecting the wall.
Common Pitfalls and Troubleshooting
Common mistakes include skipping a test, using inconsistent patch sizes, or not accounting for ambient conditions. These oversights can mislead you about final results. Plan for variations in temperature and humidity during testing.
Address issues by repeating patches under controlled conditions, documenting all steps, and consulting the product label if results seem off. When in doubt, verify guidance with the manufacturer instructions or data sheet before proceeding.
False positives from environmental factors
Don’t let Mother Nature fool you. Changes in humidity, temperature, and lighting can mimic sealer-induced darkening on your test patches.
Humidity: High humidity can cause moisture to migrate through the plaster, leading to temporary darkening. Keep your testing area consistent – around 50% relative humidity if possible.
Temperature: Extreme heat or cold can affect how the sealer interacts with the plaster. Maintain a steady temperature during testing, ideally between 68-77°F (20-25°C).
Lighting: Different light sources and intensities can alter your perception of color. Use consistent lighting when observing and photographing your test patches.
Remediation after accidental darkening
Accidents happen, even to the best of us. If you’ve ended up with unwanted darkening on your wall, don’t panic. Here are some low-risk fixes:
Wet sanding: Gently wet sand the affected area using fine-grit sandpaper (around 400-600 grit). This can help to remove excess sealer and lighten the color.
Chemical strippers: Use a mild chemical stripper to remove the sealer. Always test on a small, hidden area first to ensure it won’t damage your plaster.
Re-sealing with a lighter option: If the darkening is due to a synthetic sealer, try switching to a natural one. Or vice versa. But remember – always test on a sample patch before treating the whole wall!
Tools and Materials Checklist
Prepare a basic kit: sampling tools, small containers for patches, brushes or rollers, and labels for tracking. Include protective gear and materials for applying test sealers. Have a clean, protected area for drying patches.
Optional items include a camera for documentation and a simple notebook for notes. Consider a moisture or pH reference if your project has unusual plaster conditions, and always verify any tool or product guidance on the label or data sheet.
Recommended consumables and equipment
Before you start mixing your concrete, make sure you have all these items on hand. This checklist will help you avoid common mistakes and ensure a smooth, professional finish.
- Sample Boards: Check they’re clean, flat, and the same material as your final surface. Use them to test your mix design and practice application.
- Masking Tape: Ensure it’s wide enough (at least 1.5″) and in good condition. It helps create sharp edges and prevents concrete from sticking to formwork.
- Small Trowel or Spatula: Verify it’s the right size for your job (6″ – 12″). It’s crucial for spreading and finishing small areas and details.
- Brushes: Inspect them for stiffness and bristle loss. You’ll need both stiff-bristled brushes for scrubbing and soft-bristled ones for sweeping.
- Neutral Reference Card: Confirm it’s a standard gray card (Munsell N5 or similar). It helps you match your concrete color to the desired shade.
- Colorimeter (optional): If using, check its calibration and compatibility with your chosen concrete pigment. It ensures accurate color matching.
Quick rule: Always double-check your tools and materials before starting any task. A few minutes of preparation can save you hours of rework later on.
Safety and site preparation
Before you start any concrete work, go through this checklist to ensure a safe and well-prepared jobsite. Use it every time you begin a new task or project.
- Ventilation: Ensure the area is well-ventilated to prevent the buildup of harmful fumes from concrete and solvents. Open windows, use fans, or check local regulations for mechanical ventilation requirements.
- PPE for solvents: Wear appropriate personal protective equipment (PPE) when handling solvents like acetone or methyl ethyl ketone (MEK). This includes gloves, safety glasses, and a respirator with a suitable cartridge.
- Safety data sheets (SDS): Consult the SDS for all products you’re using. Check handling instructions, storage requirements, and disposal procedures to ensure your safety and compliance with regulations.
- Fire extinguisher: Have a fire extinguisher on-site that’s suitable for chemical fires (Class B). Ensure it’s easily accessible and in good working condition.
- Work area cleanliness: Clear the work area of debris, tools, and materials to prevent tripping hazards. Keep walkways clear and well-lit.
- Proper mixing location: Ensure concrete is mixed in a flat, stable, and accessible area to avoid spills or accidents. Check local regulations for proper disposal of excess or rejected concrete.
- Formwork stability: Before pouring, check that formwork is secure, level, and plumb. Tighten any loose bolts or screws, and brace as needed to prevent movement during pouring.
- Reinforcement inspection: Inspect reinforcement bars (rebar) before pouring. Ensure they’re properly placed, secured, and free of rust or damage that could compromise the concrete’s strength.
Quick rule: Always prioritize safety over speed. Take the time to prepare your jobsite correctly, and follow manufacturer instructions for all products used.
Conclusion
Testing a small patch upfront is the quickest way to prevent darkening surprises on the whole wall and to keep the finish durable and even. When you test, you know what sealer to use, how it will look when dry, and whether you need adjustments before you coat everything.
First, run a single, controlled test patch in a discreet area and document the color change over time; compare it to a control patch, note how long the sealer takes to dry, and record the exact product and application method you used, then translate those notes into a simple plan for the full wall. Make sure you follow the step-by-step protocol, keep surfaces clean and protected, ventilate well, and wear PPE. If you change sealer types, re-test in the same way.
Common mistakes to avoid are skipping the patch test, applying sealer too thick or too quickly, and assuming all sealers behave the same on every clay plaster mix. Always protect adjacent surfaces, work in small sections, and check for moisture or damp spots before sealing. If results look off or you see unexpected darkening on more than the test patch, pause, reassess, and don’t push ahead.
If the test results are unclear, or you’re dealing with unusual plaster mixes, high moisture, or large, exposed walls, calling a professional is wise. When in doubt, stop and verify before you commit to a full coat. With careful testing and steady work, you’ll seal cleanly, protect the plaster, and keep the look you want.
FAQ
How should I document the test patch results to guide sealer choice?
Take notes on the exact patch location, the sealer type, and the time of evaluation. Photograph the patch from the same distance and lighting as your wall tests. Keep a simple chart of darkening intensity and any color changes you see over time.
What if the darkening varies a lot across the wall after sealing a small patch?
That tells you you may need a sealer with more uniform performance or you may have moisture or texture differences. Test again on patches with similar texture and moisture levels. Use the data to pick a sealer that performed most consistently.
Can I speed up the testing process or skip steps to save time?
Don’t skip steps. Thorough testing protects the whole wall and your budget. Follow the patch protocol, document results, and allow the recommended observation window before deciding.
What signs indicate a sealer choice is not working after you coat the full wall?
Look for unexpected darkening, uneven tone, or new patches that keep changing after you cure. If this happens, recheck the patch tests, check manufacturer instructions, and verify surface preparation before trying another product.