
Introduction
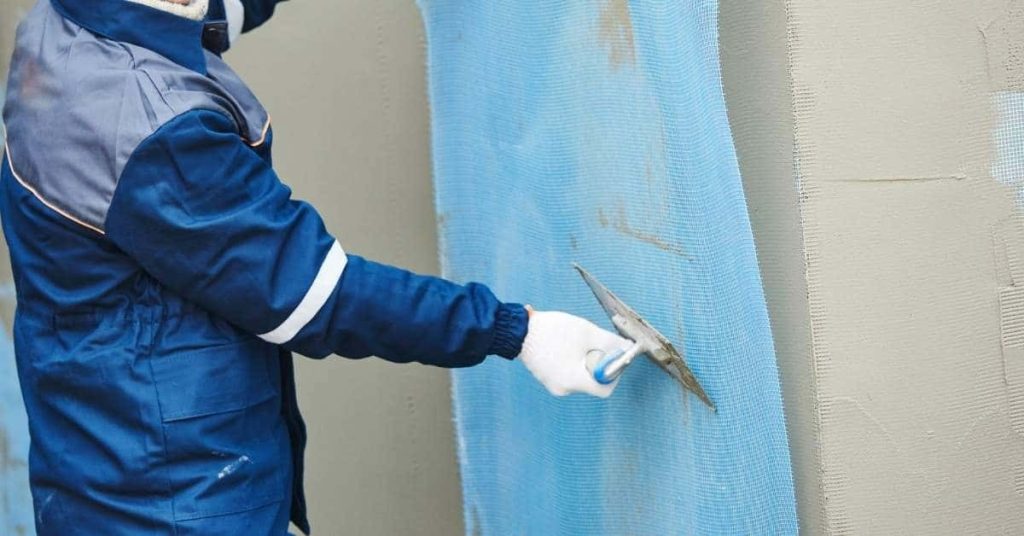
Clay plaster over plywood is a traditional finish that you apply to plywood walls, using joints and mesh to control movement and cracks. This article gives practical, hands-on steps for choosing joint spacing, mesh types, and tricks to reduce cracking. Expect a process that favors small batches, careful bonding, and testing along the way.
Before you start, check the plywood surface for flatness, clean any dust, and fix loose sheets. Choose the mesh type to suit your plaster thickness and movement; follow the label instructions for proper attachment. As you work, plan movement joints at logical breaks, keep edges neat, and test for crack-prone spots; if you see signs of movement, adjust joints or bonding and check local guidelines.
Key takeaways
- Plan movement joints with consistent spacing to prevent random cracking in plaster.
- Choose mesh reinforcement suited for clay plaster over plywood; strike balance between flex and grip.
- Seal plywood edges and prime surface per manufacturer’s guidelines before plaster adhesion.
- Apply coats with appropriate thickness limits and embed mesh at joints for crack control.
- Control environmental conditions during cure and avoid rapid drying to minimize shrinkage.
- Safety: wear eye protection, dust mask, and gloves; secure ladders and materials.
Table of Contents
- Introduction
- Key takeaways
- Why Clay Plaster over Plywood Succeeds or Fails
- Plywood Substrate Selection and Preparation
- Movement Joints: Placement, Types, and Detailing
- Mesh and Reinforcement Choices
- Plaster System Design: Coats, Thickness, and Mixes
- Adhesion Strategies and Fastener Treatment
- Environmental Controls, Curing, and Shrinkage Management
- Visual Checkpoints, Inspection, and Quality Control
- Conclusion
- FAQ
Why Clay Plaster over Plywood Succeeds or Fails
Clay plaster on plywood can work well when movement, moisture, and adhesion are considered as part of the plan. It’s important to balance the substrate behavior with the plaster’s demands. Expect pros and cons to appear based on site conditions and installation choices.
Always cross‑check your project notes against the product instructions and local requirements. Look for guidance on substrate compatibility, preparation steps, and acceptable movement ranges from the manufacturer or a trusted code source.
Risks and benefits summary
Clay plaster over plywood offers a breathable, natural aesthetic. It’s great for reducing indoor humidity and creating a warm, earthy look.
But, it can delaminate if not properly prepared or if there’s excessive movement in the substrate. Cracking is also possible due to shrinkage during drying.
Realistic expectations mean understanding these risks. Proper preparation, including using the right mesh and movement joints, can minimize them (see earlier sections).
When to choose alternative substrates
Plywood’s not always the best choice. High moisture areas or large unsupported spans might need alternatives like cement board or gypsum.
Before switching, check these:
– Moisture levels: If they’re consistently high, consider a moisture-resistant substrate.
– Span size: Large spans may need additional support to prevent excessive deflection.
Plywood Substrate Selection and Preparation
Choose plywood that is suitable for interior plastering and has a stable core. Acclimate sheets in the work area to minimize dimensional shifts before installation. Prepare the surface by cleaning, ensuring edge support, and removing coatings that could hinder adhesion.
Verify the actual plywood type, thickness, and any treatment by consulting labels or manufacturer data. Follow any specific surface priming or sealing recommendations before plaster application.
Plywood Species, Grade, and Moisture Content
The species of plywood you choose affects its stability. Go for hardwoods like oak or maple if you’re after strength. For most DIY jobs, pine is fine.
Check the grade. A-C is best for structural work, B-C for general use. Don’t skimp on quality here.
Moisture content matters. Too much and your floor will warp. Aim for around 12% when you buy. Ask your supplier to check it. If they won’t, walk away.
Fastener layout and edge support
When it comes to plywood substrates, how you fasten and support them makes all the difference. Here’s what you need to do:
First, check your panel size. Smaller panels are easier to handle and reduce unsupported spans. Aim for no more than 6′ unsupported length.
Now, let’s talk fasteners. Use 2-1/4″ or 2-1/2″ screws, not nails. Screws hold better and won’t pop out over time. Make sure they’re long enough to penetrate at least 3/4″ into the joist below.
Here’s your layout: Space screws every 6″ along panel edges and every 12″ in the field. But here’s where most DIYers go wrong – don’t skip edge support. Every 16″ to 24″, install a 2×4 or 2×6 ledger strip along panel edges. This supports the panel ends and prevents movement.
Surface cleaning, sanding, and priming
Before you start laying your clay system, you gotta prep the plywood right. Here’s how:
Clean it up: Remove any dust, dirt, or contaminants. A quick sweep and wipe down should do the trick.
Light sanding: Give the surface a light once-over with fine-grit sandpaper (120-150 grit). This’ll help your primer stick better – it’s called ‘keying’.
Prime time: Now, pick a primer or bonding coat that plays nice with your clay system. Check the labels and manufacturer instructions to make sure they’re compatible.
Movement Joints: Placement, Types, and Detailing
Plan movement joints to accommodate wood expansion and contraction without exposing cracks in the plaster. Position joints where framing members align with expected stress points. Detail edge treatments to reduce stress concentration at joints.
Check local guidance on joint spacing and detailing techniques from product literature or code references. Use the approved method for pairing joints with the plaster system you plan to apply.
Types of movement joints and when to use them
Movement joints are crucial for managing wood expansion and contraction. Here’s what you need to know:
Control Joints: These are scored into the clay plaster after application. Use them in areas with moderate movement, like interior walls.
Separation Joints: These create a physical gap between panels using foam or plastic strips. Ideal for high-movement areas, like exterior walls or corners.
Flexible Perimeter Joints: These are wide, flexible joints around the perimeter of your wall or ceiling. They’re perfect for absorbing overall building movement.
Joint spacing and layout planning
Planning joint locations is key to managing wood expansion:
Start by aligning joints with panel seams. This helps distribute stress evenly.
For corners, use a 45-degree miter cut to create a strong, flexible joint.
Long runs need more joints. Aim for every 8-10 feet, but check your product’s guidelines for exact spacing.
Sealing joints and trim detailing
Proper sealing keeps moisture out and maintains joint function:
Use a backer rod to fill the joint, then apply a flexible sealant like silicone.
For trims, use flexible caulk to ensure it moves with the wall. Apply it in a ‘V’ shape for best adhesion.
Finally, install trim pieces, ensuring they don’t restrict joint movement. Use screw-on or snap-in trims for flexibility.
Mesh and Reinforcement Choices
Assess reinforcement options based on how much movement you anticipate and the plaster method chosen. Alkali‑resistant fiberglass, non‑woven scrim, and metal lath each behave differently with clay binders. Match the reinforcement to your project’s tolerances and setup.
Always confirm with product data sheets or manufacturer instructions regarding mesh size, overlap, and installation sequence. Adhere to any surface prep and fastener guidance tied to the chosen reinforcement.
Alkali-resistant fiberglass vs stainless or galvanized metal
You’ve got options for reinforcement. Let’s compare ’em.
Fiberglass: It’s strong, light, and won’t rust like metal. Good for thin coats (1-2″). Check product label for max coat thickness it can handle. Don’t use in thick slabs; it’s not stiff enough.
Stainless Steel & Galvanized Metal: These are stiffer, great for thick slabs (4″+). Stainless won’t rust, but it’s pricey. Galvanized is cheaper, but can rust if damaged. Check local rules; some areas restrict metal reinforcement due to corrosion.
Bottom line? For thin coats, go fiberglass. For thick, go stainless or galvanized. Always check product labels and local codes before you decide.
Non-woven scrims and fabric-reinforced plasters
Alright, listen up. Non-woven fabrics are your friends when it comes to controlling cracks in your plaster. They’re like the unsung heroes of the construction world.
Here’s what you need to know:
Where to embed them: You want these babies right in the middle of your plaster build-up. Not too close to the surface, not too deep. Think Goldilocks – just right. Check your product label for exact placement.
Why they work: Non-woven fabrics bridge tiny cracks that form in the substrate. They distribute stress evenly across the plaster, preventing those pesky hairline fractures from turning into big, ugly problems. It’s like having a built-in crack repair crew.
Mesh placement and lap details
First things first, check your plans. You need to know where you’re placing mesh before you start mixing concrete.
Now, mesh goes near the bond coat or float layer, not on top of it. Here’s why: it needs something to grip onto. If you place it wrong, your mesh might just float around in there like a lost soul.
As for laps, lap at least 24 inches. Some say 30 is better. Check your local codes or the manufacturer’s instructions if you’re unsure. Remember, laps are where strength comes from. Short laps mean weak concrete.
Bridging joints and openings? Use a lap splice. It’s like giving your mesh an extra hand to hold onto. Make sure it’s at least as long as the lap itself. And for openings, use a U-shaped bend. It’ll give you that extra support you need.

Plaster System Design: Coats, Thickness, and Mixes
Understand single‑coat versus multi‑coat approaches and how total thickness relates to shrinkage and performance. Plan practical thicknesses that fit the substrate and project needs without overloading the plywood. Consider how each coat contributes to finish quality and bond durability.
Refer to the plaster mix guidance and any site‑specific restrictions in the product label or instructions. Do not exceed the recommended proportions or sequence without verifying with the manufacturer.
Bond coat vs floating/top coat roles
A bond/skim coat’s job is to seal the substrate and create a strong bond between it and the top coat. It’s usually thin, around 1-2mm.
Reinforcement mesh goes on top of this coat. Make sure it’s well embedded in the plaster for maximum strength.
A float/finish coat is the final layer that gives your wall its finished look. It should be applied after the bond coat has dried completely, usually 24-48 hours later.
Clay mix formulation considerations
The clay to sand ratio is crucial. Too much clay can lead to shrinkage cracks. Start with a 1:2 or 1:3 ratio and adjust as needed.
Fiber additives like straw, hemp, or synthetic fibers can reduce cracking. Lime can improve workability but too much can cause excessive shrinkage.
Always do test batches following your supplier’s guidelines to check for shrinkage and workability before applying the mix on your walls.
Safe thickness ranges and multi-coat strategies
Apply plaster in thin, controlled coats. A single coat should be no more than 10-12mm thick to minimize the risk of cracking.
For thicker plasters, apply multiple coats with a drying time of at least 24 hours between each. This allows any shrinkage stresses to release before applying the next coat.
Always check product literature for specific thickness guidance. It’s there to help you avoid common mistakes.
Adhesion Strategies and Fastener Treatment
Maximize bond to wood by following proper surface prep and priming steps before plastering. Treat fasteners to prevent telegraphing or rust staining through the finish. Ensure that nails, screws, and trims are installed in a way that minimizes localized movement at the plaster edge.
Consult the product instructions or data sheet for any fastening patterns and sealant requirements. Verify compatibility with the plaster system you are using and address potential wood‑conditioning needs.
Primers, bonding agents, and mechanical keying
Plywood can be tricky to plaster on. It’s smooth and sometimes oily. To get a good bond, you need to rough it up.
Bonding agent: Use one if your plywood is new or has a shiny surface. Apply it like paint, let it soak in, then sand lightly.
Primer: If your plywood is old or weathered, use a primer to seal it and give the plaster something to grab onto.
Mechanical keying: For best results, use a scratch coat. Apply a thin layer of clay plaster, let it dry, then sand lightly. This gives the final coats plenty of nooks and crannies to stick to.
Fastener countersinking and sealing
Screws and nails can cause problems if not treated right. They can rust, stain your plaster, or even pop out.
Countersink: Drive screws and nails below the surface of the plywood. Use a countersink bit for screws, or hammer in nails then fill the hole with wood filler.
Seal: Once filled, seal the holes with a dab of paint or plaster primer. This stops moisture from getting in and causing rust.
Cover: Finally, apply your bond coat. Make sure it’s thick enough to cover any screw heads or nail holes completely.
Dealing with seams and panel gaps
Seams between plywood panels are weak points. They can crack if not treated right.
Backer: Before you plaster, apply a backer like fiberglass mesh or scrim tape to the seam. This reinforces it and helps distribute stress.
Tape/scrim: Apply your chosen reinforcement over the seam, pressing it firmly into place. Use a wide enough piece to cover at least 2-3 inches on either side of the seam.
Filler: Once your backer is in place, fill any gaps with clay plaster or joint compound. Let it dry, then sand smooth before applying your final coat.
Environmental Controls, Curing, and Shrinkage Management
Control temperature and humidity to influence drying rates and shrinkage stresses in the plaster. Slow, even drying helps reduce random cracking and color shifts. Plan for ventilation and protection from rapid moisture loss during cure.
Check the curing guidelines in the product literature and local climate considerations. If in doubt, confirm recommended environmental ranges with the manufacturer or a local building authority.
Conditioning Plywood and Plaster Materials
The choice of materials and their acclimation play a significant role in the success of your clay plaster application. Incorrect material selection or improper conditioning can lead to cracking, staining, and weak bonds.
- Plywood: Look for exterior-grade plywood with a high moisture resistance rating (MR). Avoid using interior-grade plywood which is not designed to handle the humidity fluctuations in exterior applications. Avoid installing during rapid temperature or humidity swings as it can cause the plywood to expand and contract unevenly.
- Clay Plaster: Use high-quality, natural clay plasters from reputable sources. Check for proper storage conditions at the supplier’s site to ensure the plaster is not already compromised by excessive moisture or temperature changes. Avoid using plasters with added chemicals or synthetic binders that can affect curing and shrinkage behavior.
- Fiber Reinforcement: Use alkali-resistant fiberglass mesh or fabric reinforcement designed for clay plasters. Avoid metal meshes as they can corrode over time, leading to cracking and delamination. Specify the mesh with a high enough tensile strength to handle any shrinkage stresses.
- Plaster Mix: Follow the manufacturer’s guidelines for mixing ratios and water content. Too much or too little water can affect curing and shrinkage. Avoid adding extra water to make application easier as it can lead to weak plaster and increased cracking.
- Fasteners: Use corrosion-resistant fasteners suitable for exterior applications. Stainless steel or hot-dipped galvanized fasteners are good choices. Specify fasteners with a high enough shear strength to hold the plywood securely in place during plaster application and curing.
Controlled Drying and Curing Techniques
Proper curing is crucial for reducing shrinkage cracks. The key is to control the drying rate, not to speed it up.
Use shade cloth or other temporary shading methods to protect the plaster from direct sunlight during the first few days of curing. This helps slow down the initial rapid surface drying and allows the plaster to cure more evenly.
Consider using humidifiers in drier climates to maintain a consistent humidity level around the plaster as it cures. This can help reduce shrinkage stresses and prevent cracking.
Avoid sealing the surface too early or applying any topcoats until the plaster has cured completely. Rapid surface sealing traps moisture and stresses inside the plaster, leading to increased cracking.
Testing and Monitoring Shrinkage on Test Panels
Before committing to full-scale application, create test panels to observe the shrinkage behavior of your specific clay plaster mix and substrate combination.
Apply the plaster to small plywood panels (around 2′ x 2′) using the same methods you plan to use for the full project. Allow these panels to cure under the same conditions as your planned application site.
Monitor the test panels closely during the curing process. Look for any signs of cracking, delamination, or other issues. Use a straight edge and level to check for warping or uneven shrinkage. Adjust your mix design, reinforcement, or application methods as needed based on your observations.
Only after you’re satisfied with the performance of your test panels should you proceed with full-scale application. This ensures that you’ve minimized the risk of cracking and other shrinkage-related issues in your final project.
Visual Checkpoints, Inspection, and Quality Control
Use a clear checklist to verify prep, application, and cure milestones. Look for uniform texture, edge integrity, and absence of obvious voids or lifts. Note any red flags that warrant remediation before finishing work continues.
Rely on the project specs and acceptance criteria from the product instructions or code references. When in doubt, verify requirements with the manufacturer and document any deviations for sign‑off.
Pre-plaster inspection checklist
Before you start plastering, use this checklist to ensure your surface is ready.
- Surface flatness: Check for any high or low spots. Use a straight edge and level. Inconsistencies can cause uneven plaster application.
- Fastener security: Ensure all screws and nails are fully seated and countersunk. Loose fasteners can pop through the plaster.
- Moisture levels: Check for excessive moisture. Too much can weaken adhesion and cause cracking.
- Primer compatibility: Confirm the primer used is compatible with your chosen clay plaster mix to ensure proper bonding.
- Mesh alignment: If using mesh, ensure it’s properly aligned and secured before applying the first coat. Misaligned mesh can cause visible lines in the finished surface.
- Seam preparation: Ensure all seams are properly filled and sanded smooth to prevent telegraphing through the final coats.
- Temperature and humidity: Check conditions match those used when testing shrinkage on test panels. Significant differences can affect curing.
- Substrate temperature: Ensure substrate is within safe application range (usually 50-90°F or 10-32°C). Too cold or too hot can cause adhesion issues.
Quick rule: If any checks fail, address the issue before proceeding to avoid costly repairs later on.
During-application inspection points
While applying clay plaster, keep an eye out for these potential issues.
- Air pockets: Look for any bubbles or voids. Tap the surface to release trapped air. Air pockets can cause weak spots and cracking.
- Mesh embedment: Ensure mesh is fully embedded in the plaster. Inadequate embedding can lead to delamination.
- Thickness consistency: Check that each pass maintains consistent thickness. Inconsistencies can result in visible variations in the finished surface.
- Edge details: Ensure edges are properly feathered and blended into adjacent surfaces or walls to prevent cracking at corners.
- Plaster mix consistency: Monitor the plaster mix for any changes in consistency. Variations can affect application and curing.
- Working time: Keep track of how long it takes to apply each section. Too long can cause skinning or premature setting, leading to poor adhesion.
- Temperature and humidity: Monitor conditions during application. Significant changes can affect plaster behavior and curing.
- Surface contamination: Watch for any dirt, dust, or debris that may have settled on the surface. Contaminants can interfere with adhesion.
Quick rule: Address any issues as soon as they’re spotted to minimize their impact on the finished product.
Post-cure inspection and acceptable cosmetic defects
After your clay plaster has cured, use this checklist to evaluate its condition.
- Hairline cracks: Check for fine, hairline cracks. These are usually normal and can be easily repaired with touch-up plaster.
- Structural cracks: Look for wider, deeper cracks. These may indicate a more serious issue that needs immediate attention.
- Delamination: Tap the surface to listen for any hollow sounds. This could indicate delamination from the substrate.
- Telegraphing: Inspect seams and panel gaps for any signs of telegraphing through the finished surface. Slight telegraphing may be acceptable, but excessive telegraphing should be addressed.
- Color consistency: Check that the color is consistent across the entire surface. Inconsistencies could indicate issues with application or curing.
- Surface smoothness: Feel the surface for any rough spots or raised areas. These can usually be sanded down and touched up.
- Edges and corners: Inspect edges and corners for any signs of cracking or delamination. These areas are particularly vulnerable to stress.
- Moisture content: Check that the plaster has reached its equilibrium moisture content. Too much or too little can cause issues over time.
Quick rule: Acceptable cosmetic defects depend on your specific project and aesthetic goals. Always address any structural concerns immediately to prevent further damage.
Conclusion
Moving clay plaster over plywood can deliver a durable, attractive wall if you plan for joints, adhesion, and proper curing. The key is safety, proper substrate prep, and controlled steps that respect the material’s movement and moisture needs.
Start with a small test area to confirm adhesion and expansion behavior, then verify substrate flatness and clean, dust-free surfaces; install movement joints in the correct locations, choose the right mesh or reinforcement, apply the coats in the designed sequence and thickness, and control the environment to avoid rapid drying or excessive moisture; finally, inspect at key stages for cracking, adhesion issues, and even coverage before finishing. Follow these checks in order and document any deviations for future projects.
Common mistakes to avoid include skipping movement joints or misplacing them, using the wrong mesh or over-reinforcing, applying coats too thick or too fast, and letting moisture or temperature swings sprint past the cure window. Always test a small area first, keep heaters and fans off during early cure, and stop if you see peeling or soft spots. If the project is large, complex, or involves structural concerns, or you’re unsure about moisture management, call a professional and get a second pair of eyes on the work. With careful steps and steady progress, you’ll finish strong and keep the finish intact for years to come.
FAQ
What signs tell me clay plaster over plywood is at risk of cracking or delaminating?
Look for loose edges, new hairline cracks beyond surface texture, or uneven sheen. If plywood shows moisture damage or warping, stop and fix the substrate first. Check for peeling or sanding dust that goes away with a touch; that means adhesion problems ahead.
How do I choose the right mesh or reinforcement for a plywood substrate?
Select mesh that is compatible with clay plaster and the plaster system you’re using. Thicker or coarser mesh isn’t automatically better—follow the manufacturer’s guidance and the substrate thickness you’re aiming for. If in doubt, ask the product maker or consult the label for suitable mesh types and weights.
What practical steps reduce cracking when applying multiple coats on plywood?
Plan proper movement joints and ensure the base is flat and clean. Build coats within the recommended thickness per stage and let each layer dry appropriately before applying the next. If you see micro-cracks forming, address substrate movement or moisture issues before patching.
What should I check quality-wise while applying and curing the plaster?
Keep the work area stable with steady temperature and humidity as advised by the product labels. Inspect while you work: joints, edges, and any mesh waviness. If you’re unsure about drying times or finish, refer to the manufacturer instructions and regional guidance for safe handling and curing.