

Introduction
Clay plaster in entryways is a clay-based finish applied to walls to create a durable, breathable surface. In busy entry spots you’ll want to understand how it resists scuffs and how touch-ups go when scuffs happen. Check product labels and local rules for any limits on sealing or indoor use before you start.
Touch-ups on clay plaster in entryways typically involve smoothing fresh material to blend with the existing work. Use compatible finishes or sealers as recommended by the manufacturer, and test a small area first. Work cleanly, allow proper drying, and follow local guidelines for safety and ventilation; if unsure, consult the label or a pro.
Key takeaways
- Choose lime or clay plaster with compatible protective finishes for high-traffic entryways.
- Scuff resistance depends on finish and maintenance; use appropriate sealant as directed.
- For DIY touch-ups, keep matching pigments and practice blending edges.
- Apply protective finish after curing per manufacturer instructions and local rules.
- Use spill containment and ventilation during plaster work; wear masks and eye protection.
- Inspect for cracks and wear, address early to prevent moisture damage.
Table of Contents
- Introduction
- Key takeaways
- Benefits of Clay Plaster in Entryways
- Scuff Resistance and Durability in High-Traffic Areas
- Protective Finishes Compatible with Clay Plaster
- Application Process for Entryways (Professional and DIY)
- Touch-Ups and Maintenance Techniques
- Common Issues and Troubleshooting
- Safety, Sustainability, and Environmental Impact
- Planning, Cost Considerations, and Comparing Alternatives
- Conclusion
- FAQ
Benefits of Clay Plaster in Entryways
Entryways demand surfaces that can stand up to daily traffic, moisture from shoes, and the wear of furniture. Clay plaster offers a durable, breathable alternative to standard painted drywall and cement-based plasters, with a tactile warmth that resists quick chipping under heavy use. Its composition can be adjusted for different hardness and porosity, helping it wear gracefully in busy zones.
The look and feel of clay plaster contribute to a welcoming entrance, with a matte, depth-rich finish that develops patina over time. Maintenance is straightforward: small scuffs or chips can be repaired without large patches, and protective finishes can be added if desired. Over the long haul, compare upkeep and cost of ownership to common finishes to gauge value, while considering protective options that preserve breathability.
Thermal and acoustic properties
Clay plaster is an excellent choice for entryways due to its ability to moderate humidity. It absorbs excess moisture from the air when it’s humid, then releases it back as the air dries out.
This helps maintain a comfortable indoor environment without relying on energy-intensive heating or cooling systems. Plus, clay plaster contributes to thermal mass – it stores heat during the day and releases it at night, helping regulate temperatures.
Sound dampening is another benefit. Clay plaster absorbs sound waves, reducing echo and noise reverberation in entryways. This can make your space feel quieter and more peaceful.
Aesthetic and tactile advantages
Clay plaster offers a warm, inviting look that’s perfect for entryways. Its earthy color palette can be customized with natural pigments to match your home’s decor.
The matte texture of clay plaster adds depth and interest to walls. You can choose from smooth or textured finishes depending on the look you want. Over time, clay plaster develops a patina that adds character and charm.
Tactile appeal is another plus. Clay plaster has a soft, warm feel under your hand – a comforting welcome as you enter your home.
Environmental and health benefits
Clay plaster is an eco-friendly choice. It’s made from natural, renewable materials with low-toxicity and low-VOC emissions, making it a healthier option for your indoor air quality.
Because clay plaster is breathable, it allows moisture to pass through the wall while preventing mold growth. This can help improve indoor air quality by reducing the risk of mold-related health issues.
Clay plaster also has sound insulation properties, which can contribute to a quieter, more peaceful home environment – another benefit for your health and well-being.
Scuff Resistance and Durability in High-Traffic Areas
Clay plaster carries intrinsic properties that help resist scuffs, including a fine particle structure and adaptable finish variants. These factors influence how the plaster wears under foot traffic and how easily it can recover from light contact. The choice of binder and fiber content can impact surface hardness and abrasion resistance, which matters in busy entryways.
Expect different levels of wear depending on traffic patterns, from light residential use to constant daily activity. Typical responses include a matte patina and minor abrasions, with deeper damage indicating more extensive wear. Regular cleaning and timely touch-ups keep the surface looking consistent and functional.
How clay plaster performs against scuffs
Clay plaster’s natural makeup gives it a certain toughness. It’s not as soft as some other plasters, so it holds up better to wear and tear.
But remember, surface texture matters. A smooth finish will show scuffs more than a textured one. So, if you’re expecting heavy traffic, consider a textured finish or a wash coat with fine aggregate for extra durability.
Also, don’t forget to check base compaction and substrate preparation. A solid base makes all the difference. Clay plaster can only be as tough as what’s underneath it.
Factors that affect durability
The lifespan of your clay plaster in high-traffic areas depends on several factors. Let’s dive into the key ones:
Substrate quality and prep: A solid base is crucial. Check for proper compaction, leveling, and moisture control during substrate preparation.
Thickness matters: Thicker isn’t always better. Aim for a consistent 3/8″ to 1/2″ thickness. Too thin might crack, too thick can hide issues and waste material.
Pigment choice: Dark colors absorb more heat, which can lead to cracking over time. Consider lighter shades for high-traffic areas. Also, ensure pigments are compatible with your clay plaster mix.
Sealers and maintenance: Use a good quality sealer to protect against moisture and wear. Regularly inspect and touch up any minor damage to prevent bigger issues down the road.
Testing and visual checkpoints
Use this checklist after installation to ensure your clay plaster surface in high-traffic areas is performing as expected. Regular checks help prevent expensive rework.
- Check for proper curing: Ensure the plaster has cured for at least 28 days before heavy use, as per manufacturer’s instructions. Insufficient curing can lead to surface damage and reduced scuff resistance.
- Inspect for moisture content: Use a moisture meter (available at hardware stores) to check if the plaster has dried out properly. Moisture levels should be below 18%. High moisture content can affect durability and scuff resistance.
- Examine surface smoothness: Run your hand over the surface to feel for any rough patches or imperfections. A smooth surface is more resistant to scuffs than a rough one.
- Perform the ‘coin test’: Gently rub a coin (like a quarter) on the surface in a circular motion. The surface should be smooth and even, with no visible marks or scratches. This tests the surface’s hardness and resistance to scuffs.
- Check for proper sealing: Apply a small amount of water to the surface. If it beads up and doesn’t absorb, the sealant is working properly. A poorly sealed surface can be more susceptible to scuffs and stains.
- Inspect corners and edges: These areas are prone to damage due to increased foot traffic. Check for any signs of chipping or cracking, which could lead to further damage over time.
- Test with a soft object: Gently drag a soft object (like a cloth or rubber sole) across the surface. The surface should show no visible marks or scratches. This tests the surface’s resistance to scuffs from everyday items.
- Observe under different lighting: Check the surface under both natural and artificial light to ensure there are no color variations, which could indicate improper mixing or application.
Quick rule: Regularly inspect high-traffic areas every few months to catch any potential issues early. Early intervention can prevent minor problems from turning into major ones.
Protective Finishes Compatible with Clay Plaster
Breathability and chemical compatibility are essential when choosing finishes for clay plaster. Finishes that trap moisture can cause issues, so look for options that allow the plaster to breathe while resisting surface damage. Select sealants and finishes that align with this requirement and review the label for guidance.
Common choices include lime-based products, water-based options, and discreet waxes or oils. Each has its own balance of permeability and durability, so weigh sheen, porosity, and film thickness to preserve texture and moisture management while improving scuff resistance.
Breathable sealers and natural waxes
Clay plaster loves to breathe. That’s why we want breathable finishes that let moisture escape, not trap it. Sealers and natural waxes are perfect for this.
Breathable sealers like limewash or tea-stain sealers give a matte finish and protect against minor scuffs. They don’t block pores, so your plaster can still breathe.
Natural waxes, like beeswax or carnauba wax, create a protective barrier while letting moisture pass through. They add a subtle sheen and enhance scuff resistance without sacrificing breathability.
Water-repellent and scuff-resistant topcoats
Entryways need extra protection. Water-repellent and scuff-resistant topcoats can help.
Water-based acrylic sealers offer good water resistance and durability. They’re great for high-traffic areas, but they have a slight sheen that might not fit every look.
For heavy-duty protection, consider micro-hybrid topcoats. They blend acrylic and silicone to create a tough, water-repellent barrier. But remember, more durability can mean less breathability.
Hybrid coatings and trade-offs
Micro-hybrid topcoats are a step up in durability, but they come with trade-offs. Let’s talk about that.
These coatings blend acrylic and silicone to resist water and scuffs. But they’re not as breathable as natural waxes or limewash. That means your plaster might sweat if it can’t breathe properly.
They also have a slight sheen, which might not fit the natural look of clay plaster. So, use them wisely. If you live in a humid climate or have heavy foot traffic, they might be worth the trade-off. But test first to make sure you like the look and feel.
Application Process for Entryways (Professional and DIY)
A solid prep is the foundation: assess the substrate, address moisture, and plan for high-traffic zones. Verify compatibility and repair any cracks before starting, since failures here show up quickly on busy walls. Gather the right materials and tools so the job moves smoothly for both pros and capable DIYers.
Plan layering carefully, with base and finish coats that suit a high-traffic entry. Follow recommended thicknesses and feather edges to blend edges at doors and trims. Keep a controlled environment during curing and protect surfaces from rapid changes in temperature or humidity.
Surface prep and substrate requirements
Before you start slapping on that concrete, you gotta make sure your base is ready. Here’s what you need to check:
Cleanliness: Sweep off any dirt, debris, or old material. A clean surface means better adhesion.
Firmness and compaction: Check base compaction. It should be firm and solid underfoot. If it’s soft or gives way, you might need to compact it more or add a layer of gravel and compact that.
Moisture level: Concrete loves water, but not too much. Make sure your base isn’t wet or damp. If it is, let it dry out before proceeding. You can check moisture levels with a simple test kit from your local hardware store.
Lastly, if you’re using lath or board for reinforcement, make sure they’re securely fastened and won’t move around when the concrete goes down.
Layering, drying, and curing considerations
Alright, listen up. You’ve prepped your surface right? Good. Now let’s talk layers.
First layer: That’s your base course. It needs to be at least 4″ thick for entryways. Check the label or manufacturer’s instructions for mix design. Lay it, then check base compaction. Use a vibrator if needed.
Drying time: Depends on weather, but figure around 24 hours before you lay your next layer. Keep an eye out for signs like reduced surface moisture and no visible bleeding. Don’t rush it, or you’ll end up with a weak joint.
Subsequent layers: After the base, each layer should be at least 3″ thick. Again, check your mix design. Lay it, compact it, let it dry. Repeat until you’re done. And remember, curing is crucial. Keep that slab moist and covered for at least a week, unless local rules or product specs say otherwise.
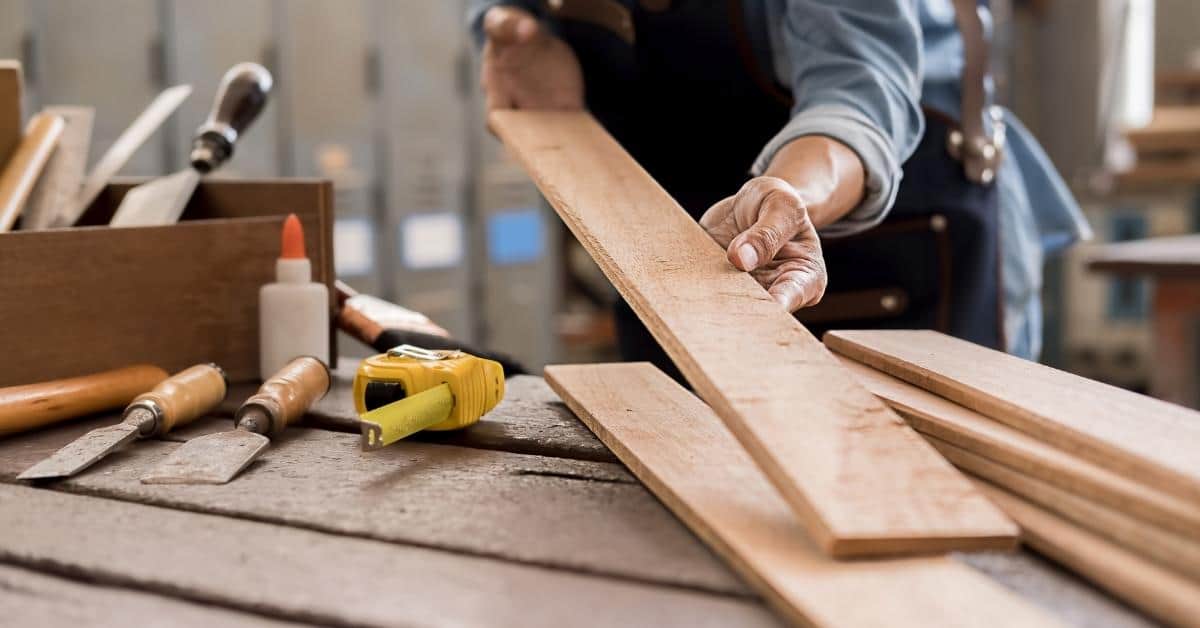
Tools and materials checklist
Use this list before you start mixing concrete for your entryway. It’ll help you gather everything you need and avoid common mistakes.
- Concrete Mix: Check the label to ensure it’s suitable for outdoor, high-traffic areas like an entryway. Verify it’s a 3000 or 4000 PSI mix for durability.
- Water: Ensure water is clean and free of contaminants. Use a 5-gallon bucket to measure the exact amount needed (typically 5 gallons per 80-pound bag).
- Concrete Mixer: Inspect your mixer to ensure it’s in good working condition. For an entryway, you’ll likely need a 1/2 cubic yard capacity mixer.
- Shovel: Have a sturdy, sharp-edged shovel for transferring and spreading concrete. Check the blade for any nicks or bends.
- Trowels (Hand & Margin): Ensure you have both hand trowel (12″ – 16″) and margin trowel (3/8″ – 1/2″). Check their edges for sharpness.
- Float: A 4′ x 8′ float is typically needed for an entryway. Inspect it for any damage or wear.
- Edging Tool: To create clean, crisp edges around your entryway. Check its blade for sharpness and ensure it’s the right size for your job.
- Protective Gear: Safety glasses, work gloves, long sleeves, and sturdy boots are essential. Check your gear to ensure it’s in good condition.
Quick rule: Always check local rules and manufacturer instructions before starting any concrete project. This ensures you’re using the right materials and following approved methods.
Touch-Ups and Maintenance Techniques
Begin by evaluating wear patterns to determine repair targets, prioritizing scuffs, chips, and hairline cracks. Document what needs touching up and plan small, controlled repairs that blend with the surrounding plaster. Keep notes on color and texture for repeat maintenance.
Repair methods should use compatible lime putty or refinishing plaster, with attention to feathering edges and proper curing. Practice color matching on an inconspicuous area, apply thin layers, and blend into the surrounding finish. Consider breathable sealers or waxes for ongoing protection and easier touch-ups.
Small-area touch-up step-by-step
Learn how to tackle localized repairs on your clay plaster entryway with these simple steps.
- Inspect the area: Identify scuffs, chips, or cracks. If deep voids are present, note them for later repair.
- Clean the surface: Gently wipe the area with a damp cloth to remove dirt and dust. Protect adjacent surfaces using painter’s tape.
- Choose your plaster: Select lime-putty or compatible refinishing plaster that matches your existing finish.
- Apply the patch: Using a trowel, apply the plaster to the affected area, feathering the edges to blend with the surrounding surface. For deep voids, apply in thin layers, allowing each to cure before applying the next.
- Cure properly: Allow the patched area to cure according to the manufacturer’s instructions. Avoid trapping moisture during this process.
Blending pigments and matching texture
Achieving a seamless transition between patched and existing surfaces requires careful color matching and texturing. Start by testing your pigment on an inconspicuous area to ensure it matches the surrounding finish.
Mixing: Combine pigments with a small amount of plaster, aiming for a consistency that closely matches the sheen and texture of the existing surface.
Apply the mixture in thin layers, using a trowel to feather the edges into the surrounding area. This technique helps create a smooth, seamless transition between the patched area and the rest of your entryway.
When to recoat vs. spot repair
Deciding whether to perform a spot repair, partial recoat, or full reapplication depends on the extent of damage and the overall condition of your finish.
Spot repairs: If you have isolated scuffs, chips, or hairline cracks, spot repairs are usually sufficient. Follow the steps outlined in the previous section to tackle these localized issues.
Partial recoat: When multiple areas show signs of wear but the overall finish is still in good condition, consider a partial recoat. This involves applying a new layer of plaster over the affected areas, ensuring proper surface preparation and curing.
Full reapplication: If your entryway shows extensive damage or an uneven finish, it may be best to perform a full reapplication. This process involves stripping away the old plaster, preparing the substrate, and applying new plaster throughout the area. Consult with a professional if you’re unsure about tackling this task yourself.
Common Issues and Troubleshooting
Moisture, cracking, and scuffing are typical concerns in entryways. Identify moisture sources early and assess substrate compatibility before patching. Regularly inspect for signs of delamination near joints or floor transitions, and address any movement promptly.
Use breathable lime plaster and compatible topcoats, maintain proper wall prep, and protect splash zones with suitable details. When issues arise, follow targeted repair steps and reapply protective finishes after repairs dry to maintain consistency.
Cracking, delamination, and adhesion failures
Cracks, delamination, or poor adhesion in your clay plaster entryway can be due to substrate movement, inadequate preparation, or incorrect mixing. Substrate movement, caused by settling or structural issues, can lead to cracks. Ensure your walls are stable before applying plaster.
Inadequate preparation of the surface can result in poor adhesion. Clean and prime surfaces properly to create a good bond. Incorrect mix ratios can also cause delamination. Follow manufacturer guidelines for mixing lime putty and aggregates.
To correct these issues, pinpoint the cause first. For cracks due to movement, consider reinforcing the substrate or consulting a professional. For adhesion failures, remove loose plaster, clean the surface, and reapply using proper techniques.
Staining, abrasion, and moisture-related problems
Clay plasters can stain from dirt, mold, or efflorescence. Abrasion occurs due to foot traffic, while moisture-related issues stem from leaks, condensation, or rising damp. Stains can be cleaned using a soft brush and mild detergent solution. For efflorescence, remove excess salt deposits with a wire brush after the plaster has fully cured.
To mitigate moisture problems, perform a moisture test on your substrate before applying plaster. If dampness persists, consider installing a damp-proof course or improving ventilation. To prevent abrasion, use durable topcoats and apply floor protectors at entry thresholds.
Mistakes to avoid during touch-ups
Touching up clay plaster can be tricky. Here are some common mistakes to avoid for better results.
- Using the wrong sealer. Ensure you’re using a breathable, compatible sealer that won’t trap moisture and cause issues later.
- Overworking the patch. Overworking can introduce air bubbles or weaken the plaster. Work quickly but carefully.
- Mismatched pigment. Blend pigments thoroughly before application to ensure a consistent color match.
- Not allowing proper drying time. Rushing reapplication of protective finish can trap moisture and lead to further issues.
Avoid these mistakes by taking your time, using the right materials, and following best practices for touch-ups as outlined earlier in this guide.
Safety, Sustainability, and Environmental Impact
Handle clay plaster with appropriate PPE and ensure good ventilation during mixing and application. Manage dust, protect skin and eyes, and maintain airflow to keep the work area comfortable. Have a plan for quick first-aid responses should exposure occur.
Consider the environmental footprint by sourcing natural materials and choosing low-VOC finishes. Use water wisely, minimize waste, and look for recyclable packaging. Plan application steps to reduce rework and extend the life of the finish through careful maintenance.
Safe handling, ventilation, and PPE
Clay plaster is generally safe to handle, but proper precautions ensure a comfortable work environment. Wear long sleeves, gloves, and safety glasses to protect your skin and eyes from dust and debris.
For mixing, use a respirator with a P100 filter or higher to safeguard against inhaling fine particles. Keep the work area well-ventilated by opening windows or using fans. Never mix in enclosed spaces without proper ventilation.
Clean up spills promptly and wet-mop floors to minimize dust. After application, allow the plaster to cure undisturbed before occupying the space to avoid inhaling residual dust.
Low-VOC and natural ingredient options
Clay plasters are naturally low in VOCs, making them an eco-friendly choice. Opt for clays high in calcium montmorillonite, which offer excellent adhesion and breathability.
Choose binders like linseed oil or casein over synthetic alternatives to keep VOC emissions low. Some clay plasters are pre-mixed with natural binders, reducing the need for additional additives.
Look for certifications such as GreenGuard, GREENGUARD Gold, or ECOCERT to ensure low VOC emissions and natural ingredients. Always check product labels for specific information on VOC content and certifications.
Waste reduction and recycling tips
Minimize waste by accurately measuring materials before mixing. Use digital scales for precise ingredient ratios, reducing the need for rework.
Reuse offcuts and leftover plaster where possible. Store in airtight containers to prevent drying out, then remix and use on smaller projects or touch-ups.
Recycle packaging responsibly. Cardboard boxes can often be reused or recycled through local programs. Plastic bags may need to be taken to a specialized recycling facility. Check with your local waste management department for specific guidelines.
Planning, Cost Considerations, and Comparing Alternatives
Develop a realistic project timeline that accounts for prep, layering, and curing without rushing through critical steps. Identify the main cost drivers and outline a simple budget to track material and tool needs, including protective finishes if desired. Compare clay plaster to other finishes in terms of durability and upkeep.
Clarify how finish choices affect maintenance plans and color consistency over large areas. Prepare checks for substrate suitability and bonding aids, and build in quality-control points to avoid cracking or delamination. Plan contingencies for weather and moisture control to keep the project on track.
Estimating time and labor for DIY vs. pro
Planning your project timeline starts with understanding the tasks at hand. Clay plaster application involves several steps, each affecting your schedule and labor intensity.
Preparation: This includes surface cleaning, repairing cracks, and applying a primer or bonding agent. Expect 1-2 days per area for thorough prep work.
Application: Clay plaster application itself takes about 3-4 hours to apply per 100 sq ft, plus drying time between coats (around 24-48 hours).
Hiring a professional can save you time and labor. Pros have experience managing these tasks efficiently, often completing prep work in half the time and applying plaster at twice the speed of an average DIYer.
Cost comparison factors and what to check in quotes
Before signing any contracts or placing orders, use this checklist to verify your quotes. It helps ensure you’re comparing apples to apples.
- Clay plaster material: Check the brand, type (e.g., lime, earth), and color. Different types have varying costs and properties.
- Surface prep materials: Ensure they’ve included primer or bonding agent, sanding tools, and any necessary repairs.
- Finishes and sealers: Verify the type (e.g., wax, oil) and quantity needed for your square footage.
- Moisture barriers: If required, ensure they’re included in the quote.
- Labor costs: Break down labor charges to understand what’s included.
- Waste/overage: Some quotes may include a contingency for waste; if not, add one yourself.
- Warranty: Check if the product or workmanship is covered and for how long.
- Contingency: Include a 10-15% contingency for unexpected costs.
Quick rule: Always ask for line-item quotes to compare accurately. Don’t rely on square footage alone; different plasters have varying coverage rates.
When to choose clay plaster vs. paint, tile, or washable coatings
Clay plaster is a durable, eco-friendly option for entryways, but it’s not always the best fit. Consider these factors when deciding:
Aesthetics: Clay plaster offers a unique, textured look that paint can’t match. However, it may not be suitable if you prefer smooth, uniform surfaces.
Durability and maintenance: Clay plaster is highly durable but requires periodic sealing (every 3-5 years). Paint needs touch-ups more frequently, while tile is low-maintenance but can crack or chip.
Budget: Clay plaster is generally more expensive than paint but cheaper than tile. Washable coatings fall in the middle of this range.
Indoor air quality: Clay plasters improve indoor air quality by absorbing and releasing moisture, making them a good choice for entryways prone to high humidity. Paint and washable coatings may off-gas VOCs initially.
Conclusion
Clay plaster in entryways pays off with better durability, a cleaner look, and safer surfaces in high traffic. When you follow solid prep, correct finishing, and careful maintenance, you reduce damage risk and keep the space looking good longer.
First, assess moisture and the existing substrate, prep and clean the wall, mix and test a small patch, apply in thin, even layers, cure with proper airflow, and finish with a compatible protective coat. Then monitor for chips or scratches, touch up promptly, and keep the surface clean and dry so the finish lasts.
Common mistakes to avoid include over-wetting the plaster or the surface, skipping a moisture check or proper surface prep, and applying a finish that isn’t compatible with clay. Always work in a well-ventilated area, wear a dust mask, protect floors and adjacent surfaces, and test any repair or finish on a small, inconspicuous spot before wider use.
If you run into persistent moisture, large areas, or high-traffic demands that feel beyond DIY scope, call a professional. Otherwise, stay disciplined about small tests, proper drying times, and using only compatible finishes to keep the entryway durable and looking right. You’ve got this—the next step is to plan the first small test patch this weekend and move from there.
FAQ
How can I maximize scuff resistance when clay plastering an entryway?
Keep high-traffic areas clean and dry before finishing. Use a compatible protective finish and avoid abrasive cleaners that can wear the surface.
What are effective touch-up methods for clay plaster in busy entryways?
Spot patch small chips with a thin skim coat that matches the existing texture, then feather the edges to blend. Once dry, lightly rub or buff with a clean, dry cloth to restore tone without overworking the surface.
Which protective finishes work best with clay plaster, and how do I apply them?
Choose a finish that is compatible with clay plaster and suitable for high-traffic areas. Follow the manufacturer’s directions on coats, drying times, and application tool; test on a discreet spot first.
What maintenance tips and cost considerations should I weigh against other materials?
Inspect for scuffs and chips regularly and address them early to avoid larger repairs. Compare material and labor costs with similar alternatives, and check local prices, supplier guidance, and long-term durability before deciding. If in doubt, check product labels and manufacturer instructions.