
Key Takeaways
- Identify burn marks early by looking for color changes, texture variations, surface cracking, and unusual odors.
- Prevent burn marks by using the right trowel, controlling your technique, and monitoring environmental conditions.
- Address burn marks based on severity: sand for minor marks, grind and patch for moderate, and consider replacement for severe damage.
- Regularly inspect your work area and take breaks to cool the surface, especially in hot conditions.
Introduction
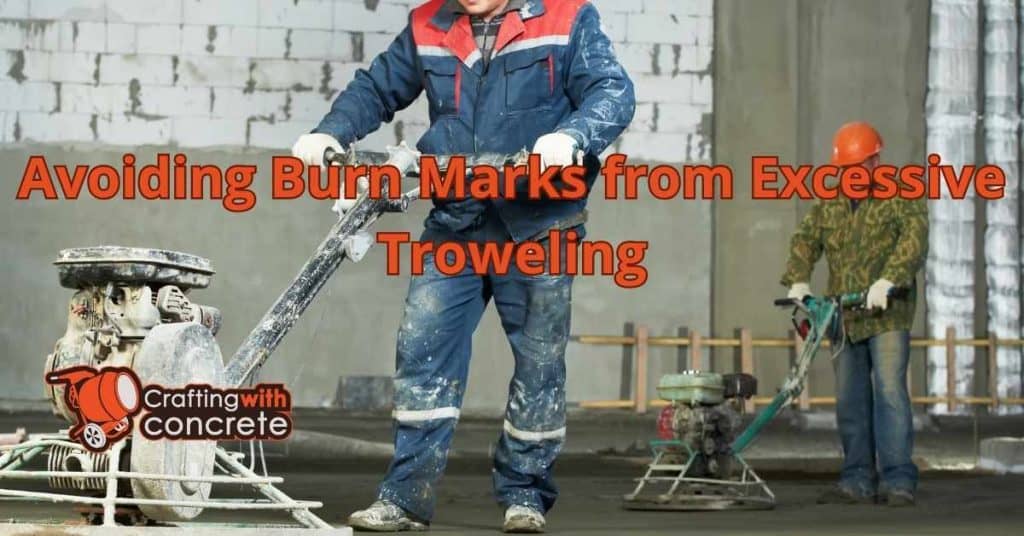
Avoiding burn marks from excessive troweling is essential for maintaining the quality of your work. Understanding the causes and implementing effective strategies can help you achieve a smooth finish without imperfections.
By paying attention to your technique and the conditions in which you are working, you can significantly reduce the risk of burn marks. This proactive approach not only enhances the appearance of your project but also saves time and effort in the long run.
Identifying the Signs of Burn Marks
Identifying burn marks early can save time and effort in your projects. Recognizing the signs helps you take corrective measures before the issue worsens.
Burn marks often appear as shiny, discolored patches on the material’s surface. These areas may look darker and feel smoother than the surrounding surface. Watch for these indicators:.
- Color Changes: Look for unexpected darkening or glossiness.
- Texture Variations: A burn mark may feel slick or less textured.
- Surface Cracking: Burn marks can sometimes lead to cracks or fissures.
- Uneven Finish: An uneven surface may indicate over-troweling.
- Temperature Sensitivity: Check if the area feels unusually hot.
- Sound Changes: A dull thud when tapping may suggest damage.
- Odor Detection: Unusual smells, like burnt material, can signal burn marks.
- Visual Inspection Under Different Lighting: Examine the surface in various lighting to detect subtle discolorations.
Inspect the edges of your work area. Different sheen or texture at the edges could indicate burn marks. Regular checks during troweling help catch these signs early.
Stay vigilant to mitigate potential damage and maintain quality. Trust your instincts; if something seems off, investigate further. Consider these checks for effective burn mark identification:.
Burn marks can develop within minutes of excessive heat exposure, so monitor the surface closely during troweling. Regular inspections every few minutes can catch signs before they escalate.

Understanding What Causes Burn Marks
Understanding what causes burn marks in troweled surfaces is crucial for effective prevention. By identifying contributing factors, you can take proactive steps to avoid these imperfections in your projects.
Burn marks usually occur due to excessive friction during troweling, generating heat that scorches the material’s surface. This often happens when:.
- Troweling too aggressively: Excessive pressure or fast, repetitive motion creates heat buildup.
- Using the wrong type of trowel: A rough trowel generates more friction than a smooth one.
- Working in hot conditions: High temperatures increase the risk of burn marks.
- Overworking the material: Repeated troweling disrupts the curing process.
- Material composition: Different materials have varying heat tolerances.
- Humidity levels: High humidity affects curing time, altering surface texture.
- Tool maintenance: Regular inspection keeps trowels in optimal condition.
- Proper curing times: Allow materials to cure adequately before troweling.
- Timing of troweling: Start when the material is firm enough, typically within 30 to 60 minutes after pouring.
- Technique adjustments: Use a circular or sweeping motion to minimize friction.
- Cooling breaks: Allow the surface to cool during breaks, especially in warm conditions.
- Test patches: Conduct small tests to determine the best method before larger areas.
Recognizing these causes helps you adjust your technique and tools, ensuring a smooth finish without burn marks. Keep these factors in mind for your next troweling job. Troweling should ideally occur at temperatures between 50°F and 90°F (10°C to 32°C) for optimal results.
By implementing these strategies, you can further reduce the risk of burn marks and achieve a professional finish.
Remember, attention to detail in both technique and environmental conditions significantly impacts your work’s outcome.
Failure Modes & Fixes
- Mode: Troweling too aggressively can cause excessive heat buildup. Fix: Use lighter pressure and slower, more controlled motions.
- Mode: Working in hot conditions increases the risk of burn marks. Fix: Schedule troweling during cooler parts of the day or use cooling breaks.
- Mode: Overworking the material disrupts the curing process. Fix: Limit the number of troweling passes and allow adequate curing time.
Solutions Based on Severity of the Issue
Effectively addressing burn marks depends on their severity. This section provides solutions tailored to the seriousness of the issue.
Minor Burn Marks: For slight burn marks, try these remedies:.
- Lightly sand the affected area with fine-grit sandpaper to smooth imperfections.
- Apply a thin layer of fresh mortar or concrete to restore uniformity.
- Feather the edges of the new material with a trowel to blend with the surrounding surface.
Moderate Burn Marks: For more noticeable marks, consider these steps:.
- Grind the area with a concrete grinder to remove burn marks.
- Clean the surface thoroughly to eliminate dust and debris.
- Reapply a patching compound to fill voids and level the surface.
- Finish with a trowel for a smooth, matching finish.
Severe Burn Marks: For extensive marks compromising surface integrity, follow these actions:.
- Assess the burn mark depth to decide on full replacement.
- If needed, cut out the damaged section with a concrete saw.
- Prepare the area by cleaning and ensuring proper bonding surfaces.
- Pour new concrete or mortar, compacting it well.
- Trowel the surface to blend with the surrounding material.
By following these solutions based on the severity of the burn marks, you can restore the surface effectively and prevent further damage.
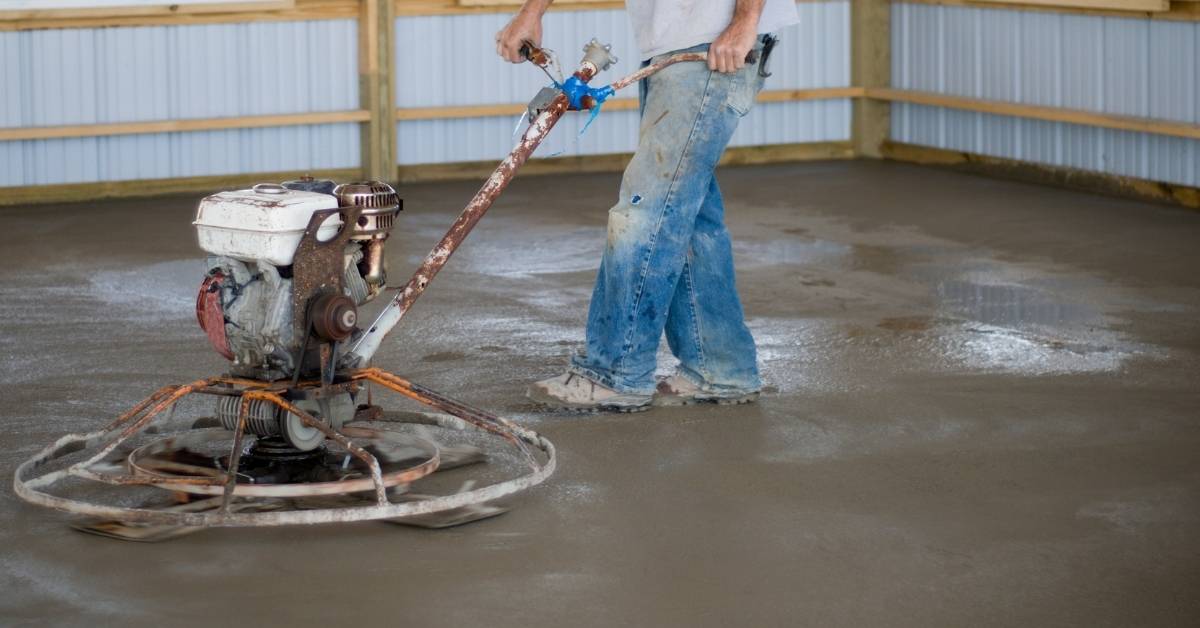
Strategies to Prevent Burn Marks
Preventing burn marks during troweling is crucial for a smooth concrete finish. Effective strategies can minimize over-troweling risks and ensure professional results.
Here are strategies to help you avoid burn marks:.
- Use the Right Trowel: Choose a trowel suitable for your concrete mix. A smooth-finished trowel reduces friction and burn marks.
- Control Your Troweling Technique: Apply consistent pressure. Avoid pressing too hard to prevent excessive heat and burn marks.
- Monitor the Concrete Set Time: Know your mix’s setting time. Trowel too early, and you risk burn marks; too late, and you miss the desired finish.
- Keep the Surface Moist: Lightly mist the surface with water before troweling to reduce friction and cool the surface.
- Use a Finishing Aid: Apply a finishing aid or chemical to the surface before troweling to reduce burn mark risks.
- Practice Proper Equipment Maintenance: Keep trowels clean and debris-free to avoid uneven surfaces and burn marks.
- Adjust Trowel Angle: Maintain a consistent angle. A slight tilt helps distribute pressure evenly, reducing burn marks.
- Limit Troweling Duration: Minimize time on any area. Prolonged troweling increases heat buildup, so work in smaller sections.
- Utilize Cooling Techniques: In hot conditions, use cooling sprays or shade to lower surface temperature before troweling.
- Check Ambient Conditions: Monitor temperature and humidity. Ideal troweling conditions are typically 50°F to 90°F.
Implementing these strategies will help you achieve a flawless finish and avoid over-troweling pitfalls. Pay attention to technique and conditions for the best results.
Be mindful of environmental factors to control work conditions better. During warmer months, schedule troweling tasks in cooler parts of the day, like early morning or late afternoon.
Quick Facts
Time: Typically 50°F to 90°F for optimal conditions.
Pitfalls: Over-troweling can lead to unwanted burn marks.
Best Practices: Maintain consistent pressure and monitor concrete set time for best results.
When Professional Help is Necessary
While many burn marks can be managed with DIY solutions, sometimes professional help is essential. Knowing when to seek help saves time, money, and ensures a quality finish.
If persistent burn marks remain despite your efforts, consult a professional. They can assess the issue’s severity and provide solutions beyond DIY capabilities.
For large areas or intricate patterns, the risk of burn marks increases. Professionals use advanced techniques and tools to achieve a flawless surface, minimizing damage.
If you’re unsure about the causes of burn marks or notice additional issues like cracking or uneven surfaces, a professional can accurately diagnose and recommend repairs.
Consider these signs indicating the need for professional help:
- Consistent burn marks across surfaces may suggest equipment issues.
- Deep, discolored burn marks indicate damage not easily fixed.
- Safety concerns, such as burns from electrical tools, require professional handling.
- Historical or valuable materials may need expert restoration to maintain integrity.
If burn marks persist after two to three DIY attempts or cover an area larger than a foot in diameter, consult a professional. Seeking help early prevents further damage and costly repairs.
For burn marks in high-traffic areas or on surfaces requiring a pristine finish, like furniture or flooring, professional expertise is invaluable for achieving desired results.
Common Questions and Answers
What are burn marks?
Burn marks are discolored or shiny spots on newly placed concrete. They result from excessive friction and heat during troweling.
How can I tell if I’m over-troweling?
Signs of over-troweling include a glassy surface, color changes, or rough texture beneath. A sticky or resistant feel while troweling also indicates over-troweling.
Can burn marks be fixed after they appear?
Though difficult to remove completely, you can improve burn marks by lightly grinding the surface or using a concrete resurfacer. These methods may not fully restore the original finish.
Is there a specific time to stop troweling?
Stop troweling when the surface can support your weight without deep impressions. This is usually when the concrete has set but remains workable, often within the first hour after placement.
What tools can help prevent burn marks?
Use a magnesium or wood float to reduce burn marks compared to steel trowels. Keep tools clean and free of debris to minimize friction.

Conclusion
To effectively address burn marks, it’s essential to categorize their severity and apply the appropriate remedial measures. Minor marks may require simple sanding, while severe cases might necessitate complete replacement of affected areas.
By implementing these strategies and solutions, you can achieve a professional finish and enhance the durability of your work. Remember, attention to detail and technique can make all the difference in preventing burn marks.
Stay proactive and ensure the quality of your projects by applying these insights today!
FAQ
What are the signs of burn marks on surfaces?Burn marks often appear as shiny, discolored patches that may feel smoother than the surrounding area. Look for color changes, texture variations, and surface cracking to identify these marks early.
What causes burn marks during troweling?Burn marks are typically caused by excessive friction from aggressive troweling, using the wrong type of trowel, or working in hot conditions. Recognizing these factors allows you to adjust your technique and tools to avoid imperfections.
How can I prevent burn marks while troweling?To prevent burn marks, use the right trowel, control your troweling technique, and monitor the concrete set time. Keeping the surface moist and practicing proper equipment maintenance also helps minimize the risk.
What should I do if I find burn marks on my surface?The approach depends on severity. For minor marks, lightly sand and apply fresh mortar. For severe marks, you may need to assess the damage and possibly replace the affected section to restore integrity.