
Introduction
If an anchor bolt landed wrong in concrete, drilling and epoxy can correct the install and restore holding strength. This hands-on guide walks through practical steps for re-anchoring and preventing misalignment when you’re handling pallet racks. You’ll learn how to evaluate the situation, choose a repair approach, and proceed safely on site.
focus>
Key Takeaways
- Ensure epoxy anchors and layout meet manufacturer specs and OSHA requirements.
- Correct placement prevents rack movement, collapse, and costly rework or injuries.
- Use the right drill, epoxy, and sleeves per concrete and load.
- Stepwise fix requires clean bore, proper depth, and cure time per labels.
- For large misplacements, consult structural guidance or replace anchor system.
- Wear PPE, implement lockout, and brace loads during corrections to prevent injuries.
Table of Contents
- Introduction
- Key Takeaways
- Why Correct Anchor-Bolt Placement Matters for Safety and Compliance
- Common Installation Errors and How to Identify Them Early
- Tools, Materials, and Specs for Drill-and-Epoxy Repairs
- Step-by-Step Drill-and-Epoxy Fix for a Misplaced Anchor Bolt
- Advanced Repair Options for Large Misplacements or Critical Loads
- Prevention: Layout, Surveying, and Drilling Best Practices to Avoid Mistakes
- Safety Protocols and Site Controls During Corrections
- Cost, Inspection, and Decision Framework: Repair Versus Replace
- Conclusion
- FAQ
Why Correct Anchor-Bolt Placement Matters for Safety and Compliance
Anchor bolts that land in the wrong position can undermine the structure’s load path and fail to meet code requirements. Layout factors such as column spacing, anchor type, concrete condition, and seismic considerations all influence performance. Understanding these elements helps prevent costly corrections later.
Misplacement can trigger OSHA citations, fines, and required corrective actions that slow work and erode warranty protections. The consequences extend to downtime and potential damage to slab integrity. Drill-and-epoxy fixes may serve as an interim remediation, but they must preserve long-term layout integrity and safety according to manufacturer instructions and local rules.
OSHA, Code, and Liability Implications
Improperly placed anchor bolts can result in significant legal and financial repercussions. OSHA citations for improper anchoring are common, with penalties ranging from $13,653 to $136,532 per violation (as of 2021).
Local building codes also impose fines and required corrective actions for non-compliance. Incorrect anchor placement can void warranties on concrete slabs and cause damage that may not be covered by insurance.
Always verify local OSHA regulations, building codes, and manufacturer guidelines to ensure compliance.
Structural and Operational Risks from Misplaced Anchors
Misplaced anchor bolts can compromise the structural integrity of your building or equipment. They may not support loads properly, leading to stress concentrations that cause cracking or failure.
In seismic areas, improperly placed anchors can reduce a structure’s resistance to earthquakes, increasing the risk of damage or collapse during tremors. Additionally, misplaced anchors can interfere with proper operation and maintenance of machinery and equipment.
To mitigate these risks, carefully plan anchor placement based on load distribution, column spacing, and seismic considerations.
Common Installation Errors and How to Identify Them Early
Identify and correct five common errors at the layout and drilling stage: misalignment, incorrect depth, improper spacing, dirty or debonded holes, and angled drilling. Always check edge distances and hole positions against the planned layout. Use a physical jig or template to verify the layout before drilling.
Pre-install checks should confirm drill bit size and anchor type match the spec, and holes must be clean and dry. Measure embedment depth with a gauge or marked drill bit before setting any fasteners. Post-drilling verification should inspect hole cleanliness, depth, perpendicularity, and spacing using precise tools like a caliper or ruler.
Typical Misalignments, Spacing Errors, and Hole Defects
To ensure a strong and safe structure, avoid these common mistakes during layout and drilling.
- Holes off-grid: Check hole positions against the planned layout using a jig or template. If holes are not where they should be, flag them for remedial action or redrill.
- Improper edge distance: Measure the distance from holes to edges. If it’s less than 2 times the anchor diameter, flag these holes for correction.
- Inadequate spacing between anchors: Use a ruler or caliper to ensure holes are at least 3 times the anchor diameter apart from each other. If not, flag them for correction.
- Holes with defects: Visually inspect holes for powder, rebar hits, or irregular edges. If present, clean and prepare these holes before setting anchors.
Correct layout, redrill holes as needed, and clean and prepare them before setting anchors to prevent structural integrity issues.
Visual Checkpoints and Quick on-Site Tests
Before setting any fasteners, perform these quick checks to ensure a successful installation.
- Dry-fit anchor: Check alignment, perpendicularity, and engagement. If not correct, adjust layout or drilling.
- Check plumb and alignment: Use a level/line laser to confirm the layout is plumb and aligned. If not, investigate and correct any discrepancies.
- Confirm drill bit size: Ensure the drill bit size matches the anchor type spec. Incorrect size can lead to improper fit or damage.
- Check hole cleanliness: Clean and dry holes before setting anchors. Dirty or wet holes can affect the bond strength of epoxy-set anchors.
- Measure hole depth: Use a gauge or marked drill bit to measure hole depth. Incorrect depth can lead to insufficient anchor engagement.
- Perform seating test: Apply a light pull or wrench torque on a few anchors to confirm proper seating. If anchors do not seat properly, investigate and correct the issue.
Quick rule: Always perform these quick checks before setting any fasteners to prevent costly rework and ensure compliance with safety standards.
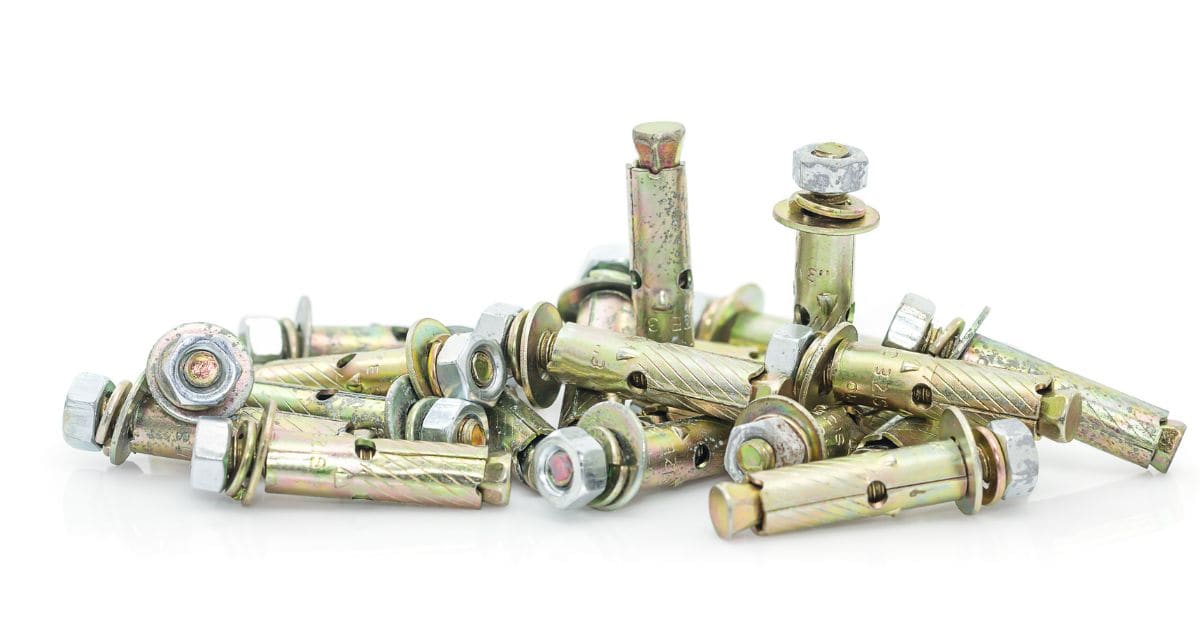
Tools, Materials, and Specs for Drill-and-Epoxy Repairs
Core tools for drilling and accuracy include a hammer drill or rotary hammer suited to concrete, paired with masonry bits sized to the anchor diameter. Set appropriate speed and percussion and ensure reversible operation for clean insertion. Choose the right combination for the repair situation.
Epoxy repair kits and anchor types should be compatible with concrete substrate and sleeve/bolt material, with correct mixing ratio, pot life, and cure times. Verify the system works with the chosen anchor and substrate by checking manufacturer instructions and data sheets. Dispensing gear, mixing cups, and clean-out brushes help maintain clean work and prevent premature curing.
Tools and Materials Checklist
Selecting the right tools and materials ensures job efficiency, safety, and a successful repair.
- Rotary Hammer: Choose between heavy-duty or compact models based on job scale. Heavy-duty hammers offer high torque for large-scale jobs, while compact ones provide better maneuverability for limited access areas.
- Masonry Bits: Use bits specifically designed for concrete and sized to match the anchor diameter. Ensure they are in good condition to prevent binding or breaking during use.
- Epoxy Injection System: Opt for bonded epoxy cartridges or dual-syringe systems, ensuring they are compatible with your chosen anchor sleeves/bolts and suitable for concrete substrates.
- Dispensing and Mixing Gear: Use a cartridge gun or compatible dispensing tool along with static-mixing nozzles, mixing cups, and clean-out brushes. Plan for waste disposal and post-use cleaning to prevent premature curing.
- Hole Preparation Tools: Include wire/steel brushes or abrasive brushed cleaning tools, vacuum or compressed air for dust removal, and solvent wipes if required. Verify hole depth and cleanliness before anchor placement.
- Personal Protective Equipment (PPE): Ensure you have eye/face protection, gloves, and a respirator if fumes or fine dust are present. Maintain good ventilation throughout the job.
Material Specs and Standards Explained
Understanding material properties and adhering to industry standards ensures reliable performance and compliance with regulations.
- Anchor Bolts: Verify anchor material grade (e.g., ASTM A307) and coating type/quality to prevent corrosion. Check load ratings, temperature/humidity ranges, and substrate compatibility.
- Epoxy Systems: Ensure the epoxy system is suitable for concrete substrates, has an appropriate mixing ratio, and meets required load ratings and cure times. Consider pot life and working time for efficient application.
- Cleaning Agents: Choose cleaning agents that effectively remove dust and debris without compromising substrate integrity or interfering with anchor bonding.
- Mixing Cups and Nozzles: Use mixing cups and static-mixing nozzles designed for your chosen epoxy system to ensure proper mixing and efficient dispensing.
- PPE and Safety Equipment: Select safety equipment that meets or exceeds industry standards, providing adequate protection against potential hazards during the repair process.
Step-by-Step Drill-and-Epoxy Fix for a Misplaced Anchor Bolt
Safety and prerequisites include verifying manufacturer instructions and local code requirements, plus proper PPE. If concerns arise, pause and consult a qualified pro before proceeding. Outline clear decision points if relocation is not feasible and a new hole is required.
Material and location checks should confirm the exact anchor type, diameter, and embedment depth, and verify the original hole position and structural conditions. Decide whether relocation is feasible or a new hole must be drilled based on the misalignment.
Step-by-Step Repair Process
Follow this clear, numbered sequence for a safe drill-and-epoxy fix of a misplaced anchor bolt. It covers preparation, main work, and final checks.
- Verify manufacturer instructions, local code requirements, and wear appropriate PPE before starting.
Reason: Safety and compliance with regulations. - Perform visual checkpoints to confirm the anchor’s misalignment.
Quick check: Mark the new hole position if relocation is feasible or decide on a new hole. - Mark the corrected hole position, ensuring it’s plumb and level.
Decision point: If the misalignment is too large, consider relocating the anchor or drilling a new hole. - Drill the hole using the specified bit type/size, maintaining correct angle and pressure to avoid dishing or binding.
Quick check: Ensure the drill bit penetrates to the correct embedment depth. - Clean the hole thoroughly to remove dust and gypsum, then decontaminate the surface.
Reason: Efficient epoxy bonding and preventing contamination. - Select a compatible epoxy system, mix it according to instructions, and inject it into the hole using the appropriate method (through-hole or retro-injection).
Quick check: Ensure the anchor is secure during cure time. - Monitor the cure time, perform post-cure stiffness checks, and verify load transfer.
Reason: Successful repair and compliance with manufacturer instructions. - Document the repair for future reference and inspections to prevent recurrence.
Reason: Maintaining structural integrity and compliance with local codes.
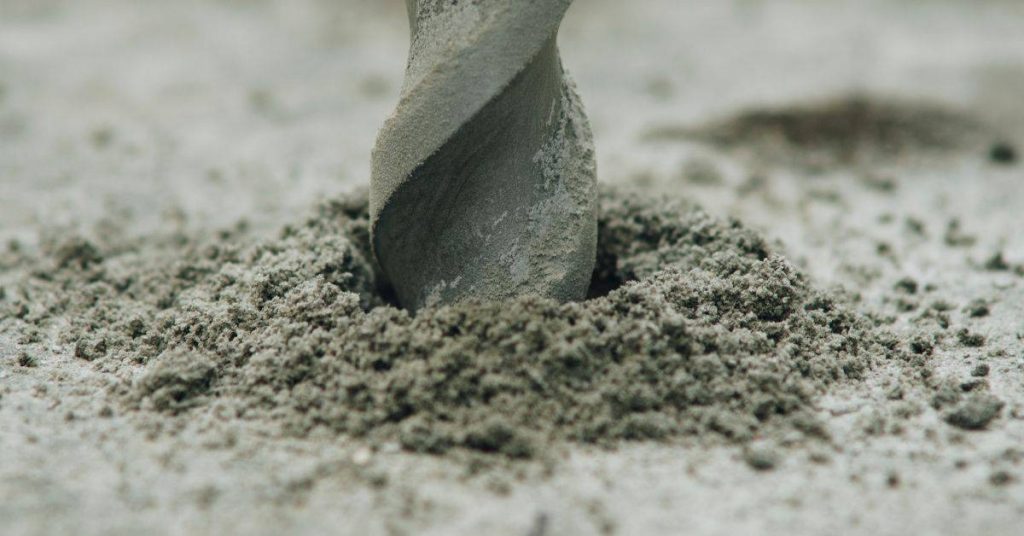
Hole Preparation and Cleaning Best Practices
Proper hole preparation ensures efficient epoxy bonding and prevents contamination. Inspect the hole condition before proceeding with repairs.
Use suitable tools and materials for the task, such as a vacuum or brush to remove dust and gypsum from the hole. Decontaminate the surface to ensure optimal epoxy adhesion.
Note: Contaminants like oil, grease, or moisture can compromise the bond strength of the epoxy.
Drilling Straight and to Correct Depth
Precise drilling prevents damage to structural members. Ensure your technique avoids dishing or binding, which can weaken the structure.
Inspect your drill bit’s condition and confirm it’s suitable for the task. Select an appropriate drill bit type and size, maintain a correct angle (typically 90 degrees), and apply consistent pressure while drilling to achieve the desired depth.
Tip: Measure and mark the required embedment depth on the drill bit to prevent over-drilling.
Epoxy Injection, Bolt Installation, and Curing Checks
Select a compatible epoxy system that matches your anchor type and follows the manufacturer’s mixing ratio instructions. Inject the epoxy using the appropriate method (through-hole or retro-injection) to ensure proper filling of the hole.
Secure the anchor position during cure time to prevent movement, which could compromise the repair. Monitor the cure time, perform post-cure stiffness checks, and verify load transfer to confirm a successful repair.
Warning: Do not apply any load to the anchor until the epoxy has fully cured as per the manufacturer’s instructions.
Advanced Repair Options for Large Misplacements or Critical Loads
Bonded sleeves and dowels require selecting appropriate sleeves, epoxy type, and proper orientation for reliable load transfer. Pay attention to alignment and post-cure inspection to ensure performance. Use metal or HDPE sleeves as specified by the design and manufacturer instructions.
Epoxy-grouted rebar dowels demand correct dowel size and length, proper hole cleanliness, and adherence to cure times and load-testing guidelines. Cutting and re-pouring small slab areas may be necessary in some cases, with attention to forms, shoring, curing, and potential effects on nearby anchors.
Bonded Sleeves and Rebar Dowels
For larger misplacements or critical loads, bonded sleeves and rebar dowels provide robust solutions. Choose between metal or HDPE sleeves based on your specific needs and local codes.
Epoxy is crucial for adhesive bonding. Follow the manufacturer’s instructions to select the appropriate epoxy type and ensure proper mixing and application.
Align sleeves and dowels carefully, maintaining a consistent orientation throughout the repair. After installation, allow sufficient time for the epoxy to cure before applying any load. Inspect the repair after curing to confirm a strong bond.
Partial Slab Removal and Reinstall Approaches
In some cases, it may be necessary to remove and reinstall small areas of the slab. Before proceeding, obtain approval from relevant authorities and ensure all required forms and shoring are in place.
Thoroughly prepare the surface by cleaning and removing any loose material. Use approved concrete mix and follow proper pouring procedures. Allow adequate time for curing before applying any load or final finishing.
Be aware that this process may impact adjacent anchors. Inspect and test these areas to ensure they remain sound and can bear the intended loads.
Prevention: Layout, Surveying, and Drilling Best Practices to Avoid Mistakes
Detail the use of laser alignment or surveyed benchmarks to create a unified coordinate system that remains consistent between the layout crew and drill operators. Establish clear reference points to reduce drift. Maintain a documented process for updates when conditions change.
Specify drilling sequence, hole spacing tolerances, and corrective steps if measurements drift during setup. Include a pre-drill inspection checklist and a method for recording deviations. Establish a communication protocol and sign-off between layout personnel and drill operators, plus documentation for changes and approvals.
Accurate Templating and Transfer Methods
To ensure precise bolt placement, especially in repeating patterns, use durable, rigid templates made from materials like aluminum or steel. These can withstand drilling without warping or breaking.
Before drilling, perform a quick on-site test by aligning the template with existing bolts or reference points to confirm its accuracy. If the template does not fit accurately, adjust or remake it and recheck before proceeding.
If holes are misaligned after drilling due to template inaccuracies, use drill-and-epoxy repair to correct bolt position.
Drilling Guidance: Stands, Pilots, and Alignment Tools
To maintain plumb and accurate depth for anchor bolts, use appropriate drill guides, stands, pilot holes, and fixture strategies.
- Drill Stands: Ensure they can secure the drill at the required angle and depth. If unstable, secure additional support and recheck stability.
- Pilot Holes: Drill small pilot holes first to guide the main drill bit, ensuring accurate placement. Check their accuracy using a level or plumb bob before starting main drilling.
- Magnetic Jigs: Use for drilling into steel surfaces. Ensure they are securely attached and aligned with the desired bolt pattern.
- Anchored Jigs: For concrete, use anchored jigs to maintain drill bit position. Ensure they are properly secured before drilling.
- Drill Guides: Use these for maintaining drill bit alignment. They can be rented or borrowed, offering a cost-effective solution compared to buying.
Safety Protocols and Site Controls During Corrections
PPE and exposure controls should cover hard hats, eye or face protection, hearing protection, gloves, and respiratory protection for dust or fumes. Include proper donning and doffing procedures, training, and contingency for impaired equipment. Ensure a clear plan for emergency conditions.
Dust, silica, and air control require wet-cutting or dust suppression, HEPA-vacuum collection, and local exhaust ventilation where feasible. Establish cleanup schedules and containment to prevent cross-contamination and minimize exposure. Maintain fall protection, edge controls, and rescue planning as needed during corrections.
Dust Control, Ventilation, and PPE Essentials
Wear appropriate personal protective equipment (PPE) when working with concrete. This includes a hard hat, safety glasses or face shield, hearing protection, gloves, and an N95/PAPR or elastomeric respirator to protect against silica dust.
Donning and doffing procedures should be followed strictly. Ensure your equipment fits properly and is in good condition. If you notice any issues, inform your supervisor immediately for a replacement or repair.
Implement dust control measures such as wet-cutting methods or dust suppression techniques to minimize silica exposure. Use HEPA vacuums for collection and local exhaust ventilation where possible. Real-time dust monitoring can help ensure safety.
Establish a regular cleanup schedule to prevent cross-contamination. Contain dust and debris within the work area using barriers or other means as necessary.
Load Control, Shoring, and Temporary Bracing
Before starting any corrections, isolate or retard nearby live loads and equipment to prevent additional stress on the structure. Implement a lockout/tagout procedure as needed to ensure safety.
Maintain temporary support where the repair could affect adjacent anchors. This helps distribute loads evenly and prevents further damage. Use proper shoring techniques and materials to provide stable support.
Communicate live-load status to all crew members. Ensure everyone is aware of any changes in conditions or structural integrity. Regularly inspect and maintain temporary bracing systems to ensure they remain effective.
If the repair could affect adjacent anchors, consult with a structural engineer to assess the situation and determine if additional support is necessary.
Cost, Inspection, and Decision Framework: Repair Versus Replace
Develop a decision framework to determine when a drill-and-epoxy repair is cost-effective versus a full re-layout or slab repair. Include criteria related to risk, downtime, and safety considerations. Use a documented process to guide follow-up inspections after repairs.
Identify key cost drivers such as epoxy and anchor costs, labor, precision drilling, potential patching, and equipment rental. Document the rationale for choosing a repair now with future inspections versus a full-layout redesign. Consider safety implications and long-term reliability in the decision.
Cost Comparison and Risk Assessment Checklist
Use this checklist when deciding between a drill-and-epxy repair and full re-layout or slab repair.
- Epoxy/Anchor Costs: Estimate the cost of epoxy and anchors for each option. Check manufacturer’s pricing and availability.
- Labor Hours: Calculate labor hours required for each option, including drilling, epoxy injection, and bolt installation. Consult with a professional if unsure.
- Precision Drilling: Consider the precision required for drilling new holes or re-drilling existing ones. Check your equipment’s capability and any rental costs.
- Floor Patching: Estimate the cost and time for floor patching after repair or replacement. Inspect the area to determine the extent of patching needed.
- Equipment Rental: If renting equipment, factor in rental costs for each option. Check local rental rates.
- Outage Impact on Operations: Estimate downtime and any impact on operations for each option. Consult with facility managers or production planners.
- Safety Risk Assessment: Evaluate the safety risks associated with each option, including drilling, epoxy injection, and any temporary bracing required. Follow OSHA guidelines for construction safety.
- Required Downtime: Determine how much downtime is acceptable for your operations. Consider production schedules and maintenance windows.
Quick rule: If the cost of repair is less than replacement, downtime is shorter, and safety risk is acceptable, proceed with a drill-and-epoxy fix, document it, and schedule follow-up inspections. Otherwise, consider full re-layout or slab repair.
Inspection, Testing, and Documentation Requirements
Use this checklist to ensure the quality of your repair and future safety.
- Visual Inspection: Inspect the area before and after repair for any signs of damage or improper installation. Check for cracks, voids, or misaligned bolts.
- Epoxy Cure Check: Verify that the epoxy has fully cured according to manufacturer’s instructions. Check for proper hardness and adhesion.
- Anchor Pull-Out Strength Test: Conduct a pull-out test on the anchors to ensure they meet required strength. Follow ASTM D9864 standards.
- Slab Integrity Check: Inspect the slab for any signs of damage or weakness around the repair area. Check for delamination, cracking, or other signs of distress.
- Non-Destructive Testing (NDT): Conduct NDT such as ultrasound or impact echo to confirm the integrity of the repair. Consult with a professional if unsure about testing methods.
- Documentation: Document all steps, results, and any issues encountered during the repair process. Keep records for future reference and acceptance.
Quick rule: If all tests pass and documentation is complete, proceed with final acceptance of the repair. If any test fails or documentation is incomplete, re-evaluate the repair and perform additional testing if necessary.
Conclusion
Correcting anchor-bolt placement is about safety, durability, and a clean finish. When you fix a mislocated bolt properly, you protect people, protect the structure, and avoid costly damage down the line.
Proceed with a concise, thoughtful check: verify the misplacement is within repairable limits, review the correct epoxy and curing instructions for your concrete, prepare and clean the bore, drill and ream as needed, install and bond with the specified epoxy, allow full cure, then test the repair and document the results for inspection.
Common mistakes to avoid are over-drilling or under-driving the epoxy, using an incompatible adhesive or resin, skipping surface prep or cleaning, and rushing cure times or skipping tests. Always wear proper PPE, work in a controlled area, and verify that the repair meets load requirements and local rules before loading the bolt. If anything about the bolt position, load path, or structural connection feels uncertain, pause and get a professional assessment to prevent irreversible damage.
When to call a professional: for critical loads, large misplacements, or if the existing concrete is cracked or spalling, if you lack the exact materials or instructions, or if code compliance is at stake. A qualified professional can confirm spacing, load path, and anchoring method to restore safety and performance. With careful planning and disciplined execution, you can complete repairs confidently and move forward with a solid, compliant result.
FAQ
What Are the Proper Anchoring Methods for Pallet Racks?
Use anchors that match the base plate and concrete conditions, following manufacturer instructions. Ensure anchors are installed at the specified locations and depths for the rack configuration. Verify the fasteners are appropriate for the load and environment and that all hardware is tightened to the recommended guidelines.
What OSHA-Related Requirements Apply to Pallet Rack Anchors?
Check the manufacturer instructions and local rules for any compliance notes. Ensure the installation supports stable, non-tilting racks and that locking devices or brackets are used as intended. Follow standard safety practices to prevent rack collapse or displacement during use.
How Can I Prevent Unsecured Pallet Rack Accidents?
Keep racks level and anchored according to the layout plan. Regularly inspect fasteners, brackets, and base plates for signs of looseness or damage. Maintain clear aisles and implement access controls to reduce unintended movement or tampering.
How Should I Drill Holes Correctly in Concrete and Prepare the Hole for Epoxy?
Drill the hole with the correct diameter and depth as specified for the anchor. Clean the hole thoroughly to remove dust and debris before epoxy application. Follow the epoxy manufacturer instructions for mixing, placement, and cure time to achieve proper bonding.