
Introduction
Air-entrained concrete is a type of concrete that has microscopic air voids added to improve its resistance to freeze–thaw damage. This helps prevent cracking and spalling in driveways and steps when the temperature swings. The key idea is that the tiny air pockets provide space for water to expand during freezing without cracking the concrete.
To avoid real freeze–thaw failures, work with a compatible mix and follow manufacturer instructions for air content, slump, and curing. Confirm that your plan matches local guidelines and consider how climate and traffic will affect performance. If in doubt, check product labels and seek advice from a concrete supplier or contractor before mixing or pouring.
Key Takeaways
- Verify air-entraining admixture compatibility with cement and aggregates before pouring.
- Use proper compacting and formwork to prevent honeycombing and voids.
- Schedule placement to avoid standing water; wear PPE during finishing operations.
- Inspect for visible cracks and map patterns during thaw cycles; plan timely repairs.
- Implement drainage design and slope to direct meltwater away from slabs.
- Schedule regular maintenance, seal cracks early, and monitor freeze–thaw performance.
Table of Contents
- Introduction
- Key Takeaways
- What Air-Entrained Concrete Is and Why It Matters for Driveways and Steps
- Documented Freeze–Thaw Failures: Real-World Case Studies and Patterns
- Root Causes Behind Freeze–Thaw Failures
- Diagnosing Freeze–Thaw Damage: Visual Checkpoints and Field Tests
- Material Specs and Standards Explained
- Prevention Checklist — Design, Mixing, Placing, Finishing, Curing, and Drainage
- Repair and Remediation Options for Freeze–Thaw Damage
- Long-Term Maintenance and Seasonal Care for Durability
- Conclusion
- FAQ
What Air-Entrained Concrete Is and Why It Matters for Driveways and Steps
Air-entrained concrete introduces tiny air voids throughout the mix. These voids act as micro-reservoirs to relieve internal pressures during freeze cycles. For driveways and steps, this can translate to better resistance to surface scaling and cracking caused by freezing and thawing.
In residential projects, the right air-entraining admixture and proper dosing are essential. Always verify the product data sheet or manufacturer instructions for recommended dosages and compatibility with aggregates and cement types. Local rules or codes may also specify minimum air content for exposed surfaces.
How Entrained Air Protects Concrete
Air-entrained concrete incorporates tiny bubbles of air throughout its mixture. These air pockets act as built-in shock absorbers, providing several benefits:
1. Improved freeze-thaw resistance: The air voids allow for expansion when water inside the concrete freezes, preventing cracking and scaling.
2. Enhanced durability: By reducing the likelihood of cracks, air entrainment helps protect against corrosion of embedded reinforcement and improves overall concrete longevity.
3. Better workability: Air-entrained concrete is easier to place and finish due to its reduced stiffness and improved flow properties.
Limitations and Common Misconceptions
While air entrainment is a crucial aspect of durable concrete, it’s essential to understand its limitations and address common misunderstandings:
Air entrainment alone does not guarantee freeze-thaw resistance. Other factors such as proper mix design, adequate curing, and effective drainage play critical roles in concrete performance.
Misconception: High air content guarantees superior freeze-thaw resistance.
Fact: Excessive air content can negatively impact strength and durability. Aim for the recommended range (typically 4-7% for most applications) as specified by standards like ASTM C231.
Documented Freeze–Thaw Failures: Real-World Case Studies and Patterns
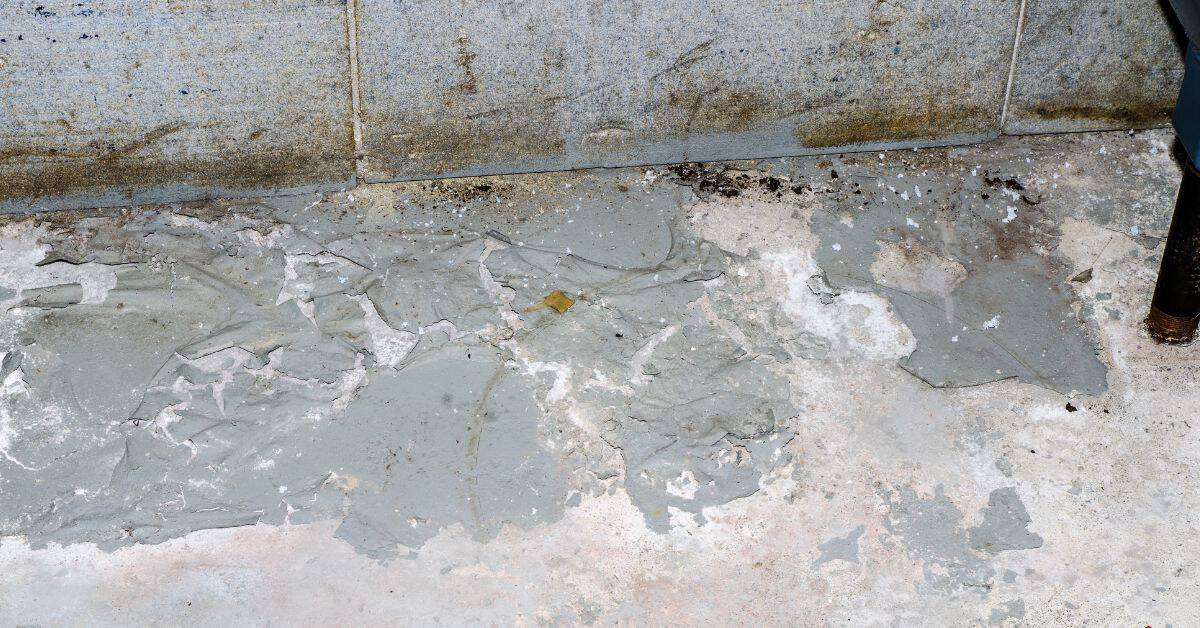
Case studies and field reports show common failure signals such as widespread cracking, spalling, and surface roughening after winters with repeated freeze cycles. Patterns often emerge near joints, edges, or areas with poor drainage or salt exposure. If a driveway or step exhibits these signs, it is worth reviewing construction details that affected performance.
When reviewing sources, note the stated materials, mix design elements, and curing practices. Always verify specifications against the label, the data sheet, or the manufacturer instructions, and consider local climate factors that influence durability and performance.
Residential Driveway Failures
Homeowners invest significantly in their driveways for both usability and aesthetic appeal. Regular visual inspections can help identify signs of deterioration before they become major issues.
During spring thaw, inspect your driveway for cracks, scaling, or spalling. These are indications that the concrete may have been damaged by freeze-thaw cycles.
If you observe any damage, contact a professional for an assessment and to discuss repair options. Prompt attention can prevent further damage and maintain the lifespan of your driveway.
Steps and Stair Failures: Why Steps Perform Worse
While all concrete structures are susceptible to freeze-thaw damage, steps often deteriorate more rapidly due to their unique design and exposure.
- Inspect step edges and corners for cracks or scaling. These areas concentrate stress and are typically the first to show signs of deterioration.
- Check joint areas for any gaps or crumbling. Joints can allow water to penetrate, leading to further damage during freeze-thaw cycles.
- Look for cracks at abrupt exposures, such as where steps meet walls or landings. These areas may be more susceptible to rapid deterioration due to increased stress and exposure.
- If you notice any damage, address it promptly to maintain safety and prevent further deterioration.
- Repair damaged areas using appropriate materials and techniques. Consider using air-entrained concrete for future steps to enhance freeze-thaw resistance.
Root Causes Behind Freeze–Thaw Failures
Mix design and admixture issues can create insufficient air void systems or incompatible components. Materials compatibility problems between cement, aggregates, and additives are another common driver. Batching and mixing practices that fail to achieve uniform distribution can compromise performance.
Placing and finishing practices that seal or close the surface too quickly trap moisture. Inadequate curing leaves the surface vulnerable to desiccation and early cracking. Site drainage problems and exposure to de-icing salts further stress susceptible concrete. In residential settings, the mix design and curing lapses are often the most likely culprits, with drainage and salts playing context dependent roles.
Mix Design and Air-Entraining Admixtures — Dosing, Compatibility, and Batch Variability
Proper mix design and correct use of air-entraining admixtures are crucial for adequate freeze-thaw resistance. Inadequate air content due to improperly designed mixes or incorrect admixture usage can lead to failures.
Verify your mix design follows local standards for residential driveways/steps, and check admixture labels/datasheets for compatibility and dosing instructions. Maintain consistent batching and mixing processes to ensure uniform air content.
If air content is below 5-7% (verify with pressure testing), adjust your mix design or admixture dosage accordingly. Regularly review and update your mix design, ensuring proper admixture dosing and consistent batching/mixing processes.
Concrete Finishing and Vibration
Proper finishing and vibration techniques help retain concrete’s air content. Excessive finishing or vibration can cause air loss, while overworking the surface may lead to scaling.
Ensure your finishers are trained in proper techniques and equipment is well-maintained. Follow best practices for finishing and vibrating concrete, inspecting surfaces for signs of overworking such as laitance or aggregate exposure.
If signs of overworking are present, refinish the surface or apply a protective treatment. Regularly train finishers on proper techniques, maintain equipment, and address any signs of overworking promptly.
Curing and Environmental Protection
Adequate air content alone may not prevent scaling if concrete is not properly cured. Early exposure to freeze-thaw cycles, high winds, or rapid moisture loss can increase the risk. Protecting concrete during initial curing is essential.
Follow recommended curing procedures, keeping track of weather conditions for the first 28 days. If temperatures drop below freezing or winds are high within the first week, apply protective measures such as curing compounds or wind barriers.
Proper curing and environmental protection during the initial period minimize scaling risk.
Diagnosing Freeze–Thaw Damage: Visual Checkpoints and Field Tests
Start with a visual assessment for cracking patterns, scaling, spalling, and efflorescence near joints or edges. Check for signs of moisture pooling or poor slope that can prolong freeze exposure. Simple field checks, such as observing surface texture and moisture behavior after a rainfall or thaw, can provide early clues.
For a more formal check, compare observed conditions with the specifications on product labels and data sheets. When in doubt, verify with the manufacturer instructions or local code guidance before selecting a remediation approach.
Visual Checkpoints for Driveways and Steps
Inspect your driveway or steps visually before performing any field tests to identify potential freeze-thaw damage.
- Edges and Joints: Check for cracks, scaling, or spalling at the edges and near joints. If concentrated here, it suggests freeze-thaw cycles and/or de-icing chemicals are the primary cause.
- Center Areas: Inspect the center areas for similar damage. Random patches may indicate issues with mix design, curing, or environmental stressors.
- Cracks: Observe visible cracks and their patterns. Horizontal cracks near the surface can suggest freeze-thaw damage.
- Scaling and Spalling: Look for flaking (scaling) or peeling (spalling) of the concrete surface, which can indicate damage from repeated freezing and thawing cycles.
- Discoloration: Check for any discoloration, as it may indicate areas more susceptible to damage.
- Joints: Inspect joints for proper detailing and ensure they are not the primary source of water ingress leading to freeze-thaw damage.
- Surface Condition: Evaluate the overall surface condition, as rough or uneven surfaces may be more prone to damage.
- Random Patches: If damage is widespread and random, it could indicate issues with mix design, curing, or environmental stressors.
Quick rule: Mapping damage patterns helps understand the cause of freeze-thaw damage, enabling targeted solutions.
Field Testing: Measuring Installed Air Content and Surface Hardness
After visual inspection, perform field tests to confirm the quality of your concrete meets requirements.
- Air Content: Use an approved air content meter to measure the installed air content. Ensure it falls within the specified range on the project’s mix design or manufacturer’s recommendations.
- Surface Hardness: Perform a surface hardness test using a pressure meter or similar approved method. This helps confirm proper curing and finishing.
- Re-testing: If air content is below the specified range, re-test and consider adjusting admixture dosage or batching process according to manufacturer’s guidelines.
- Curing Evaluation: If surface hardness is insufficient, evaluate curing, finishing, and environmental factors. Consider retesting after additional curing time.
- Environmental Factors: Assess the impact of environmental stressors on concrete performance, such as extreme temperatures or de-icing chemicals.
Quick rule: Field testing helps verify that installed concrete meets required quality standards and enables timely adjustments if necessary.
Material Specs and Standards Explained
Specifications cover cement type, aggregate quality, water-cement ratio, and air content, all of which influence freeze–thaw performance. They also address paste strength and surface durability for external wear surfaces. Understanding these basics helps in assessing whether a mix meets durability needs for driveways and steps.
To confirm compliance, consult the label, the product data sheet, or manufacturer instructions. Local standards or codes may set minimum requirements that apply to exterior concrete installations, so cross-check with them as part of planning.
What to Specify in Contracts and Drawings
To ensure your concrete driveway or steps perform well under freeze-thaw conditions, it’s crucial to specify the right materials and standards in your project contracts and drawings.
Air content range: Specify an air content range of typically 4% to 7%. This helps protect against freeze-thaw damage. Always verify compliance with relevant standards such as ASTM C685.
Review and update contract and drawing specifications to reflect the appropriate air content range and standard compliance. If specifications are unclear or missing, consult with your engineer or specifier.
How to Read Lab Reports and Air Content Measurements
Understanding lab reports and air content measurements is vital for ensuring your concrete meets performance expectations under freeze-thaw conditions.
Test methods: Ensure the test methods used (pressure/volumetric for fresh concrete, or hardened-pore assessments) are clearly stated and match your project requirements. Review lab reports for these specific tests.
If test results fall outside the specified range, contact the lab to discuss potential issues or request retesting. Always ask the lab to clarify the test methods used and how results should be interpreted for your particular project.
Prevention Checklist — Design, Mixing, Placing, Finishing, Curing, and Drainage
Establish drainage and slope between the slab and surrounding surfaces during the design phase. Ensure joint placement and spacing support crack control and water shedding. Verify that the mix design includes suitable air content and compatible admixtures for the climate and exposure.
During site work, follow exact batching and mixing procedures and maintain consistent mixing times. Use finishing practices that avoid sealing the surface too early while still controlling bleed water. Implement a curing regimen that protects the surface from rapid moisture loss and temperature swings. Cross-check where failures typically originate by reviewing project notes and manufacturer guidance.
Pre-Pour Concrete Checklist
Before commencing any concrete pour, it’s crucial to ensure all parties are aligned and necessary preparations have been made. Use this checklist to confirm everyone is aware of their roles and responsibilities.
- Review contract and drawings: Verify material specifications, standards, and site conditions.
- Clarify expectations and roles: Ensure all stakeholders understand their responsibilities.
- Check weather forecast: Plan for potential delays or adjustments due to inclement weather.
- Inspect forms and reinforcement: Ensure they are properly installed and in good condition.
- Prepare equipment: Check that all necessary tools, such as vibrators and finishing tools, are ready.
- Gather materials: Ensure all required concrete ingredients, admixtures, and curing compounds are on-site.
- Check drainage: Confirm proper slope and clear paths for water runoff.
- Coordinate with utilities: Notify utility companies if digging is required to avoid damages.
Regularly review and update the checklist as needed to ensure all parties remain informed and prepared.
On-Site Controls During Batching and Placement
During concrete batching and placement, it’s essential to monitor key aspects to ensure the final product meets quality standards. Follow this checklist for on-site controls.
- Verify admixture dosing: Cross-check with batching records and equipment settings to ensure accurate dosing.
- Monitor mixing time: Excessive mixing can lead to air loss, so keep an eye on the clock.
- Check slump: Ensure concrete has the correct workability for proper placement and finishing.
- Measure air content: Verify that the required amount of entrained air is present in the mix.
- Inspect batching equipment: Regularly check equipment to ensure it’s functioning correctly and maintained properly.
- Monitor concrete temperature: Maintain consistent temperatures to prevent thermal cracking.
- Check placement rate: Ensure a steady, controlled pace to avoid overworking or underworking the concrete.
- Inspect finished surfaces: Look for signs of excessive working or other issues that may indicate problems with batching or placement.
Quick rule: Regularly review and update on-site controls as needed to maintain consistent, high-quality results.
Finishing and Curing Techniques That Preserve Entrained Air
Proper finishing and curing are crucial for maintaining the desired amount of entrained air in concrete. Follow this checklist to ensure these critical steps are performed correctly.
- Minimize surface overworking: Avoid excessive troweling or power floating, which can cause air loss.
- Use appropriate finishing tools: Select the right tools for the job, such as bull floats, darbies, and trowels.
- Start curing promptly: Apply approved curing compounds or coverings soon after finishing to prevent moisture loss and maintain entrained air.
- Monitor surface temperature: Ensure the concrete’s surface temperature remains within acceptable ranges for proper curing.
- Check for bleed water: Remove excess bleed water to promote better curing and prevent surface defects.
- Inspect joints and control joints: Ensure they are properly formed, tooled, and sealed to prevent cracking.
- Monitor weather conditions: Adjust curing practices as needed to account for temperature fluctuations or other environmental factors.
- Perform field testing: Check surface hardness and air content to confirm the concrete is developing as expected.
Quick rule: Regularly inspect finished surfaces and adjust finishing and curing techniques as necessary to maintain desired entrained air levels.
Repair and Remediation Options for Freeze–Thaw Damage
The extent of damage guides the repair approach. For minor surface issues, surface repairs or resealing may be appropriate after addressing drainage. More extensive cracking or spalling may require joint repair, patching, or even slab replacement, depending on condition and load use.
Always verify repair materials against the original specifications and follow manufacturer instructions. Consider improvements to drainage and joint detailing to reduce the chance of recurrence, and consult a professional for structural concerns or difficult-to-access areas.
Surface Repairs and Overlays — When They Work and When They Don’t
Minor to moderate damage and cosmetic concerns can often be addressed with surface repairs or overlays. Begin by conducting a thorough visual inspection, looking for cracks, spalling, and delamination.
Inspect for structural integrity, moisture content, and the extent of damage. If damage is minor and structurally sound, proceed with surface repair or overlay using compatible materials and appropriate curing techniques.
However, if damage is extensive, structural integrity is compromised, or moisture content is high, consider removal and replacement instead. Proper preparation, including cleaning and profiling, is crucial for successful repairs.
Removing and Replacing Failed Slabs or Steps
Major damage and structural concerns may require the removal and replacement of entire slabs or steps. Begin by assessing the extent of damage, the underlying base, and surrounding structures through a detailed visual inspection.
If damage is extensive, affecting structural integrity or safety, proceed with removal and replacement. Properly remove and dispose of failed concrete, prepare the base (compact and level), use an appropriate mix design, and ensure proper curing.
However, if damage is minor, localized, and structurally sound, consider surface repair or overlay instead to avoid unnecessary costs and labor.
Long-Term Maintenance and Seasonal Care for Durability
Schedule regular inspections for cracks, joint gaps, and surface wear, especially after winter seasons. Clean surfaces to remove salts and debris that can trap moisture. Address small cracks promptly before they widen or trap water.
Plan seasonal checks and follow maintenance product instructions for sealing or protective coatings. Verify compatibility with the concrete mix and any previous coatings, and adjust care routines based on local climate and observed performance over time.
Deicing Strategies and Safe Products to Minimize Damage
Proper deicing is essential to prevent freeze-thaw damage. While aggressive chloride salts can be effective, they should be used sparingly due to their corrosive nature. Always follow manufacturer guidelines for application rates and safety precautions.
Use non-corrosive alternatives such as sand or approved chemical products for traction. Verify product labels to ensure they are chloride-free and non-corrosive. If aggressive salts are the only option, limit their use to extreme conditions and adhere to local regulations.
Avoid overuse of aggressive deicers, which can cause more harm than good. Regularly inspect your driveway and steps for signs of damage, and address any issues promptly.
Annual Inspection and Simple Maintenance Tasks
Conduct an annual inspection in early spring to assess the condition of your driveway and steps after the winter season. This will help you detect any issues early, ensuring timely repairs and prolonging their lifespan.
- Check drainage paths: Ensure water flows away from the surface to prevent pooling and erosion.
- Inspect for cracks or scaling: Look for signs of deterioration that may have occurred over the winter.
- Examine joints: Check if they are still intact and properly sealed.
- Assess surface condition: Look for any discoloration, pitting, or other signs of damage.
- Evaluate rebar exposure: If visible, it may indicate a more serious issue requiring professional assessment.
- Inspect expansion joints: Ensure they are functioning properly to accommodate temperature changes.
- Check for efflorescence: White powdery deposits can indicate moisture issues that need to be addressed.
- Assess overall stability: Gently walk on the surface to check for any give or instability.
Quick rule: Address any identified issues promptly. Minor damage can often be repaired using appropriate materials and techniques, while extensive damage may require professional assessment for repair or replacement options.
Conclusion
Air-entrained concrete is essential for driveway and step durability in cold environments, because proper air voids help resist freeze–thaw damage while keeping looks and safety intact. Focus on safe planning, sound mixing, careful placement, correct finishing, and thorough curing, with attention to drainage so water can escape rather than sit against the edge of the slab.
When you move from theory to practice, start by confirming the design and mix meet the project’s requirements, then verify the materials and instructions from the manufacturer, place and finish with care, test a small area first, and monitor drainage and curing conditions as the slab sets. Finally, perform simple field checks and visual inspections after installation to catch any issues early and prevent costly repairs. Design for drainage, use the right air-entraining admixture per manufacturer guidance, follow prescribed mixing and placement steps, and document curing and seasonal care to protect the long-term performance.
Common mistakes to avoid include undersizing or skipping proper curing, neglecting drainage or slope details, and proceeding with finishing when the concrete is not ready, all of which encourage early damage. Practice safety by wearing protective gear, working within the manufacturer’s temperature and handling limits, testing a small area first, and pausing work if conditions are unfavorable.
If you’re unsure about local rules, product specifications, or the need for professional equipment or testing, don’t push ahead alone—consult a qualified contractor or concrete supplier for design, material, and curing guidance, and choose to call in help when cracks, spalling, or frequent freeze–thaw cycles appear. With careful steps and consistent maintenance, your driveway and steps will perform reliably for many seasons.
FAQ
How Can I Verify That the Air-Entraining Admixture Is Compatible with My Driveway Mix?
Check the product label or datasheet for compatibility notes with cement type and aggregate. Follow the concrete supplier’s recommendations and ask for a tested mix design if possible. Local rules or manufacturer instructions can provide additional guidance.
What Signs Suggest Inadequate Air Voids in New Concrete, and What Should I Do?
Common signs include scaling, pop-outs, or surface roughness after the first freeze cycles. If you notice these early, consult the mix supplier or contractor for a modified mix with proper air-entrainment and review placement procedures.
How Should I Choose Curing Methods to Protect Against Freeze–Thaw Damage?
Use curing methods that maintain moisture and temperature as recommended by the supplier or manufacturer. Avoid rapid drying or extreme temperature changes during the curing period, and verify any products or wrap materials with the provided guidance.
How Do Drainage and Slope Interact with Air-Entrained Concrete for Driveways and Steps?
Ensure proper drainage design to minimize standing water near the surface, which can worsen freeze–thaw effects. Confirm that grading and drainage details conform to the project plan and manufacturer instructions, and check local guidelines for surface runoff considerations.