
Introduction
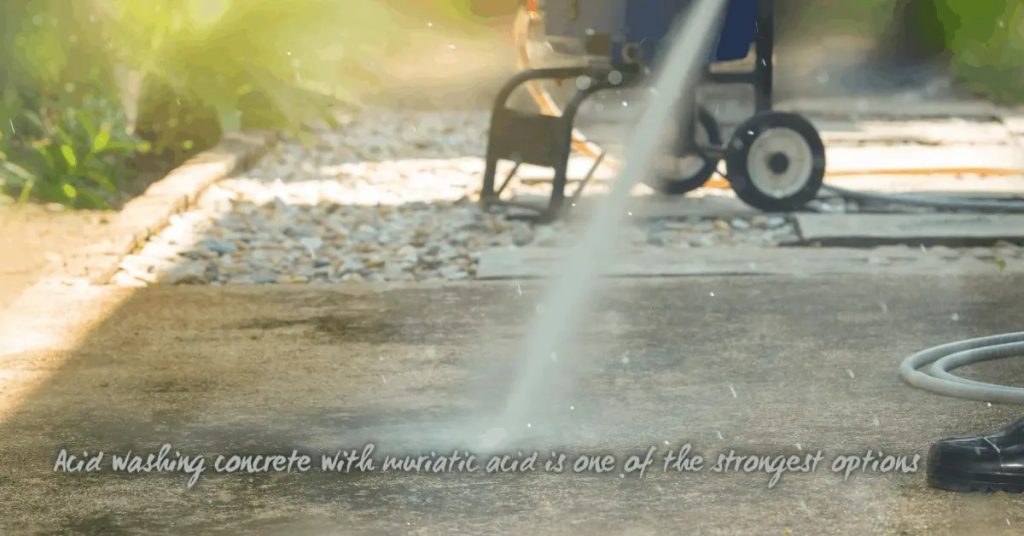
Acid stain neutralization is the simple set of checks that confirm the surface pH and residue are safe for a sealer; it tells you when the concrete is no longer chemically active after staining. In plain jobsite terms, you rinse, test, and look for no fizz, no streaks, and a neutral pH reading before you move on. Bring a scrub brush, clean water, pH strips (or a pH meter), and a bucket, and check product labels and manufacturer instructions for any specific neutralizer or wait times.
After the stain is applied and rinsed, a quick phenolphthalein or pH strip test and a tactile check for sticky residue will save a lot of rework when you seal. If anything looks off, rewash, retest, and consult the stain or sealer maker for guidance; when in doubt, follow the product label and local recommendations. For quick help, note the maker’s business hours, have contact info handy, and sign up for manufacturer updates so you get curing and prep tips relevant to your product.
Key takeaways
- Verify surface cleanliness and ambient conditions before acid stain application and neutralization.
- Gather recommended tools, acids, brushes, and neutralizing materials from credible resources.
- Check business hours and local service options when planning sealing work.
- Quick contact: have contractor or supplier contact handy for questions or dispatch.
- Stay in the know with manufacturer labels and local code guidance during prep.
- Practice thorough surface prep, proper neutralization, and safe sealing sequencing; wear PPE.
Table of Contents
- Introduction
- Key takeaways
- Why Neutralize Acid Stain Before Sealing
- Tools and Materials Checklist
- Surface Preparation Best Practices
- Simple Tests to Confirm Readiness for Sealing
- Neutralization and Rinsing: Practical Step-by-Step
- Key Specs and Numbers That Matter (Without a Datasheet)
- Sealing After Neutralization: Timing and Product Choices
- Troubleshooting, Cost Considerations, and When to Call a Pro
- Conclusion
- FAQ
Why Neutralize Acid Stain Before Sealing
Neutralization’s core job is to remove any lingering acid and salt residues left behind after acid staining so the concrete surface can accept a sealer properly. Left unneutralized, those residues can upset surface pH, cause haloing or efflorescence, reduce sealer bond, and lead to uneven sheen or altered color when the sealer cures.
Neutralization is usually required after using acid-based stains or acidic cleaners and whenever rinse water shows cloudiness, fizzing, or odor; a simple rinse may be adequate when the stain manufacturer and label indicate no acidic residues remain. To confirm readiness, run small test spots: check surface pH with strips or a meter, look for absence of fizzing and clear rinse water, then follow a short routine—apply neutralizer, agitate, rinse thoroughly, re-check pH, and allow the slab to dry before sealing.
How acid stain chemistry affects sealing
Acid stains react with concrete’s lime content, creating a chemical reaction that leaves behind byproducts like salts and low-pH residues. These can interfere with sealer performance if not neutralized.
Residual acids or salts can cause pH imbalance, leading to poor adhesion of sealers. They may also result in haloing – discolored rings around the stain – and efflorescence, a white, powdery deposit on the surface.
Uneven sealer application or appearance can occur due to reduced bonding and inconsistent sheen or color. Neutralization ensures these issues are minimized.
Risks of sealing too early or without testing
Sealing an unneutralized acid-stained surface can lead to several problems. The most common is poor adhesion, where the sealer doesn’t bond properly with the concrete, causing it to peel or flake off over time.
Another issue is blushing, a milky appearance that occurs when the sealer reacts with residual acids. This results in an uneven, unsatisfying finish. Additionally, sealing too early can trap moisture beneath the surface, leading to further issues like efflorescence and reduced longevity of the sealer.
To avoid these risks, always test for neutralization readiness before applying any sealers.
Tools and Materials Checklist
Gather neutralizers (ready-to-use or a baking soda slurry), pH test strips or a pH meter, clean water for repeated rinses, and any stain-specific cleaners you might need for stubborn residues. Include spray bottles, stiff nylon brushes, mops, buckets, a squeegee, disposable rags, and optional scouring pads to agitate and remove residue during neutralization and rinsing.
Protect yourself and the work area with chemical-resistant gloves, splash goggles, a respirator if the product label or manufacturer instructions require one, long sleeves, boots, drop cloths, plastic sheeting, and tape to mask adjacent surfaces. Also plan a simple test protocol—how many test spots, where to place them, how to record pH and color changes, and a basic disposal plan for rinse water and residues per local rules—and keep a small notebook or photos to document results and acceptable pass/fail criteria.
Neutralizers, cleaners, and sealer basics
Before you start, ensure you have the right neutralizers, cleaners, and sealers to keep your project on track.
- Ready-to-use neutralizer solution or baking soda slurry: To stop the staining process. Skip this, and you’ll end up with unwanted colors.
- Stain-specific cleaners (optional): For tough residues that won’t budge with regular cleaning.
- Water-based sealer: For easy application and low VOCs. Skip this, and you might end up with a sticky surface.
- Solvent-based sealer (optional): For better durability but higher VOCs. Make sure it’s compatible with your stain.
- pH test strips or meter: To confirm neutralization. Skip this, and you might seal too early.
- Clean water for rinsing: To remove residue after neutralizing and cleaning.
Quick rule: Always match neutralizers, cleaners, and sealers to your specific stain type to avoid surprises.
Testing tools and equipment
Before you start sealing, test first. Here’s what you need:
- pH test strips or meter: To measure the pH level after neutralization.
- Spray bottle (empty): For applying neutralizer and cleaner solutions.
- Soft scrub brush: To gently agitate the surface during cleaning.
- Mop or white cloth: For rinsing. Skip this, and you might leave residue behind.
Quick rule: Test in multiple spots to ensure consistent results across your entire surface.
Personal protective equipment (PPE)
Safety first! Here’s what you need before you start:
- Chemical-resistant gloves: To protect your hands from chemicals.
- Splash goggles or safety glasses: To shield your eyes from splashes.
- Respirator (optional): For high-VOC sealers. Skip this, and you might inhale harmful fumes.
- Adequate ventilation: Open windows or use fans to keep the air moving.
Quick rule: Always prioritize safety gear before handling chemicals.
Surface Preparation Best Practices
Thorough surface prep makes neutralization tests reliable and prevents surprises after sealing: contaminants, old sealers, or repairs change absorption, pH readings, and how a sealer performs. Start with cleaning and degreasing to remove oil, wax, and dirt; use an approved concrete cleaner or degreaser per label directions, allow the recommended dwell time, then rinse repeatedly until rinse water runs clear.
If old sealers or coatings remain, strip them mechanically or with a product the label specifies for concrete, then remove residues and dispose of waste properly. Repair cracks, spalls, and divots with compatible patch materials and let repairs cure per manufacturer guidance before testing; finally run pre-test checks—moisture, porosity, and surface temperature—and document results so your neutralization and sealing steps are based on a stable, clean surface.
Cleaning and removing contaminants
Thorough cleaning is crucial for reliable neutralization tests and sealing results. Contaminants like oil, grease, paint, or wax can prevent the acid stain from reacting properly with the concrete.
For oil and grease, use a degreaser specifically designed for concrete. Apply it liberally, let it dwell for 15-30 minutes, then scrub and rinse thoroughly. Repeat if necessary.
To remove paint or wax, you’ll likely need a stripper. Choose one that’s safe for concrete and follow the manufacturer’s instructions. After stripping, clean the surface with a mild detergent and water to ensure no residue remains.
Removing old sealers and surface preparation
Existing sealers or films can hinder acid stain reaction and sealer adhesion. Detect them by performing a simple water test: sprinkle water on the surface. If it beads up, you’ve got a sealer.
To remove old sealers, use a stripper designed for concrete sealers. Apply it liberally, let it dwell as directed, then scrub and rinse thoroughly. For tough cases, mechanical stripping with a floor scraper may be needed.
After stripping, clean the surface with a mild detergent and water to remove any residue. Allow the surface to dry completely before proceeding with neutralization tests.
Repairs, cracks, and patching before testing
Before neutralization, address any major cracks, spalls, or divots. These can affect test results and the final appearance of your stain.
For cracks, use a concrete crack filler specifically designed for acid-stained surfaces. Apply it according to the manufacturer’s instructions, then allow it to cure completely before proceeding.
If you’ve got moisture-related issues, address them now. Waterproofing may be necessary before applying any stain or sealer.
Cosmetic fixes like touch-ups and minor repairs can wait until after sealing. These should not affect the reliability of your neutralization tests.
Simple Tests to Confirm Readiness for Sealing
Start with pH testing: wipe a small area with distilled water, blot dry, apply pH strip or meter to the rinse residue or swab, and compare to the reference chart; repeat until readings stop drifting toward acidic values. Pair that with a moisture check—a tack-free feel or a plastic sheet test over a representative patch—to ensure no trapped moisture that would interfere with sealer cure.
Check for residues visually and by touch: no oily spots, soap film, dust, or efflorescence should remain—if present, clean and neutralize again and re-test. Finally run a porosity spot test (a few drops of water or neutralizer on the surface) to observe absorption versus beading; document pH, moisture, and porosity results for multiple spots and use those pass/fail criteria before you begin sealing.
pH Strip or Meter Test and Interpretation
Wet the surface with distilled water. Take multiple pH readings using a pH strip or meter to ensure accuracy.
Ideal range: 6-8 (or as specified by your sealer). If readings drift, wipe clean with distilled water and retest.
If the surface is too acidic (<6) or alkaline (>8), re-clean using a neutral cleaner before re-testing.
Water Absorption / Droplet Test
Place a few droplets of water on the surface. Observe how they behave:
Absorption: The surface is porous and ready for sealing.
Beading: Residue or contaminants are present. Clean again and re-test.
Visual and Tactile Residue Checks
Inspect the surface for any signs of residue:
Efflorescence (white residue): Clean with a suitable cleaner. Ensure it’s neutralized before sealing.
Gloss/tack/streaking: These indicate leftover cleaner or sealer. Re-clean and re-test.

Neutralization and Rinsing: Practical Step-by-Step
Begin with a small-area test patch: don PPE, apply the neutralizer per product instructions or use a conservative baking soda slurry, agitate with a soft brush, rinse, and verify pH on the patch before scaling up. Use pass/fail criteria you recorded—no fizzing, neutral pH on strips or meter, and clear rinse water—before proceeding to the full slab.
When you move to the full area, apply neutralizer evenly, work in manageable sections with agitation, and rinse thoroughly with multiple clear-water passes until swab or rinse-water tests read neutral. After rinsing, allow the slab to dry fully, re-check pH and moisture, and follow local guidelines for disposal of rinse water and used materials; if tests fail, repeat neutralization and rinsing until the criteria are met.
Step-by-Step Process
Follow this clear, numbered sequence to safely neutralize and rinse your acid-stained surface, ensuring it’s ready for sealing.
- Designate a representative patch for testing. Ensure the surface is clean, dry, and free of contaminants.
Wear appropriate PPE: gloves, safety glasses, and old clothes. - Perform a small-area test using your chosen neutralizer, following the label’s mixing/dilution guidelines.
Observe for any fumes or residue. Check pH strips to ensure they’re ready. - Apply the neutralizer evenly across the test patch using a sprayer or pump-up sprayer.
Let it dwell for the recommended time (usually 10-20 minutes). - Agitate the neutralizer with a soft-bristled brush or microfiber pad to release reaction residues.
Work in small sections, applying even pressure. - Rinse thoroughly using clear water and a squeegee or wet-vac.
Check pH strips and visually inspect for residue. Repeat until pass criteria are met. - Extend the process to the entire area, ensuring complete removal of neutralizer and residue.
Allow the surface to dry completely before re-testing and sealing. - Dispose of rinse water and any waste responsibly, following local regulations.
Consider using a sump pump or wet-vac for efficient disposal.
Applying and agitating the neutralizer
Always follow the neutralizer label’s guidelines for dilution and application. Start with a small test area to ensure compatibility.
Using a sprayer or pump-up sprayer, apply the neutralizer evenly across your surface.
Be sure to cover all areas thoroughly, ensuring no dry spots remain.
Allow the neutralizer to dwell for the recommended time (usually 10-20 minutes).
This gives it enough time to react with and neutralize the remaining acid.
Using a soft-bristled brush or microfiber pad, agitate the neutralizer gently.
Work in small sections, applying even pressure to release any reaction residues.
This step is crucial for ensuring complete neutralization.
Rinse technique and verifying residue removal
Thorough rinsing is key to removing all neutralizer and residues, ensuring your surface is ready for sealing.
Use plenty of clear water and a squeegee or wet-vac for efficient rinse water removal.
Perform multiple passes, working from one end of the area to the other.
Ensure no residue remains, as this can interfere with the sealer’s adhesion.
After each pass, check pH strips and visually inspect for any remaining residue.
Repeat rinsing until pH readings meet your pass criteria (usually 7-9) or until residue is visibly removed.
This may take several passes, so be patient and thorough.
Once you’ve confirmed complete residue removal, allow the surface to dry completely before re-testing and sealing.
This ensures that no moisture remains, which could compromise the sealer’s performance.
Key Specs and Numbers That Matter (Without a Datasheet)
Before you handle acids or neutralizers, confirm PPE, ventilation needs, and exposure information on the product label or Safety Data Sheet—if you don’t have the SDS, get it from the manufacturer website or supplier. Important numeric parameters to verify include the pH of rinse water, neutralizer dilution and contact recommendations, and any contact or dwell times; consult product instructions rather than guessing specific values.
Use simple repeatable checks on test patches: measure pH with strips or a meter, time contact intervals with a stopwatch, and note when visual indicators (no fizzing, clear rinse water) appear. Also review the SDS sections for First Aid, Reactivity, and Disposal for emergency thresholds and response steps; if you encounter a spill, exposure, or uncertain readings, follow SDS guidance or contact a professional for help and proper disposal of used neutralizers and rinse water.
Key SDS sections to check
The Safety Data Sheet (SDS) is your go-to guide for handling acids and neutralizers safely. Here’s what you need to check:
Hazards: Understand the hazards of both the acid stain and the neutralizer. Record the signal words – ‘Danger’ or ‘Warning’.
Personal Protection Equipment (PPE): List down the recommended PPE, including gloves, goggles, and protective clothing.
First Aid: Note down first aid measures for skin and eye contact. Keep this information handy during the job.
Storage, disposal, and spill response
Short-term storage: Keep acids and neutralizers in a cool, dry place away from heat sources. Store them upright with tightly closed lids.
Rinsate and residues: Follow local guidelines for disposing of rinsate and residues. Typically, they should be treated as hazardous waste.
Spill response: Have spill kits ready. For small spills (less than a cup), absorb with inert material like vermiculite or sand. Contain larger spills using dams made from absorbent materials or plastic sheets. Wear PPE during cleanup.
Sealing After Neutralization: Timing and Product Choices
Only seal when your test patches consistently meet your pass criteria: neutral pH on swabs, no detectable residues, and no staining or etching that would react with the sealer. Confirm the slab is dry and at acceptable ambient conditions for the chosen sealer—consult the sealer label or manufacturer instructions for recommended temperature and humidity ranges before you start.
Match sealer type to the stain chemistry and desired finish—water-based, solvent-based, or penetrating products behave differently and require label-confirmed compatibility with acid-stained surfaces. Consider slip-resistance needs and whether anti-slip additives or textured application are appropriate, and perform a small test-seal on an inconspicuous area to verify appearance, adhesion, and timing for recoat or foot traffic.
When to apply sealer after tests pass
Once your neutralization tests come back consistent and positive across multiple spots, it’s time to consider applying the sealer. But hold on a moment.
First, ensure the surface is dry. Wait for any remaining moisture to evaporate. Your goal is to reach the recommended dew point for sealing – usually around 40-50°F (4-10°C) and 30-50% relative humidity.
Next, double-check your sealer manufacturer’s guidelines. They’ll specify a window of time for application after neutralization. Stick to that timeline to ensure the best results.
Choosing the right sealer and additives
Selecting the right sealer depends on your stain, neutralizer, and desired finish. Here’s a quick guide:
Water-based sealers are easy to apply and clean up. They’re great for indoor use but may not be durable enough for high-traffic outdoor areas.
Solvent-based sealers offer better durability and UV resistance, making them ideal for outdoors. However, they have strong odors and require proper ventilation during application.
For slip resistance, consider adding anti-slip additives to your sealer or opting for a textured finish. These are crucial for high-traffic zones like entryways, stairs, or pool decks.
Post-seal maintenance and care
Proper maintenance will keep your sealed concrete looking great and performing well. Here’s a simple schedule:
Daily/Weekly: Sweep or vacuum to remove dirt and debris. Use a mild, pH-neutral cleaner for spot cleaning.
Monthly/Quarterly: Inspect the surface for any signs of wear or damage. Reapply sealer as needed, following the manufacturer’s guidelines.
Annually: Perform a thorough cleaning using a suitable concrete cleaner. Rinse well and allow it to dry completely before reapplying sealer if necessary.
Troubleshooting, Cost Considerations, and When to Call a Pro
Common failures include non-neutral pH readings, lingering residues, uneven color after sealing, or moisture problems; correct these by repeating cleaning/neutralization, improving rinsing, or addressing moisture sources before re-testing. If tests repeatedly fail across multiple spots, or if the slab shows unknown contamination, severe porosity, or structural issues, it’s time to involve a pro who can run lab tests or perform specialized remediation.
When estimating DIY costs, include neutralizer and cleaner, pH test supplies, PPE, tools, sealer, and disposal fees; track labor time and potential repeat work if tests fail. Use a decision flow: retry cleaning/neutralizing for minor failures, escalate to professional help for persistent or complex issues, and ask a contractor to provide preparatory testing, documented results, and any warranty tied to their work.
Common failures and how to fix them
Under-neutralization can leave lingering acids, causing pH readings below 7. Re-apply neutralizer, focusing on affected areas.
White salts indicate over-neutralization or improper rinsing. Scrub with a stiff brush and clean water, then re-rinse.
If sealer blushing occurs (white patches after sealing), it’s likely due to incomplete neutralization or moisture. Strip the sealer, repeat neutralization and rinse, then re-seal.
Estimating materials, labor, and contingencies
Choosing right materials ensures a successful seal. Here’s what to consider:
- Neutralizer: Look for pH-neutralizing strength, coverage rate.
- Cleaners: Choose based on stain type, pH level, and safety profile.
- Sealer: Consider durability, UV resistance, and desired finish (gloss, matte).
- Tools: Brushes, sprayers, scrubbers – ensure quality for easy application.
- Disposal: Check local regulations; some neutralizers may require special disposal.
- Labor contingencies: Allocate time for troubleshooting, re-work, or unexpected delays.
When to call a professional
DIY has its limits. Here are signs it’s time to call in the pros:
Large commercial jobs require expertise and equipment beyond typical DIY scope.
If there are structural issues or unknown previous treatments, a pro can assess safety and compatibility.
Persistent contamination, despite your best efforts, may need specialized cleaning techniques. Don’t hesitate to seek professional help.
Conclusion
Neutralizing acid stain before sealing protects the finish, prevents blotching, and keeps your work durable and easy to clean. The key is to confirm the surface is truly ready—free of residual acidity, proper rinse, and dry enough to accept sealer without trapping moisture or creating haziness.
Do this like a quick, practical checklist: verify you have followed the neutralization and rinsing steps, test the surface with the simple readiness checks described earlier, allow ample drying time, and only then proceed to sealing with the chosen product while keeping surfaces clean and free of debris. Move in a steady, deliberate order: neutralize, rinse, dry, test, then seal; if any step fails a test, fix it and retest before progressing.
Common mistakes to avoid are skipping the test area, rushing drying time, and selecting a sealer incompatible with the stain or surface. Never seal a surface that still feels damp or shows active color bleed. Wear eye protection and gloves, ventilate the area, and clean up spills promptly to prevent runoff or staining of adjacent materials.
If the project runs long, or you see unexpected color changes, uneven absorption, or unclear results after testing, it makes sense to call a pro rather than guessing. When you follow these steps and stick to the tests, you can seal with confidence and finish with a durable, even look that lasts. You’ve got this—keep it steady, stay safe, and seal cleanly.
FAQ
How should I prepare and clean the concrete before staining?
Sweep and vacuum the surface to remove all dust and debris. If there are oil spots or old coatings, clean and scrub them with a concrete-safe cleaner, then rinse well and let dry completely. Don’t start staining on a damp or dirty surface; test the surface moisture before you begin.
How do I apply the acid stain correctly without streaks?
Apply in small sections and work with the grain of the concrete. Use even, steady coats and avoid pooling. If you see blotches, back off the stain and re-apply fresh solution in thin layers as needed.
What’s involved in the neutralization process after staining?
Apply the neutralizer according to the label directions and scrub to keep it from drying on the surface. Rinse thoroughly with plenty of clean water and remove all residues. Let the surface dry before moving to sealing.
How do I test readiness and seal after staining safely?
Check for complete color development and no lingering residue after the surface dries. Perform the simple readiness tests you’ve been using, then follow the manufacturer’s instructions for sealing on a small test patch first. Always use the correct respirator or protection and work in a ventilated area.