
Introduction
Common water problems have practical cures you can DIY or address with smart alternatives.
The guide walks through diagnosing issues, choosing safe solutions, and applying practical tips you can implement at home.
You’ll learn how to tell which fixes fit your situation, when to upgrade devices, and how to evaluate the results to ensure reliable water quality.
Key takeaways
- Prioritize immediate leaks; shutoff valves and record locations for quick response.
- Hard water? test minerals, consider filters or compact water softeners; verify impact.
- Low pressure: check meter, inspect fixtures, consider pressure booster or aerators.
- Drips and leaks: fix promptly with plumber’s tape, sealant, or replace faulty fittings.
- Cloudy discolored water: test contaminant, flush system, use appropriate filters.
- Slow drains: safe clearing methods: baking soda, vinegar flush, plunger, avoid chemical drains.
Table of Contents
- Introduction
- Key takeaways
- Quick Overview: The 7 Most Common Home Water Problems
- Problem 1 — Hard Water: Causes, Tests, and Simple Remedies
- Problem 2 — Low Water Pressure: Diagnosis and Fixes
- Problem 3 — Drips, Leaks, and Seepage: Stop Immediate Damage
- Problem 4 — Discolored, Cloudy, or Bad-Tasting Water: Identify and Treat Contamination
- Problem 5 — Slow Drains and Clogs: Safe Clearing Methods
- Problem 6 — Moisture, Mold, and Mildew from Water Intrusion
- Problem 7 — Outdoor Water Issues and Conservation (Irrigation, Runoff, and Foundation Risk)
- Conclusion
- FAQ
Quick Overview: The 7 Most Common Home Water Problems
Seven common issues to watch for: hard water (scaly deposits, soap buildup), low water pressure (faucets slow to stream), leaks (visible drip or damp spots), cloudy or contaminated water (milky appearance, odd taste), discolored water (brown or reddish tint), slow drains or clogs (slow backup), and moisture or mold (musty smell, damp walls).
Urgency depends on the problem—leaks, mold, or sudden sharp changes in water should be treated now; others can be planned with a DIY approach or a pro when you’re unsure.
How to use this guide
This guide is structured to help you tackle common water issues efficiently. Start by identifying the problem, then move on to DIY fixes and smart alternatives before considering professional options.
Problem Identification: Each section starts with a clear description of the issue and its typical signs so you can quickly pinpoint what’s wrong.
Detailed Fixes: Follow up with practical steps for addressing each problem, including safe checks and minor repairs that don’t require professional help.
Maintenance Tips: Finally, learn about ongoing maintenance to prevent future issues. This way, you can keep your home’s water system running smoothly without constant intervention from pros.
When to call a professional
Knowing when to bring in the experts is crucial for safety and efficiency. If you encounter major leaks, structural damage, or issues with gas lines, it’s best to contact a licensed plumber immediately.
If your water shows persistent signs of contamination, such as unusual colors or smells, don’t hesitate to seek professional advice. These can indicate deeper problems that need expert assessment.
For minor issues like slow drains or discolored water, you might start with DIY solutions but keep an eye out for worsening conditions. If the problem persists after a few attempts at fixing it yourself, it’s time to call in the pros.
Safety First: Always shut off valves and take necessary electrical precautions before attempting any repairs. When in doubt, err on the side of caution and consult a professional.

Problem 1 — Hard Water: Causes, Tests, and Simple Remedies
Hard water is water with lots of minerals, mainly calcium and magnesium, which makes soap lather poorly, leaves white scale, and can dull cleaning results in kitchen and bath tasks. You can test at home with a simple soap test and quick DIY strips to gauge mineral levels, then interpret results in practical terms for daily use. These minerals can also affect appliances and comfort, not just cleaning power.
This matters because knowing your water profile helps you choose practical fixes and maintenance. Rinse aids, chelating cleaners, and a choice between salt-based softeners or salt-free conditioners are common options, with trade‑offs to weigh. Keep up with routine checks and maintenance, and if tests or appliance symptoms point to significant scale or recurring issues, consider professional advice.
DIY fixes for hard water
To tackle the immediate effects of hard water, start with simple vinegar rinses. Pour a cup of white vinegar into your kettle or coffee maker and run it through once to remove mineral buildup.
Another quick fix is using a water-softening pitcher. These pitchers use resin beads that attract minerals as water passes through them, reducing the hardness before you drink it. They’re easy to install and maintain.
If your dishes are leaving spots or streaks, try adding a rinse aid like Jet Dry to your dishwasher cycle. This helps break up mineral deposits and leaves glassware sparkling clean.
Smart alternatives and long-term options
For more permanent solutions, consider an ion-exchange water softener. These systems replace calcium and magnesium ions with sodium or potassium ions, effectively softening the water throughout your home. They require regular salt refills but can significantly reduce mineral buildup in appliances.
Salt-free conditioners are another option that doesn’t use chemicals to soften water. Instead, they alter the structure of minerals so they don’t stick to surfaces as easily. This method is maintenance-free and eco-friendly, though it may not be as effective for very hard water conditions.
Magnetic or templating systems claim to change mineral ions into a form that doesn’t cause buildup. While these are non-invasive and require no salt, their effectiveness can vary widely depending on the hardness of your water and specific needs.
Problem 2 — Low Water Pressure: Diagnosis and Fixes
Low water pressure usually comes from a few common culprits: clogged aerators or faucet screens, a faulty pressure-reducing valve, and mineral buildup or corroded pipes. You can pinpoint the source by isolating fixtures one at a time and comparing to a main supply reading, using a basic water pressure gauge at an outdoor faucet to establish a baseline. Don’t forget to consider variations in municipal pressure or a failing hot water setup if heated flow is involved.
This matters because a quick check with simple fixture cleanings and valve inspections can save you from tearing into walls or replacing good pipes. Use it to guide what to fix first, and know when to stop and call a pro: don’t over-tighten fittings, and don’t pursue major replacements without proper tools or permits. Always check labels and manufacturer instructions for any valve settings or replacement parts you choose.
Quick DIY fixes
To tackle low water pressure, start by cleaning your faucet aerators and removing any buildup. Take off the aerator with a wrench and soak it in vinegar overnight to dissolve mineral deposits. Scrub it clean and reattach.
If you suspect issues with your pressure-reducing valve (PRV), check its settings or replace it if faulty. A PRV should be set between 40 and 60 psi, but always refer to the manufacturer’s guidelines for specific models. If you notice a significant drop in water flow after an appliance like a washing machine or dishwasher, flush out sediment from these lines.
Another common issue is kinks or blockages in supply lines. Inspect your pipes and look for any bends that might restrict water flow. Straighten them if possible or replace damaged sections of pipe to restore full pressure.
When upgrades or smart solutions help
If DIY fixes don’t solve your low water pressure issues, consider upgrading to a whole-house pump or booster system. These devices can significantly increase the flow and pressure throughout your home, especially if you live in an area with naturally low municipal pressure.
In cases where mineral buildup is extensive, re-piping might be necessary. This involves replacing old pipes with new ones, which can be costly but essential for long-term water quality and pressure stability. Always consult a licensed plumber before undertaking such major work.
Smart technology also offers solutions like pressure monitors that alert you to drops in water pressure before they become critical issues. These devices can help prevent damage from low flow by signaling when it’s time to take action, whether through maintenance or professional intervention.
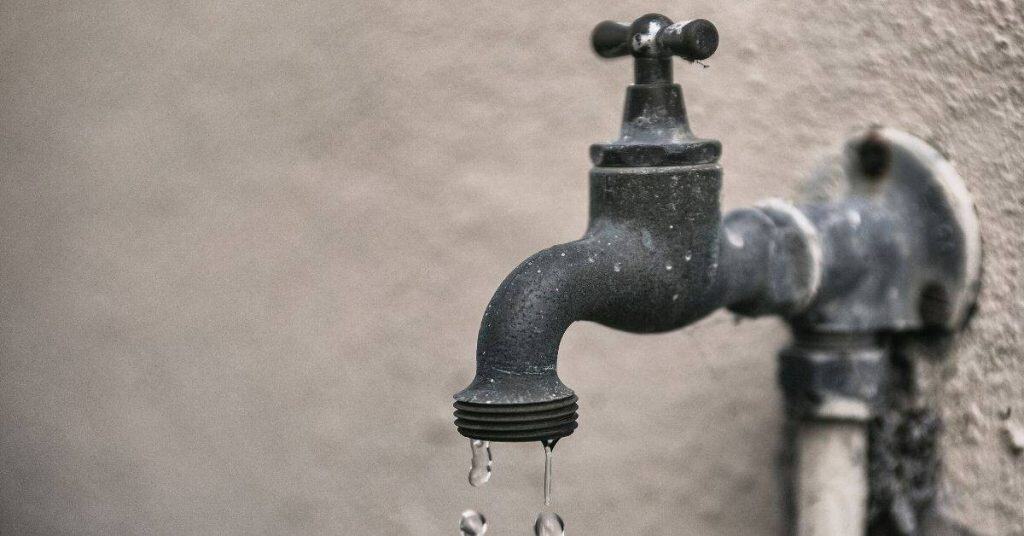
Problem 3 — Drips, Leaks, and Seepage: Stop Immediate Damage
Drips, leaks, and seepage can come from fixture leaks (toilets and faucets), hidden pipe leaks you can’t see easily, slab or foundation seepage, and roof-to-interior seepage that shows up as damp walls or ceilings. When a leak shows up, start containment right away: shut off the main water supply if the leak is serious, isolate the affected fixture or area, and lay towels, buckets, and plastic to limit water damage. Protect electrical items and turn off power in the wet area if you can do so safely.
Quick DIY location methods include visually inspecting for drips and water stains, checking visible pipes and fixtures for corrosion or loose connections, and using a simple dye test or toilet dye tablets to identify leaks. For temporary fixes, tighten fittings without overtightening, apply sealants or plumber’s tape on minor threads, and use waterproof patches or epoxy on small non-pressurized cracks to slow seepage. If you see signs of hidden or structural leaks, rising moisture, or mold after basic fixes, escalate to a professional and follow safety guidelines and local guidance.
Low-cost DIY repairs
Tighten loose connections on pipes and fixtures with a wrench. Don’t overdo it—just snug them up to stop leaks.
For faucet leaks, replace worn-out washers or cartridges inside the handle. It’s usually a quick fix if you have the right parts.
Use epoxy putty for small cracks in pipes or walls. Just knead it and press into place; let it cure overnight before turning water back on.
For bigger pipe leaks, apply rubber repair sleeves or use pipe clamps to hold sections together until a pro can fix them properly.
Long-term solutions and when to call a plumber
If you’re dealing with persistent leaks, consider replacing old pipes. PEX tubing is cheaper and easier to install than copper but may not last as long.
Trenchless slab repair can fix cracks without digging up your entire foundation. It’s more expensive upfront but saves time and mess compared to traditional methods.
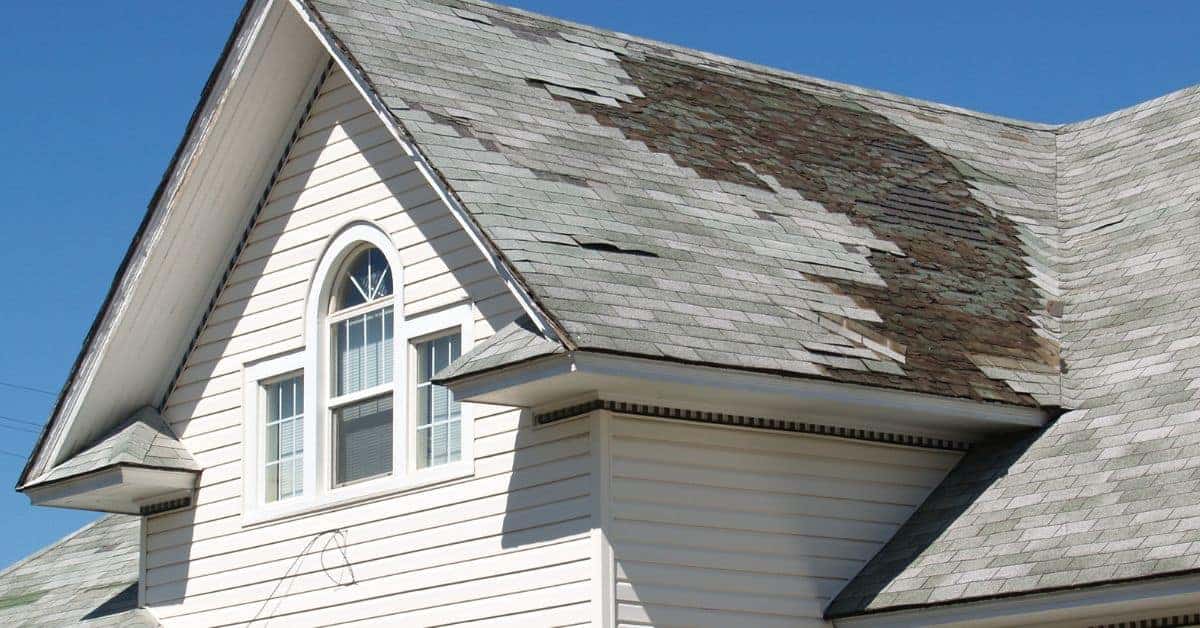
Signs you need a plumber include leaks that won’t stop, water stains on walls or ceilings, and mold growth from dampness. These could indicate bigger issues like structural damage or roof problems.
Always document your repairs and keep receipts for future reference. Knowing when to call in the pros can save you money and headaches down the line.
Problem 4 — Discolored, Cloudy, or Bad-Tasting Water: Identify and Treat Contamination
Discolored, cloudy, or bad-tasting water usually means something is off with contaminants like rust, sediment, chlorine, or bacteria, and you can spot some clues with simple checks. Look for visible particles, changes in color, unusual smell, or metallic taste, and use a basic boiling test or home test kits for common parameters.
Knowing the likely sources helps you decide what to try first—aging pipes, well issues, or changes in the municipal supply—and when to escalate. Start with flushing lines and replacing corroded fixtures, but be aware that boiling is not a complete purification method, and getting professional testing or treatment may be needed if problems persist.
Immediate DIY treatments
To address discolored, cloudy, or bad-tasting water quickly, start by flushing your pipes. Turn on the faucet and let it run for a few minutes until the water clears up. If you notice rust-colored stains in your sink after this process, check your fixtures for signs of corrosion.
For ongoing issues, consider installing point-of-use filters like carbon or sediment filters at key taps. These can remove small particles and improve taste without major plumbing changes. For bacterial concerns, a UV bottle sterilizer is effective for treating drinking water before use.
Boiling water is another quick fix to kill bacteria but won’t address issues with minerals or chemicals. Use it temporarily until you find a more permanent solution like installing filters.
Smart filtration and whole-house solutions
For long-term water quality, consider under-sink filters for targeted purification at key taps. These are easy to install and maintain but only treat the water coming from that specific faucet.
Reverse osmosis systems offer comprehensive purification by removing a wide range of contaminants, though they can be slower due to their multi-stage filtration process. They’re ideal if your water has high levels of dissolved solids or heavy metals.
Whole-house filters tackle issues across all taps and appliances, ensuring consistent quality throughout the home. These require regular maintenance and filter changes but provide peace of mind for overall water health.
Smart monitors can also be a game-changer by alerting you to any sudden changes in your water’s condition, helping you stay proactive about potential contamination issues.
Problem 5 — Slow Drains and Clogs: Safe Clearing Methods
Slow drains usually come from hair, grease, foreign objects, or roots. Start with safe mechanical methods and enzyme-based cleaners rather than harsh chemicals. Always shut off water, use PPE, and avoid mixing cleaners.
Begin by listening for gurgling, check traps, and distinguish partial from full blockages. Use a plunger or toilet auger first, then enzyme cleaners; a hot water flush can help where appropriate. If drains back up across fixtures or roots are suspected, pause and seek professional help.
DIY unclogging steps
Start with the plunger. It’s your first line of defense for clogs caused by hair, soap scum, or small objects. Make sure to cover the drain completely and use a steady up-and-down motion to create suction.
If that doesn’t work, move on to a hand auger or drain snake. These tools can reach deeper into your pipes to clear stubborn blockages. Be careful not to force too hard; you don’t want to damage your pipes.
Next, try an enzymatic cleaner. They’re safer than chemical cleaners and work by breaking down organic matter like grease and hair without harming the pipe material. Follow the instructions on the bottle for best results.
Finally, check the P-trap under the sink for any visible debris that might be causing a blockage. Clearing this area can often resolve minor clogs quickly.
Preventive and smart options
To avoid frequent clogs, install hair traps or drain screens in your shower and sink to catch debris before it enters the pipes. Regular use of enzyme-based cleaners can also prevent buildup over time.
If you have a history of tree root issues, consider using a camera inspection tool to check for roots entering your main line. This will help you identify problem areas early on and save money in the long run.
For recurring clogs, invest in a smart drain auger that can be controlled remotely. These tools are more precise than standard snakes and can reach deeper into pipes without causing damage.
Maintaining your drains with regular cleaning and preventive measures is key to avoiding costly repairs down the road. A little effort now can save you big headaches later on.
Problem 6 — Moisture, Mold, and Mildew from Water Intrusion
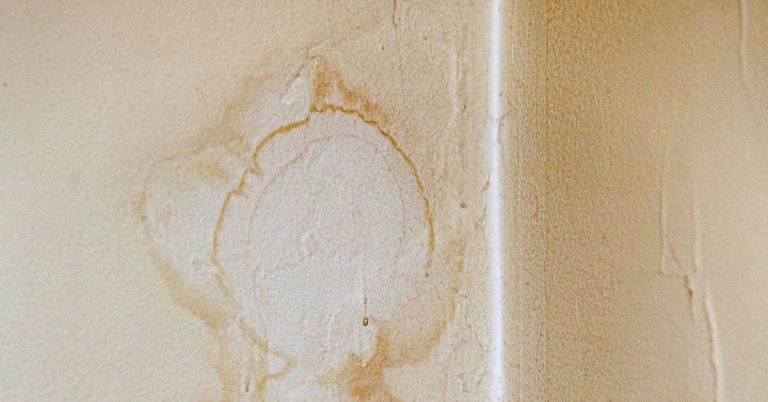
Moisture intrusion fuels mold growth. Leaks and high humidity create a mold-friendly environment, especially when they’re ongoing. Look for signs like damp walls, staining, peeling paint, and a musty odor.
Early detection matters because mold can irritate airways and trigger allergies, especially for kids, the elderly, or immune-compromised folks. Containment, thorough drying, and cleaning of non-porous surfaces help, but porous materials may need professional handling. When mold is widespread or extensive water damage is involved, bring in professionals and check your policy for coverage and required documentation.
Immediate containment and cleanup
When you spot a leak or mold, act fast. First, put on protective gear: gloves, mask, and goggles to avoid inhaling spores. If the area is small—less than 10 square feet—you can handle it yourself.
Rapidly extract standing water with pumps or wet vacs. Then ventilate the space by opening windows and running fans. Use dehumidifiers if needed to lower moisture levels below 60%. Check surfaces with a hygrometer to ensure they’re dry enough—below 15% is ideal.
For non-porous materials like metal or glass, clean them thoroughly using soap and water followed by a bleach solution. Scrub until the mold is gone. For porous items such as wood or carpet, these often need professional help since they can’t be fully sanitized without risking further growth.
If you see extensive mold—more than 10 square feet—or if it’s in hard-to-reach spots like behind walls, call a pro right away. They have the equipment and training to safely remove mold without causing more damage.
Prevention and long-term moisture control
To keep water out of your home, start by fixing any roof leaks or plumbing issues. Make sure gutters are clear and downspouts direct water away from the foundation. Grading around your house should slope downward to prevent pooling.
In basements and crawlspaces, install vapor barriers on walls and floors to stop moisture migration. Ensure proper ventilation in attics and crawlspaces by adding vents or fans to circulate air and reduce humidity levels.
Consider installing smart humidity monitors that alert you when conditions are right for mold growth. These devices can help catch issues early before they become major problems. Regularly check these areas and address any signs of moisture intrusion promptly.
Maintaining a dry home is key to preventing mold. By addressing leaks, improving drainage, and monitoring humidity levels, you’ll create an environment that’s inhospitable for mold growth.
Problem 7 — Outdoor Water Issues and Conservation (Irrigation, Runoff, and Foundation Risk)
Outdoor water issues boil down to leaks, misaligned or broken sprinkler heads, and irrigation that wastes water by causing runoff or pooling near the foundation. A quick audit reveals where water is going, what’s leaking, and whether the coverage avoids dry spots while protecting soil and landscaping. Simple fixes like realigning heads, sealing emitters, and pruning overgrown zones can cut waste and reduce pressure on your foundation over time.
Getting ahead of these problems matters because improper irrigation can undermine the foundation, erode soil, and spike water bills while creating soggy ground around the home. A DIY approach lets you test for leaks, map coverage with catchments, and adjust or replace components to improve infiltration and reduce runoff. Smart design tweaks—shorter watering windows, mulch, regrading away from the house, and adding rain barrels or permeable landscaping—help conserve water and keep landscapes healthy without overdoing irrigation.
DIY fixes to reduce runoff and leaks
Start by checking your sprinkler system for any broken heads, misalignment, or leaking lines. A quick fix can save gallons of water each day. Use a catchment pan under the sprinklers to see if they’re dripping or spraying too much.
If you spot runoff pooling around your foundation, it’s time to regrade the landscape. Create gentle slopes away from the house with swales and berms to direct excess water safely into your yard. This not only reduces waste but also protects your home’s foundation.
Consider switching to drip irrigation for areas like flower beds or shrubs where sprinklers might be overwatering. Drip systems deliver water directly to plant roots, reducing evaporation and runoff significantly. Seal any leaks in the lines with repair kits available at hardware stores.
Smart alternatives for water-efficient yards
Incorporate soil moisture sensors into your irrigation system to ensure you’re only watering when needed. These devices connect directly to smart controllers, which automatically adjust the schedule based on weather conditions and plant needs.
Install rain barrels at downspouts to collect runoff from rooftops for later use in gardens or lawns. This simple setup can provide a steady supply of water without tapping into your main system.
Opt for drought-tolerant plants that require less watering once established. These hardy varieties thrive with minimal care and help conserve resources year-round. Pair them with mulch to retain soil moisture and reduce weed competition.
Conclusion
Handle water problems with a clear plan and steady steps. The goal is safety, durability, and a home that looks and feels right again.
Start by following a simple check sequence: verify basic symptoms, test where safe, try practical remedies in small areas first, document what you find, and then move to the next issue without jumping around. If a fix involves pressure, electrical components, mold, or hidden leaks, proceed with caution and pause if anything doesn’t feel right.
Common mistakes to avoid include rushing repairs, using harsh cleaners or chemicals not suited for the problem, and ignoring hidden leaks that can cause bigger damage. Always shut off the correct supply before working, test in a small area, and wear basic safety gear. When in doubt, double‑check instructions, and don’t force fittings or components that don’t fit well.
If water intrusion is widespread, mold is involved, or you’re unsure about the condition of your plumbing, call a professional rather than pushing ahead alone. Stay steady, follow the checks, and you’ll restore safety and peace of mind—one solid fix at a time.
FAQ
1. What should I do first if I notice a sudden drop in water pressure?
Start by checking if the issue is in one fixture or the whole house. Look for leaks, clogged aerators, or a shutoff valve that’s partially closed. If pressure stays low, don’t force things; call a pro before you damage pipes.
2. How can I tell if my water has hard minerals and what fixes work?
Hard water shows as white mineral buildup on fixtures and soap that won’t rinse clean. A simple fix is a whole-house or point-of-use water conditioner or a scaled removal system. Avoid overdoing shortcuts that claim to remove minerals on the cheap.
3. What’s the right way to fix a leaking pipe or fitting?
Turn off the water supply first and dry the area. Use the proper replacement part and a suitable sealant or tape. If the leak is behind walls or near the foundation, stop here and call a licensed plumber.
4. Are water filtration systems worth installing at home?
Filtration can improve taste and remove some contaminants, but not all. Pick a system that targets what you actually need, and have it installed to manufacturer specs. Skipping service checks can let problems creep back in.