

Introduction
This article explains how to prep, apply, and touch up paint for a near-perfect finish. It covers clearing the space, evaluating wall condition, and selecting the right tools and materials. You’ll get straight, hands-on steps you can follow without getting lost in theory.
Wall prep matters most, from patching small dents to scuffing surfaces so new paint can grab. Start with a clean room, remove or protect everything, and choose rollers, brushes, and binders that fit the job. Always read product labels and local rules to confirm compatibility and safety before you start.
Key takeaways
- Clear the room and cover floors before any scraping or sanding begins.
- Inspect walls for cracks, peeling paint, or moisture before choosing repairs.
- Choose tools and PPE appropriate for surface type; wear masks and goggles.
- Clean, sand, and prime in stages to reduce lap marks and rough transitions.
- Protect trim, outlets, and floors; mask edges to keep paint off non-target areas.
- Reserve time for touch-ups, cleanup, and tool maintenance at job end.
Table of Contents
- Introduction
- Key takeaways
- Overview: What a Near-Perfect Paint Job Looks Like and How to Use This Guide
- Planning, Scheduling, and Budgeting Before You Start
- Preparing the Workspace: Clearing, Protecting, and Staging
- Evaluating Wall and Surface Condition
- Tools and Materials Checklist: Choosing the Right Gear
- Surface Prep: Cleaning, Sanding, and Priming
- Painting Techniques: Cutting In, Rolling, and Working Efficiently
- Touch-Ups, Cleanup, Tool Care, and Long-Term Maintenance
- Conclusion
- FAQ
Overview: What a Near-Perfect Paint Job Looks Like and How to Use This Guide
A near-perfect paint job delivers a smooth surface, clean edges, and durable coverage. Visual cues include consistent sheen, crisp lines, and even color density across the area. This guide is designed to help you achieve those outcomes at your own pace.
The quick-start overview points you to prep, priming, cutting in, rolling, edges, touch-ups, and cleanup. Each stage explains what to expect, common pitfalls to avoid, and practical checks you can perform along the way. You’ll find a short stage-by-stage preview and a practical checklist to verify progress with before/after cues.
What ‘near-perfect’ means for DIYers
A near-perfect paint job doesn’t mean professional-grade perfection. It’s about achieving a smooth, even finish that you’re proud to show off. Remember, trade-offs exist between speed and finish. Rushing can lead to mistakes, but taking too long might disrupt your schedule.
Understand your limits. If the project requires specialized skills or equipment, consider hiring a pro. This guide helps you achieve the best results with your tools and time.
How to use these 10 tips in your project plan
These 10 tips are mapped to four key project phases: planning, prep, application, and finishing. Start by reading the entire guide to understand what’s involved.
Planning: Choose the right paint, tools, and techniques for your surfaces. Consider drying times and weather conditions.
Prep: Follow tips 1-3 for surface preparation. This sets the stage for a smooth finish.
Application: Use tips 4-8 for cutting in, rolling, and applying paint. These techniques ensure even coverage and clean edges.
Finishing: Follow tips 9-10 for touch-ups and cleanup. A thorough final pass ensures durability and longevity.
Planning, Scheduling, and Budgeting Before You Start
Begin with a clear scope for the concrete area, noting surface type and finish you intend to achieve. Consider repairs and moisture needs and how they affect your plan. Use these notes to drive a reality-based schedule and procurement list.
Think through workflow, dust control, ventilation, and lighting to keep work moving smoothly. Build in lead times and contingencies for unexpected repairs or weather. Your budget should cover primers, paints, patching compounds, and any rental gear you might need.
Scope, timeline, and work order
Break your project down into manageable tasks. Start with exterior surfaces, then move indoors. Allow for drying/curing windows as per manufacturer guidance.
Demolition/Clearing: Remove old paint, debris, and any obstacles. This might involve grinding or chipping off old concrete coatings.
Repairs: Fix cracks, remove efflorescence, and address peeling paint. Let repairs cure before priming.
Priming & Painting: Apply primer to seal the surface and improve paint adhesion. Follow with your chosen finish (epoxy, acrylic, or latex).
Cost guidance and buying strategy
Estimate costs based on quantity needed, desired finish level, and primer requirements. Here’s a smart buying strategy:
First, test samples to ensure color and finish meet your expectations. Buy enough for touch-ups later.
Compare midrange vs. premium options. Midrange might suffice for garage floors or exterior surfaces, while premium could be worth it for high-traffic areas like kitchen counters.
Factor in a buffer for unforeseen repairs and touch-ups. Always check lead times to avoid delays.
Safety, permits, and lead-paint considerations
Safety first: Wear gloves, goggles, and a respirator when working with concrete paints. Ventilate work areas.
Lead Paint: If your home was built before 1978, test for lead paint. If present, follow EPA guidelines for safe removal and disposal.
Check local regulations: You might need permits for major structural changes or if you’re painting exterior surfaces facing public property.
Always consult local codes and regulations to ensure compliance and safety.
Preparing the Workspace: Clearing, Protecting, and Staging
Start by removing or shielding movable items and establishing a clean, unobstructed workspace. Decide what to relocate and what to protect with drop cloths or tarps. Create a defined area so dust and spills stay contained.
Set up lighting and ventilation to keep fumes manageable and visibility high. Check filters, open a window if possible, and use fans to move air away from you. Stage all tools and materials where you can reach them quickly for faster work.
Clearing and staging the room
Start by removing all movable furniture, fixtures, and fragile belongings from the area you’ll be painting. If an item can’t be moved, position it centrally in the room and cover it with a sheet or plastic to protect it.
Create a safe route for moving materials in and out of the workspace. This could mean temporarily removing a rug, closing off a hallway with plastic sheeting, or designating a specific entry point for your supplies.
Once everything is cleared, you’ll have a clean, unobstructed workspace ready for painting.
Masking, drop cloths, and protecting fixtures
Before you start painting, protect your surfaces from unwanted paint drips or spatters. Use painter’s tape to mask off edges where walls meet ceilings, floors, or trim. Choose a high-quality tape that won’t peel off drywall or leave residue behind.
Lay down drop cloths or heavy-duty tarps on the floor to protect it from paint. Secure them with weights or tape to prevent them from shifting while you work.
Protect fixtures like light switches, outlets, and doorknobs by covering them with plastic wrap or painter’s tape. Make sure your coverings are secure to avoid paint seepage.
Common mistakes to avoid in workspace prep
Preparing the workspace is a crucial step that’s often overlooked or rushed. Here are some common mistakes to avoid:
- Inadequate protection: Not covering floors, trim, and fixtures properly can lead to paint damage that’s difficult to fix.
- Poor lighting: Insufficient light makes it hard to see what you’re doing, leading to sloppy work and missed spots.
- Not creating a drying zone: Painting in an area with poor ventilation can result in slow drying times and increased risk of dust or fumes affecting your paint job.
- Ignoring dust and debris: Not removing loose concrete dust or patching cracks can lead to poor adhesion and an uneven finish.
Take the time to properly prepare your workspace, and you’ll be well on your way to a near-perfect paint job.
Evaluating Wall and Surface Condition
Identify surface types and subsurface irregularities that affect prep and primer choice. Note cracks, peeling, and rough patches that will need attention. This assessment guides your repair plan and product selection.
Look for moisture signs, dirt, grease, and previous coatings that might impact adhesion. Plan cleaning methods and decide when to strip, sand, or prime. Use simple adhesion checks to decide next steps before applying anything new.
Inspection checklist and visual checkpoints
Before you start painting, use this checklist to inspect your walls and surfaces. It’ll help you spot issues early and save time in the long run.
- Cracks: Check for hairline cracks or larger gaps. Ignoring these can lead to paint peeling later on.
- Bubbles or blisters: These indicate moisture or previous coating issues. Scrape and test adhesion if found.
- Mildew or mold: Look for dark spots, especially in damp areas. If present, clean and treat with a suitable solution before painting.
- Gloss levels: Check gloss levels of existing paint. High-gloss surfaces may need sanding to improve primer adhesion.
- Efflorescence: White, powdery deposits on walls indicate moisture issues. Test for dampness and address if found.
- Loose or damaged trim: Inspect baseboards, door frames, and other trim. Repair or replace as needed.
- Substrate irregularities: Feel the surface for any unevenness. Note areas that need sanding or leveling.
- Previous coatings: Identify unknown or peeling paint. Test adhesion and plan stripping, sanding, or priming accordingly.
Quick rule: Always document problem areas for repair before painting begins.
Repair priorities: patching, sanding, and trim work
Before you start prepping your surfaces for paint, address these repair tasks to ensure a smooth finish.
Start by filling cracks. Use a suitable filler for the surface type. Feather the edges to blend with the surrounding area. Ignoring this step can lead to visible imperfections in your final coat.
Next, replace or repair damaged trim. Ensure all trim is secure and in good condition. This will give your room a polished look once painted.
Sanding should be done after filling cracks and before priming. Lightly sand to smooth surfaces and improve primer adhesion. Be sure to dust off thoroughly afterwards.
Common mistakes to avoid when assessing surfaces
To ensure a successful paint job, steer clear of these common assessment pitfalls.
- Skipping inspection: Rushing through the assessment phase can lead to hidden issues causing problems later on. Always take the time to inspect thoroughly.
- Underestimating substrate issues: Assuming minor surface imperfections won’t affect your paint job is a common mistake. Address all issues before painting.
- Using wrong repair materials: Different surfaces require different repair methods and materials. Using the wrong ones can lead to poor results or further damage.
- Ignoring moisture issues: Moisture problems won’t go away on their own. Address them before painting to prevent peeling, bubbling, or mold growth.
By avoiding these mistakes, you’ll set your paint job up for success.
Tools and Materials Checklist: Choosing the Right Gear
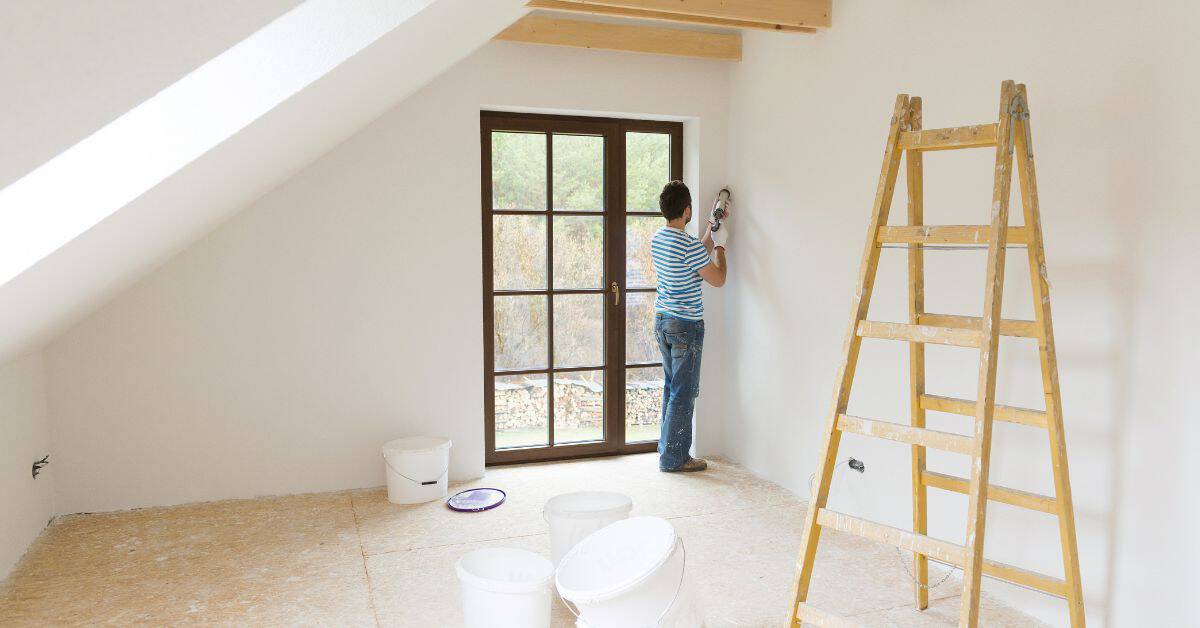
Clarify indoor vs outdoor conditions and surface types to guide tool choices and compatibility. Have a clear sense of what you’ll be applying so you pick appropriate gear. This keeps your work efficient and reduces waste.
Stock essential hand tools, appropriate rollers, trays, masking supplies, and PPE. Plan for rental or purchase of specialty gear when needed, and keep maintenance in mind. A simple list helps you avoid last-minute trips to the store.
Choosing brushes, rollers, and applicators
Select the right tools for a smooth, efficient paint job.
- Brush shape: Angled for cutting in edges, flat for wide surfaces.
- Bristles: Synthetic for latex, natural for oil-based. Worn bristles cause streaks.
- Nap length: Short (1/4″-3/8″) for smooth surfaces, long (3/8″-1/2″) for texture. Wrong nap causes poor coverage.
- Roller covers: High-density for glossy finishes, low-density for matte. Worn covers leave marks.
- Tray setup: Deep tray for high ceilings, shallow for easy access. Wrong tray causes spills.
- Liner choice: Reusable for multiple coats, disposable for one-time use. Wrong liner leaks paint.
- Extension poles: 18″-24″ for high walls. Too short means ladder work, too long is unstable.
- Pad for edging: Use with angled brush for clean edges. Wrong pad leaves marks.
Quick rule: Quality tools mean less time, better finish.
Paint, primers, and specialty products
Choose the right paint and primer for a durable, attractive finish.
- Paint formulation: Latex for most interiors, oil-based for trim. Wrong formula causes peeling.
- Finish sheen: High-gloss for durability, flat for hiding imperfections. Wrong sheen shows flaws.
- Primer type: Stain-blocking for smoke/heat damage, adhesion for new surfaces. Skipping primer causes poor paint adhesion.
- Problem areas: Use stain-killing primer on smoky walls, adhesion primer on new drywall. Wrong primer causes issues.
- Specialty products: Consider textured paints, metallic finishes. Wrong product doesn’t achieve desired look.
Quick rule: Match paint and primer to surface type for best results.
Common mistakes to avoid with tools and materials
Learn from these common errors to save time and money.
- Worn brushes: Replace worn bristles for smooth strokes. Worn brushes cause streaks.
- Wrong roller nap: Match nap length to surface texture. Wrong nap leaves marks.
- Skimping on primer: Apply at least one coat of primer. Skipping causes poor paint adhesion.
- Low-quality materials: Invest in good paint, brushes. Cheap tools/ paint cause poor finish.
- Using wrong tools: Match tool to job size (brush for small areas, roller for large). Wrong tool is inefficient.
Quick rule: Quality tools and materials mean a better, longer-lasting finish.
Surface Prep: Cleaning, Sanding, and Priming
Assess gloss, surface contaminants, and moisture to tailor cleaning, sanding, and priming. This step is the foundation for a long-lasting finish. Take time to set up proper containment and safety measures.
Follow cleaning protocols to remove oils, curing compounds, and residues. Choose whether to degloss or abrade, and select the right primers for your surface. Perform a moisture check and plan spot testing for adhesion before proceeding.
Cleaning and decontamination
Start by removing dust with a damp cloth or broom. For greasy surfaces, use a degreaser like TSP (trisodium phosphate) diluted in water. Mildew can be tackled with a solution of bleach and water, but rinse thoroughly afterwards to avoid damaging the concrete.
Rinse the surface well with clean water after cleaning. Let it dry completely before moving on to sanding or priming. This step is crucial for good paint adhesion.
Sanding, feathering, and deglossing
Sanding helps remove loose material and creates smooth transitions. Start with a coarse grit (e.g., 60-grit) for heavy-duty work, then progress to finer grits (e.g., 120-grit) for a smoother finish.
For glossy surfaces, deglossing is necessary for paint to bond. Use a fine-grit sandpaper (e.g., 220-grit) and lightly sand in the direction of the grain. Be careful not to over-sand, as this can damage the surface.
Feather the edges around repairs or transitions using a flexible sanding sponge and a fine grit. This ensures a smooth blend between old and new surfaces.
Priming strategy and special primers
A full primer coat is usually needed for bare concrete or repaired areas to ensure good paint adhesion. For problem spots like tannin bleed, use a stain-blocking primer. In high-moisture areas, consider a penetrating primer that seals the pores while allowing moisture to escape.
Spot-priming can be sufficient for small repairs or touch-ups. However, for larger areas, a full coat is recommended to ensure even coverage and adhesion.
Always follow the manufacturer’s guidelines for primer-to-paint ratios and recoat windows to achieve the best results.
Common mistakes to avoid in prep and priming
Skipping proper cleaning, sanding, or priming can lead to paint failure. Here are some common pitfalls:
- Priming over contamination: Always ensure the surface is clean before priming.
- Insufficient feathering: Inadequate blending between old and new surfaces can result in visible transitions.
- Skipping primer on problem spots: Special primers are designed to tackle specific issues – use them where needed.
- Ignoring moisture testing: High moisture levels can cause paint to peel. Test before priming.
Taking the time to avoid these mistakes will save you from having to redo work later on.
Painting Techniques: Cutting In, Rolling, and Working Efficiently
Develop a cutting-in plan that protects adjacent surfaces and yields crisp edges. Identify doors, windows, trim, and ceilings to sequence your work effectively. Keep the plan simple and repeatable to stay on track.
Choose brushes and rollers appropriate for your surface, keep a steady load, and feather edges to blend. Maintain a wet edge and work in logical panels to minimize lap marks. Use extensions to reduce ladder movement and keep momentum going.
Cutting in corners and edges
Start by applying painter’s tape along your cut-in lines. This helps keep paint off unwanted areas and ensures crisp, clean edges.
Use a 1.5 to 2-inch angled sash brush for cutting in. Dip it about halfway into the paint can, then tap it against the side to remove excess paint. Work in manageable sections, steadying your hand with your other palm or resting your elbow on something stable.
Hold the brush at a 45-degree angle to the surface and use short, steady strokes, feathering out towards the edge. This helps blend the cut-in area with the rolled work later on. Once you’ve finished cutting in, remove the tape while the paint is still wet for best results.
Rolling technique, coverage, and working in sections
Load your roller by dipping it into the paint tray, then rolling off excess paint on the ribbed section of the tray. This helps ensure even coverage and prevents drips.
Maintain consistent pressure while rolling to achieve an even finish. Work in manageable 3×3 or 4×4 foot sections, starting at the top of the wall and working your way down. Keep a ‘wet edge’ by overlapping each new section by about half the width of your roller nap.
For back-rolling, apply paint to the wall as usual, then roll over it again from the opposite direction. This helps blend the edges and ensures even coverage. If you notice any lap marks, lightly sand them out with fine-grit sandpaper once the paint is dry.
Painting windows, doors, and tricky spots
Start by applying painter’s tape along the edges of your window or door frames. Use a small angled brush to cut in around these areas, using the same technique as you would for walls.
For sash windows, paint the frame first, then carefully paint the glass with a small brush, working from one side to the other in steady strokes. Protect the floor below with a drop cloth or painter’s tape to catch any drips.
For tight areas like electrical outlets or light switches, use a small artist’s brush or even a toothpick to apply paint carefully, feathering out any edges. Always remember to turn off and test power at these points before painting.
Common mistakes to avoid while painting
Even the most experienced painters can make mistakes. Here are some common ones to watch out for:
- Overworking paint: Too many coats or applying paint too thickly can lead to drips, runs, and a longer drying time.
- Painting in poor conditions: Extreme temperatures, high humidity, or painting surfaces that are not completely dry can result in poor adhesion and peeling.
- Failing to feather overlaps: Not blending the edges of your cut-in work with your rolled work can leave visible lines.
- Not allowing enough drying time: Rushing through coats or not giving each layer sufficient time to dry can lead to poor adhesion and a less durable finish.
- Using low-quality paint or tools: Cheap paint and inferior brushes or rollers can result in an uneven, unsatisfying finish.
By being aware of these common mistakes, you can avoid them and achieve a near-perfect paint job.
Touch-Ups, Cleanup, Tool Care, and Long-Term Maintenance
Plan touch-ups to blend colors without creating noticeable edge lines. Test on hidden patches and adjust as needed. Recoat only when the surface is ready and the color matches well.
Clean and store tools properly, label touch-up cans, and dispose of leftovers responsibly. Maintain a practical routine to monitor peeling, staining, or moisture issues and refresh coatings as needed. Keep a simple plan for future touch-ups and maintenance checks.
Touch-up techniques and color matching
Feathering touch-ups is key to blending them seamlessly. Use a dry brush, lightly stroking the area around the touch-up to soften any edges.
For color matching, use your original paint batch or samples for reference. Apply a small test patch in an inconspicuous spot before committing to the entire area.
When to recoat: If you’ve patched holes or sanded down glossy surfaces, you’ll need to recoat the entire section to maintain a uniform finish.
Cleaning, storing tools, and disposal
Proper tool care extends their life. Here’s how:
- Brushes and rollers: Clean with warm water and soap immediately after use. For latex paint, rinse thoroughly; for oil-based, use mineral spirits.
- Caulk guns: Wipe clean, then reseal the tube to prevent drying out. Store upright in a cool, dry place.
- Paint disposal: Check local regulations. Some areas require paint to be dried out and disposed of as trash; others have hazardous waste facilities.
- Recycling: Rinse and dry empty containers before recycling. If your area doesn’t recycle, check for recycling-ready containers at hardware stores.
- Rentable tools: Consider renting expensive or specialty tools. Prices vary but can be cost-effective for occasional use.
Final inspection and routine maintenance
Before you put away your tools, do a final walkthrough to catch any missed spots:
- Check for drips: Look for any missed areas or runs.
- Inspect edges: Ensure all cuts are clean and even.
- Examine corners: Check for proper coverage in tight spaces.
- Monitor problem areas: Keep an eye on spots prone to moisture, stains, or UV damage.
- Record paint details: Note the brand, color, and finish for future touch-ups.
Quick rule: Establish a simple maintenance routine – quarterly wipe-downs, annual touch-ups – to keep your paint looking fresh.
Common mistakes to avoid during finish and cleanup
Here are some pitfalls to steer clear of:
- Improper tool cleaning: Not cleaning tools properly can ruin them. Always clean immediately after use.
- Discarding product info: Keep track of what products you used, where you bought them, and their warranties.
- Not recording paint details: Without these details, future touch-ups will be challenging.
- Rushing cleanup: Taking shortcuts can lead to damaged tools or improper disposal methods.
By avoiding these mistakes, you’ll ensure a long-lasting, high-quality finish.
Conclusion
Get to a finish that looks and lasts by sticking to solid prep, correct technique, and careful touch-ups. Safety and discipline now save you time and money later, and they keep you from damaging the work or your home.
First, check that the area is cleared and protected, you have the right gear, and a small test patch is done. Then clean, sand, and prime where needed, cut in neatly, roll in manageable sections, keep edges wet and consistent, do the touch-ups with a light hand, and finish with thorough cleanup and proper tool care.
Avoid rushing drying times, skipping prep or primer, or overworking a single spot. Don’t paint in bad conditions or without ventilation, and always wear eye protection and a mask when sanding or spraying; ventilate the space and keep a clean path to exit if fumes build up. If you encounter rotten wood, persistent stains, or large areas, or you’re dealing with lead paint or high ceilings, call a professional rather than forcing it to work.
FAQ
How should I prepare the room before painting?
Move furniture out or to the center. Cover floors and remaining furniture with drop cloths. Remove switch plates, outlet covers, and hardware you can safely take off.
How do I evaluate wall condition before priming?
Look for cracks, bulges, and peeling paint. Check for moisture stains and mold in damp spots. Note rough patches, holes, and peeling edges that need filling or sanding.
How do I choose painting tools and materials?
Pick brushes for edges and trim, and rollers for large surfaces. Match roller nap to wall texture, and get a suitable primer. Read labels for coverage and drying guidance, then choose brands you trust.
What are effective wall prep techniques before applying primer?
Clean walls to remove dust and grease. Patch cracks and holes with appropriate filler. Sand smooth, wipe away dust, and let surfaces dry before priming.
How should I approach cutting in edges?
Use a steady hand and a high-quality angled brush. Paint neat, even lines along ceilings, trim, and corners before rolling. Work in small sections to avoid roller marks.