Introduction
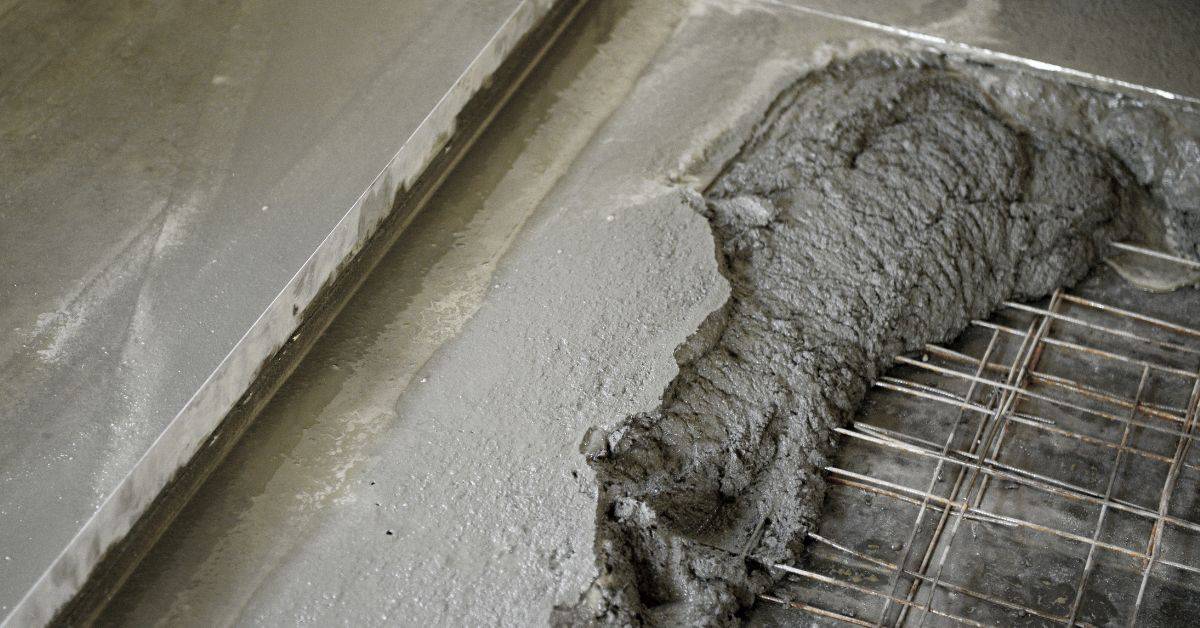
Properly placing and supporting rebar before pouring concrete prevents voids. This is the core idea behind working concrete around reinforcement. Keeping the bar(s) elevated and centered helps the concrete bond and carry load.
Use appropriate spacers or chairs to hold rebar at the right height and position. Make sure the bars are clean, tied together, and not resting on the ground so they stay in place during the pour. Pour evenly and compact gently, watching for any gaps and adjusting as needed rather than blasting through the mix.
Key takeaways
- Rebar provides structural strength and crack control in concrete members.
- Use proper spacing, chairs, and supports to position rebar accurately.
- Pre-pour checks confirm coverage, clear pour path, and form alignment.
- Keep tools ready, secure ties, and protect rebar from displacement.
- During pour, ensure continuous concrete flow beneath rebars to eliminate voids.
- Follow safety rules, document inspections, and coordinate with crew for quality.
Table of Contents
- Introduction
- Key takeaways
- Why Correct Concrete Placement Around Rebar Matters
- Pre-Pour Planning and Specification Checks
- Tools, Materials, and Accessories Checklist
- Securing Reinforcement to Minimize Movement During Pour
- Placement Techniques to Avoid Voids Under Rebar
- Special Approaches for Densely Reinforced Zones
- Inspection, Acceptance Criteria, and Testing
- Safety, Quality Control, and Contractor Responsibilities
- Conclusion
- FAQ
Why Correct Concrete Placement Around Rebar Matters
Proper consolidation around rebar and adequate concrete cover are critical to the member’s bond, load transfer, and overall strength. When rebar is surrounded by well-compacted concrete, the structure develops its intended performance and durability. Voids under bars weaken capacity and invite problems later in service.
Check cover values, rebar spacing, and alignment at corners, intersections, and around ties. Understand how improper placement can lead to gaps that trap air or create microvoids. Use a practical QA approach to flag potential congestion early and guide corrective actions.
Structural integrity and load transfer
Proper concrete placement around rebar is crucial for maintaining the structural capacity of your project. Voids under rebar can interrupt load paths, reducing the section’s ability to carry intended loads.
Each piece of rebar needs adequate compaction around it to ensure bond strength and proper load transfer. This helps maintain the designed strength of the member.
Following design intent is key here. Voids can lead to unexpected deflections, cracks, or even structural failure over time.
Durability and corrosion risks
Voids and inadequate concrete cover around rebar allow moisture and chlorides to reach the steel, accelerating corrosion. This can lead to reduced service life and costly repairs.
Corrosion causes expansive rust, which cracks the surrounding concrete. This further exposes the rebar to more corrosion, creating a vicious cycle.
Proper consolidation ensures a dense, homogeneous concrete matrix that resists moisture penetration and protects against corrosion.
Cost and remediation implications
Voids under rebar can lead to costly consequences. Inspections may reveal defects, requiring repairs that involve removing and replacing concrete, adding labor and material costs.
Downtime is another factor. Repairs can delay project completion or shut down structures for maintenance, impacting productivity and potential revenue.
Prevention through correct placement is cheaper than remediation. Always follow best practices to avoid these issues.
Pre-Pour Planning and Specification Checks
Pre-pour work defines how voids are avoided by confirming bar layout, clear cover, spacers, and embedment lengths on the drawings. This step ties the as-built reality to project requirements. It sets expectations for subsequent concrete placement and consolidation.
Review drawings and specs for spacing, hooks, minimum clearances, and embedded items. Verify pour plan, mix design notes, vibrator type and use, and consolidation approach. Assess form stability, spacer distribution, and potential misalignment risks before pouring.
Review drawings and cover requirements
Before you start, grab the project plans. You need to understand how reinforcement is laid out.
Check these:
- Rebar spacing – too close can trap concrete, creating voids.
- Hooks and stirrups – ensure they’re placed correctly to hold everything together.
- Minimum clearances – rebar needs space from forms. Too little, you’ll have voids.
- Embedment lengths – check where reinforcement goes into other elements like walls or slabs.
Verify cover requirements too. Rebar needs a certain thickness of concrete around it for protection and strength. Check contract docs and local codes. If unsure, consult the engineer.
Sequence, access, and logistics planning
Plan your pour sequence carefully. You want to avoid trapping concrete under rebar.
First, identify temporary openings in forms where you can place concrete without covering reinforcement.
Then, plan access paths. Your crew needs room to move around, vibrate the concrete, and consolidate it properly. Too narrow, and you’ll create voids.
Lastly, consider lift heights. Pouring too high at once can lead to bridging and voids under rebar.
Communication and roles
A good pour starts with a good plan. Get everyone on the same page before you begin.
Hold a pre-pour meeting. Invite formwork crew, steel fixers, pump operator, and concrete crew. Assign responsibilities clearly:
- Formwork crew – ensure forms are stable and properly spaced.
- Steel fixers – confirm reinforcement is placed correctly.
- Pump operator – coordinate concrete delivery to avoid congestion.
- Concrete crew – consolidate the mix around rebar without creating voids.
Assign field verification roles too. Someone needs to check cover and ensure proper consolidation before finishing.
Tools, Materials, and Accessories Checklist
Core supports and shoring keep reinforcement at the right elevation and prevent movement during the pour. Select chairs, spacers, and form accessories that match the cover requirements. Clear redundant items that could obstruct placement.
Vibration and consolidation tools should match the job: internal vibrators, pokers, and tampers, plus a plan for curing. Use placement aids like chutes, rails, and spacer blocks to maintain margins. Verify mix compatibility with additives and confirm a practical slump range for your section.
Supports: chairs, spacers, bolsters, and ties
Use these supports to hold rebar at the correct elevation and prevent movement during concrete placement.
- Rebar chairs: Ensure they are evenly spaced along the bars. Check that they maintain the required cover from the formwork face.
- Slab bolsters: Verify they support the slab reinforcement grid at the correct elevation and prevent sagging.
- Formwork spacers: Confirm they keep the formwork tight and maintain consistent cover throughout the pour.
- Rebar ties: Check that they secure the vertical bars to the horizontal ones, preventing movement during placement.
- Adjustable supports: Ensure they can be raised or lowered to accommodate varying cover requirements.
- Plastic vs. metal: Choose supports based on your formwork material and required durability.
- Compatibility with formwork: Make sure supports are compatible with the formwork system being used.
- Inspect before pour: Check all supports for damage or wear that could compromise their function during placement.
Quick rule: Inspect and adjust supports as needed just before concrete placement to ensure rebar is held at the correct elevation and won’t move during pouring.
Vibration and placement equipment
Use these tools to consolidate concrete around reinforcement and prevent voids.
- Internal vibrators: Use them for slabs and heavily reinforced sections. Ensure they reach the bottom of the pour without displacing rebar.
- External pokers: Employ these for walls and columns with accessible faces. Work from top to bottom in a systematic pattern.
- Tamps: Use them for small, thin sections or where vibrators can’t reach. Ensure consistent pressure is applied.
- Vibration time: Calculate the required duration based on slab thickness and concrete slump.
- Access tools: Have necessary equipment (like ladders, platforms) to safely access hard-to-reach areas.
- Chutes or funnels: Use them for controlled placement of concrete into forms, preventing segregation and reducing void risk.
- Rails or screeds: Ensure they are level and properly secured to maintain a consistent finish and prevent honeycombing.
- Spacer blocks: Use them to maintain gasket-free margins between forms, preventing concrete leakage and ensuring proper consolidation.
Quick rule: Always vibrate or consolidate concrete around reinforcement until it stops moving. This ensures no voids are left under the rebar.
Mix and admixture considerations
Coordinate with your concrete supplier to select a suitable mix design and admixtures for your reinforcement layout.
- Slump: Request a slump range of 4-6 inches for most reinforced placements. This provides adequate workability without excessive segregation.
- Plasticizers: Consider using them to improve concrete flow and reduce void risk in heavily reinforced areas.
- Superplasticizers: Use these high-range water reducers for highly congested reinforcement. They can significantly improve concrete flow without increasing water content.
- Air-entraining agents: Add them to increase concrete durability and resistance to freeze-thaw cycles, but avoid excessive air content which can compromise strength.
- Curing compounds: Choose ones that won’t compromise the bond between concrete and reinforcement or cause bleeding issues.
- Compatibility with steel: Ensure admixtures are compatible with the type of reinforcing steel being used to prevent corrosion risks.
- Mix design review: Verify that the selected mix design meets required strength and durability standards for your project.
- On-site testing: Conduct slump tests and perform air content measurements to confirm concrete quality before placement.
Quick rule: Always consult with your concrete supplier when selecting admixtures. They can provide expert guidance based on the specific mix design and reinforcement layout of your project.
Securing Reinforcement to Minimize Movement During Pour
Pre-pour planning aligns rebar layout with drawings and identifies critical intersections. Decide on chair and spacer placements to maintain cover during the pour. This reduces the chance of bars shifting when the concrete rushes in.
Use proper tying techniques and avoid over-tight connections that kink bars. Bracing and supports should be consistent to resist movement from concrete pressure. Perform on-site checks right after setup and adjust before the pour begins.
Proper tying and fastening methods
Use wire ties, not pliers, to secure intersecting rebar. Tighten enough for stability but not so much that you kink the bars.
Position ties away from concrete’s flow path. This lets concrete consolidate properly around the reinforcement.
At critical intersections, use a figure-eight tie pattern. This gives better support and prevents bars from moving out of alignment.
Preventing vertical/lateral displacement
Use rebar chairs, supports, or temporarily braced assemblies to keep spacing consistent. This resists movement from concrete pressure and vibration.
Edge bars need extra support. Use additional chairs or braces at the edges of your pour to prevent lateral displacement.
At openings, install temporary bracing to maintain rebar position during lifts. This keeps your spacing consistent under wet concrete’s weight.
Managing overlaps and congested areas
Plan lap lengths carefully. Overlaps should be at least 40 times the bar diameter, but not so long they cause congestion.
Stagger laps where possible. This reduces congestion and allows concrete to flow more easily around the reinforcement.
Use chairs or spacers in congested areas. This maintains cover and alignment, and helps prevent voids under rebar.