

Introduction
Wind-driven rain on stucco walls is best managed through proper drainage details rather than thicker coats. This article focuses on how flashing, joints, weep screed, and surface slope influence moisture control. A DIY approach works when you follow practical steps and check manufacturer guidance.
Myths about EIFS trapping moisture are common, but proper drainage details can reduce risk. We’ll cover practical checks for stucco durability in cold weather and how to compare maintenance costs over time. Always verify with the product label, manufacturer instructions, and local rules before any installation or repair.
Key takeaways
- Prioritize proper drainage plane details over thicker stucco coats for wind-driven rain.
- Ensure flashing, sealants, and penetrations are continuous and integrated with the drainage layer.
- Inspect EIFS myths: moisture traps are not inevitable; follow safe detailing practices.
- Freeze-thaw durability depends on joint control, drainage, and proper curing methods.
- Fire-safety concerns with EIFS require compliant assemblies and appropriate barriers.
- Cost implications: weigh EIFS installation against long-term maintenance and safety considerations.
Table of Contents
- Introduction
- Key takeaways
- How Wind-Driven Rain Attacks Stucco Walls
- Why Drainage Details Matter More Than Thicker Coats
- Critical Drainage Techniques and Construction Details
- Flashing, Sealants, and Penetrations: Getting Transitions Right
- Comparative Analysis of Drainage Methods and Materials
- Common Installation Errors and Contractor Red Flags
- Performance in Cold Climates and Fire-Safety Considerations
- Cost, ROI, Maintenance, and When to Repair Vs. Retrofit
- Conclusion
- FAQ
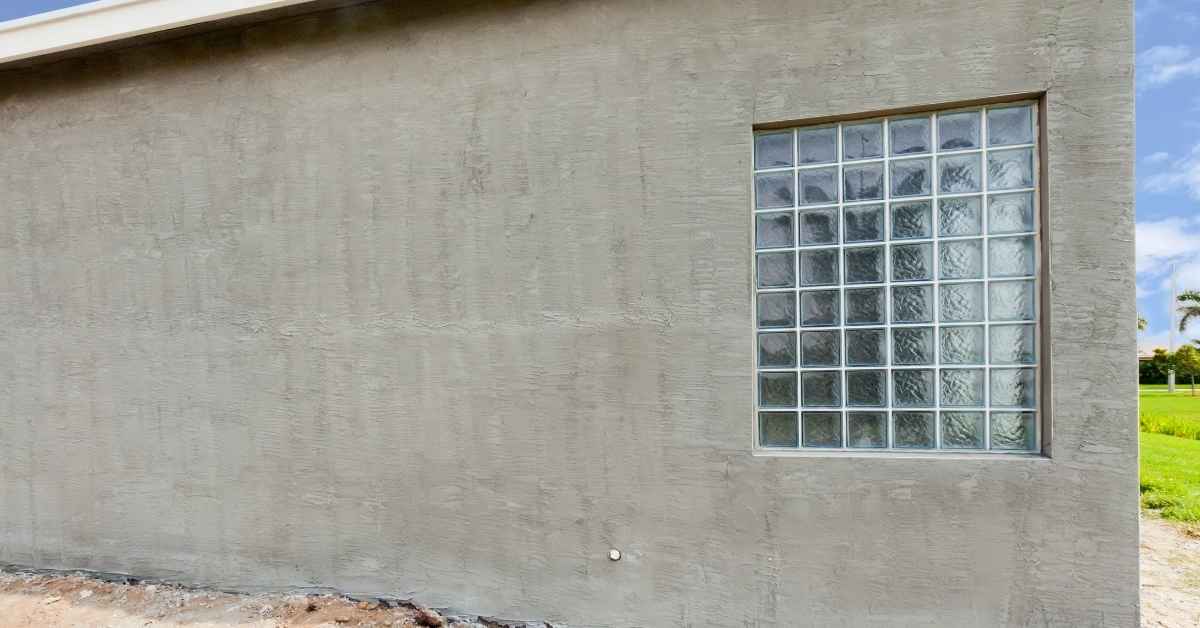
How Wind-Driven Rain Attacks Stucco Walls
Wind-driven rain behaves differently from vertical runoff. High wind pressures and suction push water horizontally into joints, seams, and around flashings, creating moisture pathways. These pathways often bypass the surface coatings and reveal weaknesses in the cladding system.
Vulnerable entry points on stucco facades include panel joints, window and door penetrations, wall-to-roof transitions, flashings, coping, and joints with lath or mesh. Diagnostic signs include staining, efflorescence, and a woody odor in damp areas. Practical checks, such as a shower-test in bad weather or a wind-driven test, can reveal concealed moisture; moisture meters or infrared can aid detection where available.
Mechanics of wind-driven rain penetration
Wind-driven rain poses a unique threat to stucco walls due to its horizontal force. High winds create pressure and suction, driving water droplets into joints, seams, and around flashings.
Wind velocity, angle, and water droplet momentum increase water entry at terminations and open joints. This intrusion can occur through capillary action or pressure-driven entry.
Understanding these mechanics helps identify entry points and design effective drainage strategies. If you understand the wind-driven rain mechanics, proceed with identifying vulnerable locations on stucco-clad walls.
Common vulnerable locations on stucco-clad walls
Stucco facades are susceptible to moisture intrusion at specific points. Identifying these failure points enables targeted maintenance and design improvements.
Control joints, window/door perimeters, roof-to-wall intersections, penetrations, and base-of-wall details are typical failure points that invite moisture intrusion. If you can list these common vulnerable locations, proceed with diagnostic signs and testing approach.
Why Drainage Details Matter More Than Thicker Coats
Thickness is not a substitute for drainage and ventilation. Proper water management reduces hidden moisture risks behind the surface. The goal is to control how water enters, travels, and exits the wall system.
Wind-driven rain infiltrates through seams and around penetrations, and water can travel behind the stucco if drainage planes are incomplete. A continuous drainage plane directs moisture to weep points and away from sheathing. Components like flashing, proper base coats, joints, and sealants work together to manage moisture at the assembly level.
The misconception that thicker stucco prevents water entry
Adding thickness to your stucco may seem like a logical way to protect against wind-driven rain, but it’s not as effective as proper drainage and ventilation. Thicker coats can mask problems temporarily, but they do not prevent water from reaching flaws at transitions or entering the wall assembly.
Water can still find its way through cracks, gaps, or poorly sealed areas, leading to hidden moisture damage behind the stucco. Thickness may hide these issues for a while, but it does not address the root cause of water intrusion.
To ensure your stucco cladding is truly protected, prioritize proper drainage and ventilation details. Regularly inspect visible signs of moisture damage or improperly sealed transitions. If thicker coats are specified without proper drainage and ventilation, re-evaluate the design to prioritize water management over added thickness.
How drainage and ventilation control moisture movement
Proper drainage and ventilation are crucial for managing wind-driven rain on stucco walls. Directed drainage paths, such as weep screeds and proper flashing, help remove incidental water that penetrates the stucco layer.
Air spaces created by adequate ventilation gaps allow moisture to evaporate quickly, reducing drying times and minimizing the risk of hidden damage behind the stucco. Effective water management ensures that any trapped moisture is efficiently removed, preventing mold, rot, and mildew growth.
To maintain long-term performance, regularly inspect and maintain drainage details. Check for clogged or missing weep holes, and ensure all components are intact and functioning correctly. If drainage paths are blocked or incomplete, address and correct any issues to ensure proper water flow.
Critical Drainage Techniques and Construction Details
Drainage planes and continuous barriers form the first line of defense against wind-driven water. Orientation, material choice, and careful installation prevent capillary draw and ingress. These planes should be continuous and properly integrated with other layers of the wall system.
Weep screed and flashing must be continuous at openings, with capillary breaks to discourage moisture travel behind the stucco. Water should have defined escape paths through the wall cavity, including vented spaces accessible for maintenance. Corner details, soffits, and wall-to-roof junctions require integrated drainage details like drip edges and kick-out flashing to shed water away from the substrate.
Drainage planes, rainscreen gaps, and cavity management
Properly sized cavities and rainscreens are crucial for effective drainage and ventilation in stucco assemblies. They create a path for water to drain and air to circulate, preventing moisture buildup.
Cavity depth should be consistent throughout the wall and large enough to allow for proper drainage and ventilation. Measure cavity depth at multiple points to confirm consistency. Ensure it complies with local building codes and manufacturer recommendations.
If cavities are too small, increase their size to facilitate adequate drainage and ventilation. Common mistakes include improperly sized or non-existent cavities. To fix this, reinstall with appropriate dimensions.
Through-wall Flashings, Termination Bars, and Backwrapping
Install continuous through-wall flashings at all terminations, correctly positioned termination bars, and backwrap the weather-resistive barrier (WRB) to prevent water intrusion into the substrate.
Through-wall flashings should extend beyond the face of the wall and be securely fastened. Ensure termination bars are properly aligned and extend at least 4 inches beyond the face of the wall. Inspect flashing material for proper width, overlap, and adhesion to the WRB.
If flashings are damaged or incomplete, replace or install missing sections and secure termination bars. Common issues include improperly installed or missing flashings. Repair or replace as needed.
Weep holes, scuppers, and outlet detailing
Properly located and designed weeps and outlets allow trapped water to exit the wall assembly without rewetting the stucco. They are critical for maintaining a dry substrate.
Weep holes/slots should be sized and spaced according to local building codes and manufacturer recommendations. Ensure scuppers or other outlets are unobstructed and positioned to drain water away from the substrate.
If weeps/outlets are blocked or incorrectly placed, clean or relocate them to allow proper drainage. Common mistakes include blocked or improperly placed weeps/outlets. Address these issues promptly to maintain effective drainage.
Flashing, Sealants, and Penetrations: Getting Transitions Right
Frequent transition failures occur around openings and penetrations where flashing and sealants bear the brunt of wind loads. Inadequate detailing at these points is a common failure point. Understanding these failure modes helps prioritize durable solutions.
Durable flashing sequences should integrate with the drainage plane, including step flashing, kick-out detailing, and continuous head flashing. Sealants should be compatible, movement-rated, and correctly backed with backer rods after proper surface prep. For penetrations, boots, collars, and properly sealed joints prevent water ingress while allowing for movement without breakdown.
Window and Door Perimeters, Sill Pans, and Head Flashings
Proper integration of flanges, sloped sill pan design, and head flashing strategies are crucial for directing wind-driven rain away from the assembly. Ensure that window and door perimeters are properly flashed with compatible materials that integrate seamlessly with the drainage plane.
Sill pans should be designed to slope water away from the opening. Check for proper sloping during installation to prevent water from pooling and potentially entering the structure.
Head flashings should extend beyond the outer edge of the window or door frame, providing a continuous barrier against wind-driven rain. Verify that head flashings are properly integrated with the drainage plane to allow water to flow freely off the assembly.
Pipes, Vents, and Mechanical Penetrations
Proper collar flashing, watertight mounting, compatible sealants, and factory-installed boots are essential for preventing wind-driven rain intrusion around penetrations. Inspect all pipes, vents, and mechanical penetrations for any gaps or voids that could allow water entry.
Collar flashings should be installed around each penetration, extending beyond the stucco surface to direct water away from the opening. Ensure that collars are compatible with the stucco system and securely mounted to prevent movement.
Factory-installed boots can provide an additional layer of protection against wind-driven rain. If boots are not present, apply a compatible sealant around the penetration, following the manufacturer’s instructions for proper surface preparation and application.
Comparative Analysis of Drainage Methods and Materials
Three main drainage approaches exist: drainable EIFS, traditional stucco over a rainscreen, and barrier configurations. Each manages water ingress, venting, and drainage differently under wind-driven rain conditions. The likelihood of moisture persistence varies by method and detail.
Installation complexity and retrofit potential differ as well, with implications for framing, cladding removal, and tolerances. Detailing quality—drainage plane continuity, weep/vent design, and flashing integration—directly affects long-term performance and failure modes.
Drainable Systems vs. Barrier Systems: Pros and Cons
Understanding the differences between drainable and barrier systems is crucial for effective water management under wind-driven rain conditions.
Pros of Drainable Systems
- Active Water Management: Drainable systems actively manage water ingress by allowing it to drain off, reducing the risk of moisture buildup.
- Repairability: These systems allow for easier access and repair due to their open design.
- Performance in Wind-Driven Rain: Drainable systems perform better under wind-driven rain conditions as they provide a clear path for water drainage.
- Reduced Risk of Mold and Rot: By preventing water stagnation, drainable systems reduce the risk of mold growth and rot.
Cons of Drainable Systems
- Complexity in Installation: Drainable systems require more complex installation with proper spacing tolerances and continuous drainage paths.
- Potential for Clogging: If not properly maintained, drainable systems can clog, leading to water buildup.
- Higher Initial Cost: Drainable systems often come with a higher initial cost compared to barrier systems.
Drainable systems are preferable when wind-driven rain is a significant concern and where repair and maintenance access is readily available.
Materials for WRBs, Drainage Mats, and Flashing Membranes
The selection of materials for weather-resistive barriers (WRBs), drainage mats, and flashing membranes is crucial for effective water intrusion management.
- House Wrap (WRB): Used as a secondary barrier to prevent water intrusion. Spec: Look for ASTM E2570/E2510 ratings. Tip: Ensure it’s compatible with other cladding materials.
- Drainage Mats: Facilitate water drainage behind the cladding. Spec: Check for appropriate drainage capacity and compatibility with WRBs. Tip: Avoid mats that can’t handle wind-driven rain conditions.
- Flashing Membranes: Seal joints and transitions to prevent water intrusion. Spec: Look for flexibility and adhesion properties. Tip: Ensure they’re compatible with the cladding material.
- Self-Adhesive Flashing Tape: Seals seams and gaps in WRBs. Spec: Check for appropriate adhesive strength and weather resistance. Tip: Avoid tapes that can’t maintain adhesion over time.
- Expansion Joint Fillers: Fill expansion joints to prevent water intrusion. Spec: Look for flexibility and durability. Tip: Ensure they’re compatible with the cladding material.
Incompatibility issues can lead to cracking, staining, or weak bonds, so it’s crucial to verify material compatibility and follow installation instructions carefully.
Common Installation Errors and Contractor Red Flags
Substrate preparation mistakes include inadequate moisture assessment and skipped moisture barriers. Failing to repair damaged sheathing or test moisture before coating creates hidden moisture paths. These errors set up later failures.
drainage and weather-resistance detailing often suffers from missing planes, poorly installed flashing, inadequate weep screed, or missing drip edges around openings. Material and mix errors, improper curing, or flawed application techniques can weaken bonds and trap moisture. Attention to openings and penetrations, along with clear on-site cues, helps identify red flags early.
Typical Workmanship Failures That Allow Water Entry
Inadequate attention to detail during installation can lead to water intrusion in your stucco walls. Ensure continuous coverage of the weather-resistant barrier (WRB) and proper lapping of flashings.
Gaps in WRB continuity: These allow wind-driven rain to reach the substrate, leading to moisture buildup and potential failure. Inspect for any tears or holes in the WRB before installing stucco.
Improperly lapped flashings: Inadequate overlap of flashings at perimeters and openings can result in water entry. Verify that all flashings are properly lapped and secured.
Missing backwraps: Backwrapping involves extending the WRB behind obstructions like windows and doors to prevent water from getting trapped. Ensure that all penetrations have been backwrapped.
Blocked weeps: Weep screeds allow moisture to exit at the bottom of the wall. Check that they are not blocked by debris or caulk, which can trap water in the wall cavity.
Poor sealant detailing: Inadequate or improperly applied sealants around openings and penetrations can lead to water intrusion. Inspect all sealant joints to ensure they are intact and properly installed.
Contractor Selection Red Flags and Inspection Checkpoints
Before hiring a contractor or conducting final inspections, use this checklist to ensure proper qualifications, warranties, and as-built details.
- Licensing: Verify that the contractor is licensed to perform stucco work in your area. Ask for their license number and check with your local licensing board.
- Insurance: Ensure the contractor has liability and workers’ compensation insurance to protect you from financial responsibility if an accident occurs on your property.
- Experience: Ask about their experience with stucco installation, especially in areas prone to wind-driven rain. Request references or examples of their past work.
- Warranty: Inquire about the warranty they offer for both materials and labor. Ensure it covers potential moisture issues.
- Detailing: Ask for a detailed scope of work outlining how they plan to address drainage, flashing, and sealants. Check if it aligns with best practices discussed earlier in this article.
- Subcontractors: If they use subcontractors, ensure they are also licensed, insured, and qualified.
- Timeline: Be wary of contractors who promise unrealistically short completion times. This could indicate they may rush the job or cut corners.
- Price: Be suspicious of bids that seem too good to be true. They might be omitting essential moisture-control strategies to undercut competitors.
- Inspections: Ensure that required inspections are scheduled and not bypassed. This includes inspections at the substrate stage, after flashing installation, and before final stucco application.
Quick rule: If a contractor is reluctant to provide detailed information or skip any of these checks, consider it a red flag and look for another contractor.
Performance in Cold Climates and Fire-Safety Considerations
Freeze-thaw cycles influence long-term performance when wind-driven rain is present. Drainage planes and substrate compatibility affect cracking risk and durability in cold climates. Construction details should anticipate seasonal moisture patterns.
Fire-safety considerations compare traditional stucco with EIFS, noting how drainage details and material choices impact fire resistance. When selecting materials for cold climates, permeability, vapor transport, and maintenance implications should guide decisions, while staying within code guidelines and manufacturer instructions.
Freeze-thaw behavior and detailing to prevent damage
In cold climates, freeze-thaw cycles can cause significant damage to stucco walls. Water absorbed by the wall freezes, expands, and cracks the surface. Proper detailing and material selection can mitigate this risk.
Key details include: adequate drainage planes to prevent water buildup, proper reinforcement to strengthen the substrate, control joints to manage expansion and contraction, and using freeze-thaw resistant materials.
Regular seasonal inspections are crucial. Look for cracks, bulges, or other signs of freeze-thaw damage. If present, inspect for water intrusion and consider moisture testing. Address any identified issues promptly to prevent further damage.
Fire-safety myths vs. reality for stucco and EIFS
Myths about fire safety in stucco and EIFS often lead to misinformed decisions. The truth is, fire performance depends on the whole assembly’s compliance with local codes.
To ensure fire safety: check manufacturer fire data for specific materials, verify local code requirements, and ensure proper installation of ignition barriers as per manufacturer instructions and local codes.
Visually inspect walls for signs of fire damage or non-compliance. If present, contact relevant authorities for assessment and remediation. Always comply with local fire safety codes to protect your property and loved ones.
Cost, ROI, Maintenance, and When to Repair Vs. Retrofit
Identify cost drivers such as material choices, labor, drainage components, and inspection needs. Understanding these factors helps frame total ownership costs without guessing at exact prices. Maintenance contracts can influence long-term budgets and planning.
Build an ROI and decision framework by weighing benefits like reduced moisture risk and energy savings against the typical timeline for payback. Maintenance indicators include hidden moisture, efflorescence, and mold, which guide when to act. Retrofit options should align with budgets and goals, offering targeted improvements or full-system upgrades as appropriate.
What to Inspect to Estimate Repair vs. Retrofit Needs
To determine the extent of repairs or retrofits needed for your stucco walls, start by conducting a thorough inspection. Focus on visible signs of water intrusion and structural damage.
Stake: Identify visible signs of water intrusion and structural damage.
Quick check/cue: Look for cracked weep holes, efflorescence, or missing/broken flashing components. If you notice any of these issues, it’s time to perform a more detailed inspection.
Pro check: Inspect drainage outlets, flashings, and moisture stains on the exterior. Check interior walls for signs of mold or mildew. If visible water intrusion or extensive damage is found, consider a full system upgrade or targeted retrofit. For minor issues or localized damage, repairs may be sufficient.
Common mistake + fix: Address any visible damage promptly. Replace broken components and ensure proper drainage to prevent further issues.
Maintenance Schedule and Seasonal Priorities
Regular upkeep is crucial to prevent wind-driven rain issues from affecting your stucco walls. Here’s a maintenance schedule with seasonal priorities:
Stake: Regular upkeep to prevent wind-driven rain issues.
Quick check/cue: Inspect your walls after severe weather events for any signs of damage or wear.
Pro check: Clear drainage outlets twice a year, ideally in spring and fall. Inspect sealants and flashings annually to ensure they remain intact and functional.
Seasonal priorities: In spring, inspect and clean drainage outlets to remove any debris that may have accumulated over the winter. In fall, inspect sealants, flashings, and prepare your walls for winter by ensuring all components are in good condition.
Common mistake + fix: Address any issues promptly to prevent them from escalating into more significant problems that may require costly repairs or retrofits.
Conclusion
Effective drainage details protect stucco from wind-driven rain, preserving safety, durability, and curb appeal. Prioritizing proper transitions, flashing, sealants, and careful penetrations reduces damage and costly repairs.
Make a practical check as you move from assessment to action: evaluate existing drainage paths and transitions, confirm flashing is continuous and properly flashed at openings, verify sealants are compatible with stucco and weather conditions, ensure penetrations have proper clearances and slopes, and test a small area for waterproofing before scaling up the work, then plan in the sequence: weatherproof the surface, address transitions, install or repair flashing, seal, and finally inspect for any gaps or pooling water.
Avoid common installation mistakes by keeping these safety rules: work only in dry weather or with appropriate temporary shelter, use compatible materials and correct caulking techniques, and never coat beyond recommended thickness to avoid trapping moisture. If you are uncertain about any transition or flashing detail, stop and confirm with the manufacturer instructions or local building guidelines before proceeding.
FAQ
Are EIFS systems a moisture trap or dangerous for stucco walls?
There are myths about EIFS trapping moisture. Proper installation includes a drainage plane, flashing, and sealants to manage water and ventilation.
Always check the manufacturer instructions and local recommendations for EIFS detailing and maintenance.
How durable is stucco in freeze-thaw climates, and what affects long-term performance?
Durability depends on installation quality, drainage, and crack control. Proper expansion joints and control joints help reduce damage from freeze-thaw cycles.
Refer to product labels and installation guides for limits and compatible substrates.
What are the fire safety concerns with EIFS, and how can they be addressed?
Fire safety considerations vary by system; some EIFS assemblies include fire-rated components. Ensure the system is installed with approved materials and follows the manufacturer’s fire-safety specifications.
Check the installation instructions and local guidance for appropriate detailing, clearance, and inspections.
What should I know about the cost implications of EIFS versus maintenance for stucco?
Initial costs for EIFS can be higher, but maintenance needs and frequency may differ from traditional stucco. Compare expected life, required repairs, and drainage details rather than just upfront price.
Look at manufacturer guidance and contractor estimates for a balanced view of long-term costs and performance expectations.