
Introduction
Blending textures on old plaster walls means smoothing uneven surfaces by using sand grading and sponge timing to achieve a cohesive finish. This article focuses on practical, hands-on steps you can follow in a DIY setting. You’ll balance texture retention with a softer final look while it remains within safe expectations for plaster repair.
You’ll consider texture levels and what grade of finish your walls can support before starting. We cover the tools and materials for plaster repairs, plus a step-by-step skim coating approach and how to time sponge work for the best blend. Safe, practical tips help you judge when to sand, when to re-coat, and how to check for consistency throughout the job.
Key takeaways
- Understand drywall texture grades to match plaster textures before blending.
- Inspect plaster condition and plan repairs with a practical checklist before work.
- Select hand tools and materials for plaster repair, skim coats, and sanding.
- Sand grading basics help optimize aggregate size and finish consistency.
- Use a step-by-step skim coat and light sanding sequence for smooth walls.
- Safety: wear dust mask, eye protection, and keep ventilation during sanding.
Table of Contents
- Introduction
- Key takeaways
- Why Blend Textures on Old Plaster Walls
- Assessing Old Plaster and Planning Repairs
- Tools and Materials Checklist (Selection and Specs)
- Sand Grading Basics: What Sand Grading Is and Why It Matters
- Step-by-Step Sand Grading Technique
- Sponge Timing and Application Techniques
- Combined Workflow: from Prep to Painted Finish
- Safety, Common Mistakes, Cost Considerations, and Maintenance
- Conclusion
- FAQ
Why Blend Textures on Old Plaster Walls
Blending textures helps you decide early whether to preserve the room’s character or move toward a flatter surface. The choice influences light diffusion, paint behavior, and how furniture or art sit in the space. Consider how texture changes will read in both daylight and artificial light.
Begin by evaluating plaster texture depth, any cracks or repairs, moisture history, and overall condition. Quick tests, like checking absorbency or revealing a small patch, can indicate how a blend might respond. Outline when to skim smooth, how to feather edges, and how sponge timing will affect transitions without harsh lines.
When to Smooth Versus Preserve Texture
Before blending textures on old plaster walls, consider several factors to decide whether to skim, blend, or leave the texture as is. This decision impacts practical aspects such as light diffusion and furniture placement.
Historical value, wall condition, room function, and desired aesthetic are key stakeholders in this decision.
First, assess the overall condition of your walls. Check for existing cracks or repairs, moisture history, and texture depth. A quick test like revealing a small patch can gauge how a blend might respond. If the texture is deep, has historical value, and the room function demands character, preserve the texture with minimal blending.
However, if the texture is shallow, wall condition is poor, or room function requires a smooth surface, consider smoothing with patch/skim coats. Be sure to adjust sponge timing (wet vs. damp) or reapply with a lighter touch to avoid abrupt changes in texture.
Visual and Functional Benefits
Blending textures on old plaster walls can significantly impact paint appearance, room brightness, and the perceived quality of finishes. Understanding these effects helps you plan your approach.
Paint appearance, room brightness, and perceived quality of finishes are crucial aspects to consider.
Before full-room work, create 2–3 blend samples on discreet patches. Compare results under room lighting to assess the visual impact. Evaluate light reflectance, primer adhesion, and paint sheen on these blended samples. If the blended texture diffuses light evenly, proceed with your full-room work.
However, if the blended texture creates unwanted shadows or highlights, adjust your blend technique, primer type, or topcoat finish. Re-evaluating primer and topcoat choices or adjusting blending technique can help achieve even results across blended areas.
Assessing Old Plaster and Planning Repairs
Inspect adhesion, delamination, and hairline cracks to determine whether the plaster is lime- or gypsum-based, and identify substrate issues like loose lath or moisture damage. Note any backerboard or moisture history that could affect repair choices. Map problem areas as you go so planning stays realistic.
Assess moisture risk, plaster type, bond coat condition, and existing paint layers. Review any previous repairs that might influence success. Establish a practical repair plan with materials, timeline considerations, ventilation, and a contingency for unexpected findings.
Quick structural checks and problem signs
Before proceeding with texturing, perform a thorough visual and tactile inspection of your old plaster walls to identify urgent repair needs.
Start by tactilely checking for any hollow or spongy areas. These could indicate loose plaster or substrate issues that need immediate attention.
Visually inspect the walls for signs of loose plaster, bulges, moisture stains, and backing concerns such as loose lath or drywall. If any of these issues are found, repair them before proceeding with texturing. Addressing structural issues first will prevent further damage and ensure successful texturing.
Common mistakes include overlooking or improperly repairing structural issues. To avoid this, thoroughly inspect your walls and address any concerns before starting the texturing process.
Creating a flatness map and prioritizing repairs
To efficiently plan and execute repair work, create a flatness map of your old plaster walls. This will help you identify high/low spots, prioritize repairs, and decide whether full skim-coating is necessary.
Use a simple grid or color-coded system to mark high/low spots on the wall. Assess the depth of damage in each marked area to determine the extent of repair needed.
If severe low spots or extensive damage are found, consider full skim-coating. Otherwise, prioritize spot-skimming to minimize time and materials.
It’s common to discover new issues during the repair process. If this happens, re-evaluate your flatness map and repair plan to ensure complete and effective repairs. This will help you avoid incomplete or ineffective repairs and save you time in the long run.
Tools and Materials Checklist (Selection and Specs)
Assess wall condition and surface compatibility to tailor tool and material choices, and determine if a bonding agent or primer is needed. Consider moisture risk and porosity when selecting products. Identify items that are commonly rented versus bought.
Tools include hawks and trowels, a margin trowel, a plaster mixer or drill with paddle, sanding blocks, putty knives, sponges, buckets, and drop cloths. Specify hand versus machine application based on wall area and texture. Check manufacturer specs and local codes for safety guidance.
Essential Tools for Plaster Wall Texturing
Using the right tools ensures efficient application and blending of plaster on old walls.
- Metal Hawk: Transfers plaster from bucket to trowel. Tip: Choose a hawk matching your largest trowel for better control.
- Trowels (Large & Small): Apply and spread plaster. Key specs: Widths vary from 6 to 18 inches. Tip: Longer trowels are ideal for large areas, while shorter ones offer better control for fine finishes.
- Margin Trowel: Used for edging and creating clean lines. Key spec: Typically 6 to 8 inches wide.
- Plaster Mixer or Drill with Paddle: Blends plaster mix evenly. Rental/Buy: Often rented due to size and cost. Tip: Ensure the mixer’s capacity matches your project needs.
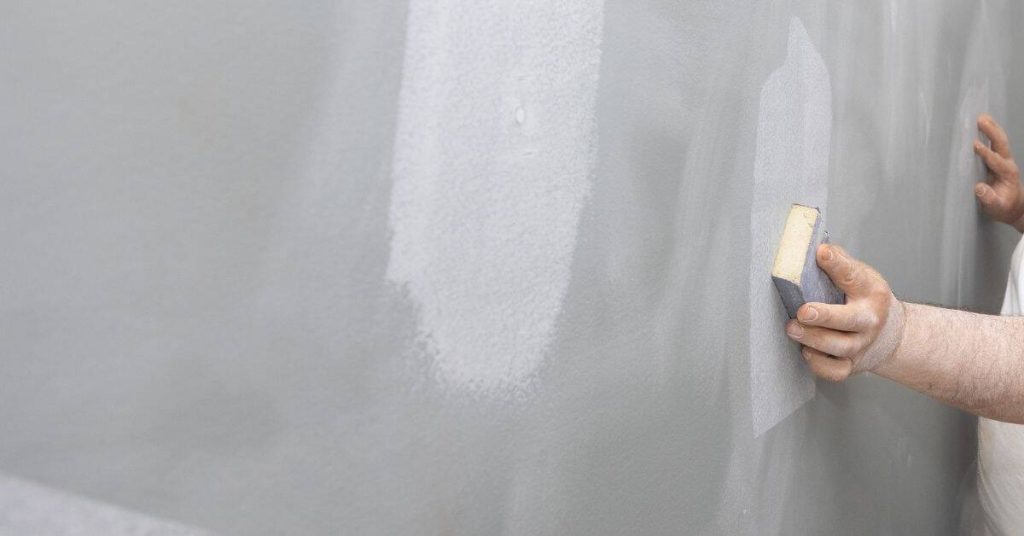
- Sanding Block or Multi-Disc Sander: Smooths finished surfaces. Key spec: Grit sizes range from 120 to 220. Tip: Choose a sander that fits the size and shape of your wall area.
- Durable Putty Knives: Apply and remove compounds. Key specs: Widths vary from 1 to 6 inches. Tip: Wider knives are useful for large areas, while narrower ones offer better control for small patches.
- Sponges: Create textured finishes. Tip: Experiment with different sponge types and sizes for varied textures.
- Buckets: Hold plaster mix and water. Key spec: Sizes range from 1 to 5 gallons. Tip: Choose a bucket size that suits your project needs.
- Dust Containment/Drop Cloths: Protect surfaces and contain dust. Tip: Use heavy-duty, low-lint cloths for better results.
Materials and Product Notes
Choosing the right materials ensures adhesion, durability, and desired finish on your old plaster walls.
- Joint Compound/Skimming Compound: Used for filling cracks and creating smooth finishes. Key spec: Lightweight or all-purpose compounds are suitable for most projects. Tip: Avoid heavy-duty compounds for fine finishing work.
- Bonding Primers: Prepare surfaces for better adhesion. Key spec: Choose a primer that matches your plaster type (latex, oil-based). Tip: Ensure the primer is compatible with your chosen plaster mix.
- Patching Plasters: Repair damaged areas. Key specs: Options include gypsum, lime, or cement-based plasters. Tip: Match the existing plaster type for best results.
- Sand: Mixed with plaster to create desired consistency. Key spec: Fine to medium sand is suitable for most plastering tasks. Tip: Avoid coarse sands that can cause an uneven finish.
- Waterproofing/Sealants: Protect against moisture damage. Use when: Working in moisture-prone areas. Tip: Apply sealants after plastering and sanding, following manufacturer guidelines.
- Low-Odor/Sustainable Products: Reduce indoor air pollution. Use when: Working indoors with odor concerns. Tip: Look for products certified by eco-labels like GREENGUARD or ECOLOGO.
Sand Grading Basics: What Sand Grading Is and Why It Matters
Sand grading in plaster finishing means progressively reducing particle sizes as you work, from coarser screenings to finer ones. This sequence helps create a smoother, more uniform base before sponge work and paint. Visual and tactile checks—such as a diminishing texture and a uniform sheen—signal readiness for the next stage.
Proper grading prepares the substrate and improves adhesion for the sponge-touched coats and paint. A quick hand check should reveal a uniform sheen and no grainy spots. If the surface feels slick or remains rough in patches, re-evaluate aggregate size, screen choice, or timing; over-grading or under-grading can compromise texture.
The Grading Principle: Coarse to Fine
Sand grading in plaster finishing follows a logical progression from coarse to fine. This method ensures that significant texture is removed before refining the surface.
Starting with heavier correction: Begin with coarser aggregate to tackle major ridges and imperfections. This step removes the bulk of the texture, preparing the wall for finer refinement.
Finishing with finer abrasion: As you progress through each grade, use finer screens or screensets to smooth edges and create a uniform base for sponge work. This ensures that no rough patches remain to interfere with subsequent coats.
Visual Checkpoints During Grading
As you progress through each grade, use this checklist to ensure your wall is ready for the next stage. Perform these checks in natural or artificial light.
- Uniform reflection: Check for consistent sheen across the surface. Inconsistencies may indicate remaining texture or tool marks.
- Smooth hand-feel: Run your hands over the wall to feel for reduced roughness. Any grainy spots or hollows signal a need for further refinement.
- Absence of visible tool marks: Inspect the wall closely for any remaining marks from previous grades. These should be minimal at this stage.
- Consistent pull with a damp sponge: Lightly dab the wall with a damp sponge to check for even suction. Inconsistencies may indicate over-sanding or hollows.
Quick rule: If any of these checks fail, reapply the current grade before moving on to avoid issues in later stages.

Step-by-Step Sand Grading Technique
Set up with protection, containment, and a small test patch to verify finish. Gather the right tools and materials, including a progression of grits and a dust-collection setup. Keep the workspace tidy to monitor progress accurately.
Follow a sequence from coarser to finer grits, working in small sections with consistent angles. Feather transitions and mai