
Introduction
Venetian plaster touch-ups are about repairing shine and burnish lines to restore an even, mirror-like finish. This hands-on guide walks you through practical steps and what to watch for on a DIY job. Check the product label and manufacturer instructions for any limitations and recommended mixing or application notes.
There are several finishes you might encounter, and your approach depends on the plaster you used and its stage. For high-polish looks, work in small, controlled sections and use the right tools to avoid overworking the surface and creating burnish lines. Always follow local rules and the plaster’s guidelines, and test on a small patch first if you’re unsure.
Key takeaways
- Assess substrate moisture, curing age, and previous plaster before touch-ups begin.
- Match plaster type (Marmorino Classico vs Lucido Grassello) for blending consistency.
- Use consistent tooling and gentle compression to avoid burnish lines during application.
- Clean edges and feather blend with light passes to prevent shiny spots.
- Work in thin coats, confirm drying; document surface changes with minimal polish.
- Safety: wear goggles and mask, avoid dust inhalation during sanding or mixing.
Table of Contents
- Introduction
- Key takeaways
- Why Venetian Plaster Touch-Ups Matter and Common Issues
- Types of Venetian Plaster and How They Affect Touch-Ups
- Tools and Materials Checklist for Touch-Ups
- Surface Assessment and Visual Checkpoints Before Starting
- Preparation Steps to Ensure Invisible Blending
- Application Techniques to Avoid Shiny Spots and Burnish Lines
- Fixing Shiny Spots and Burnish Lines After They Appear
- Best Practices, Common Mistakes, Troubleshooting, and Cost Considerations
- Conclusion
- FAQ
Why Venetian Plaster Touch-Ups Matter and Common Issues
Timely touch-ups keep the sheen, color, and durability consistent across the plastered surface. A uniform finish looks intentional and avoids patchy areas that draw attention. Properly executed touch-ups extend the life of the mortar and the overall look of the project.
Shiny spots and burnish lines are the typical defects to address. They usually come from over-polishing, improper sealer or wax application, or an inconsistent plaster mix. Use a diagnostic approach to locate high-traffic areas, joints, and repaired zones, then assess depth of finish versus damage before restoring.
Common problems: shiny spots, burnish lines, color shifts
Shiny spots and burnish lines are common issues with Venetian plaster that can detract from its beautiful finish. Let’s define each defect and understand why they happen.
Shiny Spots: These appear as glossy patches on an otherwise matte surface. They’re usually caused by over-polishing or improper sealer/wax application, which leaves a layer that doesn’t absorb into the plaster.
Burnish Lines: These are visible lines or streaks that stand out from the rest of the finish. They can be caused by inconsistent plaster mix, improper curing, or over-polishing in specific areas.
Color Shifts: Changes in color can occur due to inconsistent plaster mixing, improper curing, or using incompatible primers. This can result in patches that don’t match the surrounding area.
When to touch up vs. when to refinish
Knowing when to perform a simple touch-up versus a full refinishing job is crucial for maintaining your Venetian plaster’s uniform appearance and durability.
For small, isolated defects, like minor shiny spots or burnish lines, a touch-up should suffice. These can usually be addressed with a small amount of matching plaster, proper curing, and controlled polishing.
However, for large areas with extensive damage, color shifts, or multiple defects, it’s best to refinish the entire area. This ensures a consistent finish and prevents further issues down the line.
Always consider the size of the affected area, the extent of the damage, and how well you can match the surrounding finish when deciding between a touch-up and a full refinishing job.
Types of Venetian Plaster and How They Affect Touch-Ups
This section contrasts traditional Marmorino Classico, Lucido Grassello, acrylic/mineral Venetian plasters, and Roman clay by their lime content and binders. Understand how composition guides repair choices and color behavior. The discussion helps you pick compatible materials for patches and seals.
Sheen potential and burnish behavior vary by type, influencing patch visibility and finish matching. Consider suitable fillers, pigments, and mixing ratios, plus drying times and color-matching when planning repairs. Practical workflows specify primers or sealers and timing to manage burnish versus re-burnish for each plaster type.
Marmorino Classic & Lucido Grassello specifics
Marmorino Classico and Lucido Grassello are traditional Venetian plasters, rich in lime. They produce high sheen when burnished.
Blending is crucial for touch-ups. Use a putty knife to spread the plaster thinly over the repair area, feathering out edges. Let it dry slowly to avoid cracks.
Polishing requires patience. Start with a soft cloth and gentle circular motions. Increase pressure gradually. Re-burnish after 24 hours for an even sheen.
Acrylic/mineral plasters and Roman clay
Acrylic/mineral plasters and Roman clay are more flexible, with lower lime content. They adhere well to most surfaces.
Touch-ups should be done quickly before the plaster dries out. Use a trowel or spatula for application, pressing firmly to ensure adhesion. Let it dry naturally.
Polishing is easier with these plasters. Start with a soft pad and light pressure. Increase intensity gradually. Re-burnish after 48 hours for optimal results.
Finish sheen levels and touch-up implications
Low sheen finishes are forgiving, hiding repairs better. Satin finishes require careful blending to match the surrounding area’s sheen.
Mirror finishes demand precision. Use a fine-grit sanding sponge before burnishing. Re-burnish after 24 hours for consistency in sheen.
Always test touch-ups on a small, hidden area first to ensure color and sheen match the existing plaster.
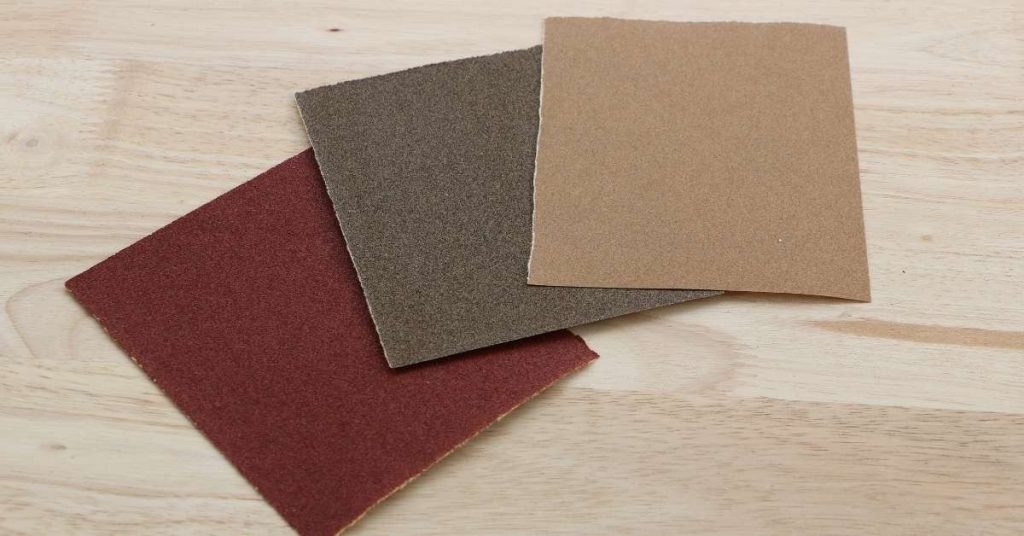
Tools and Materials Checklist for Touch-Ups
Core tools for precise work include trowels, plastic spatulas, fine sanding blocks, soft brushes, mixing cups, a drop cloth, color swatches, and a small notebook. Keep everything clean and accessible to avoid mix-ups. This setup supports consistent color and texture during repairs.
Stock up on base plaster or lime-putty, pigment additives, sealers or matte topcoats, burnishers, test boards, and masking materials. Plan for testing and color control by patching on scrap surface and checking under different lighting. Maintain a clear system for surface prep and compatibility checks.
Recommended tools (trowels, spatulas, burnishers, sandpaper)
Before you start touching up your Venetian plaster, make sure you have the right tools. They’ll help you blend new patches with existing surfaces without over-burnishing.
- Stainless steel trowels (6″ and 12″): Essential for applying and spreading the plaster. The 6″ is great for details, while the 12″ covers larger areas quickly.
- Plastic spatulas (3″-4″): Useful for scraping off excess material and smoothing edges.
- Fine-grit sanding blocks (120-220 grit): Needed to lightly sand the surface before applying new plaster, ensuring a smooth finish.
- Soft-bristle brushes: Gently remove dust and debris from the surface before touching up.
- Burnishers (pumice or steel): These tools give your Venetian plaster its final sheen. Pumice is gentler, while steel provides a higher gloss.
- Mixing cups: Essential for preparing small batches of plaster and pigments.
- Cleanable drop cloth: Protects your floor from drips and splashes.
- Color-matching swatches: Helps you match the existing color exactly. Keep them on hand for reference.
- Small notebook: Jot down notes about your mix ratios, application techniques, and any issues that arise.
Quick rule: Always inspect your tools before starting. Dull or damaged tools can ruin your finish.
Touch-up materials and product types (plaster, pigments, sealers, waxes)
Having the right materials is crucial for a seamless touch-up job. Here’s what you’ll need:
- Base plaster or lime-putty mix: This forms the base of your patch. It should match the existing plaster type (Marmorino, Lucido Grassello, acrylic/mineral, etc.).
- Pigment additives: These tints ensure consistent color throughout your touch-up. Match them to your existing walls using color-matching swatches.
- Sealers or matte topcoats: Applied after burnishing, these protect the surface and enhance its sheen.
- Waxes (optional): Some Venetian plasters benefit from a wax finish for added protection and depth of color. Choose one compatible with your plaster type.
- Temporary release agents or masking materials: Protect areas you don’t want to touch up, like adjacent walls or floors.
- Surface primer or bonding agents: Apply these before touching up to ensure the new plaster adheres properly.
- Surface repair compounds: Use these to fill any cracks or holes before applying new plaster.
Quick rule: Always test your materials on a scrap piece of wall first. This ensures compatibility and helps you perfect your technique.
Safety gear and ventilation equipment
Protecting yourself and ensuring proper drying/curing is crucial when touching up Venetian plaster. Here’s what you’ll need:
- Gloves: Protect your hands from lime-based products, which can cause skin irritation.
- Eye protection: Safety glasses or goggles shield your eyes from dust and splashes.
- Respirator: Wear one when sanding to protect against inhaling dust particles.
- Ventilation fan: Set up a fan to blow away fumes and ensure proper drying. Open windows can help, but fans provide better control.
- Drop cloths: Protect your floor from drips and spills. They also make cleanup easier.
- Plastic sheeting: Use this to cover areas you don’t want to touch up, like adjacent walls or furniture.
- Trash bags: Have these on hand for quick cleanups of dust and debris.
- Wet wipes or damp cloths: These help clean up spills quickly and prevent them from drying onto surfaces.
Quick rule: Always prioritize safety. Proper PPE and ventilation can prevent serious issues down the line.
Surface Assessment and Visual Checkpoints Before Starting
Set up adjustable, high-CRI lighting and use raking light to reveal sheen variations, hairline cracks, and embedded dust. Document problem areas with photos and notes before you start. A thorough initial read helps prevent surprise issues later.
Screen for substrate and moisture issues, test for moisture content, and note efflorescence or moisture pathways. Assess surface cleanliness, porosity, and any previous coatings. Identify repair feasibility and potential shiny spots caused by underlying conditions.
How to evaluate sheen, texture, and edge transitions
Before you start any concrete touch-up work, use this checklist to assess the existing surface. This will help you determine where touch-ups will be visible and how much blending is needed.
- Check sheen variation: Look at the surface from different angles. Sheen can vary due to sunlight reflection. If you see significant differences, note these areas for touch-up.
- Feel texture with your hand: Run your hand over the surface to feel any textural inconsistencies. These areas will need blending to match the existing texture.
- Inspect edge transitions: Check where the old and new concrete meet. Sharp edges or lines indicate a poor transition. Blend these edges to create a seamless look.
- Check for discoloration: Look for any stains, spots, or color variations. These may require additional touch-up work.
- Examine cracks and joints: Inspect all cracks and control joints. If they’re visible, you’ll need to fill and reseal them before applying new concrete.
- Evaluate surface moisture: Check for any damp spots or areas that feel wet. Concrete should be dry before touch-up work begins.
- Inspect for efflorescence: Look for white, powdery deposits on the surface. If present, clean these areas before applying new concrete to prevent discoloration.
- Check for scaling or delamination: Tap the surface with a hammer. If it sounds hollow or flakes off, you have scaling or delamination issues that need addressing before touch-up work.
Quick rule: Always remember: the more thorough your assessment, the better your touch-up results will be. Skipping these checks can lead to costly rework and visible touch-ups.
Moisture, substrate, and adhesion checks
Before starting any cosmetic touch-ups, use this checklist to ensure your surface is dry, stable, and ready for new coatings. Perform these checks on a calm, dry day to get accurate results.
- Check for moisture: Use a moisture meter (available at hardware stores) to test the substrate’s moisture content. Aim for readings below 12% for most surfaces; check product labels for specific requirements.
- Look for efflorescence: Inspect the surface for white, powdery deposits. These indicate excess moisture and must be removed before applying new coatings.
- Feel for cold spots: Moisture can hide behind walls or under floors. Check for unusually cold areas that could indicate hidden dampness.
- Inspect for delamination: Gently tap the surface with a hammer to listen for hollow sounds, indicating adhesion failure between layers.
- Check for cracks and gaps: Inspect the surface for hairline cracks or gaps that could allow moisture intrusion. Fill and prime these before applying new coatings.
- Evaluate substrate texture: Ensure the surface is smooth and even, as per your desired finish. Rough or uneven surfaces may require additional preparation steps.
- Verify sheen consistency: Check that the existing sheen matches your desired new coating. Inconsistencies may indicate previous repairs or areas requiring attention.
- Examine edge transitions: Ensure edges blend smoothly with adjacent surfaces. Sharp transitions may require additional preparation to achieve a seamless finish.
Quick rule: Always address moisture issues and adhesion failures before applying new coatings. Skipping these checks can lead to costly rework, peeling paint, and mold growth.
Preparation Steps to Ensure Invisible Blending
Clean the surface to remove dust and oils, ensure it is dry and ventilated, and perform a moisture check to prevent future sheen issues. Set a solid foundation for blending by controlling dust and contaminants. Keep the workspace stable during prep.
Plan edge feathering and gradual transitions around patched areas. Use a pointed or rounded trowel to feather edges for invisible gradients, and document patch shapes for consistency. Record any surface adjustments for reference during the main work.
Cleaning, degreasing, and surface scuffing
Start by removing dust with a soft brush. Use a mild detergent and water solution to clean the area. Avoid harsh chemicals that could damage the surface or affect adhesion.
Degrease any oily spots using a degreaser specifically designed for concrete. Rinse thoroughly with clean water.
Lightly scuff the surface using 220-grit sandpaper to promote plaster adhesion. Be careful not to over-sand and create glossy spots.
Feathering, sanding, and edge blending techniques
Use a pointed or rounded trowel to feather the edges of your patch. Work from the center outwards in smooth, even strokes.
Lightly sand any rough edges using 400-grit sandpaper. Wipe off dust with a damp cloth. This helps create an invisible gradient between the patched area and the existing finish.
For larger patches, consider using a sponge or brush to blend the edges visually. Work in small sections, gradually increasing pressure as you move towards the center of the patch.
Test patches and color matching protocol
Before applying the Venetian plaster to the entire area, create a small test patch in an inconspicuous spot. This allows you to check the sheen, color, and texture under different lighting conditions.
Mix your plaster and pigments carefully, ensuring consistent tinting. Apply the test patch using the same technique you’ll use on the main area. Allow it to cure according to the manufacturer’s instructions.
Compare the test patch to the existing finish. Make any necessary adjustments to your mix or application technique before proceeding with the full repair.
Application Techniques to Avoid Shiny Spots and Burnish Lines
The goal is a repeatable process that yields a uniform appearance with no hotspots or burnish bands, suitable for DIY projects. Focus on consistent results over random technique. Stick to a controllable method from start to finish.
Prescribe trowel grip and angles to distribute material without dragging, and define pass directions. Build thin, even base coats and stagger edges to minimize ridges. Control drying with ambient conditions and avoid rapid cure that creates shine irregularities.
Layering, drying, and timing best practices
Apply Venetian plaster in thin, even layers. Thinner coats dry faster and reduce the risk of shiny hotspots or burnish lines.
Base Coat: Start with a thin layer to seal the surface. This helps prevent suction that could cause uneven drying.
Subsequent Coats: Apply 2-3 more coats, staggering edges to minimize ridges. Wait until the surface is dull and no longer tacky before applying the next pass – usually around 15-30 minutes depending on conditions.
Full drying between passes ensures each layer has an even foundation, preventing uneven burnish and shine.
Trowel handling, pressure control, and stroke patterns
Hold your trowel like a pencil, with the blade at a 15-30 degree angle for distribution. Use consistent, light pressure to avoid dragging that creates lines.
For the final glide, tilt the trowel to 0-5 degrees. Apply gentle pressure, just enough to smooth the surface without pulling material.
Use cross-hatch or circular motions for your strokes. Start at one corner and work in overlapping ‘W’ or ‘S’ patterns to ensure full coverage and minimize visible strokes.
Wait 5-10 minutes between passes before burnishing, allowing the plaster to set slightly but not dry completely.
Controlled burnishing: when and how to polish
Burnish when the surface is dull but still slightly tacky. This is usually around 15-30 minutes after application, depending on conditions.
Use a polished steel trowel or nylon pad for burnishing. Apply light, even pressure in small circular motions. Too much pressure or large strokes can cause over-burnished areas and glossy spots.
Burnish until you achieve the desired sheen level. Do not over-polish. Leave deliberate micro-texture to maintain a natural, matte appearance.
If you encounter shiny hotspots post-application, lightly sand with 400-600 grit wet/dry sandpaper, then reapply a thin layer of plaster and burnish again. This should correct minor shine without compromising the finish.
Fixing Shiny Spots and Burnish Lines After They Appear
Map the problem by distinguishing shiny spots from burnish lines and locate affected panels. Determine if issues are surface or indicate moisture or substrate problems. Use lighting to capture the depth and lighting angle for planning.
Consider low-impact options first, like dulling the gloss and re-sealing, then move to localized rework if needed. Feather edges, apply a thin recoat, and blend to minimize edge visibility. Assess whether larger fixes are warranted based on panel size and color consistency.
Minor fixes: scuffing, dulling agents, and spot blending
For small shiny spots or light burnish lines, you can try some minor touch-ups to avoid full rework. Always start with a test patch in an inconspicuous area.
Scuff-dulling: Use a fine abrasive pad (like 2000-grit) and gently scuff the shiny spot. Be careful not to press too hard or you’ll create more shine. Wipe off dust with a damp cloth.
Dulling agents: Apply a solvent- or water-based dulling agent (like a mattifier) using a soft brush or trowel. Work in small sections, blending edges as you go. Let it dry, then lightly buff with a clean, soft cloth.
Moderate rework: spot sanding, re-coating, and feather-in patches
For larger issues or deeper burnish lines, you’ll need to do some localized rework. Start by lightly sanding the affected area with 2000-grit sandpaper, feathering edges to blend into surrounding plaster.
Re-coating: Apply a thin layer of Venetian plaster using your trowel, working from top to bottom and side to side. Blend edges well to avoid visible lines. Let it dry according to the manufacturer’s instructions.
Feather-in patches: If you’ve had to sand down to the substrate, apply a thin layer of skim coat (like joint compound) to build up the surface before applying Venetian plaster. This helps ensure an even finish and adhesion.
Major corrections: when to refinish entire wall or hire a pro
If shiny spots or burnish lines cover large areas, are inconsistent in color depth, or if you’ve had previous repair attempts fail, it’s time for bigger fixes. Full refinishing might be necessary.
Panel size: If the affected area is larger than a small panel (say, 2′ x 2′), full reapplication may be the best option to avoid visible lines or inconsistencies.
Color consistency and risk of new streaks: If you can’t match the color perfectly or if there’s a high risk of creating new streaks during repair, it might be wise to refinish the entire wall. Consider hiring a professional for complex jobs.
Best Practices, Common Mistakes, Troubleshooting, and Cost Considerations
Adopt best practices for prep, mixing, application, curing, and burnish timing to minimize shiny spots and burnish lines. Follow a consistent sequence and document results for future touch-ups. Maintain a careful workflow from start to finish.
Avoid common mistakes such as surface contamination, improper substrate prep, and moisture issues. Use a practical troubleshooting checklist to diagnose irregular sheen or patchy color. Consider factors like material quality, labor time, and surface complexity when estimating effort and scope.
Top do’s and don’ts for invisible touch-ups
The key to seamless Venetian plaster touch-ups lies in careful preparation and application. Here are your top do’s and don’ts:
Do: Clean, degrease, and scuff the surface before applying any new plaster. Feather edges well to avoid visible lines. Apply thin layers, allowing each to dry fully before burnishing.
Don’t: Skip proper substrate preparation. Don’t overwork or underwork the plaster; both can lead to shiny spots or patchy color. Avoid incompatible finishes and moisture issues by testing patches first.
Troubleshooting checklist for persistent shine or lines
If you’re struggling with shiny spots or burnish lines, use this checklist to diagnose and fix the issue.
- Irregular sheen: Check if the plaster was overworked or underworked. If so, spot sand, re-coat, and feather-in patches.
- Patchy color: Ensure you’ve matched the base color correctly. If not, test new batches before applying.
- Hairline cracks: Inspect for moisture issues or substrate movement. If found, address the cause and reapply plaster.
- … (continue with 10-12 more items)
- Quick rule: Always start with simple fixes before escalating to major corrections or professional help.
Cost factors and budgeting guidance
The cost of Venetian plaster touch-ups varies based on several factors. Here’s what drives higher or lower costs:
Material quality: Higher-quality plasters and pigments drive up the cost. Shop around for better prices.
Labor time: Larger patches, complex surfaces, or extensive rework increase labor time, driving up costs. Plan your touch-ups to minimize labor time.
Maintenance needs: More frequent touch-ups due to wear and tear will increase overall cost. Consider long-term maintenance when budgeting.
Conclusion
Getting a durable, seamless finish comes down to careful prep, controlled application, and smart fixes done in the right order. Safety and watching for damage prevent costly mistakes, and a good blend will look intentional rather than patched.
The practical checklist is simple: assess the surface under good light, confirm the plaster type you’re using, gather the tools and materials from your checklist, test a small area first, mix to the recommended consistency, apply thin coats with controlled pressure, blend gradually while the plaster is workable, let each coat set as directed, recheck under the same lighting, address any shiny spots or burnish lines immediately, clean your tools, and document what worked for future touch-ups.
Two or three common mistakes to avoid are overworking the area, which creates burnish marks; skipping proper surface preparation and sealing, which makes patches obvious; and applying too-wet or too-thick coats that never dry evenly. Safety rules are simple: ventilate well, wear a dust mask and eye protection, protect adjacent walls and flooring, and test everything on a small patch before committing to the full area.
If you encounter significant cracks, grainy texture, or color mismatch after repeated attempts, it’s time to call a professional rather than push on. A pro can match the texture, repair substrate issues, and prevent further damage. Stay patient, follow your steps, and you’ll finish with a durable, invisible look that stands up to daily life.
FAQ
What’s the difference between Marmorino Classico and Lucido Grassello for touch-ups, and how does that affect my approach?
Marmorino Classico has a matte to satin look with more texture. Lucido Grassello finishes are high gloss and show flaws easily. For touch-ups, match the base material first, then adjust polish level gradually to avoid obvious patches.
Which application technique works best for achieving a high-polish finish without burnish lines?
Start with a thin, even layer and build in controlled passes. Use a clean, fine trowel and work the surface in consistent strokes. Allow appropriate dry time between steps and测试 a small area first to gauge polish potential.
What should I check when choosing brands or products for Venetian plaster touch-ups?
Look at the product label or datasheet for finish type and application method. If you’re unsure, compare notes with manufacturer instructions and local recommendations. Stick to products designed for plaster touch-ups and compatible with your base coat.
What are common mistakes during touch-ups and how can I avoid them when aiming for a mirror-like surface?
Avoid layering too thickly or reworking a fresh patch too soon. Don’t mix incompatible products or overwork the area with a dull tool. Smooth, feathered blends and a light final burnish can help, but verify with the product’s guidance.