
Introduction
Topcoating epoxy with urethane is applying a urethane topcoat over an epoxy coating to seal and protect the finish. This step adds abrasion resistance and UV protection beyond the epoxy layer. Do it only after the epoxy has cured as instructed and the surface is clean and prepared for a new coat.
Choose compatible epoxy and urethane products and follow the label for recoat windows and compatibility. Sand between coats using a light, even pass and remove dust before applying the next coat to help bonding. Prepare the surface by cleaning, repairing any imperfections, and ensuring the previous coat is dry and free of contaminants to prevent delamination.
Key takeaways
- Verify compatible epoxy and urethane systems to ensure proper adhesion and cure.
- Sand between coats with a fine-grit approach until the surface feels tack-free.
- Avoid delamination by respecting surface prep, dust control, and correct recoat windows.
- Prep surface thoroughly: remove contaminants, repair cracks, and ensure dry, solid substrate.
- Plan cycle time and coatings sequence to align cure windows and edges.
- Wear proper ventilation, PPE, and monitor odor or fumes during application.
Table of Contents
- Introduction
- Key takeaways
- Why Topcoat Epoxy with Urethane: Goals and When to Do It
- Types of Urethane Topcoats and How to Choose
- Surface Preparation: Curing, Contamination, and Recoat Windows
- Sanding Levels and Techniques That Prevent Delamination
- Recoating Windows, Edges, and Complex Areas: Methods and Tips
- Number of Coats, Planning Cycle Time, and Cure Windows
- Tools, Materials Checklist and Budget Analysis
- Safety, Ventilation, and PPE Best Practices
- Conclusion
- FAQ
Why Topcoat Epoxy with Urethane: Goals and When to Do It
A urethane topcoat adds UV protection, abrasion resistance, and the kind of gloss many DIYers want on a concrete floor. It sits on top of the epoxy to slow sun damage and surface wear, while keeping the look you expect. Think of it as a protective finish that enhances both durability and appearance.
Consider topcoating in new epoxy installations, during repairs, or when you want a color refresh. Look at exposure level, traffic, and the desired look to decide if a topcoat fits the project. Check compatibility notes, substrate prep needs, and recoat windows in the product instructions before committing.
Benefits vs limitations
A urethane topcoat over epoxy offers several benefits, but it’s not always the best choice. Let’s weigh the pros and cons.
Pros: Urethane provides excellent UV stabilization, protecting your epoxy from sun damage. It also boosts scratch and abrasion resistance, making it ideal for high-traffic areas. Plus, you can achieve a desired gloss level to match your aesthetic.
Cons: While urethane enhances durability, it adds extra steps to your project. Additionally, ensuring material compatibility between epoxy and urethane is crucial to prevent delamination. If not properly matched, the topcoat might not adhere well or could peel off over time.
When to skip urethane
In some cases, leaving your epoxy as-is is perfectly fine. Here are situations where topcoating offers little value:
Firstly, if your epoxy floor or surface is indoors and away from sunlight, UV protection isn’t necessary. A urethane topcoat won’t significantly improve its lifespan in this case.
Secondly, if you’re on a tight budget or want to minimize project steps, skipping the urethane topcoat can save you time and money. Epoxy alone provides good durability for many indoor applications with low traffic.
Lastly, if your epoxy surface is already highly durable and resistant to wear, like a thick, high-quality epoxy coating, adding a urethane topcoat might not make much difference. Always assess your specific needs before deciding to topcoat or not.
Types of Urethane Topcoats and How to Choose
Urethane topcoats come in two main families: two-component and one-component, with options that are catalyzed or moisture-cure. Each type tends to influence clarity, hardness, and UV stability in different ways. Understand how these traits relate to your concrete and the epoxy beneath.
Epoxy chemistry and surface prep steer selection, including primer needs and porosity. Compare cure times, odor, VOC options, and compatibility with your epoxy system, then rely on the technical data sheets for guidance. Use local rules and instructions to inform your choice.
Pros and cons of each type
The four main types of urethane topcoats each have their pros and cons. Here’s a quick rundown to help you decide.
Pros
- Two-component: High durability, excellent chemical resistance.
- One-component: Easy application, no mixing required.
- Catalyzed: Fast cure time, ready for traffic quickly.
- Moisture-cure: Good UV resistance, suitable for outdoor use.
- Solvent-based: Excellent adhesion, good for porous surfaces.
- Waterborne: Low VOCs, eco-friendly and low odor.
Cons
- Two-component: Complex application, requires proper mixing.
- One-component: Lower durability, may not last as long.
- Catalyzed: Shorter pot life, hurry up with application.
- Moisture-cure: Slower cure time, may take longer to use the surface.
- Solvent-based: High VOCs, strong solvent odor and environmental impact.
- Waterborne: Lower chemical resistance, not ideal for harsh environments.
Choose based on your project’s needs. For heavy-duty use, two-component or catalyzed might be best. For eco-friendliness, consider waterborne. Always check compatibility with your epoxy first.
Compatibility checklist
Before applying any urethane topcoat, ensure it’s compatible with your epoxy and the environment. Here’s a quick checklist to follow.
- Epoxy cure state: Check if the epoxy is fully cured before applying the topcoat. Applying too early can cause delamination.
- Adhesion testing: Perform an adhesion test on a small, hidden area to ensure good bonding between the epoxy and urethane.
- Manufacturer compatibility statements: Check if the manufacturer of your epoxy and topcoat recommends using them together. Some epoxies may not play nice with certain urethanes.
- Primer needs: Some urethanes require a primer for proper adhesion. Don’t skip this step if recommended.
- Porosity: Ensure the epoxy surface is not too porous. Excessive porosity can lead to poor topcoat adhesion and blistering.
- Contamination: The epoxy surface must be clean, dry, and free of contaminants for good adhesion. Wipe with a suitable solvent if needed.
- Temperature and humidity: Apply urethanes within their recommended temperature and humidity ranges for optimal performance.
- Moisture exposure: Some urethanes are moisture-sensitive. If your floor is prone to dampness, choose a moisture-tolerant urethane or address the moisture issue first.
- Color compatibility: Ensure the topcoat color you’ve chosen is compatible with your epoxy and won’t cause discoloration over time.
- Chemical inhibitors/blush: Some urethanes may contain inhibitors or blush that can interfere with adhesion. Check if these are present and how to address them.
Quick rule: Always check the technical data sheets for both your epoxy and urethane topcoat. If in doubt, consult a professional or contact the manufacturers directly.
Surface Preparation: Curing, Contamination, and Recoat Windows
Epoxy cure state matters: tacky stages limit what you can apply next, while fully cured surfaces need different prep. Identify the stage accurately to avoid delamination risks. Don’t rush into a topcoat before the epoxy shows proper cure behavior.
Use the product data sheets to find the correct recoat window rather than guessing. Clean the surface thoroughly to remove oils, wax, and dust, then verify the surface is dry and ready for topcoating. Follow the manufacturer’s guidance for any light sanding or cleaning steps before coating again.
Identifying the recoat window
The epoxy’s cure state determines when you can safely apply a urethane topcoat. Here’s how to identify it:
Tack-free: This is when the epoxy no longer feels sticky to touch, usually 24-72 hours after application. It’s ready for light sanding and cleaning.
Full cure: This takes much longer, often a week or more. Consult your epoxy’s Technical Data Sheet (TDS) for exact times. Only then can you apply the urethane topcoat without risking delamination.
Cleaning and decontamination methods
Before applying urethane, remove any contaminants that could hinder adhesion:
Solvent wipe: Use a suitable solvent like acetone or xylene to clean the surface. Apply with a lint-free cloth, let it evaporate, then wipe off any residue.
High-tack tape: Press high-tack tape firmly onto the surface, pull it off quickly at a 45-degree angle. This removes dust and loose particles.
Lint-free cloth: Use a clean, lint-free cloth dampened with water or solvent to wipe down the surface one last time before topcoating.
Sanding Levels and Techniques That Prevent Delamination
Set clear sanding goals: create a mechanical key for adhesion without removing too much epoxy. Decide if you need a rough profile or a smoother finish based on the next coat. Your goal is a stable anchor for the urethane, not a rough edge everywhere.
Choose abrasives and follow the product instructions for pressure and progression. Use steady, parallel strokes and avoid deep gouges or overheating the surface. Check that the surface is properly prepared for the next coat with an adhesion test if recommended by the label.
Progressive Sanding Workflow
Start by addressing any defects or high spots on your epoxy surface. Use a suitable abrasive to correctively sand these areas.
Next, blend the edges of your corrections using a slightly finer grit. This helps prevent visible transitions between sanded and unsanded areas.
Finally, scuff-sand the entire surface with a very fine grit. This gives a uniform sheen and prepares the surface for urethane application. Remember: avoid over-sanding to bare substrate as it can cause delamination.
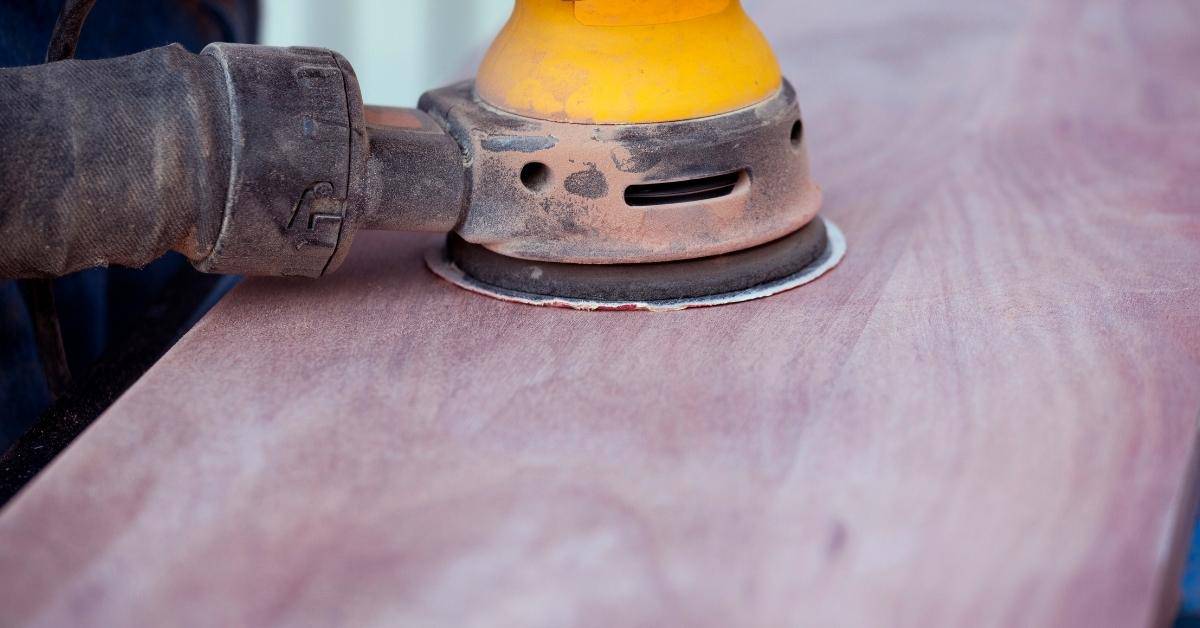
Hand vs. Orbital Sanding and Wet vs. Dry
Use hand sanding for delicate edges where an orbital sander might be too aggressive. It provides better control and can help prevent over-sanding.
For flat surfaces, an orbital sander is your friend. It covers more area quickly and evenly.
Wet sanding helps control dust but can lead to heat buildup if not done carefully. Dry scuffing is faster but generates more dust. Choose based on your specific needs and conditions.
Visual and Tactile Checkpoints
Before applying urethane, perform a quick visual and tactile inspection to ensure your surface is ready. This helps prevent delamination and ensures a smooth finish.
- Uniform dullness: The entire surface should have a consistent, non-glossy appearance.
- No glossy islands: Check for any shiny spots that might indicate missed areas or insufficient sanding.
- Clean edges: Ensure edges are smooth and free of burrs or sharp corners.
- No deep gouges: Feel for any deep scratches or valleys that could compromise adhesion.
- No burnishing: Check for shiny streaks caused by too much pressure during sanding.
- No heat buildup: Ensure the surface is cool to touch, indicating no excessive heat was generated during sanding.
- Edges are blended: Transition areas between sanded and unsanded should be smooth and gradual.
- Surface feels consistent: No hard or soft spots that could indicate underlying issues.
Quick rule: If it doesn’t feel right, look closer. Trust your instincts; they’re usually correct.
Recoating Windows, Edges, and Complex Areas: Methods and Tips
Windows, edges, and joints can cure differently, so identify areas that stay tacky or cure unevenly. Plan the timing for a second coat or switch formulations to maintain bonding without lifting. Use testing on inconspicuous spots to confirm readiness.
Masking and edges require careful technique. Remove tape at the right window and feather edges to avoid edge lifting or fish-eye issues. For hard-to-reach spots, use appropriate tools and clean between passes to maintain surface readiness.
Feathering and blending windows
Windows are tricky. They cure differently due to air flow. To avoid a glossy-to-dull transition that might lift, feather out the urethane.
Start at the window’s edge. Use a small roller or brush with less material. Work it into the solid epoxy, blending as you go. This gives the urethane a consistent profile to bond onto.
Remember, less is more here. You’re not trying to cover the whole area, just blend the edges.
If you’re unsure, do a test in an inconspicuous spot first. Let it cure, then check for any signs of lifting or delamination.
Handling taped seams and edges
Tape helps keep things neat, but removing it too soon can cause issues. Wait until the epoxy is fully cured before peeling off the tape.
Once removed, you’ll see a sharp edge. This needs to be sanded or solvent-cleaned to create a better bond for the urethane. Use fine-grit sandpaper or a suitable solvent, working it into the edge.
Be careful not to damage the cured epoxy. Go slow and use light pressure. Wipe off any residue with a tack cloth.
If you’re re-taping after sanding, do so lightly to avoid damaging the cured surface.
Working around hardware and fasteners
Hardware like handles or hinges needs special attention. Mask off these areas tightly with tape to prevent any gaps.
Once masked, sand and prime the epoxy around the hardware. This gives the urethane something to bond onto. Use a fine-grit sandpaper and a suitable primer.
After applying the urethane, check for any pinholes or gaps. If found, touch up with more urethane once it’s cured.
Remember, patience is key here. Take your time masking and sanding to avoid any issues later on.
Number of Coats, Planning Cycle Time, and Cure Windows
Decide the number of coats based on the level of protection, gloss, and UV resistance you want, considering how the epoxy underneath behaves. Consider the porosity of the surface after the first coat as the project moves forward. Let the project guide the final count rather than a fixed rule.
Look to the manufacturer for cure and recoat windows and how they affect the schedule. Plan contingencies for environmental changes and test between coats to verify adhesion and appearance. Use a simple planning method to track timelines and environmental readings as the work progresses.
Typical application approaches
The standard approach for applying urethane topcoats is to start with a build coat, followed by one or two finish coats. This provides the best balance between protection and appearance.
Build Coat: This initial layer focuses on coverage and penetration into the epoxy base. It’s usually applied thicker than subsequent coats to ensure good adhesion and protection.
Finish Coats: These are lighter applications, typically two in number, that focus on gloss, leveling, and UV resistance. They provide the final aesthetic appeal.
Extra build coats may be justified for areas with severe wear or high traffic. However, always consult manufacturer guidelines to ensure you’re not over-applying and compromising the coating’s integrity.
Scheduling around environmental conditions
Temperature and humidity play significant roles in how urethane topcoats cure and perform. Monitoring these conditions is crucial for a successful application.
Temperature: Ideal working temperatures range between 70-85°F (21-29°C). Below this, the coating’s viscosity increases, slowing down curing time. Above this, it can cause excessive drying and blush.
Humidity: High humidity levels can trap moisture in the coating, leading to delamination or blushing. Ideally, relative humidity should be below 85% during application and curing.
Always check manufacturer guidelines for specific product recommendations. Adjust your schedule accordingly to accommodate varying environmental conditions.
Tools, Materials Checklist and Budget Analysis
Organize a concise tools list by category, with a clear purpose for each item in the workflow. Include essential PPE, abrasives, mixing equipment, and application tools. This helps you keep the job moving and avoid last‑minute shopping.
Break out consumables and look at coverage claims with a critical eye. Compare cost per area and factor in waste and safety gear. Use local pricing and supplier notes to keep the budget grounded in reality.
Essential tools and consumables
Before you start, ensure you have all the necessary tools and consumables for a successful topcoat job.
- 80-120 grit sandpaper: For scuff-sanding existing surfaces to improve adhesion.
- 150-220 grit sandpaper: For final sanding and smoothing before application.
- Sanding blocks: To ensure even pressure and consistent results when sanding.
- Respirator: Essential for protecting against harmful fumes during mixing and application.
- Disposable gloves: To protect your hands from chemicals and stains.
- Mixing cups: For accurate measuring and mixing of epoxy and urethane components.
- Measuring sticks or spoons: To ensure proper ratios when mixing products.
- Applicators (rollers, brushes): For applying the topcoat evenly. Choose rollers for large areas, brushes for edges and details.
- Release agent: To prevent the topcoat from sticking to surfaces like tape or plastic.
- Cleaning solvents (acetone, denatured alcohol): For cleaning tools and surfaces after application.
Quick rule: Always check product labels for specific tool recommendations and safety precautions.
How to estimate materials and costs
Accurate material estimation helps keep your project on budget. Here’s how to do it:
- Coverage claims: Check product labels for square footage coverage per unit. Most epoxies cover about 250-400 sq ft per gallon, urethanes around 300-500 sq ft.
- Waste allowance (10-15%): Add extra material to account for spills, overcoats, and waste. Divide your total square footage by the coverage claim, then multiply by 1.10-1.15.
- Unit cost comparison: Compare costs per unit (gallon, quart) rather than just the total price. Cheaper options might have lower coverage or performance.
- Performance factors: Consider durability, gloss level, and chemical resistance when comparing products. Better performance often means higher cost but better long-term results.
- Local pricing: Check prices at local hardware stores and online retailers to find the best deal.
- Procurement tips: Buy in bulk for larger discounts, but ensure you can use it all before expiration. Consider renting tools if costs are prohibitive.
- Compatibility check: Ensure epoxy and urethane products are compatible with each other and your existing surface. Check manufacturer specs to avoid delamination risks.
Quick rule: Always round up when estimating materials to account for waste and unexpected needs.
Safety, Ventilation, and PPE Best Practices
Identify hazards and specify the required PPE, including respirator types and skin protection. Have eye protection ready for all mixing and application steps. Use a plan that covers the full workflow from prep to cleanup.
Ventilation matters for curing and comfort. Use local exhaust or air scrubbers as appropriate and follow guidance for off‑gassing. Always consult SDS/TDS documents for hazard details and work practices related to your products.
Respiratory protection and ventilation
When working with epoxies and urethanes, you’re dealing with organic vapors. You need a respirator rated for these. I recommend a NIOSH-approved half-face or full-face respirator with organic vapor cartridges.
For high VOC products, consider using a PAPR (Powered Air Purifying Respirator) instead. It provides better protection and comfort.
Ventilation is crucial. You want cross-ventilation in the work area. Open windows or use fans to blow air away from you. If you’re working indoors, consider using an air scrubber with HEPA/activated carbon filters.
Remember: Always follow the manufacturer’s recommendations on ventilation and respirator usage found in the SDS/TDS documents.
Handling and spill procedures
First, always wear appropriate PPE when handling these chemicals. That means nitrile/neoprene gloves, long sleeves, and chemical splash goggles or a face shield.
If there’s a spill, do not try to clean it up with bare hands. Use absorbents like kitty litter or sawdust to soak up the spill. Then, carefully place the absorbed material in a sealed container for disposal.
For larger spills, you might need neutralizers. Always follow the manufacturer’s guidelines on your specific product’s SDS/TDS document.
Disposal: Follow local and regional regulations. Do not pour chemicals down drains or into the ground. Keep waste segregated and store it properly until disposal.
Conclusion
Plenty of people underestimate how much a good topcoat job hinges on clean surface, correct timing, and solid safety habits. When you follow the recoat windows, sand to the right level, and plan your cycle times, you get a durable, smooth finish that resists delamination and looks professional.
To move forward, lock in these checks: confirm the epoxy has cured, wipe any contamination, verify the surface is dry and dust-free, test a small area to confirm the urethane wets out cleanly, check that you have adequate ventilation and PPE, then apply the first coat within the prescribed window, sand lightly as needed, and apply subsequent coats in clean, controlled passes with the right number of coats to meet your plan and budget.
Common mistakes to avoid are skipping surface prep, ignoring recoat windows, and rushing the sanding or cleaning between coats. Don’t skip ventilation or PPE, don’t mix products with mismatched cure times, and don’t expose uncured layers to moisture or heat spikes. Always test in a small area first and follow the manufacturer’s guidance for cure times and film buildup.
If the project scope grows beyond a small DIY spot, or you’re dealing with complex edges, deep pours, or unusual substrate conditions, it makes sense to call a pro. Otherwise, stay disciplined, work in daylight or good lighting, keep temps steady, and finish with a solid, even film. You’ll end up with a durable, professional-looking coat that stands up to wear and moisture.
FAQ
How do I choose epoxy and urethane for recoating windows?
Check the product labels and manufacturer instructions for compatibility and recoat windows. Look for guidance on bonding to cured epoxy and whether urethane is recommended as a topcoat over that epoxy. If in doubt, ask the supplier or read the datasheet and local rules before committing.
What sanding steps help prevent delamination between coats?
Sand to lightly abrade the surface between coats, remove dust, and keep the grit consistent with the product’s guidance. Use a clean, appropriate sanding pad and avoid deep grooves. Wipe orvacuum away dust before applying the next coat.
How should I prepare the surface before applying topcoats to windows?
Ensure the epoxy is fully cured per the manufacturer. Clean off any contaminants, oils, or residues. If the surface feels tacky or soft, wait longer or review the cure window guidance from the product label.
What tools will I need to recoat windows successfully?
Have clean rags, a sanding block or pad, a vacuum or brush for dust, and the appropriate applicators recommended by the product. Use a tester or small area first to confirm adhesion before coating the entire window. Always follow the label for tool compatibility and cleanup.