
Introduction
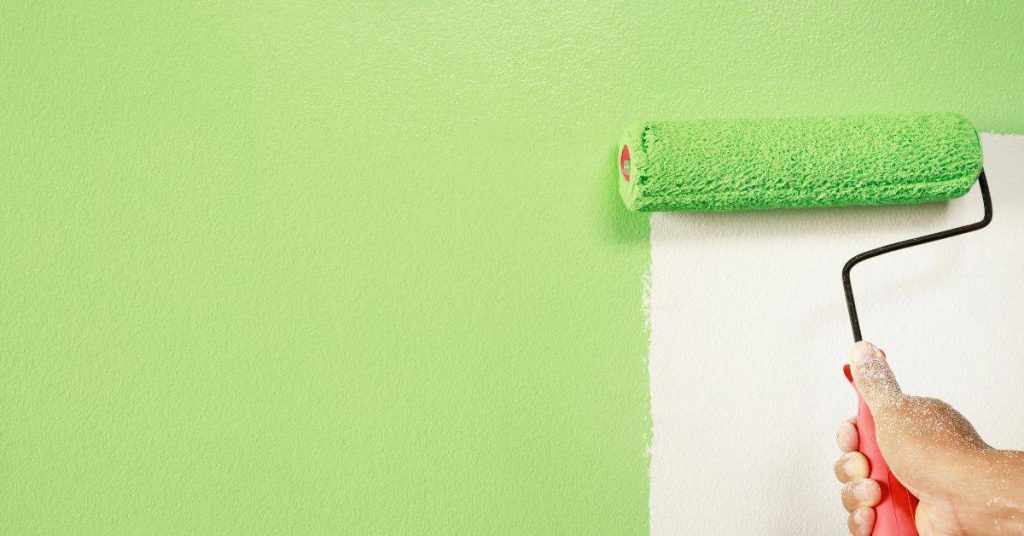
Testing concrete pH before you paint tells you how acidic or basic the surface is. This helps you choose the right prep steps and paint compatibility. A simple strip test can give you a quick read and reduce guesswork.
There are a few common types of pH test strips that you can use on concrete for a quick read. Compare the strip results to the instructions on the label and follow the paint maker’s guidance for surface preparation. Since the ideal range depends on the paint and the project, verify what to expect with the paint manufacturer and your local rules.
Key takeaways
- Test concrete pH with a reliable strip test before priming or painting.
- Choose test strips designed for concrete; verify application instructions and expiry dates.
- Interpret numbers by following manufacturer guidelines; avoid painting until acceptable range is reached.
- If pH is too high or too low, surface preparation may be required.
- Safety: wear gloves and eye protection when handling strips and cleaners.
- Document results and plan reps, as pH affects adhesion and finish quality.
Table of Contents
- Introduction
- Key takeaways
- Why Testing Concrete Ph Matters Before Painting
- Tools and Materials Checklist for Simple Strip Tests
- Types of Strip Tests and Simple Alternatives
- Step-by-Step: How to Perform a Concrete Ph Strip Test
- Interpreting Ph Numbers and What They Indicate for Paint
- How Incorrect Ph Affects Paint Adhesion and Finish
- Correcting Problematic Ph and Preparing the Surface
- Safety, Planning, and Common Mistakes to Avoid
- Conclusion
- FAQ
Why Testing Concrete Ph Matters Before Painting
Understanding pH helps predict how well primers will bond to the surface and how long the coating system will last. High alkalinity on concrete can interfere with primer films and may lead to early delamination or coating failure in challenging environments. A simple test acts as low-cost insurance before any material is chosen.
Changes in pH over time, driven by moisture movement, carbonation, or lime leaching, affect coating performance. Testing establishes a baseline that guides material selection and surface preparation. Simple strip tests or affordable pH test strips show pass or fail guidance for primer and topcoat choices, helping you plan ahead and avoid costly rework.
Risks of skipping a pH test
Skipping a concrete pH test before painting can lead to costly failures. High alkalinity in concrete can impair paint adhesion, causing primers to fail and topcoats to delaminate or blister.
Efflorescence, a white, powdery deposit, may also appear due to unchecked alkalinity, leading to discoloration and further deterioration of the coating system.
In humid environments, accelerated failure is possible. Reworking, stripping, and repainting can become necessary, increasing project costs significantly.
When a pH test is essential
A pH test is crucial before painting to ensure the longevity of your coating system. Testing should be performed on new concrete pours, repairs, and when moisture issues arise.
For exterior slabs and when applying urethane or decorative coatings, testing is also necessary. These conditions can increase alkalinity levels, making a pH test vital for suitable paint selection.
Always consult project specifics and manufacturer guidelines to determine if a pH test is required before painting.
Tools and Materials Checklist for Simple Strip Tests
The checklist defines what needs to be tested, where, and how results will influence coatings decisions. Gather items that cover sampling, measurement, and documentation to keep the process repeatable. Verify compatibility between the test kit and the chosen coating system for best results.
Core items include pH strips or a basic test kit, clean containers, rinsing water, and disposable protection for hands and eyes. Add cleaners or degreasers, clean rags, and a small brush for site preparation. A simple log sheet helps capture readings, locations, and actions taken for future reference.
Choosing the right pH strips and test kits
Before you begin testing your concrete’s pH, ensure you have the correct tools. This checklist helps you select suitable pH strips or test kits.
- Paper pH strips: Check package for clear, distinct color chart to ensure easy reading. Prefer strips with dual-indicators for better precision.
- Color charts: Verify the chart covers a wide range (e.g., 3-12) as concrete typically falls within this range. Check accuracy claims (e.g., ±0.5 pH units).
- Dual-indicator kits: Confirm they offer better precision with two indicators and cover the required pH range.
- Avoid strips with narrow pH range: If the kit’s range is 6-8 and accuracy is ±1 unit, it may not be suitable for concrete testing.
- Consider larger color pads: If standard strips are hard to read, opt for kits with larger color pads or a meter for clearer results.
Quick rule: Always verify the pH range and accuracy claims on the package to ensure reliable readings.
Optional tools for more accuracy
While not essential, these optional tools can improve your test’s reliability and precision.
- Hand-held pH meter: Offers digital readings with higher resolution (e.g., 0.1 pH units) and often has auto-calibration features. Consider renting or borrowing for occasional use.
- Distilled water: Ensures no impurities affect test results, providing more accurate readings. Purchase in small quantities as needed.
- Clean swabs: Verify they are non-abrasive to avoid damaging the surface. Use them to apply a thin layer of concrete paste for testing.
- Magnifier: Helps read strips more accurately, especially in low light or with smaller color pads. Test it with strips to ensure clear magnification.
Types of Strip Tests and Simple Alternatives
Home-strips primarily measure neutral to alkaline conditions and are straightforward for basic screening. DIY color indicators offer a quick sense of surface alkalinity, but readings may not reflect exact pH values. Each method has limits that affect interpretation on concrete.
Use a simple strip for fresh, clean surfaces and small touch-ups, or escalate to lab testing or a digital meter for older or sealed concrete or critical coatings. This helps match the test approach to project needs and the required adhesion level.
pH Test Strips (Paper) — Pros and Cons
pH test strips are a simple, portable, and cost-effective method to check the pH level of concrete surfaces before painting. They provide quick results by changing color in response to different pH levels.
Pros
- Easy to use: Simply apply to the surface and compare with the provided color chart.
- Low cost: Generally less expensive than digital meters or lab testing.
- Portable: Can be used on-site without needing a power source.
- Readily available: Found in most hardware stores and online retailers.
- Suitable for quick checks: Ideal for small touch-ups or fresh surfaces where exact readings aren’t crucial.
- Non-destructive: Does not damage the surface when used correctly.
Cons
- Limited accuracy: While they give a general idea, test strips may not provide precise pH readings.
- Not ideal for dense surfaces: Strips might struggle to penetrate sealed or painted surfaces.
- Expiration and storage: Test strips can expire if not stored properly, affecting their reliability.
- Interpretation: Requires understanding the color change in relation to concrete chemistry.
- Single-use: Each strip is used only once, contributing to waste.
pH test strips are sufficient for quick, simple checks on fresh, clean surfaces. However, they should not be relied upon for exact readings or when working with dense surfaces. Always store strips properly and discard any expired ones to maintain their integrity.
Digital pH Meters and Professional Testing
For more precise measurements, digital pH meters offer a higher level of accuracy. They are suitable for various surfaces and can even measure through sealers or paints in some cases.
Professional lab testing is recommended for complex projects such as waterproofing systems or commercial applications where exact numbers matter. Labs have specialized equipment and expertise to handle challenging samples.
Digital pH meters require proper calibration and care to ensure accurate readings. They are more expensive than test strips but offer data logging capabilities, making them ideal for projects requiring multiple measurements over time. Always follow the manufacturer’s guidelines for use, storage, and maintenance.
Lab testing provides the most precise results but is typically more expensive and time-consuming than using a digital meter or test strips. It is recommended when dealing with older concrete, dense surfaces, or critical coatings where exact pH numbers are essential. Additionally, lab tests can help identify potential issues not visible to the naked eye.
Quick Indicator Alternatives (Phenolphthalein, Vinegar)
For simple field checks, phenolphthalein and vinegar can provide a basic idea of concrete pH. These methods are safe, easy to use, and low cost but should not replace accurate testing for critical projects.
Phenolphthalein is a color indicator that turns pink in alkaline conditions, indicating a basic pH. To use, apply a few drops of phenolphthalein solution onto the concrete surface. If it turns pink, the pH is above 8.5.
Vinegar, an acidic substance, can also be used to check pH. Apply a small amount of vinegar to the concrete surface. If bubbles or effervescence occur, the pH is basic (above 7). However, this method may not work as well on surfaces with existing sealers or paints.
While these indicators can provide a quick assessment, they are qualitative rather than quantitative and should not be relied upon for exact readings. Be aware of potential false positives/negatives, especially when dealing with acidic surfaces or where precise pH measurements are needed.
Step-by-Step: How to Perform a Concrete Ph Strip Test
Prepare the surface by removing loose material, dust, and contaminants so the reading reflects the actual surface. Ensure the area is dry and free of debris that could skew results. This foundation supports repeatable testing across spots.
Wetting the surface and allowing moisture to balance is the next step, followed by applying the strip with consistent pressure. Record exposure time and note ambient conditions to interpret results accurately. Documentation should cover multiple spots for traceability.
Concrete pH Strip Test Procedure
Accurately perform a concrete pH strip test with the following steps, ensuring reliable results for safe painting preparation.
- Preparation: Gather necessary tools and wear appropriate personal protective equipment (PPE), including gloves and safety glasses. Ensure the test area is dry and free from contaminants.
- Surface Preparation: Remove any loose paint or finish, clean dust from the surface using a damp cloth, and allow it to dry completely.
- Moisten Surface: Lightly mist the test areas with water. Allow the moisture to equilibrate for 15-30 minutes to ensure accurate readings.
- Apply pH Strip: Apply the pH strip to the moistened surface, ensuring full contact and consistent pressure. Leave it undisturbed for the recommended exposure time (usually 1-2 seconds).
- Interpret Results: Compare the color of the strip to the provided color chart to determine the pH value. Record this value along with test location, date, temperature, and humidity.
- Conduct Multiple Tests: Test multiple spots across the surface, using a standardized grid if possible, to ensure accurate representation of the entire area.
- Cleanup: Dispose of or store used test materials according to manufacturer instructions. Clean and dry your tools for future use.
Surface Preparation and Sample Selection
Accurate pH readings depend on a clean, uncontaminated surface. Begin by removing any loose paint or finish using a scraper or wire brush.
Clean the surface thoroughly with a damp cloth to remove dust and other contaminants. Ensure the test area is representative of the entire surface by avoiding edges, patched areas, or locations with visible damage.
Allow the cleaned surface to dry completely before proceeding with the pH strip test. This step ensures that moisture does not interfere with accurate readings.
Conducting the Strip Test and Reading Results
Lightly moisten the surface using a spray bottle or damp cloth. Allow the moisture to equilibrate before applying the pH strip, following the manufacturer’s recommended time (usually 15-30 minutes).
Apply the pH strip to the moistened surface, ensuring full contact and consistent pressure. Leave it undisturbed for the recommended exposure time (typically 1-2 seconds).
Compare the color of the strip to the provided color chart to determine the pH value. If the color change is unclear or outside the expected range, re-test and average multiple readings for a more accurate result.
Weather and Timing Considerations for Accuracy
Test in temperatures between 68-77°F (20-25°C) and low humidity for optimal results. After exposure to moisture, such as rain or high humidity, test once the surface has dried sufficiently.
Extreme weather conditions may impact pH strip test results. If conditions are extreme or have recently changed, retest after weather stabilizes for accurate readings.
Allow at least 24 hours of drying time before testing if the surface has been exposed to moisture. This ensures that residual moisture does not affect accuracy.

Interpreting Ph Numbers and What They Indicate for Paint
Understand that neutral, alkaline, and acidic readings correspond to different surface conditions and influence primer choice. High pH typically signals strong alkalinity that can affect film formation, while low pH can indicate acidity that may require different prep steps. These contexts guide coating decisions.
When results are clear, check coating manufacturer pH guidance to select compatible primers and topcoats. Use a logical workflow to decide on cleaning, etching, neutralizing, or choosing specialty primers, then document the findings for maintenance.
Typical pH Ranges and Paint Compatibility
Concrete pH levels can vary, influencing the suitability of different paints. Understanding these ranges helps select appropriate coatings.
Neutral pH (6.5 – 7.5) is ideal for most paints. Acrylic and latex paints are suitable in this range.
Mildly Alkaline pH (7.5 – 9) may require epoxy or specialty primers before applying acrylic or latex paints to ensure adhesion.
Strongly Alkaline pH (>9) can damage some paints and should be avoided if possible. Always consult coating manufacturer’s guidelines for specific recommendations.
What Persistent Alkalinity Suggests (Causes)
High alkalinity in concrete can indicate underlying issues that may affect coating performance. Identifying these causes helps prevent failures.
Persistent alkalinity can be caused by trapped salts, often visible as efflorescence, suggesting incomplete curing or rising damp.
Moisture detection may indicate water intrusion sources like leaks or inadequate drainage, which should be addressed before painting to prevent recurring issues.
Review construction history and previous maintenance records for clues about the cause of high alkalinity. Inspect the concrete for signs of moisture, efflorescence, or other issues.
How Incorrect Ph Affects Paint Adhesion and Finish
Incorrect pH levels can attack lime-based binders in concrete, reducing adhesion and causing premature coating failure on alkaline surfaces. The chemical environment of the substrate drives the performance of the first coat and subsequent layers. This is a common path to bond-related issues.
Salt migration, moisture movement, and micro-porosity changes can degrade film formation and shorten the life of a finish. Use test results to guide surface prep, primer selection, and timing to prevent visible problems after painting.
Failure modes: peeling, blistering, discoloration
Incorrect pH levels in concrete can lead to visible paint failures over time. High alkalinity can cause chemical attack on lime-based binders, leading to binder degradation and reduced paint adhesion.
Peeling is a common symptom of poor bonding due to high pH. It may appear weeks to months after painting, depending on traffic, exposure, and climate.
Blistering can occur when moisture and pigments are pulled away from the coating due to salt migration and efflorescence. This can cause the paint film to lift and form blisters.
Discoloration may also occur, as micro-porosity changes hinder film formation, allowing contaminants to penetrate the paint surface. If your paint shows signs of failure within weeks to months after application, consider pH-related causes and test the surface for an accurate pH reading.
Real-world case examples and diagnostics
Differentiating pH-related problems from other causes is crucial. Here are some real-world examples:
If you notice efflorescence or salt deposits on the surface, high pH could be the culprit. Test for confirmation to ensure accurate diagnosis and treatment.
However, if moisture signs such as dampness or mold are evident, investigate moisture-related causes separately from pH issues. Moisture can also degrade paint adhesion and lead to failures.
Common mistakes include assuming all surface problems are due to high pH. Always inspect for visual clues and test the surface accordingly before painting. Address identified cause(s) and treat the surface appropriately.
Correcting Problematic Ph and Preparing the Surface
Begin with assessing whether the surface is acidic or alkaline and decide on a remediation plan based on compatibility with chosen coatings. The goal is to reach a surface condition that accepts a durable coating. Plan steps that align with product guidance.
Remediation options include rinsing, neutralizing, or etching as appropriate for the surface and coating. After each treatment, re-test and ensure the surface is suitable for primer adhesion. Follow manufacturer instructions and seek guidance if the chemistry is complex.
Neutralizing and acid-etching approaches
If your concrete’s pH is too high (alkaline), it can hinder paint adhesion. Neutralization helps lower the pH, making the surface more receptive to paint. If your pH is too low (acidic) but your chosen paint requires an alkaline surface, acid-etching raises the pH.
Always follow manufacturer directions for safety and effectiveness. After treatment, re-test the pH to confirm correction.
If neutralization or etching fails, re-test and consider alternative methods or professional guidance.
Primers, sealers, and products for high-alkaline surfaces
Even after pH correction, residual alkalinity can affect paint adhesion. Specialty primers and moisture-tolerant products can help overcome this issue.
Verify product compatibility with both the substrate (concrete) and your chosen topcoat to ensure optimal performance. Conduct adhesion checks or a tack-test after application.
If residual alkalinity persists, use primers or sealers designed for high-alkaline surfaces. If moisture is present or expected, consider moisture-tolerant products to prevent issues.
Safety, Planning, and Common Mistakes to Avoid
Prioritize PPE such as gloves, eye protection, and appropriate ventilation when using cleaners or reagents. Review safety data sheets and handle waste according to local regulations. Safe handling minimizes risk during testing and cleanup.
Plan for proper site setup, weather considerations, and potential delays in drying or curing. Document results, calibrate tools when needed, and allocate time for re-testing to ensure reliable outcomes and avoid repeat work.
Chemical Safety and PPE
Safety is paramount when handling test reagents, cleaners, and acids. Always wear appropriate Personal Protective Equipment (PPE): gloves to protect your hands, eye protection to safeguard your eyes, and a respirator if you’re sanding or using strong acids.
Review the Safety Data Sheets (SDS) for all chemicals involved to understand their specific hazards and safe handling procedures. If handling strong acids, use a face shield in addition to safety glasses for extra protection.
In case of spills, follow the guidelines provided on the SDS for cleanup and disposal to minimize environmental impact and personal risk.
Scheduling, Weather, and Cost Planning
Weather conditions significantly impact concrete surface readiness and test accuracy. Monitor local forecasts and adjust your testing schedule accordingly to avoid rain or extreme temperatures.
Allocate buffer time in your project timeline for re-testing and potential remediation steps. If test results are borderline, retest before proceeding with painting to ensure accurate readings.
Weather windows, re-test intervals, and remediation steps can extend project duration and increase costs. Re-evaluate cost estimates if delays or additional treatments are required to stay within your budget.
Common Testing Mistakes and Troubleshooting
To ensure accurate test results, avoid these common pitfalls:
- Contaminated samples: Ensure the test area is clean before taking samples to prevent contamination.
- Single-spot testing: Take multiple samples from different locations to get representative readings.
- Misreading strips: If you’re unsure, retest using a new strip and ensure proper calibration for accurate results.
- Testing on damp surfaces: Allow the concrete to dry completely before testing to avoid inaccurate readings.
If single spot tests show high variation or strips are consistently misread, perform additional tests or consider lab analysis to confirm your findings and prevent project setbacks.
Conclusion
Testing the concrete pH before painting helps protect your skin, your finish, and your investment by catching issues that can lead to poor adhesion, staining, or premature failure.
Perform the test by validating that you have a clean, dry work area, selecting the appropriate strip test from your tools and materials, following the strip’s label instructions, testing a small, inconspicuous area first, and noting the pH result and any surface clues. If the result signals an extreme or unexpected value, plan the next steps before proceeding with any coating, and consult the strip instructions or the surface manufacturer guidelines to determine if resealing, neutralizing, or additional surface preparation is required.
Common mistakes include skipping safety gear or ventilation, testing a damp or dirty patch, and applying paint without confirming the surface has dried and aged as needed after any treatment. Always work in a well‑ventilated area, wear appropriate personal protective equipment, and verify that any cleaners or neutralizers you use are compatible with the paint you intend to apply. If you’re unsure about the right corrective steps for your surface, line up a plan with a professional rather than guessing, and remember that taking time to test and prepare now saves material, time, and the need for costly fixes later.
FAQ
How do you test concrete pH before painting?
Clean the area and remove loose dust. Moisten a small spot or use a damp cloth, then apply the pH strip according to the product instructions. Compare the strip color to the chart and record the result for reference.
What types of pH testing strips work for concrete?
Use strips labeled for general pH testing and those suitable for concrete surfaces. Some strips require a liquid extract or a damp surface; follow the manufacturer’s instructions closely. Always check the label or datasheet to confirm concrete compatibility.
How should you interpret pH strip results for painting readiness?
Read the color against the strip’s chart and compare to the paint manufacturer’s recommended pH range. If the result is outside the recommended range, plan surface preparation or corrective steps and re-test after treatment.
What is the ideal pH range for concrete prior to painting?
Refer to the paint maker’s instructions for the exact range. If guidance is not available, use the manufacturer’s data sheet or contact the supplier to confirm the acceptable pH range for the chosen coating.