
Introduction
Tarp lines on concrete after curing are the visible creases or texture lines where a tarp overlapped during the curing process. They show up as different shading or ridges on the surface. You can address them by cleaning, light grinding, or letting time and use soften or blend them in.
Start with a simple cleaning if the lines are just dirty or smeared. If the lines persist, you may consider light grinding, but check the surface and tool guidance before you proceed. If you’re unsure, test your approach on a small area and consult product labels, manufacturer instructions, or local rules to choose the safe path.
Key takeaways
- Understand tarp lines: they form from curing residue and pigment shift on surface.
- Visual tests: quick scratch test and water bead check to gauge hardness.
- Patience often avoids grinding: delay mechanical work until surface stabilizes.
- Cleaning method: use neutral cleaner and avoid abrasive brushes on film.
- Light grinding: perform with proper containment, minimal removal, test in a small area first.
- Prevention: seal curing area, protect from rain exposure, and schedule cleanup post-set.
Table of Contents
- Introduction
- Key takeaways
- What Tarp Lines Are and How They Form
- Diagnosing the Mark: Quick Tests and Visual Checkpoints
- Patience: When Waiting Is the Right First Step
- Cleaning Methods for Surface Films and Stains
- Light Grinding/Scuffing: When and How to Do Minimal Mechanical Correction
- Decision Framework: Cleaning Vs Light Grinding Vs Patience
- Tools and Materials Checklist and Material Specs Explained
- Finishing, Repair Touch-Ups, and Prevention
- Conclusion
- FAQ
What Tarp Lines Are and How They Form
Tarp lines show up as marks on cured concrete. They can appear as surface films, staining, efflorescence, or a light etching. Moisture, curing compounds, and trapped debris often contribute to how they form.
Think of the mark as a surface interaction where moisture moves through the slab or where finishing products leave a residue. The exact cause may involve several factors working together. Confirm by comparing the surface feel and color with nearby areas that were treated differently.
Types of Visible Defects
Tarp lines on concrete can manifest differently. Understanding these variations helps you choose the right repair method.
Film: This is a thin, often shiny layer left by curing compounds or membranes. It’s usually easy to remove with cleaning.
Stain: Stains are discolorations that penetrate slightly into the surface. They might need light grinding and sealing for removal.
Etch: Etching is a light, frosty appearance caused by chemical reaction with moisture. It’s typically removed by light grinding.
Light Scar: These are shallow grooves or marks that break the concrete’s surface. They often require light grinding to smooth out.
Causes of Tarp Lines
Tarp lines form due to how concrete cures under tarps. Here’s what happens:
Moisture gets trapped, creating moisture gradients. This leads to uneven curing and line formation.
Reduced air circulation under the tarp causes concentration of curing compounds or membranes. These can leave lines as they cure differently than the rest of the slab.
Any trapped debris, like dust or small stones, can also create lines by preventing even curing.
Cosmetic vs Structural Marks
Not all tarp lines require heavy-duty repair. Here’s how to tell if a line is just cosmetic or needs deeper remediation:
Cosmetic: If the line is shallow, smooth, and doesn’t affect the concrete’s strength, it’s likely just cosmetic. You can usually feel this with your fingers.
Structural: Deeper, rough, or cracked lines might indicate structural issues. These could weaken the concrete over time. If you feel a dip or roughness when running your hand over the line, it might be structural and need more attention.
Diagnosing the Mark: Quick Tests and Visual Checkpoints
Start with a visual walk‑through: note color, sheen, and pattern of the mark. Gently run your hand over the area to feel for film or roughness. Look for signs of trapped material beneath the surface, like a crust or powdery residue.
Do a small test in an inconspicuous spot by cleaning a tiny patch and watching how it responds. Decide if the issue is a surface film, a deeper stain, or something etched. When in doubt, reference the product label, manufacturer instructions, or local guidance before proceeding to cleaning, grinding, or waiting.
Wet Wipe and Etch Test
Use this checklist when you suspect a film or stain on your cured concrete. It helps identify surface issues before deciding between cleaning, grinding, or waiting.
- Wet wipe test: Use a damp cloth to see if residue lifts. If it does, you’re dealing with a film that can be cleaned.
- Etch test: Apply an acid-free etchant (like muriatic acid diluted 1:6) on a small hidden area. If the mark lightens, it’s a stain; if it darkens or bubbles, it’s true etching that may require grinding.
Quick rule: Always test before proceeding with any treatment to avoid unnecessary work and potential damage.
Tap and Sound, Hammer-and-Chisel Check for Delamination
Use this checklist when you suspect underlying damage or delamination. These non-destructive checks help rule out serious issues that require professional attention.
- Tap test: Gently tap the concrete with a hammer. A dull sound indicates possible delamination; a clear, ringing sound means it’s solid.
- Hammer-and-chisel check: Carefully chip away at the edge of the mark using a cold chisel and hammer. If the concrete chips off easily or reveals hollow spaces, there’s underlying damage.
Quick rule: If you find signs of delamination or underlying damage, stop work immediately and consult a professional.
Visual Checkpoints and Photo Log
Use this checklist to consistently document your concrete’s condition. Good photos help track progress, communicate with pros, or make claims if needed.
- Consistent lighting: Use the same light source and time of day for each photo to ensure consistency.
- Reference points: Include a ruler, tape measure, or other known size objects in your photos for scale.
Quick rule: Take photos from the same angle and distance each time to clearly see changes over time.
Patience: When Waiting Is the Right First Step
Some discoloration or haze will lessen as moisture equilibrates in the slab. Waiting gives the concrete a chance to breathe without introducing new work. Rushing can push you toward unnecessary grinding or harsh cleaners.
Check the manufacturer guidance or local rules for any recommended cure times or conditions. If the surface looks unchanged after a reasonable pause, you can consider other options. Patience is a legitimate first step when the goal is a safe, minimal intervention.
Typical Curing Behavior and What to Expect Over Time
Concrete needs time to cure properly. This process can take anywhere from a few days to several weeks, depending on the mix design, temperature, and humidity.
During this period, you might notice some discoloration or minor defects. These are often temporary and will improve as the concrete stabilizes. Here’s what to expect:
First 24-72 hours: The surface may look wet or shiny due to excess water evaporating.
Next few days to a couple of weeks: You might see some discoloration, film, or minor stains. These can fade as the moisture equilibrates and the concrete hardens.
Temperature and Humidity: Factors Affecting Natural Improvement
Environmental conditions play a significant role in how quickly your concrete improves. Here’s what you need to know:
High temperatures and low humidity speed up evaporation, which can cause rapid curing but may also lead to surface defects like crazing or mapping.
Conversely, cool temperatures and high humidity slow down the curing process, allowing for more gradual moisture loss and potentially reducing the likelihood of defects. However, this can also prolong the time it takes for your concrete to reach its full strength.
In borderline cases where you’re unsure whether to wait or intervene, monitor the situation closely. Keep an eye on the weather forecast and re-check the surface regularly.
Re-Checking and Documenting Before Intervention
Before you decide to clean or grind those tarp lines, it’s crucial to give your concrete time to stabilize. Here’s a simple schedule to follow:
After 7 days: Re-check the surface for any signs of improvement. Take photos from the same angle and distance to document the condition.
After 14-21 days: Re-check again. Some defects may have faded or disappeared entirely. If there’s no change, consider waiting another week before making a decision.
Only when you’re confident that natural improvement has stopped and the marks are persistent should you proceed with cleaning or grinding. Always document the surface condition before and after any intervention to track progress effectively.
Cleaning Methods for Surface Films and Stains
Begin with the gentlest approach: a basic detergent wash and a soft scrub. If the surface remains dull or stained, move to an alkaline cleaner following the label. For efflorescence, apply the recommended cleaner and test in a small area first.
Always wear eye protection and gloves, and test a hidden spot before full use. Follow the product instructions and verify required dwell time and rinsing steps. If you must use stronger cleaners, check compatibility with your concrete and surrounding materials.
Gentle cleaning: detergent and agitation
Start with the gentlest method to avoid damaging your concrete. Mix a mild detergent – like dish soap – with warm water.
Apply the solution to the affected area using a soft-bristled brush or a long-handled scrubber. Work in small sections, about 2-3 feet at a time.
Scrub gently but firmly, using circular motions. Agitation helps break down and lift off surface films. Be sure to avoid scrubbing too hard, as this can scratch the concrete.
This method should be your first attempt for removable films. It’s safe, easy, and won’t harm your concrete if done correctly.
Chemical cleaners: alkaline cleaners and efflorescence removers
For tougher films, consider using an alkaline cleaner or an efflorescence remover. These products are designed to break down and dissolve certain types of stains.
Always follow the manufacturer’s instructions for mixing and application. Safety first – wear gloves, eye protection, and old clothes.
Before applying to your entire surface, test the product on a small, hidden area. This ensures it won’t cause discoloration or damage to your concrete.
Apply the cleaner using a sprayer or a brush, working in small sections. Let it sit for the recommended time, then scrub gently with a soft-bristled brush. Rinse thoroughly afterwards.
Rinsing, neutralizing, and drying best practices
After cleaning, thoroughly rinse the area with clean water. This removes any residue that could redeposit or cause new marks.
If you’ve used an alkaline cleaner, neutralize the pH by rinsing with a solution of white vinegar (1 part) and water (4 parts). This helps prevent efflorescence from forming again.
Let the concrete dry naturally. Do not use heat or fans to speed up drying, as this can cause new marks or cracks. Keep pets and children away until it’s completely dry.
Regular inspection during drying is crucial. If you notice any new marks or issues, address them immediately before they become bigger problems.
Light Grinding/Scuffing: When and How to Do Minimal Mechanical Correction
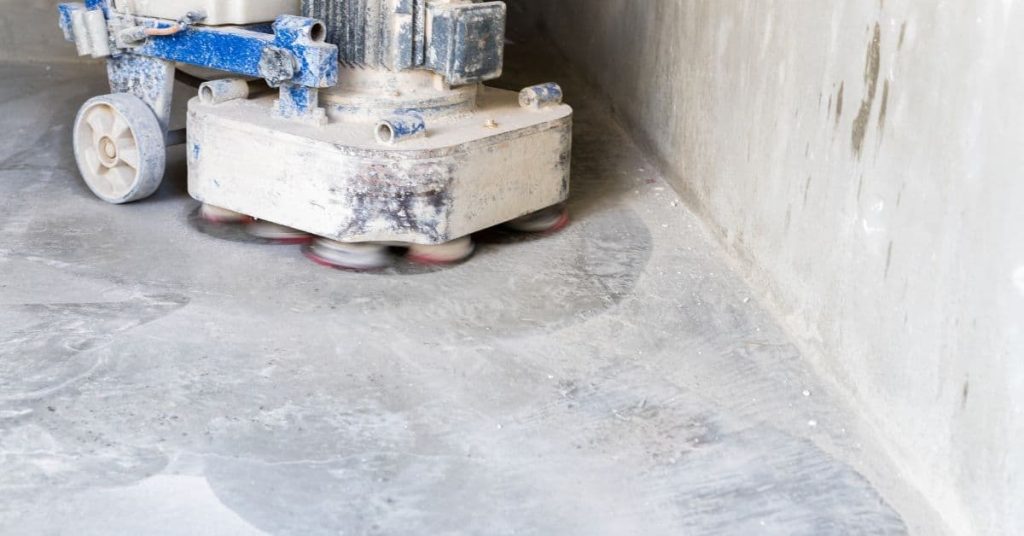
Light mechanical abrasion is justified when the mark sits at the surface and does not respond to cleaners. Use the mildest pad and lowest material removal that achieves the look you want. Work in small, controlled passes and avoid deep or uneven grinding.
Keep the finish uniform by testing in a hidden area first. Monitor the depth of material removal and adjust pressure accordingly. Always verify tool suitability and patch guidelines with official instructions or local rules before proceeding.
Tools, abrasives, and safe operating guidelines
To tackle light grinding on your concrete surface, you’ll need the right tools and safety gear.